实现颜色区
 现在我们可以实现将对象放入的区域。我们将在地板上挖洞,实现区域可视化,并添加一个 trigger volume来销毁进入其中的对象。
步骤1。拆包节点参考在地板上打孔#
为了让某些楼层节点不可见且不发生碰撞(物体会穿过它们),同时保持角色的转动顺畅,我们必须分解一些楼层节点引用。解包意味着断开到磁盘上的节点文件的链接,并更改其参数。
- 要创建颜色区域,在一组中选择一些地砖(按住Shift热键),右键单击并选择Unpack To Node Content。
- 然后为这些节点禁用Collisions,但确保Intersection是启用的,以便字符的旋转工作正常。
-
要使它们不可见,请转到Viewport蒙版,然后单击Clear All。这样所有的掩码位都被设置为0,它们将不会匹配相机的Viewport掩码。
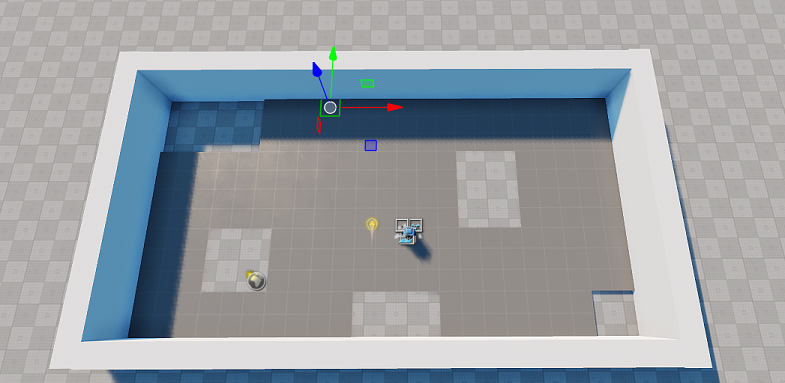
- 为ground节点禁用Collision选项。现在,物理物体可以从洞里掉到地上。
步骤2。实现区域可视化#
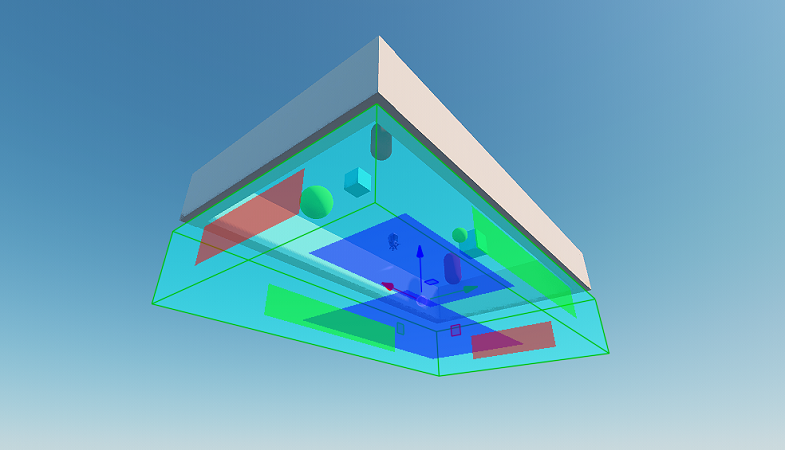
让我们用发射材质创建一个平面来代表颜色区域。
- 选择 Create->Mesh->Static 并搜索 plane.mesh
- 通过Viewport将其放置在世界中。
- 重命名节点color_zone。
- 将其缩放到游戏区域的大小,并将其放置在地板和地面之间,所以只有通过孔才能看到它。
-
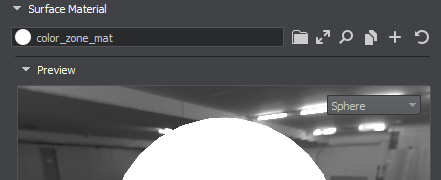
创建一个color_zone_mat材质继承mesh_base,并将其分配给plane表面。
-
在States选项卡中,检查Emission选项。
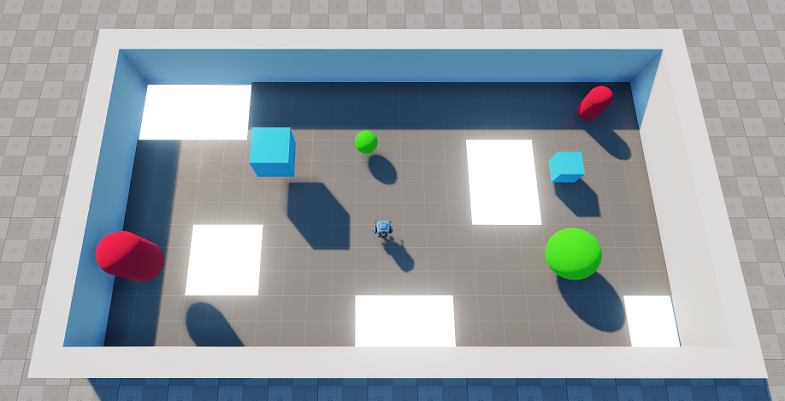 颜色区域可视化
步骤3。颜色随时间变化#
颜色区域必须很容易被发现。让我们创建一个动态材质,改变颜色发射随时间使用线性插值。
- 创建一个新的 C++ 组件 并将其命名为 ColorChanger。
- 下面给出了随时间更改颜色区域的材质 emission 颜色的代码。
ColorChanger.h (C++)
#pragma once
#include <UnigineComponentSystem.h>
#include <UnigineMathLib.h>
#include <UnigineGame.h>

class ColorChanger : public Unigine::ComponentBase
{
public:
	// declare constructor and destructor for our class and define a property name.
	COMPONENT_DEFINE(ColorChanger, ComponentBase)
	// declare methods to be called at the corresponding stages of the execution sequence
	COMPONENT_INIT(init);
	COMPONENT_UPDATE(update);

protected:
	void init();
	void update();

private:
	float changeSpeed = 1.5f;

	Unigine::MaterialPtr color_zone_mat;
};
ColorChanger.cpp (C++)#include "ColorChanger.h" using namespace Unigine; using namespace Math; REGISTER_COMPONENT(ColorChanger); void ColorChanger::init() { ObjectMeshStaticPtr mesh = checked_ptr_cast<ObjectMeshStatic>(node); // get the color zone's material color_zone_mat = mesh->getMaterial(0); } void ColorChanger::update() { if (color_zone_mat != nullptr) { // calculate the interpolation coefficient for this frame float k = (Math::sin(Game::getTime() * changeSpeed) + 1) / 2.0f; //interpolate between two colors with given coefficient and set it to the first surface's material color_zone_mat->setParameterFloat4("emission_color", Math::lerp(vec4(1.0f, 1.0f, 0.0f, 1.0f), vec4(0.0f, 1.0f, 1.0f, 1.0f), k)); //interpolate between two values of emission intensity with given coefficient and set it to the first surface's material color_zone_mat->setParameterFloat("emission_scale", Math::lerp(1.0f, 4.0f, k)); } } - 构建和运行的解决方案组件生成一个属性文件。
-
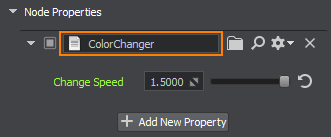
切换回UnigineEditor,并将ColorChanger属性附加到颜色区域可视化(color_zone)。
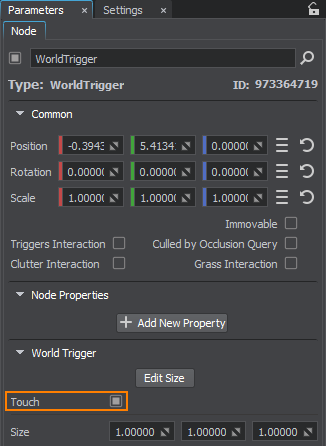
步骤4。添加一个世界触发器#
为了摆脱在颜色区域中抛出的对象,让我们使用 World Trigger。 触发器定义了一个物理对象将落入的区域,以及一个在对象进入时触发的 callback。
- 通过选择Create->Logic->World Tigger创建一个新的World Trigger,并将其放到世界中。
-
在 World Trigger 节点的 Parameters 窗口中选中 Touch 选项,使触发器在部分接触时触发 callbacks 与另一个节点。
-
将它放置在地面下,调整它的大小,让它覆盖整个游戏区域,点击参数和Edit Size。在视口中调整World Trigger的大小。
-
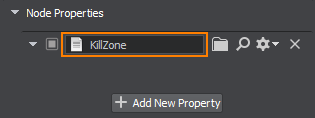
在您的 IDE 中创建一个新的 C++ 组件并将其命名为 KillZone 并将以下代码复制到相应的文件中。 触发器 callback 将删除任何进入的对象。 不要忘记保存您的代码。KillZone.h (C++)
#pragma once
#include <UnigineComponentSystem.h>

#include <UnigineWorlds.h>

class KillZone : public Unigine::ComponentBase
{
public:
	// declare constructor and destructor for our class and define a property name.
	COMPONENT_DEFINE(KillZone, ComponentBase)
	// declare methods to be called at the corresponding stages of the execution sequence
	COMPONENT_INIT(init);

protected:
	void init();

	void enterEventHandler(const Unigine::NodePtr &target);

private:
	// the area into which an object should fall
	Unigine::WorldTriggerPtr trigger;
};
KillZone.cpp (C++)#include "KillZone.h" using namespace Unigine; REGISTER_COMPONENT(KillZone); void KillZone::init() { trigger = checked_ptr_cast<WorldTrigger>(node); // subscribe for the Enter event (when an object enters the area) if (trigger) trigger->getEventEnter().connect(this, &KillZone::enterEventHandler); } void KillZone::enterEventHandler(const NodePtr &target) { target.deleteLater(); } - 构建并运行解决方案以生成组件的属性文件。
-
切换回UnigineEditor并添加KillZone触发组件之前创建的世界。
- 为世界保存更改。转到File->Save World或按Ctrl+S热键。
-
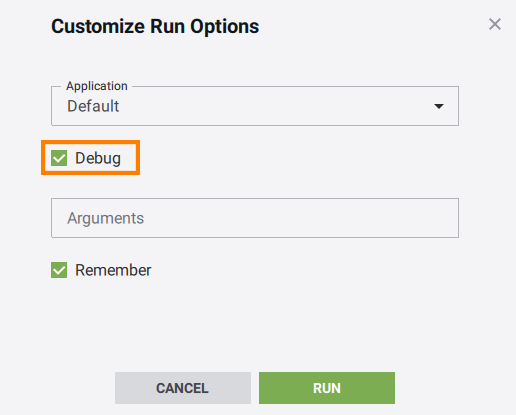
通过SDK Browser运行项目,单击省略号在Run按钮打开Customize Run Options窗口。默认情况下IDE构建Debug版本的应用程序,而SDK浏览器配置为启动Release。点击Run前你应该检查Debug选项运行适当的可执行的检查你的进展在开发您的应用程序。
本页面上的信息适用于 UNIGINE 2.20 SDK.