Configuring Landscape Terrain Visualization and Performance
The global Landscape Terrain settings (and the corresponding console parameters) provide a set of parameters for fine-tuning of Landscape Terrain in order to achieve stable work, high performance, and great level of detail. All settings are interdependent and have huge influence on performance, therefore they are to be considered to the full extent.
The Advanced Settings exposing rarely used parameters are intended for fine tuning of data streaming performance. Use them carefully as the last frontier of acceptable performance in extreme conditions.
The vast majority of parameters causes the Landscape Terrain object to reload all its graphic data, which is unacceptable at run time. The Making it Run-Time section lists parameters that are safe to be changed at run time.
Render Parameters#
First, the Texel Size parameter defines the maximum possible density of the components of the main virtual texture. Set this value (from 0.0001 to 1 unit) to limit the density for albedo, normal and height components up to 1 mm per pixel.
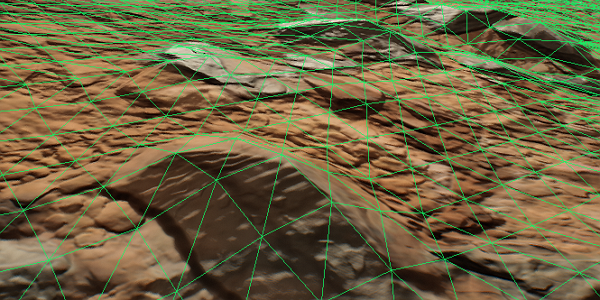
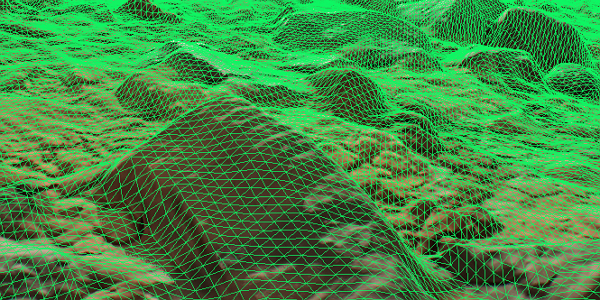
The geometry of the Landscape Terrain is split down to a number of detail levels and refined by means of adaptive hardware tessellation. The intensity of subdivision is controlled by the group of geometry parameters.
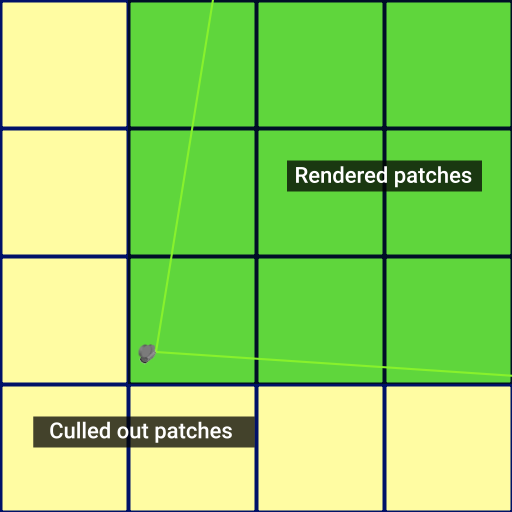
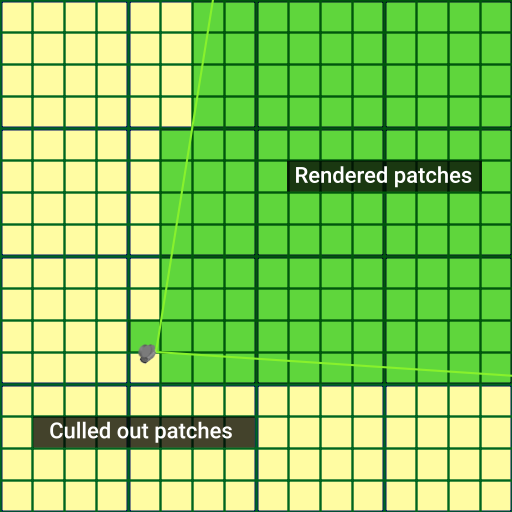
Adjust the Progression value to configure tessellation progression and levels of detail with the distance.
- The grid density is actively changing depending on the camera's FoV. Values of FoV below 1 degree do not densify Landscape Terrain.
- Geometry Progression is not affected by the Distance Scale value.

Control the density of tessellated geometry separately using the Polygon Size parameter (in comparison with the Texel Size the maximum value is used).
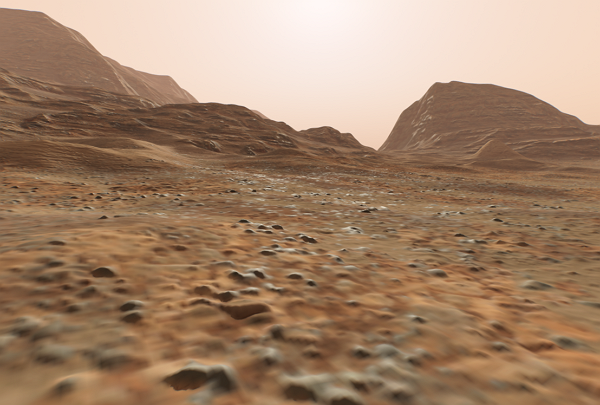
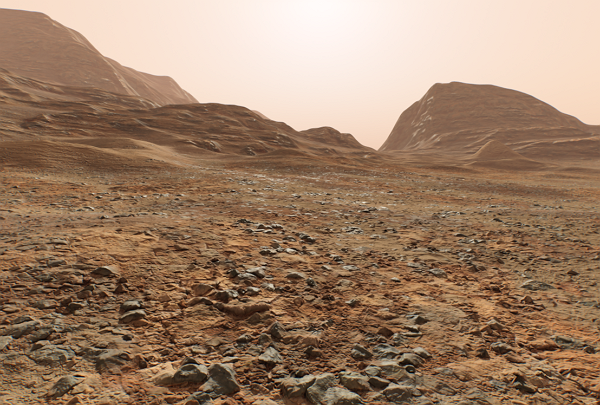
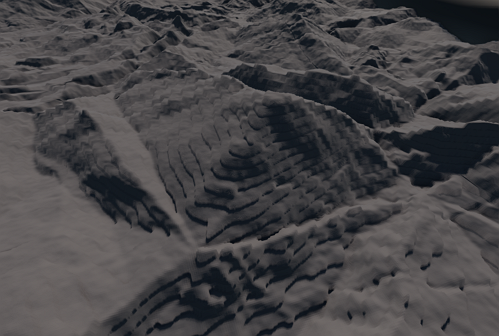
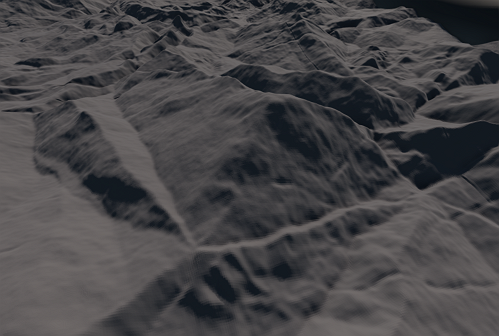
For optimization purposes you can increase the Subpixel Reduction value to get rid of too small polygon patches. This feature is performed on-the-fly, so make note that high values may cause slight but noticeable visual artifacts when the camera moves.
![]()
![]()
The Detail Max Height parameter enables you to set the maximum height for detail displacement. By default, it equals to 1 — the maximum possible value. In case of artifacts of stepped geometry caused by insufficient bit depth, you can adjust this parameter to a lower value, set it to the highest height value used in details. Make note that geometry will be clamped to this maximum height if details use higher values, however, normals will be affected appropriately.
The Culling Parameters provide additional optimization techniques, such as Culling By Depth and Frustum Culling.
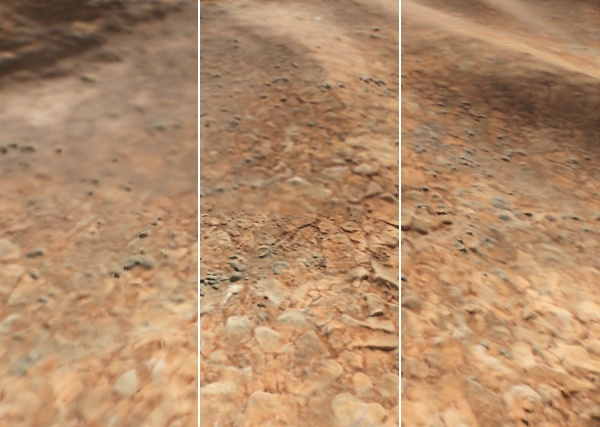
During rasterization the renderer selects the mip-level of textures according to the distance to the camera, as well as to the angle of the surface to the camera, i.e. the screen size of the polygon: distant polygons and polygons that are not faced right to the camera are rendered at a lower quality. The Texture Filtering mode controls the way of treating such situations, it has the following presets:
- Low — use the lower mip-level. This option has the best performance but low quality: there is a noticeable edge of mip-levels change.
- Medium — use the higher mip-level. Though the quality is better, the edge still remains. This option has a moderate effect on the performance.
- High — linearly interpolate adjacent mip-levels. This option uses appropriate mip-levels and interpolates pixels, so the edge between mip-levels disappears. This is the most performance-consuming mode.
You can force selecting a higher-quality mip-level by using the Detail Level By Angle parameter:

Target Resolution defines the maximum viewport resolution available for the Landscape Terrain renderer, which guarantees that VRAM limits will not be exceeded if the Application is launched with a higher screen resolution. When being equal to the current viewport size, the parameter provides pixel perfect quality. Decrease it, to gain more performance at a cost of visual quality.
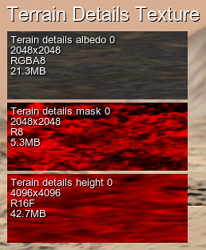
The final quality of details (if there are some on the Landscape Terrain object) is defined by the resolution of detail textures: albedo, height, and additional masks. The available range is as follows:
- 64×64 pixels,
- ...
- 16384×16384 pixels.
Amount of video memory currently consumed by detail textures is available in Rendering Performance Profiler and using the Render Textures helper:
You can engage Detail Compression for detail textures to save some video memory occupied by them.
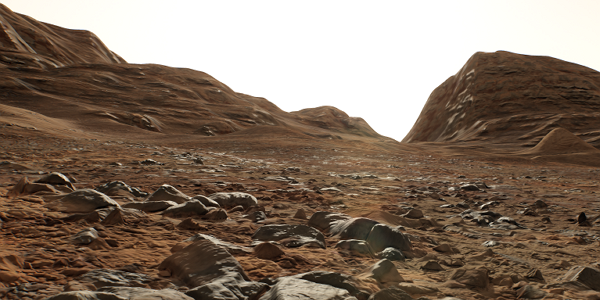
By changing the Visibility Distance value you can control the distance from the camera on which the surface of the Landscape Terrain is visible.
Streaming Configuration#
The Landscape Terrain is a sophisticated and powerful system for landscape simulation featuring scopes/binoculars support, multiple cameras and run-time modification. Using these advantages may significantly increase performance consumption and requires careful adjustment.
Flexible streaming settings make it possible to configure terrain rendering even for computers with a limited VRAM capacity, but these settings depend on the content used (distances, level of detail, etc.) and requirements (the number of cameras and viewports, etc.) and are to be adjusted for each project individually.
On the very loading of a world with a Landscape Terrain and later, when the camera moves and the point of view is changed, graphic data is being asynchronously loaded. Asynchronous data streaming of Landscape Terrain implies that tiles appearing in the viewport are first cached into RAM and video memory, and afterwards passed to the Virtual Texture to be rendered on the screen. This process is performed on demand, so appropriate streaming settings are required for seamless loading of graphic data.

Asynchronous Data Streaming is multi-threaded. At that, multi-core processors have an advantage here enabling you to distribute the load without bottlenecks. You can set the number of threads in the Advanced settings.
Landscape Layers#
Only visible Landscape Layers are taken into account when streaming graphic data. Thus, a Landscape Layer Map with a higher Order value would overlap other ones and take part in data streaming, provided there is no blending between layers.
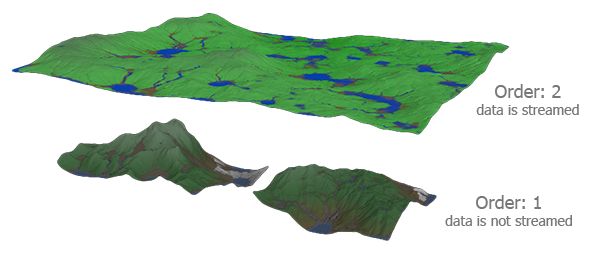
The one with the higher Order value will overlap the other ones and its data will be loaded.
Streaming is based on using previously loaded geometry to define the visible areas of terrain. The Culling flag of Landscape Layer Map enables uploading preliminary low-level data of the map to CPU (about 2 meters per pixel) to be used for checking what tiles are to be streamed next. For maps with the Culling option disabled, only high-detail data of the base map is uploaded on CPU, provided there is data loaded in the visible area.
For Landscape Layer Maps that form basic shape of the landscape keep the Culling flag enabled, otherwise no graphic data will be loaded.
Virtual Texture Size#
The overall terrain memory consumption and intensity of data streaming depend on the size of the Virtual Texture components (Albedo, Normal, Height). Higher Texture Memory Size lets more tiles to be presented in video memory enabling you to have more tiles loaded at a moment. This parameter has the highest effect on the amount of VRAM consumption and is defined in the [0, 1] range, where:
- The lowest value of 0 corresponds to the size of 3072×3072 pixels for each of 3 Landscape Terrain textures (~140 MB of VRAM),
- The highest value of 1 stands for the size of 16384×16384 pixels for each of 3 Landscape Terrain textures (~3.1 GB of VRAM).
With lower size the Virtual Texture requires less video memory but doesn't provide enough capacity for high-detail mip-levels resulting in poor performance, low detail level and fast flickering of the Landscape Terrain surface due to continuous reloading of tiles. Check video memory consumption using the VRAM Terrain Virtual Texture counter of Rendering Performance Profiler.
To precisely map the tile's spatial position to its location in the Virtual Texture, a hash function is used. Use these console commands to control its operation and accuracy but the default values are suitable for most cases:
- render_landscape_terrain_vt_hash_size — the upper limit for the hash function values. The value must be high enough to cover all variety of world-space positions of tiles being used and streamed.
- render_landscape_terrain_vt_hash_number_mistakes — the number of mistakes for the hash function. This value represents the number of iterations to compute a new unique hash value that determines a tile being streamed. Too low values may introduce hash collisions and, therefore, wrong terrain data at certain areas.
Cache Settings#
The more the CPU Cache Size, the faster intersection and collision detection is, overall loading of tiles is faster. The GPU cache contains graphic data of tiles to be transferred to the GPU for rendering. It is also accountable for fast work of GPU-based run-time modification of the Landscape Terrain surface. Control the volume of GPU cache using the GPU Cache Size parameter.
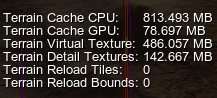
Check memory consumption using the VRAM Terrain Cache counter of Rendering Performance Profiler.
GPU cache has the Life Time parameter for landscape tiles. It can be increased to speedup landscape modification (less cache misses), but this will increase memory consumption.
Tiles Loading#
Even having high cache memory limits and the size of the virtual texture, you can have a bottleneck in the speed of tiles being loaded. Control the number of tiles loaded to memory per each frame via the Tiles Load Per Frame parameter. The Tiles Update Per Frame parameter controls the number of tiles updated and presented on the Landscape Terrain per each frame. Make note that by using high values of these parameters you will increase load on CPU and GPU cache and the Virtual Texture but make streaming of tiles really fast.
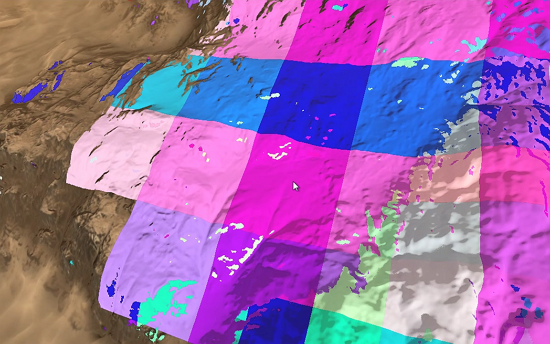
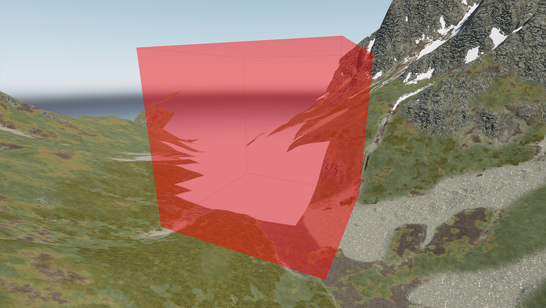
Use the Landscape Terrain VT Streaming helper (or the render_show_landscape_terrain_vt_streaming 1 console command) to enable visualization of tiles being streamed. In this mode colored areas show the tiles that are currently being rendered in a lower resolution until the highest mip-level is loaded.
Culling Optimization#
Culling of Landscape Terrain polygons is one of the most efficient optimizations intended to reduce the number of polygons rendered, it affects both data streaming and rendering. Landscape Terrain has a number of sophisticated culling techniques intented to gain rendering performance.
Culling By Depth#
Culling By Depth utilizes the depth buffer of the previous rendered frame in order to determine terrain patches occluded by opaque geometry and terrain itself. Although, the technique has Culling in its name, in fact, it actively reduces the polycount of occluded patches and, therefore, decreases the number of tessellated tiles and rendered polygons a lot.
The fact that depth is obtained from the previous frame may lead to barely noticeable inconsistencies of the terrain mesh density, especially if the framerate is too low for quickly moving camera and overlapping geometry.
You can disable this optimization in the Landscape Culling settings, although, it is not recommended as it significantly reduces the polycount of Landscape Terrain. Use the Culling Depth Resolution setting available in the Advanced settings for fine tuning.
Frustum Culling#
The polygons of Landscape Terrain are subject to frustum culling optimization. If a polygon falls out of the camera frustum (i.e. its screen position is outside the viewport bounds), it is culled out for rendering. You can enable the Aggressive Frustum Culling mode that implies more strict requirements for polygons to be rendered thereby increasing performance. In case of any issues with polygons rendering, try disabling this option (however, note that performance may drop).
Increase the Culling Oblique Frustum multiplier to cull out more polygons beyond the oblique frustum plane.
Advanced Culling Adjustment#
Internally, Landscape Terrain has 3 main stages of grid formation and culling, here is their schematic representation (top view), geometry levels of detail (Geometry Progression) are omitted for simplicity:
| 1. CPU Culling Patches |
|---|
| 2. GPU Culling Patches |
|---|
| 3. Tessellation Quads |
|---|
You can use the Advanced settings for fine-tuning of internal operation of this system.
-
CPU Culling Patches — initial patches (tiles) tested for occlusion and visibility on the CPU side. Among other culling techniques, these patches support occlusion culling by Occluders.
 Occluders support.
The CPU patches are to be subdivided and passed to the next stage — GPU Patches. The Culling Patch Resolution CPU value defines the number of subdivisions for CPU patches:
- The lowest value of 2 corresponds to no subdivisions at all, i.e. all patches will be culled on the CPU side. Stick with lower values if you intend to use Occluders for polygon reduction.
- Higher values reduce the load on CPU as more patches will be checked for visibility on the GPU side.
Another important parameter is Culling Patch Batching defining the size of batches for culling patches. Batched culling of patches enables skipping large areas at once making it possible to operate on patches of smaller size for better culling quality and performance.
-
GPU Culling Patches — Landscape Terrain patches, visibility of which is tested on the GPU side.
The GPU patches are to be subdivided one more time before tessellation. The Culling Patch Resolution GPU value defines the number of subdivisions for GPU patches:
- By lowering this value you reduce the load on CPU, more loading GPU due to less efficient culling of patches of larger size.
- By increasing it you move more computations to CPU (more rendered primitives), reducing the load on GPU (less polygons).
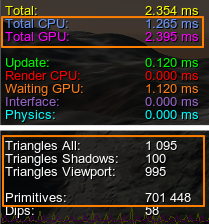
The point is to use these parameters to find a trade-off between loads on processing units in the given conditions on the target hardware. Use the Rendering Profiler to track the number of rendered primitives and triangles and achieve the best CPU and GPU timings:
- Tessellation Quads — this is where Adaptive Hardware Tessellation comes into play, subdividing polygons to the target density. The last Frustum Culling optimization is applied to polygons.
All patches are constructed for all geometry LODs. Since it is impossible to match edges of culled patches of adjacent LODs, it is needed to introduce overlapping edges. In case of geometry gaps, use the following settings to increase the distance of overlap between LODs:
Additional culling is applied to Landscape Layer Maps having small apparent size on the screen due to large distance to them or a high camera's FoV. In case small Landscape Layer Maps disappear too soon with the distance, try increasing the Culling Map value.
Advanced Streaming Adjustment#
The Advanced Streaming settings expose additional internal parameters that can be used for even finer tuning.
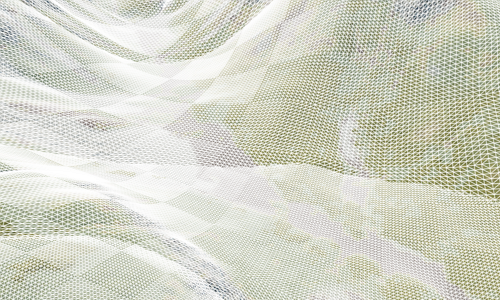
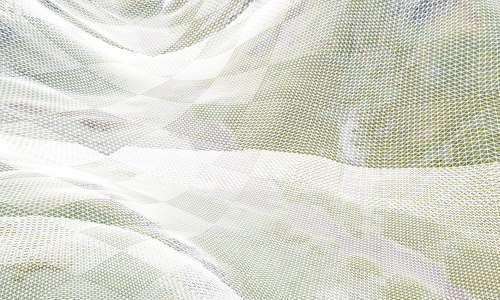
By default, tiles are loaded from the lowest to the highest available mip-level (texture level of detail) ensuring smooth appearance of fine details. The Streaming Per LODs flag enables you to avoid loading of intermediate mip-levels to reduce the loading time by sacrificing seamlessness:
Internally, Asynchronous Data Streaming system adopts the concept of Sampler Feedback — a set of structures for capturing visible tiles and mip-levels to be loaded and passing the data from GPU back to CPU. Adjustment of these settings is a rare task and must be performed with complete understanding:
- Sampler Feedback Screen Resolution — resolution of the screen buffer used to detect visible tiles and determine MIP-levels non-resident in video memory, expressed as a fraction of the viewport size. Fetching values from the buffer of lower sizes is faster but may cause artifacts.
- Sampler Feedback Buffer Resolution — resolution of the buffer used to transfer data about what tiles and MIP-levels to be loaded. With bigger buffers more data can be transferred at once but fetching data is also slower, so to set the best buffer resolution is to find a trade-off.
Making It Run-Time#
Asynchronous nature of the Landscape Terrain system makes it possible to modify the landscape surface at run time: vehicles leaving tracks while moving, procedural pit holes or even an excavator digging trenches are easy to simulate by using a separate Landscape Layer Map.
It is crucial to understand that operating a Landscape Layer Map is not the same as operating a mesh or another familiar type of object. If any of the events listed below occurs, it causes the affected tiles of the Landscape Terrain to be reloaded with the changes taken into account:
- A Landscape Layer Map is toggled on and off or created/deleted.
- The Transformation Parameters of the node are changed.
- Any of the following parameters of a Landscape Layer Map is changed:
- The graphic data of a Landscape Layer Map is modified either via API or by using Brush Editor.
Loading of tiles data is time-sliced and not performed momentarily, neither is reloading of data. Thus, when making any changes to the set of Landscape Layer Maps in the world, it is necessary to minimize the number of modifications. As an example, you can substitute a crater with a decal or a mesh to hide the moment when the crater abruptly appears.
Control the number of reloaded tiles per each frame via the Tiles Reload Per Frame parameter, in all cases described above it might be worth increasing this value for better performance. You may also need to increase the GPU Cache Update Limit and the GPU Cache Life Time for better performance.
Nonetheless, don't forget to check performance consumption of applied changes by using Rendering Performance Profiler. The Terrain Reload Bounds counter shows the number of unprocessed events causing restreaming some area of the Landscape Terrain surface. Obviously, a big number of tiles can be subject to reloading at the same moment due to these changes, so the Terrain Reload Tiles counter will help you estimate this number.
Changing most render and streaming settings, as well as operations on Landscape Terrain Details (switching detail masks on and off, assigning materials to details or specifying textures) initiate reloading of all Landscape Terrain graphic data, which is unacceptable at run time. The following parameters are safe to be changed when running a project using Landscape Terrain:
- Cache parameters
- Culling settings
- Holes toggle
- Geometry Subpixel Reduction
- Detail Level By Angle
- Target Resolution
- Tiles Load Per Frame, Tiles Reload Per Frame and Tiles Update Per Frame parameters.
As an example, you can modify these parameters to achieve variable level of detail for different fields of view of the camera. Observing Landscape Terrain through a camera with a narrow FOV may drop performance and make streaming issues noticeable.
Perform the following steps:
- Set the lowest camera FOV your project requires. Degrade the quality a bit for better performance by tweaking safe parameters, e.g. Detail Level By Albedo, Target Resolution and Geometry Subpixel Reduction.
- Switch to the highest possible camera FOV. Adjust the listed render settings.
- Use coding or scripting to linearly interpolate between target values if the FOV is changed gradually or simply change the values for instantly changing field of view of the camera.
Summary#
To sum up, when configuring a Landscape Terrain pay the closest attention to the following steps:
- Prepare all cameras in the project, open all viewports if your project requires more than one. Two cameras observing the same area of the terrain at the same time don't increase the resources consumption (however, there may be performance drop due to rendering) while cameras that visualize different parts of the landscape will require more performance-consuming settings.
- Adjust the Texture Memory Size so the size of all terrain render textures fits your VRAM and the terrain surface doesn't have noticeable flickering.
- Check the performance and resources consumption using the Rendering Profiler tool and the Render Textures helper at the full screen size and resolution of the target platform, specify the maximum Target Resolution.
- Adjust cache memory limits and the render parameters to avoid visual artifacts, streaming errors and performance spikes.
- Tweak the streaming parameters, especially if your project implies run-time terrain modification.
The information on this page is valid for UNIGINE 2.20 SDK.