灯光优化
 Light sources in the scene are resource-consuming (especially, if there are a lot of them). For example, depending on the light source type, calculation of shadows cast by the lit objects may require up to 6 rendering passes. Some type-specific settings of light sources can affect the performance, as well.场景中的光源是资源消耗的(尤其是在有很多光源的情况下)。例如,根据光源类型,计算被照亮对象投射的阴影可能需要多达6次渲染通道。某些特定类型的光源设置也会影响性能。
The article describes basic light optimization techniques.这篇文章描述了基本的光优化技术。
Light and shadow settings for each surface can be monitored using the Surfaces tab of the Content Profiler tool.每个曲面的光和影设置可以使用Content Profiler工具的Surfaces选项卡进行监控Common Lighting Optimizations常见的照明优化#
Some optimization approaches differ depending on the type of the light source. However, there are several common optimizations that can be applied to all light sources in the scene.一些优化方法因光源的类型而异。但是,有几种常见的优化可以应用于场景中的所有光源。
Disabling Shadows for Surfaces禁用曲面的阴影#
You can disable shadow rendering for some surfaces or materials. For example, it can be done for the farthest LOD surface (when the shadows don't matter).您可以禁用某些表面或材质的阴影渲染。例如,它可以针对最远的 LOD 表面(当阴影无关紧要时)完成。
To disable shadow rendering for a surface:要禁用表面的阴影渲染:
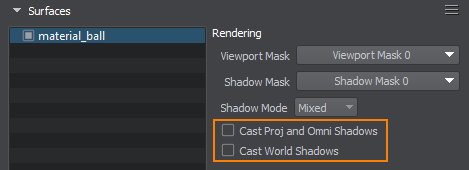
- In the World Hierarchy window, choose the node and go to the Surfaces section in the Node tab of the Parameters window.在 World Hierarchy 窗口中,选择节点并转到 Parameters 窗口的 Node 选项卡中的 Surfaces 部分。
-
Select the required surfaces and toggle the Cast Proj and Omni Shadows parameter off. To disable shadows from the world light, toggle the Cast World Shadows parameter off.选择所需的曲面并关闭 Cast Proj and Omni Shadows 参数。要禁用世界光的阴影,请关闭 Cast World Shadows 参数。
To disable shadow rendering for a material:要禁用材质的阴影渲染:
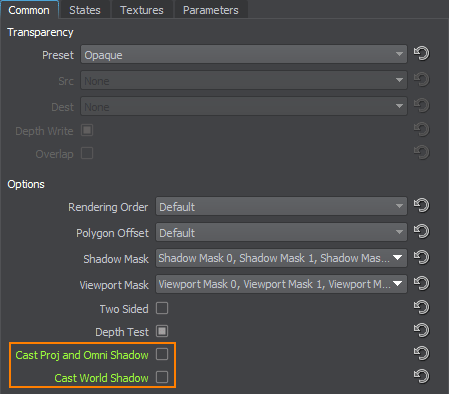
- In the Materials Hierarchy window, choose the material and go to the Common tab of the Parameters window.在 Materials Hierarchy 窗口中,选择材质并转到 Parameters 窗口的 Common 选项卡。
-
Toggle the Cast Proj and Omni Shadow parameter off. To disable shadows from the World Light, toggle the Cast World Shadow parameter off.关闭 Cast Proj and Omni Shadow 参数。要禁用 World Light 的阴影,请关闭 Cast World Shadow 参数。
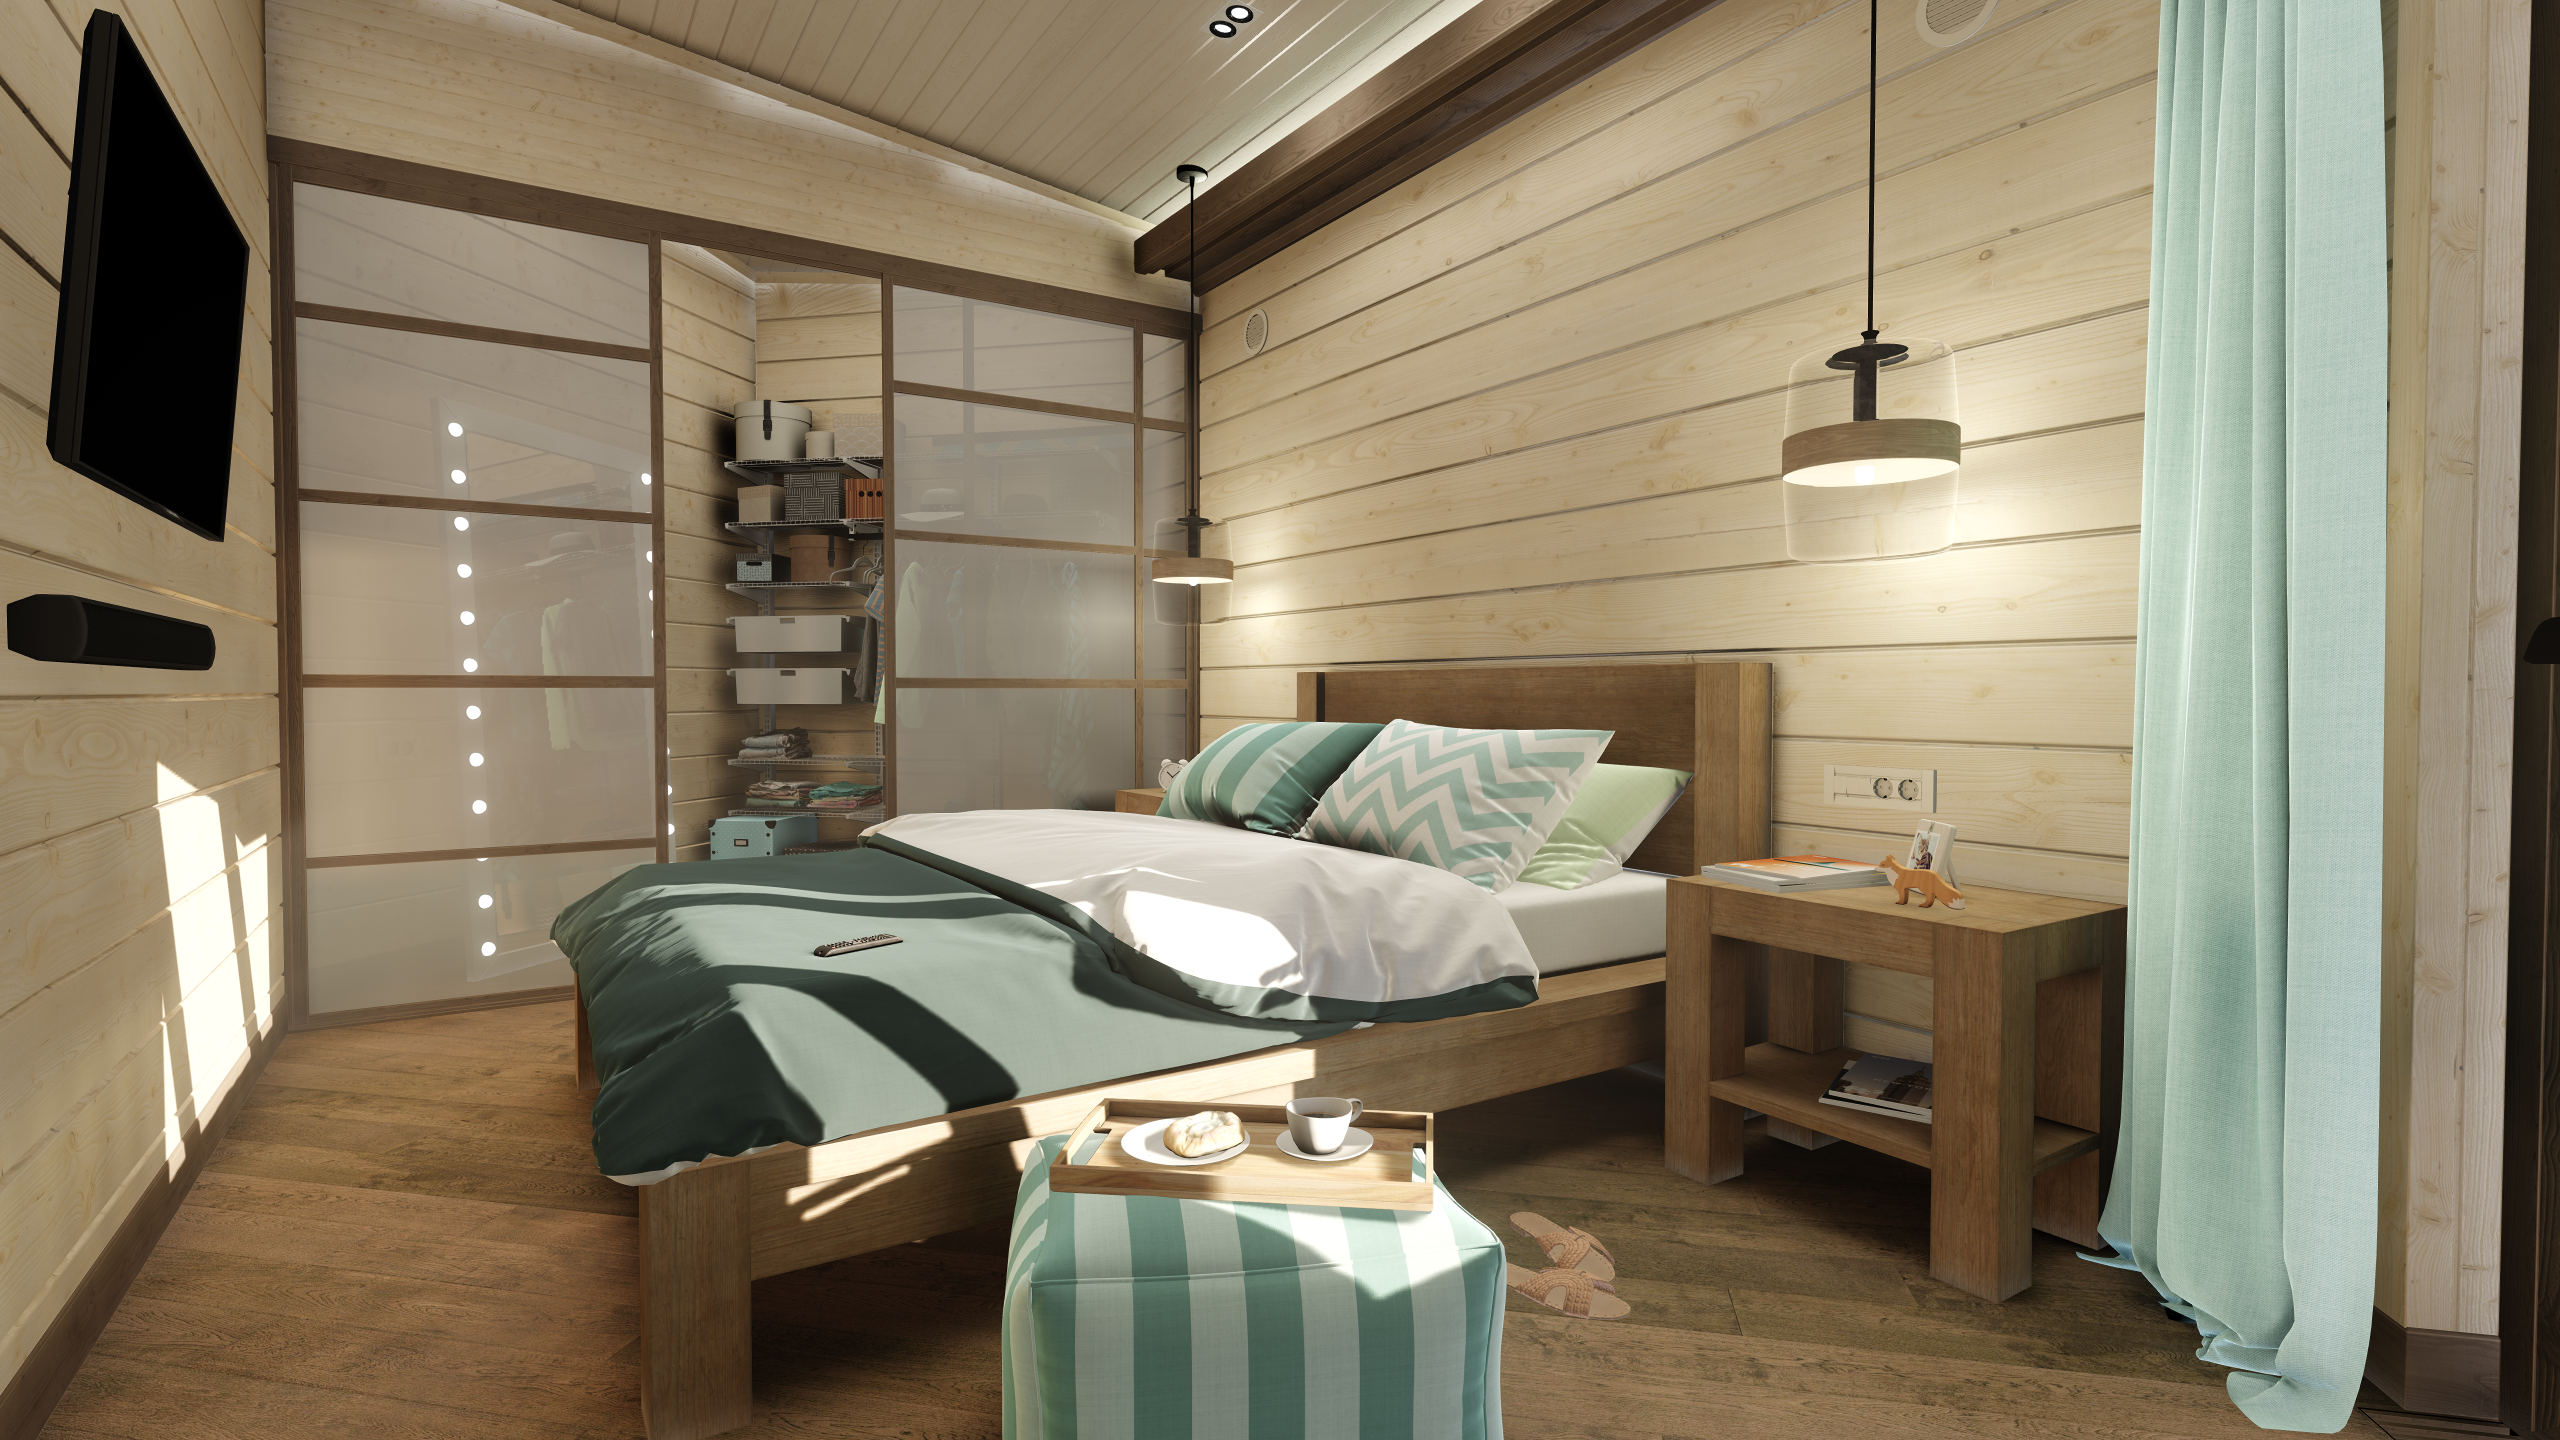
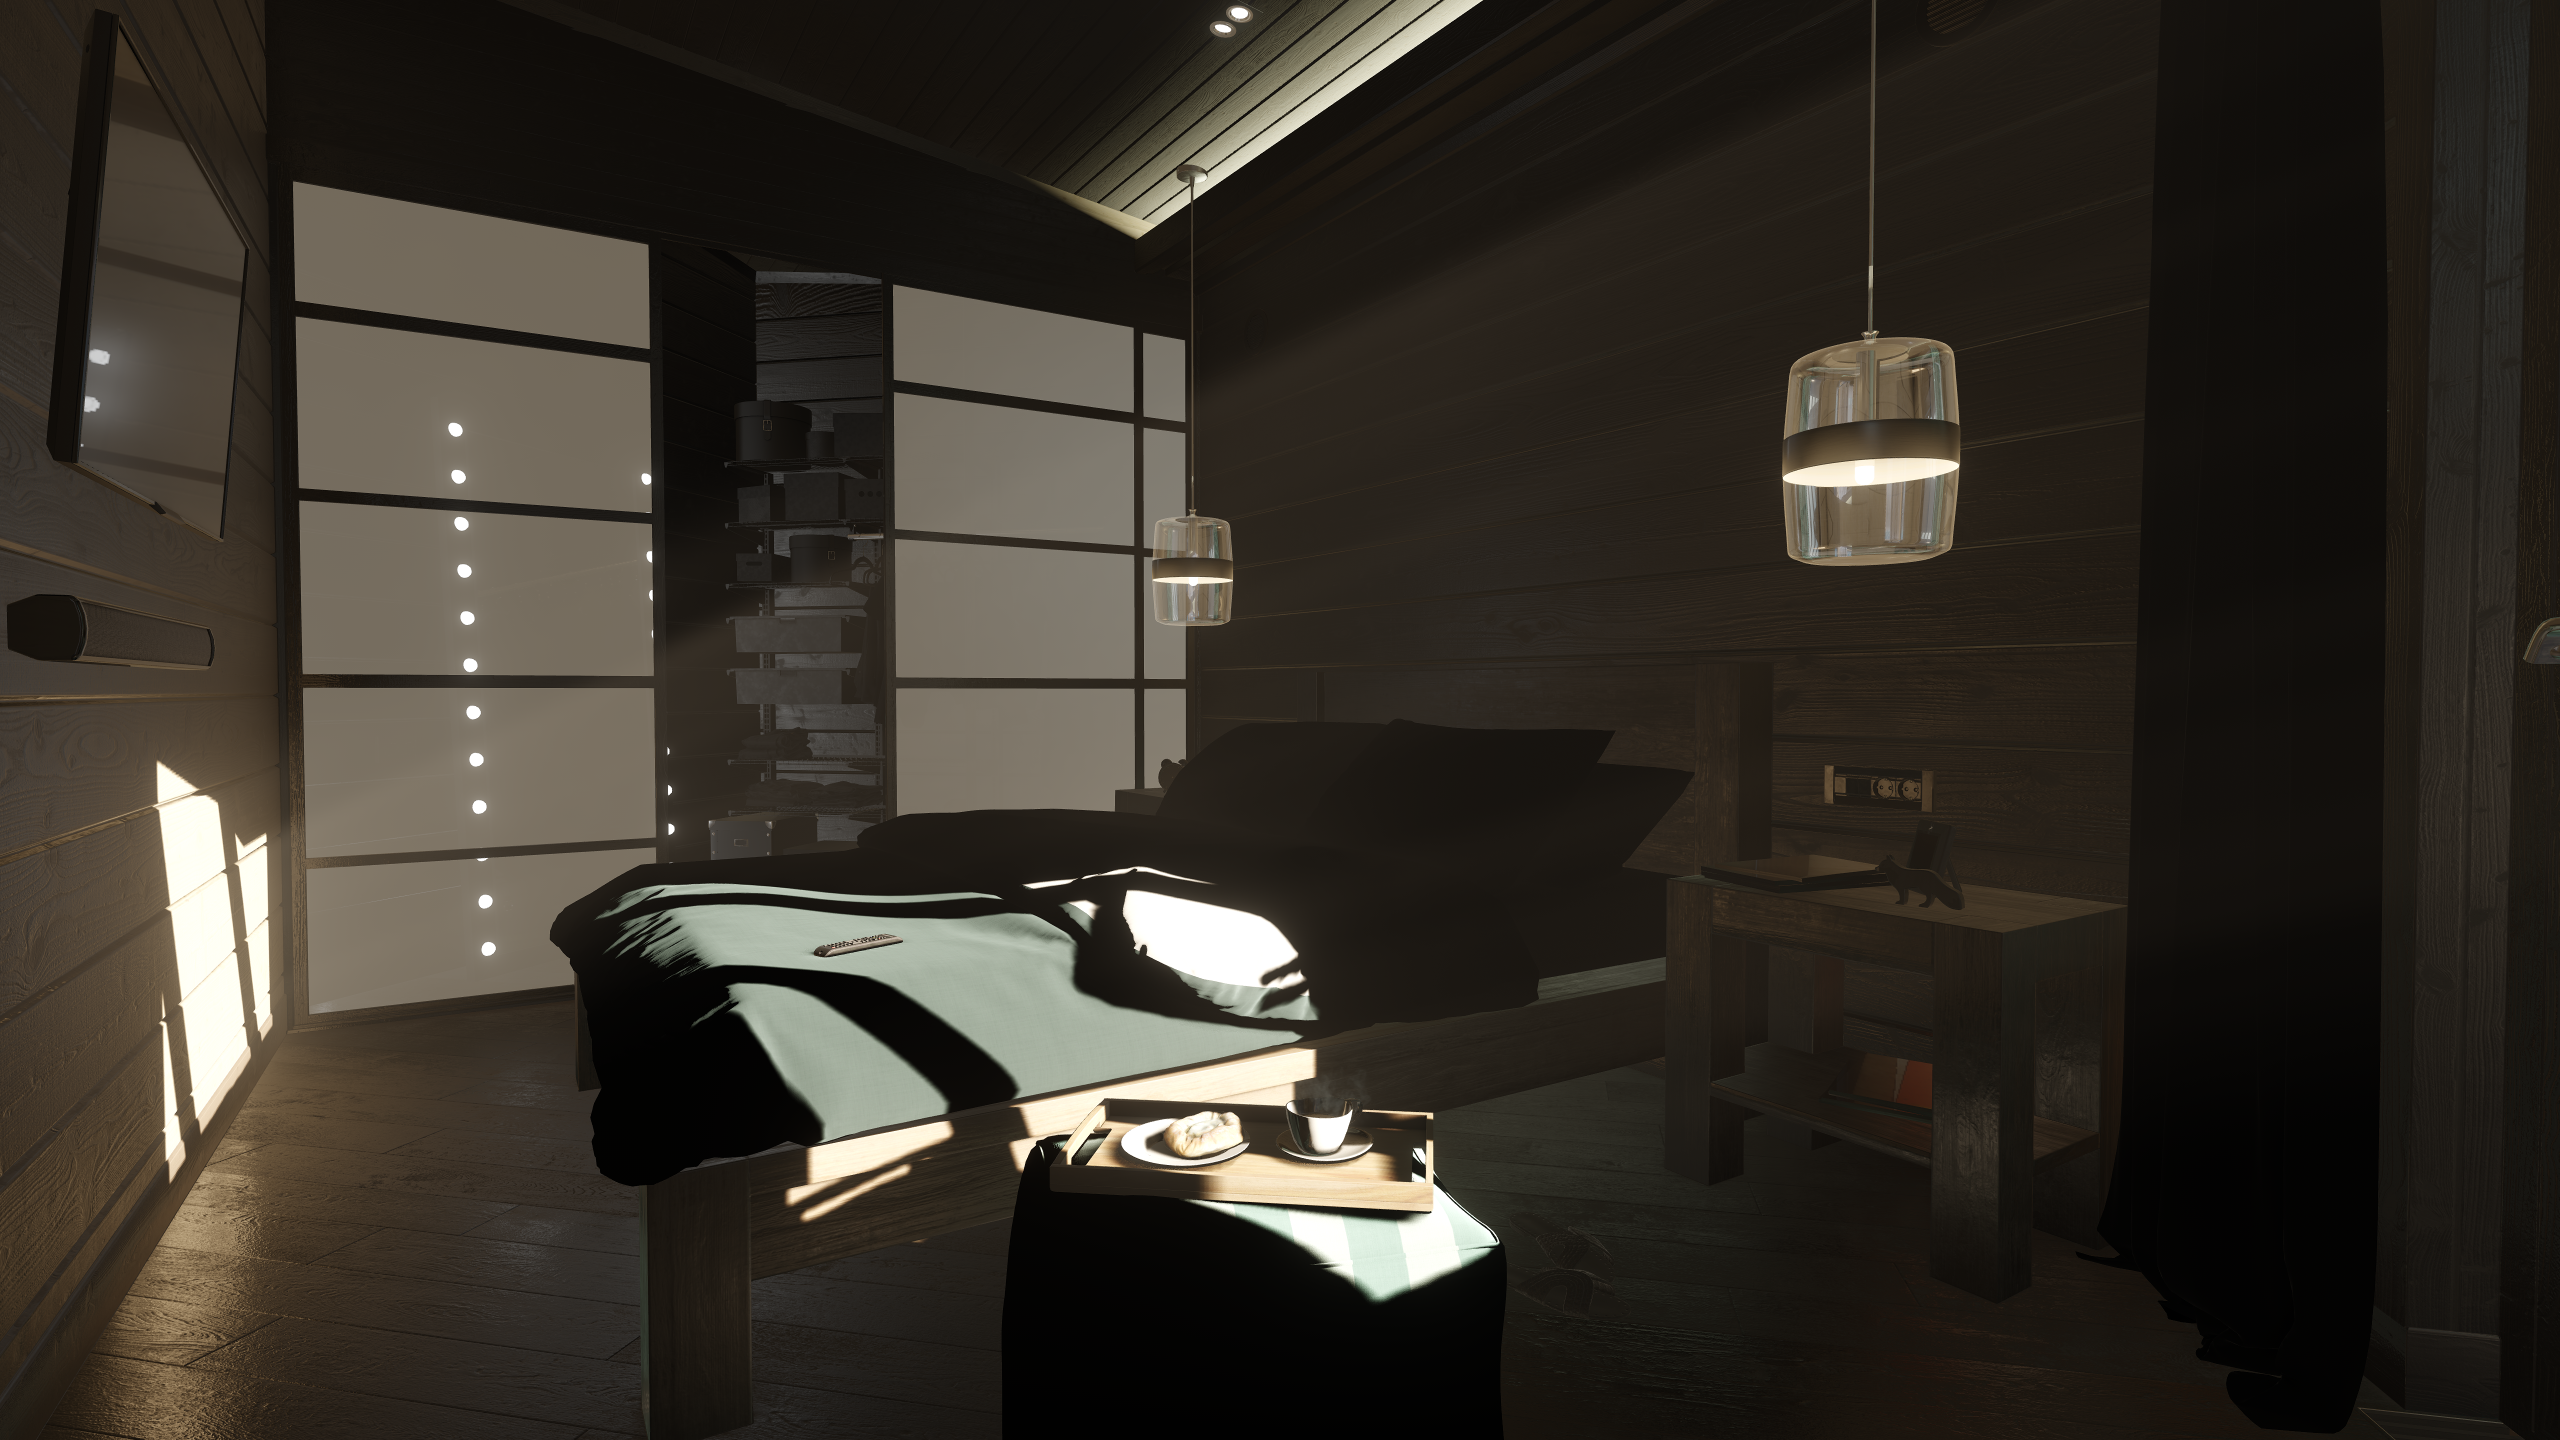
Enabling Static Lighting and Shadows启用静态照明和阴影#
Dynamic lighting ensures that all shadows from moving light sources cast by moving objects are rendered correctly. This approach implies that geometry of your scene is rendered one more time each frame to calculate shadows for each Projected light source (or six more times — for each Omni). Using multiple dynamic lights in the scene and calculating shadows for them on the fly may cause a performance drop, especially when the scene contains complex geometry with lots of polygons. It can be a terrible waste of resources, when most objects and lights are static.动态照明可确保正确渲染移动物体投射的移动光源的所有阴影。这种方法意味着场景的几何图形每帧再渲染一次,以计算每个 Projected 光源的阴影(或每 Omni 多六次)。在场景中使用多个动态灯光并动态计算它们的阴影可能会导致性能下降,尤其是当场景包含具有大量多边形的复杂几何体时。当大多数物体和灯光都是静态的时,这可能会严重浪费资源。
It’s better to avoid dynamic shadows and use baked ones for everything static wherever possible. You can replace dynamic Omni and Projected Light sources with static ones (shadows for them are precomputed and stored in depth textures).最好避免动态阴影,并尽可能对所有静态阴影使用烘焙阴影。您可以将动态 Omni 和 Projected 光源替换为静态光源(它们的阴影已预先计算并存储在深度纹理中)。
Types of shadows to be rendered are defined by the light’s mode and shadow modes set for both lights and object surfaces.要渲染的阴影类型由灯光模式和阴影模式为两者设置灯和物体表面.
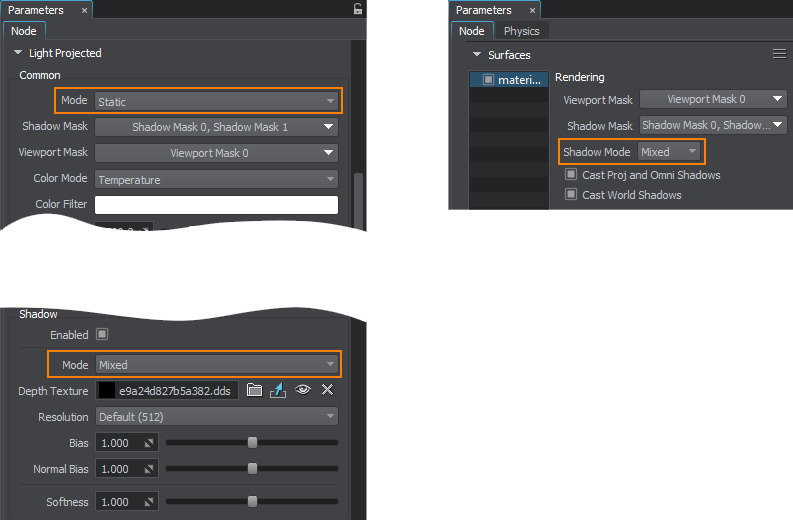
Depending on your needs, you can choose to render baked shadows only, or combine rendering of both baked and dynamic ones. The table below shows all possible variants of shadow settings.根据您的需要,您可以选择仅渲染烘焙阴影,或结合渲染烘焙阴影和动态阴影。下表显示了阴影设置的所有可能变体。

Thus, for a Dynamic light, shadows from all lit objects are rendered as dynamic.因此,对于动态光,来自所有被照亮对象的阴影都被渲染为动态的。
For a Static light in Static shadow mode, only baked shadows from objects with Mixed shadow mode are rendered; dynamic shadows are not rendered at all.对于 Static 阴影模式的静态光,仅渲染来自具有 Mixed 阴影模式的对象的烘焙阴影;根本不渲染动态阴影。
For a Static light in Mixed shadow mode, both types of shadows are rendered: baked (from surfaces with Mixed shadow mode) and dynamic (from surfaces with Dynamic shadow mode).
对于 Mixed 阴影模式下的静态光,两种类型的阴影都会被渲染:烘焙(来自具有 Mixed 阴影模式的表面)和动态(来自具有 Dynamic 阴影模式的表面)。
Mixed mode implies that the dynamic shadow map is copied into the static depth texture and the result is rendered. If you select a higher resolution, the process of copying the shadow map can take time and affect performance. Therefore, 4K resolution in the Mixed shadow mode makes sense if the scene has more than 1.5 million triangles, otherwise Dynamic mode may be faster. Moreover, pay attention to video memory consumption, as a single 4K resolution depth texture for an omni light takes about 400 MB.混合模式意味着将动态阴影贴图复制到静态深度纹理并呈现结果。如果选择更高解决,复制阴影贴图的过程可能需要时间并影响性能。因此,如果场景有超过 150 万个三角形,Mixed 阴影模式下的 4K 分辨率是有意义的,否则 Dynamic 模式可能会更快。此外,请注意显存消耗,因为泛光灯的单个 4K 分辨率深度纹理大约需要 400 MB。
If shadows from static light sources are not rebaked automatically, use the Bake Lighting tool.如果来自静态光源的阴影没有自动重新烘焙,请使用 Bake Lighting 工具。The World Light source works in a similar way, but it uses shadow cascades. In Dynamic mode, shadow cascades are built dynamically relative to the camera's position, while in Static, they are baked and have their area defined by the light source's position. Static mode of the World Light is suitable as a performance optimization technique for small-area ArchViz projects where shadow cascades can be divided into two sections: walkable area with high-resolution shadows (as they're observed closely) and non-walkable area with low-resolution shadows (as they're observed from a distance). Note that changing the time of day is not available in Static mode, as shadow cascades are baked.World Light 源以类似的方式工作,但它使用阴影级联.在 Dynamic 模式下,阴影级联是相对于相机的位置动态构建的,而在 Static 模式下,它们是烘焙的,并且它们的区域由光源的位置定义。 World Light 的 Static 模式适合作为小区域 ArchViz 项目的性能优化技术,其中阴影级联可分为两个部分:具有高分辨率阴影的可步行区域(因为它们被仔细观察)和不可步行区域低分辨率阴影(从远处观察)。请注意,在 Static 模式下无法更改时间,因为阴影级联已烘焙。
The  Cached Shadows video tutorial illustrates how to set and use dynamic and static shadows.这Cached Shadows 视频教程说明了如何设置和使用动态和静态阴影。
Using Shadow Masks使用阴影蒙版#
A Shadow mask allows you to control rendering of shadows. You can specify which surfaces lit by a light source should cast shadows:Shadow 掩码允许您控制阴影的渲染。您可以指定由光源照亮的表面应该投射阴影:
-
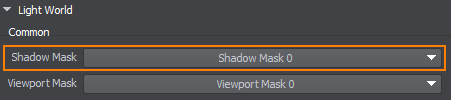
For a light source, specify the Shadow mask: open the World Hierarchy window and select your light source. In the Shadow Mask section of the Node tab in the Parameters window, specify the shadow mask.对于光源,指定 Shadow 掩码:打开 World Hierarchy 窗口并选择您的光源。在 Parameters 窗口的 Node 选项卡的 Shadow Mask 部分中,指定阴影遮罩。
- For all surfaces that are lit by the light source and should cast shadows, specify the Shadow mask that matches the light source's Shadow mask (one bit at least).对于由光源照亮并应投射阴影的所有表面,指定与光源的 Shadow 遮罩匹配的 Shadow 遮罩(至少一位)。
- For all materials applied to such surfaces, specify the matching shadow mask as well.对于应用于此类表面的所有材质,还要指定匹配的阴影遮罩。
An example of using shadow masks is available in the Content Optimization video tutorial.使用阴影蒙版的示例可在Content 优化视频教程。
Using Screen Space Shadows使用屏幕空间阴影#
For all types of light sources, screen-space shadows can be rendered instead of the shadow maps at large distances. It improves the performance, as such shadows don't depend on complexity of the geometry.对于所有类型的光源,屏幕空间阴影可以代替远距离的阴影贴图进行渲染。它提高了性能,因为这样的阴影不依赖于几何的复杂性。
Screen-space shadows depend on the screen resolution: the higher the resolution, the more accurate shadows are.屏幕空间阴影取决于屏幕分辨率:分辨率越高,阴影越准确。You can enable screen-space shadows in one of the following ways:您可以通过以下方式之一启用屏幕空间阴影:
- In the Menu Bar, choose Rendering -> Shadows -> Screen Space Shadows.在菜单栏中,选择 Rendering -> Shadows -> Screen Space Shadows。
- In the Menu Bar, choose Windows -> Settings and then go to the Shadows section. Here you can toggle the Screen Space Shadows parameter on.在菜单栏中,选择 Windows -> Settings,然后转到 Shadows 部分。在这里您可以打开 Screen Space Shadows 参数。
You can also set up per-light screen space shadows in the type-specific tabs (Light World, Light Omni, etc.) of the Parameters window.您还可以在 Parameters 窗口的特定类型选项卡(Light World, Light Omni 等)中设置每个灯光的屏幕空间阴影。
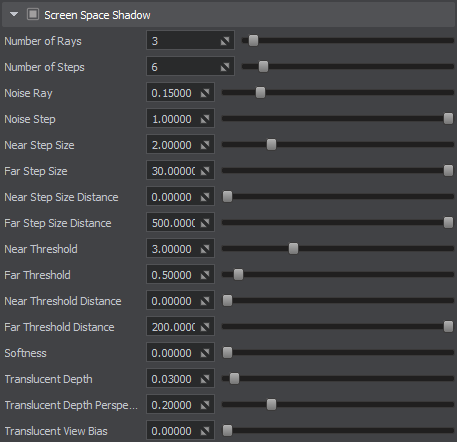
Screen Space Shadow Settings of Omni LightOmni Light的屏幕空间阴影设置Reducing Size of Light Source减小光源尺寸#
All Omni and Projected light sources are subject to a common deferred optimization technique — the Scissor Test: for each light source a scissor rectangle is found to define its bounds and, therefore, the area of its influence. The scissor rectangle defines the size of the render target for the current light source, since everything that falls outside that region is not affected by the light at the current moment.所有 Omni 和 Projected 光源都采用一种常见的延迟优化技术 - Scissor Test:为每个光源找到一个剪刀矩形来定义其边界,从而定义其影响区域。剪刀矩形定义当前光源的渲染目标的大小,因为在该区域之外的所有内容都不受当前时刻的光线影响。
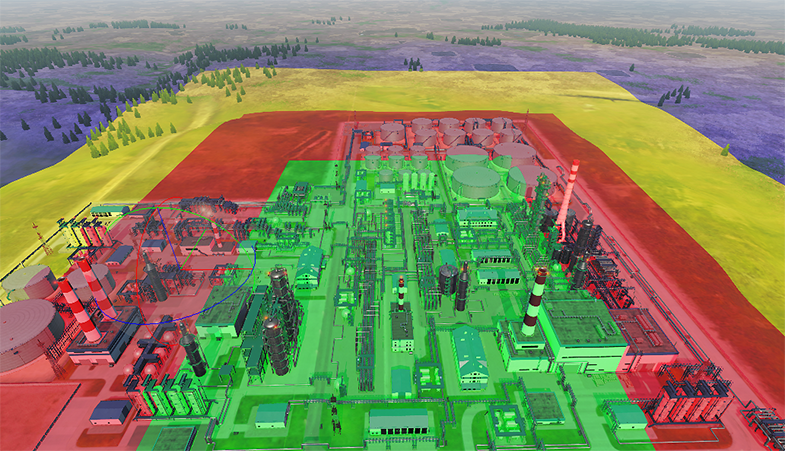
Enable the Scissors visual helper or use the render_show_scissors 1 console command to enable visualization of the Scissor Test.启用 Scissors 可视化助手或使用 render_show_scissors 1 控制台命令启用 Scissor Test 的可视化。
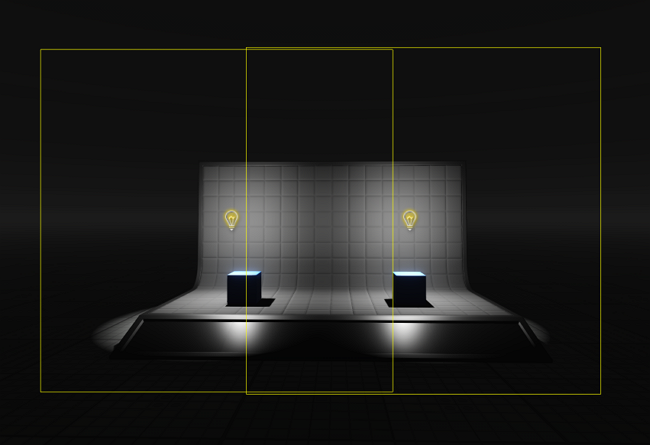
Scissor rectangles for Omni light sources用于 Omni 光源的剪刀矩形Therefore, the size of a light source significantly affects the performance: the larger the screen area where the illuminated surface is rendered, the lower the light performance is. So, keep the size as small as possible.因此,尺寸光源的大小对性能有显着影响:被照面渲染的屏幕面积越大,光性能越低。所以,尽量保持尺寸小。
Engaging Interleaved Lights Rendering使用交错灯光渲染#
In this mode lighting is rendered during the Deferred pass in half resolution (1/4 of all pixels) with subsequent reconstruction of neighboring pixels using the data from previous frames, making it possible to reduce rendering load.在这种模式下,在延迟传递期间以半分辨率(所有像素的 1/4)渲染照明,随后使用来自先前帧的数据重建相邻像素,从而可以减少渲染负载。
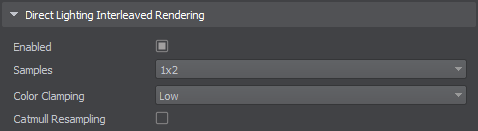
Interleaved Lights Rendering settings交错灯光渲染设置For more details refer to the Interleaved Lights Rendering article.有关详细信息,请参阅交错灯光渲染文章。
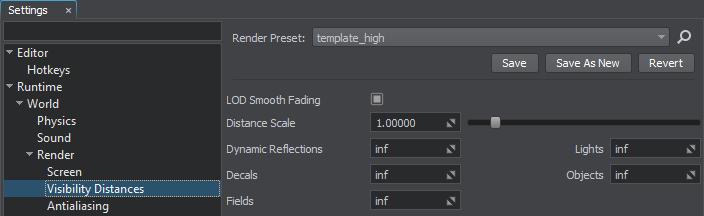
Setting Up Visibility Distances设置可见距离#
You can control rendering of light sources and cast shadows by specifying the visibility distances.您可以通过指定 visibility distances 来控制光源的渲染和投射阴影。
The global settings for all light sources (World, Omni, Projected) can be specified in the Visibility Distances section of the Settings window.可以在 Settings 窗口的 Visibility Distances 部分中指定所有光源 (World, Omni, Projected) 的全局设置。
Setting Limits For Transparent Objects为透明对象设置限制#
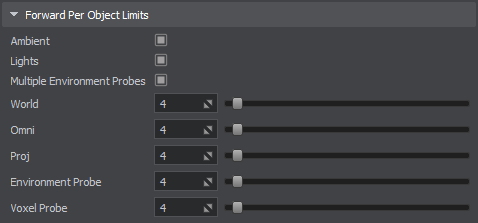
Non-opaque geometry is shaded on the Forward pass of the Rendering Sequence. Since all light sources are applied to each transparent surface in a cycle, it is highly recommended to keep the number of lights affecting transparent objects as low as possible for optimal performance.不透明几何图形在渲染序列的 Forward 通道上着色。由于所有光源都在一个循环中应用于每个透明表面,因此强烈建议将影响透明对象的灯光数量保持在尽可能低的水平,以获得最佳性能。
Global Lights Settings include Forward Per-Object Limits where you can limit the number of certain light sources that affect each transparent object at a time.全局灯光设置包括 Forward Per-Object Limits,您可以在其中限制一次影响每个透明对象的某些光源的数量。
Rendering Lights on Water在水上渲染灯光#
If your scene contains water object(s), you can disable rendering the light from the light source on them. It will significantly increase the performance.如果您的场景包含水对象,您可以禁用在它们上渲染来自光源的光。它将显着提高性能。
-
Select a light source in the World Hierarchy.在 World Hierarchy 中选择一个光源。
-
In the Parameters window, go to the Render section and toggle the Water parameter off.在 Parameters 窗口中,转到 Render 部分并关闭 Water 参数。

World Light世界之光#
The World Light source illuminates all objects that are positioned along the shadows visibility distance thus increasing the number of calculations of shadows. So it is recommended to keep the number of World Light objects in the scene as low as possible. For most purposes, other light sources (Projected Light, etc.) are more suitable in terms of project performance.这世界之光光源照亮沿阴影可见距离从而增加阴影的计算次数。所以建议尽量减少场景中 World Light 对象的数量。对于大多数目的,其他光源(Projected Light等)在项目性能方面更合适。
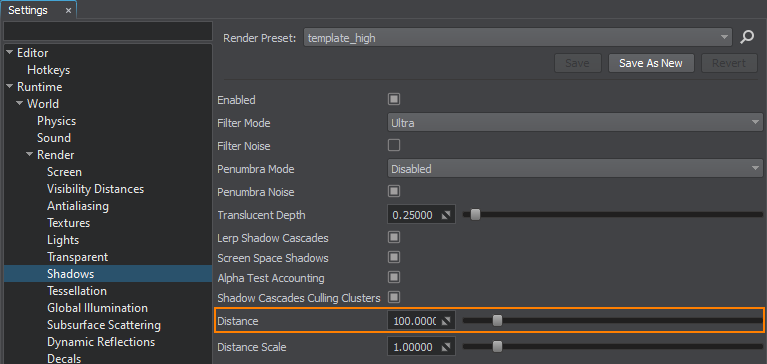
Shadow Distance Parameter阴影距离参数For the World Light, the Engine creates cascaded shadow maps (maximum 4 cascades). Each cascade requires a separate rendering pass.对于 World Light,引擎会创建级联阴影贴图(最多 4 级联)。每个级联都需要一个单独的渲染通道。
4 Shadow Cascades4个阴影级联您可以通过减少 Parameters 窗口(Number of Cascades 参数)中渲染的级联数来影响性能。但是,改变级联的数量也会影响渲染的图像质量,所以要尽量找到一个平衡点。
Omni Light全向灯#
Omni light sources emit light in all directions, which allows reproducing realistic shadow casting.Omni 光源向所有方向发射光,从而可以再现逼真的阴影投射。
Omni Light in Scene场景中的全光The Omni light source uses 6 cameras that generate shadow maps, so shadowing by this light source requires 6 rendering passes and can sufficiently decrease the performance. So, keep the number of such light sources as low as possible. For better performance, you can disable rendering of shadows created by the Omni light in certain directions or use Projected light sources instead of the Omni ones.Omni 光源使用6 个相机生成阴影贴图,因此该光源的阴影需要6 次渲染通道,并且会大大降低性能。因此,尽量减少此类光源的数量。为了获得更好的性能,您可以禁用 Omni 光在某些方向上创建的阴影的渲染或使用 Projected 光源而不是 Omni 光源。

Rendering of shadows in certain directions can be disabled可以禁用某些方向的阴影渲染However, there is a way to use a lot of Omni light sources in the scene without negative impact on the performance: you should disable shadows for them (not screen-space shadows). As the Engine uses tile rendering for the Omni lights with the Point shape and shadows disabled, they will be grouped and rendered in batches, decreasing the number of DIP calls and making Omni lights the fastest light sources in the scene.但是,有一种方法可以在场景中使用大量 Omni 光源而不会对性能产生负面影响:您应该为它们禁用阴影(不是屏幕空间阴影)。由于引擎在禁用 Point 形状和阴影的情况下对 Omni 灯使用平铺渲染,它们将被分组并分批渲染,从而减少 DIP 调用的数量并使 Omni 灯成为场景中最快的光源。
The related settings are available in the Batching options:相关设置可在配料选项:

This optimization enables you to engage big numbers of Omni lights with no significant performance drop.这种优化使您能够使用大量 Omni 灯,而不会显着降低性能。

Batching of 1024 Omni lights1024个全向灯的批处理You can also control rendering of Omni lights and cast shadows by specifying visibility distances for the light sources. When the camera is located at a given distance from the light source, it is turned off. The same can be specified for the cast shadows:您还可以通过指定来控制 Omni 灯光的渲染和投射阴影能见度对于光源。当相机位于距光源给定距离处时,它会关闭。可以为投射阴影指定相同的内容:
- Open the World Hierarchy window and select an Omni light source.打开 World Hierarchy 窗口并选择一个 Omni 光源。
- In the Parameters window, specify the Distance Visibility Settings.在 Parameters 窗口中,指定 Distance Visibility Settings。
Projected Light投射光#
Projected light sources cast light from a single point forming a light pyramid. Such light sources produces shadows that require only 1 rendering pass, so they are performance-cheap.Projected 光源从一个点投射光线,形成一个光金字塔。这种光源产生的阴影只需要1 个渲染通道,因此它们的性能很低。
Projected Light in Scene场景中的投影光However, the influence of these light sources on performance can be also reduced by:但是,这些光源对性能的影响也可以通过指定来减少能见度对于光源和投射阴影:
- Specifying visibility distances for the light sources and the cast shadows.打开 World Hierarchy 窗口并选择一个 Projected 光源。
- Adjusting the beam length (attenuation distance) in the light's Parameters tab to limit the area affected by the light.在 Parameters 窗口中,指定 Distance Visibility Settings。
Voxel and Environment Probes体素和环境探测器#
The Voxel Probe light source provides static voxel lighting and shading on an object inside the Probe by using a prebaked 3D lighting map. Voxel Probe is a required object for baking indirect lighting from light sources in static mode.Voxel Probe 光源通过使用预烘焙的 3D 光照贴图在 Probe 内部的对象上提供静态体素光照和着色。 Voxel Probe 是必需的对象在静态模式下烘焙来自光源的间接照明.
Resolution of a 3D lighting map that the Voxel Probe projects, has no influence on performance. Therefore, you can use any resolution you want.Voxel Probe 投影的 3D 光照贴图的分辨率对性能没有影响。因此,您可以使用任何您想要的分辨率。Using a Voxel Probe as an inset inside another Voxel Probe with the same size decreases performance, while the visual result will be the same as if you add a single Voxel Probe. However, nesting Voxel Probes, applying higher resolution to smaller inner probes and lower resolution to outer probes, where higher quality would be unnecessary, can reduce performance costs.在另一个 Voxel Probe 中使用 Voxel Probe 作为插图会显着降低性能。此外,如果您添加多个大小一致的嵌套 Voxel Probe 对象,则视觉结果将与添加单个 Voxel Probe 相同。但是,性能会下降。所以,如果可能的话,尽量避免这种情况。
The main performance overhead in Voxel Probe comes from Cubic Filtering. Disable it if the linear filtering for ambient lighting is enough.显着降低性能的 Voxel Probe 的主要设置是 Cubic Filtering。如果环境照明的线性过滤足够,则禁用它。

影响性能的另一种设置是 Reflections。打开时,Voxel Probe 用于两者环境照明和反思.我们建议您使用 Environment Probe 进行反射模拟。
The Environment Probe light source provides ambient lighting and reflections on an object inside the Probe by using a cubemap. However, the main purpose of Environment Probe is reflection rendering. For lighting, we recommend using Voxel Probe: just toggle the Indirect Diffuse lighting off in the Parameters window.Environment Probe 光源提供环境照明和反思使用立方体贴图在 Probe 内的对象上。但是,Environment Probe 的主要用途是反射渲染。对于照明,我们建议使用 Voxel Probe:只需在 Parameters 窗口中关闭 Indirect Diffuse 照明即可。
At that, the Reflections should be toggled off for Voxel Probe.那时,应该为 Voxel Probe 关闭 Reflections。
This approach allows improving the application performance without loss of visual quality: using both the Environment and Voxel Probes for ambient lighting and reflections rarely gives notable visual improvement.这种方法可以在不损失视觉质量的情况下提高应用程序性能:同时使用 Environment 和 Voxel Probes 进行环境照明和反射很少能带来显着的视觉改善。
Voxel Probe Ambient Light + Environment Probe Reflections体素探针环境光+环境探针反射Fake Lighting假照明#
When you need only the visualization of a light source without illumination, you can use one of the tricks described below.当您只需要在没有照明的情况下可视化光源时,您可以使用下面描述的技巧之一。
Using Billboards使用广告牌#
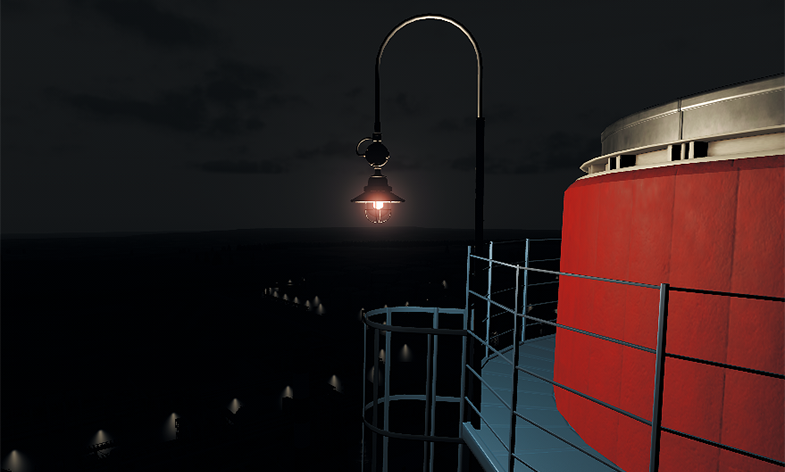
Billboards can be used to simulate small light sources observed from large distances. In such cases, only visualization of light sources matters. For example, you can use Billboards for takeoff runway lights. They don't produce any light, but look like real lights.Billboards 可用于模拟从远距离观察到的小光源。在这种情况下,只有光源的可视化很重要。例如,您可以将 Billboards 用于起飞跑道灯。它们不产生任何光,但看起来像真正的光。
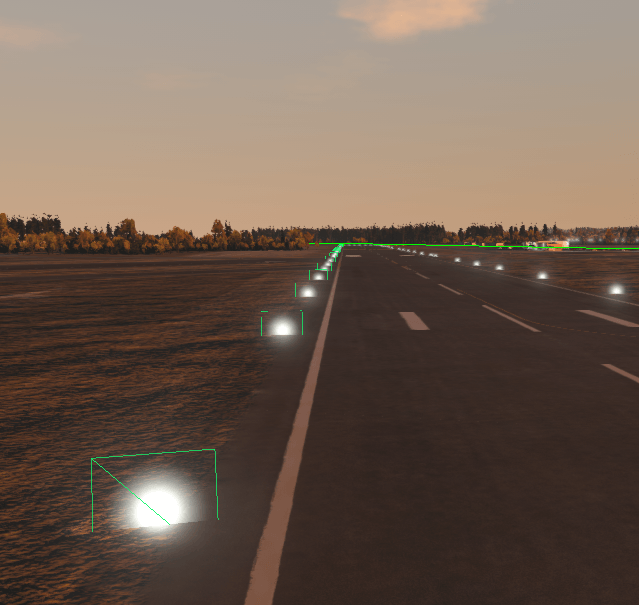
Billboards Used for Takeoff Runway Lights用于起飞跑道灯的广告牌To create Billboard that replaces a real light source, perform the following:要创建替换真实光源的 Billboard,请执行以下操作:
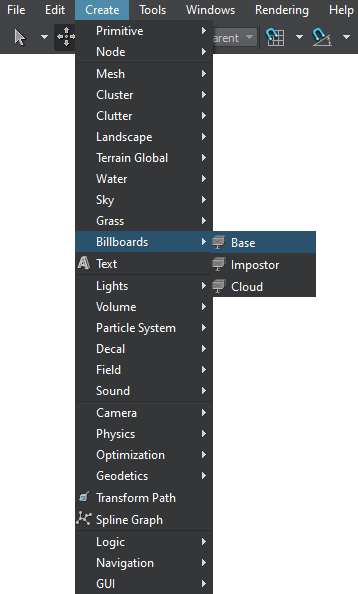
-
Add a Billboard object to the scene by choosing Create -> Billboards -> Base in the Menu Bar and place it somewhere in the world.通过在菜单栏中选择 Create -> Billboards -> Base 将 Billboard 对象添加到场景中,并将其放置在世界的某个位置。
- Assign a material inherited from the billboards_base material.分配从 billboards_base 材质继承的材质。
-
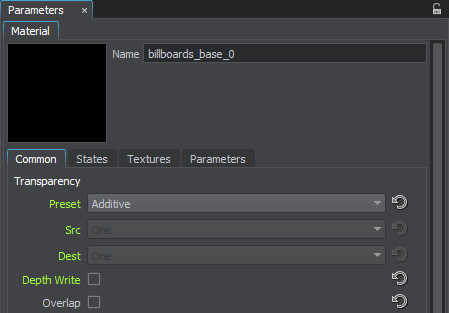
Specify the following settings for this material:为此材质指定以下设置:
-
In the Common tab, set the blending
Preset to Additive and toggle the Depth Write parameter off to avoid obstructing objects behind the Billboard.在 Common 选项卡中,将混合
Preset 设置为 Additive 并关闭 Depth Write 参数以避免遮挡 Billboard 后面的对象。
-
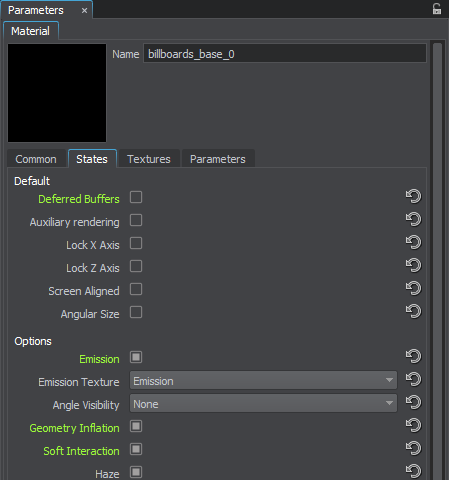
In the States tab, disable writing into the Deferred Buffers and enable the following states:在 States 选项卡中,禁用写入 Deferred Buffers 并启用以下状态:
- Emission to provide the emission effect by using the corresponding texture.Emission 通过使用相应的纹理来提供发射效果。
- Geometry Inflation to limit the minimum Billboard screen size to a fixed value and, therefore, to provide visibility from far distances.Geometry Inflation 将最小 Billboard 屏幕尺寸限制为固定值,因此,提供远距离可见性。
- Soft Interaction to make interaction of the Billboard with other objects in the scene softer and avoid artifacts.Soft Interaction 使 Billboard 与场景中其他对象的交互更柔和并避免伪影。
-
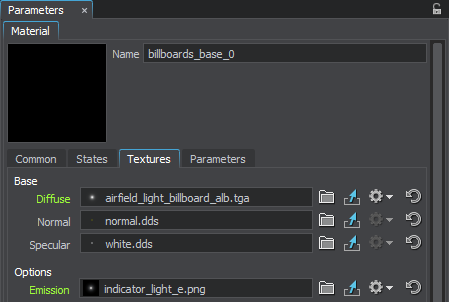
In the Textures tab, specify the Diffuse and Emission textures.在 Textures 选项卡中,指定 Diffuse 和 Emission 纹理。
-
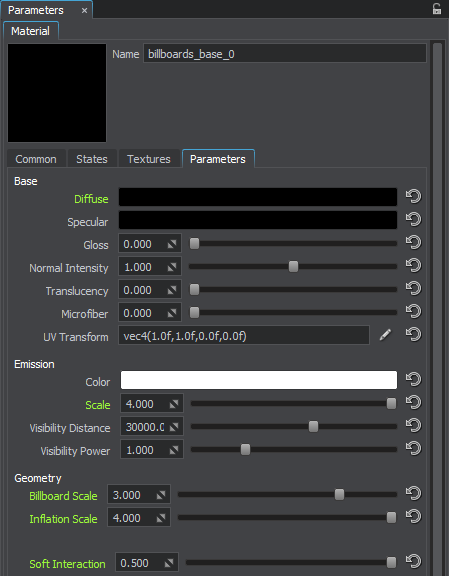
In the Parameters window, specify the following values:在 Parameters 窗口中,指定以下值:
- Set the Diffuse color multiplier to black, so that Billboard become fully transparent.将 Diffuse 颜色乘数设置为black ,使 Billboard 变得完全透明。
- Increase the Emission Scale to make Billboard brighter.增加 Emission Scale 使 Billboard 更亮。
- Increase the Geometry Parameters to scale the size of Billboard and limit the minimum size of Billboard.增加几何参数缩放 Billboard 的大小并限制 Billboard 的最小大小。
- Correct the Soft Interaction value, if necessary.如有必要,更正 Soft Interaction 值。
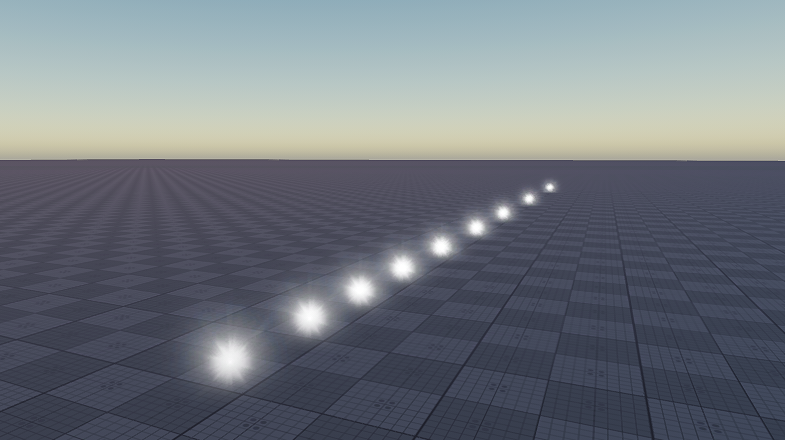
-
As a result, you get the Billboard that can be used to simulate a small light source at far distances. You can add any required number of Billboards to the existing Billboard object: in the Parameters window, select the created Billboard in the list and click Add.结果,您获得了可用于模拟远距离小光源的 Billboard。您可以将任何所需数量的 Billboards 添加到现有的 Billboard 对象中:在 Parameters 窗口中,选择列表中创建的 Billboard 并单击 Add。
Lights Simulated by Billboards广告牌模拟的灯光Using Volumetric Objects使用体积对象#
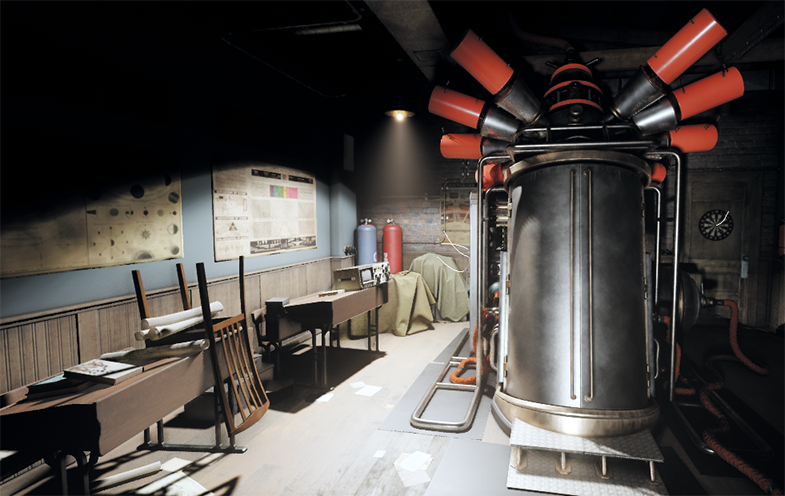
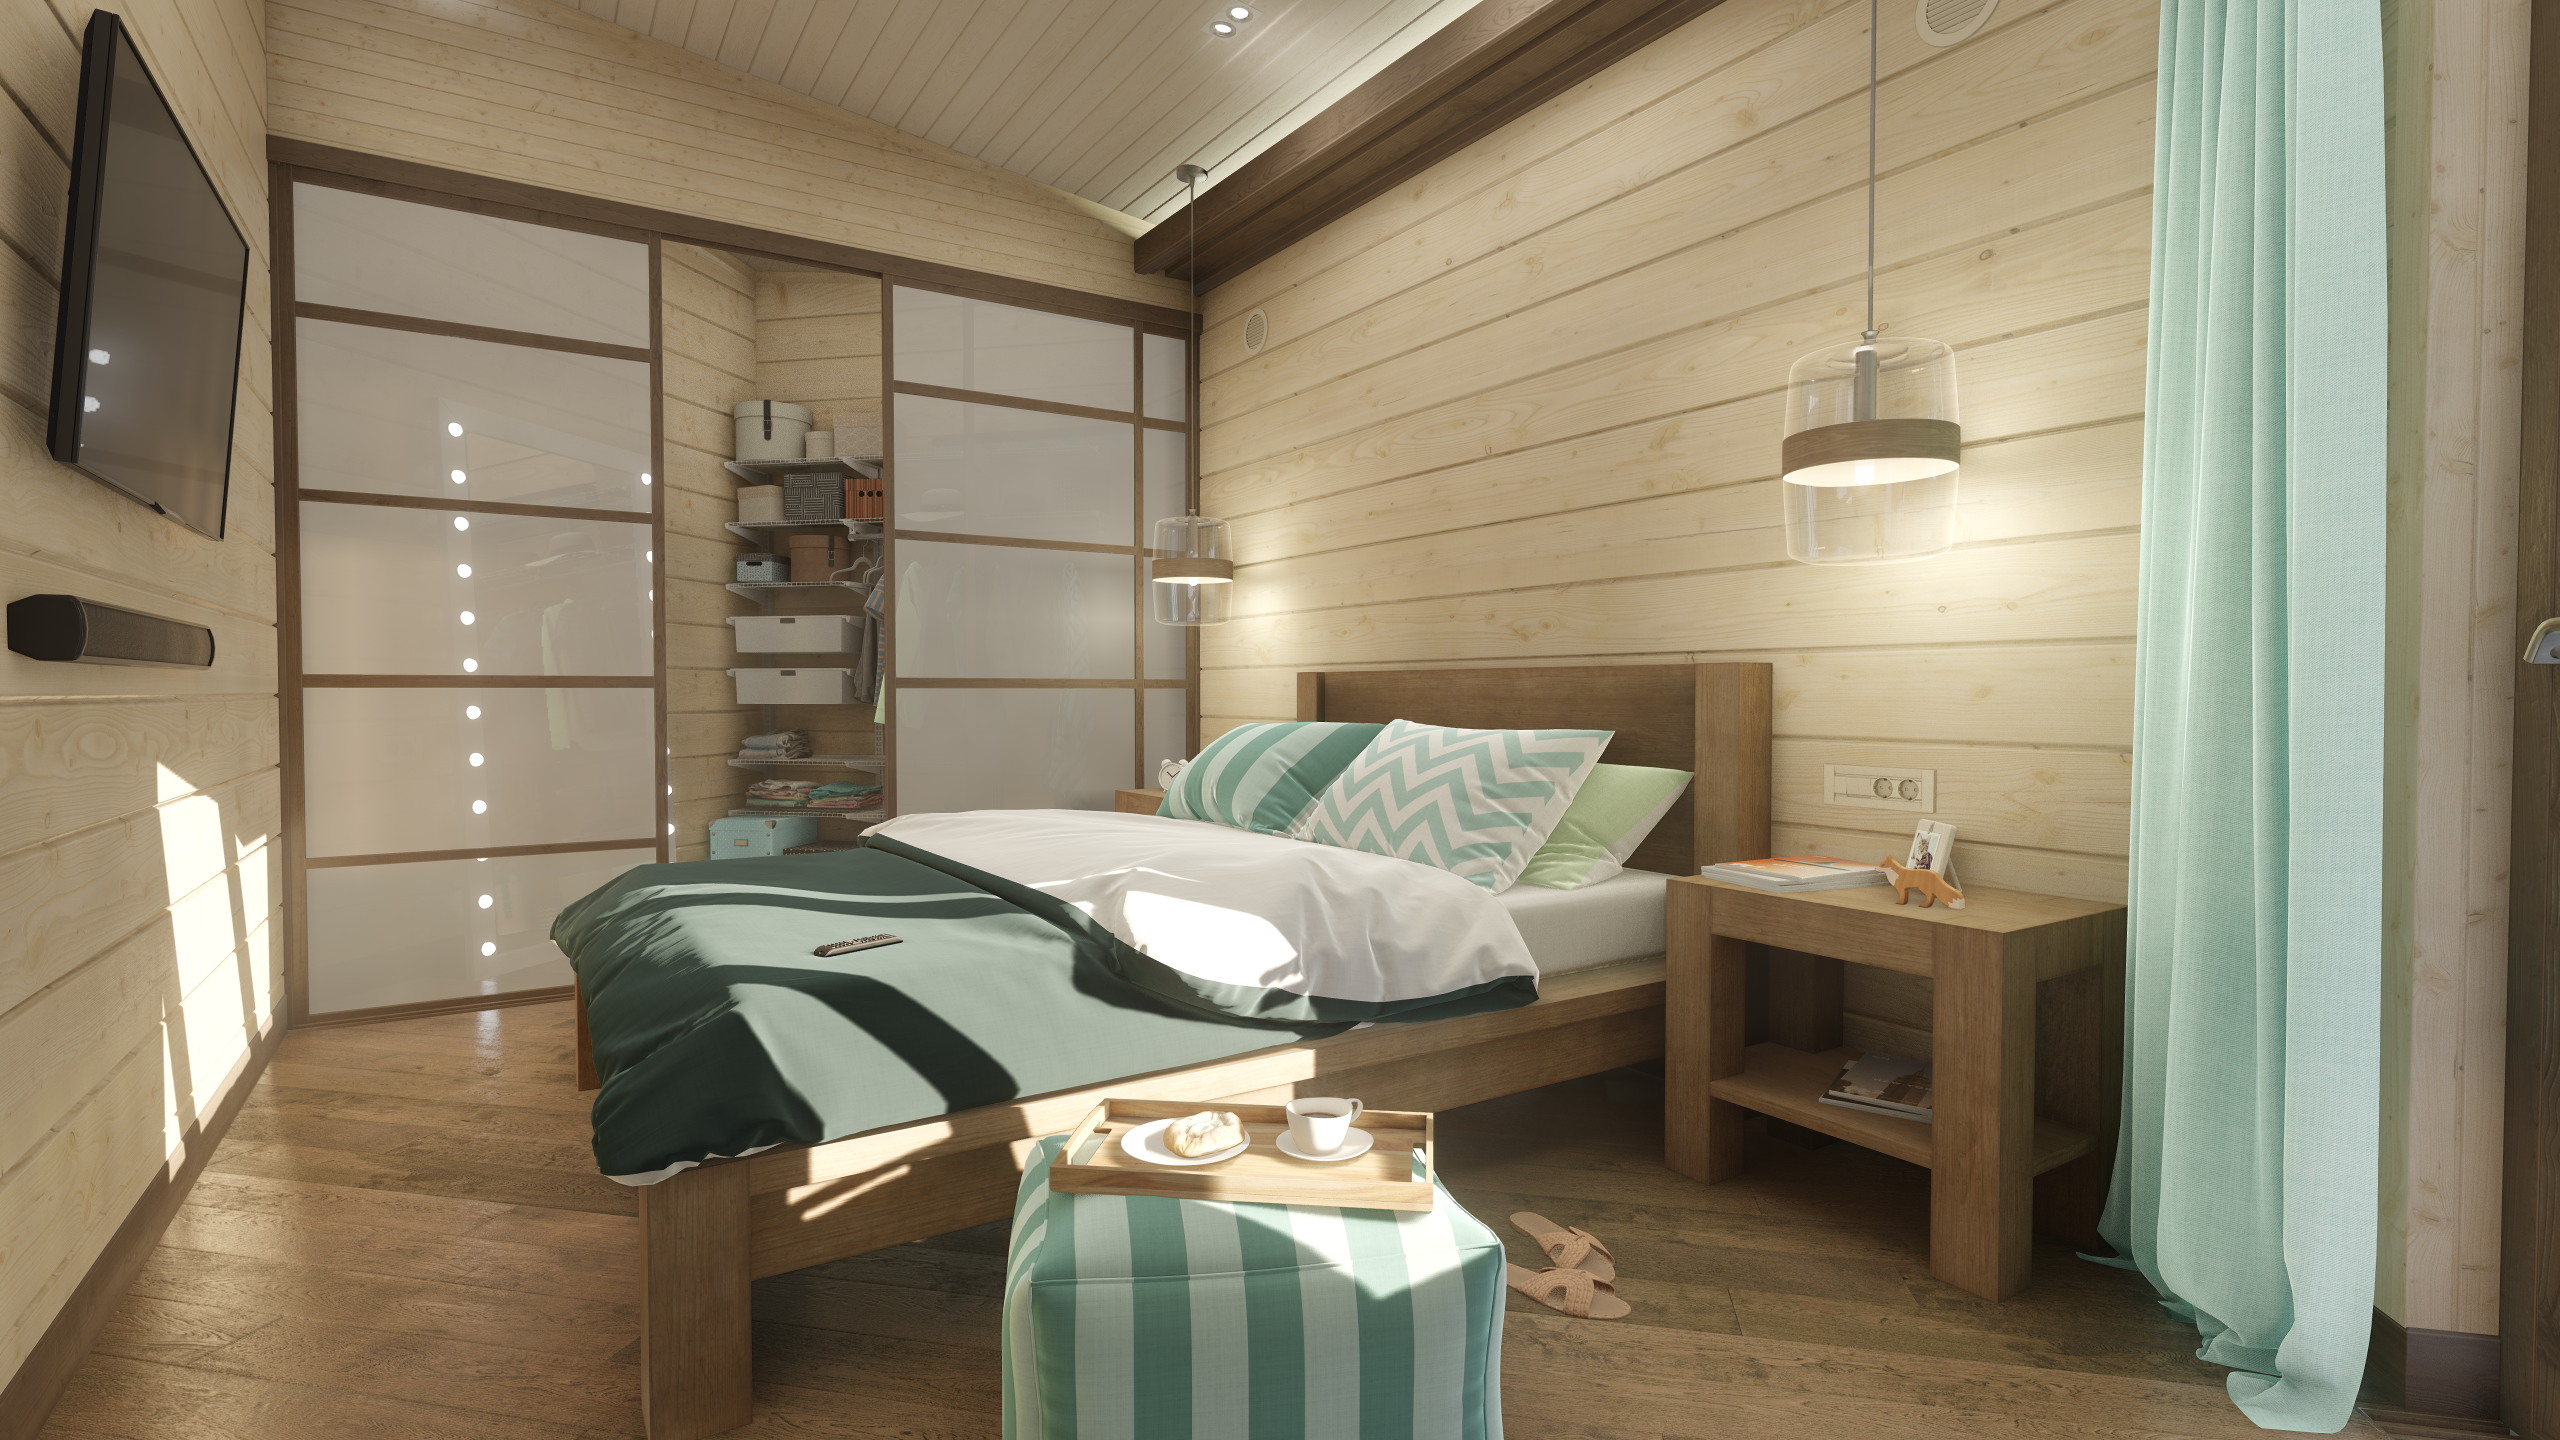
Volumetric objects can be used to simulate visible light volumes instead of using real light sources. Such objects should be used when you don't need illumination. For example, by using Volumetric objects, you can create light spheres, beams, or volumes, imitate sun beams falling into a room through openings, and so on.Volumetric 对象可用于模拟可见光体积,而不是使用真实光源。当您不需要照明时,应使用此类对象。例如,通过使用 Volumetric 对象,您可以创建灯光球体,梁, 要么卷, 模仿太阳光束通过开口落入房间,等等。
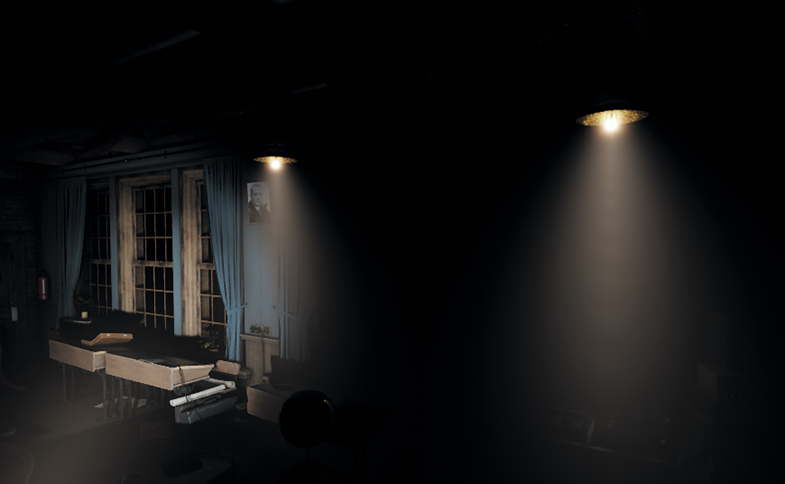
Light sphere and beam simulated instead of real light source模拟光球和光束而不是真实光源To create such light volumes, perform the following:要创建此类轻量级,请执行以下操作:
-
Add the Volume Sphere object by choosing Create -> Volume -> Sphere Light in the Menu Bar and make it a child of the node that should emit the light.通过在菜单栏中选择 Create -> Volume -> Sphere Light 添加 Volume Sphere 对象,并使其成为应该发光的节点的子节点。
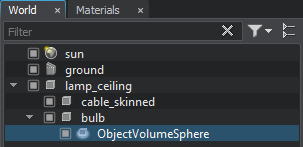
- In the Volume Sphere section of the Parameters window, change the size of the sphere to 0.15.在 Parameters 窗口的 Volume Sphere 部分,将球体的大小更改为 0.15。
-
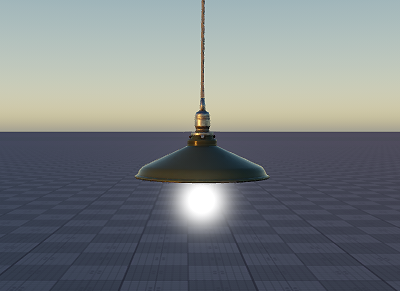
In the Node tab of the Parameters window, set coordinates of the volume sphere to the parent node and then slightly correct the sphere position, so that it looks realistic.在 Parameters 窗口的 Node 选项卡中,将体积球体的坐标设置为父节点,然后稍微修正球体位置,使其看起来更逼真。
-
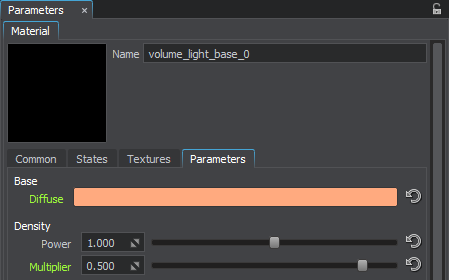
Assign a material inherited from the volume_light_base base material and specify the required values in the Parameters tab. For example, you can set the color of the light sphere and scale the density of the light.分配从 volume_light_base 基础材质继承的材质,并在 Parameters 选项卡中指定所需的值。例如,您可以设置颜色光球和缩放密度的光。
-
Add the Volume Projected object by choosing Create -> Volume -> Projected in the Menu Bar and make it a child of the node that should emit the light.通过在菜单栏中选择 Create -> Volume -> Projected 添加 Volume Projected 对象,并使其成为应该发光的节点的子节点。
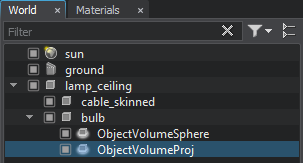
-
In the Node tab of the Parameters window, reset the position and rotation of the Volume Projected to the parent node ones.在 Parameters 窗口的 Node 选项卡中,将 Volume Projected 的位置和旋转重置为父节点的位置和旋转。

-
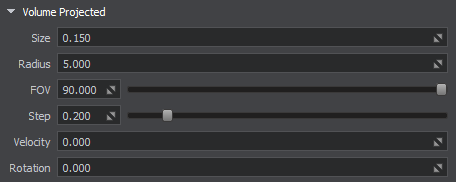
In the Volume Projected section of the Parameters window, specify the required parameters of the light beam. For example, change its size, radius, field of view, and step.在 Parameters 窗口的 Volume Projected 部分,指定光束所需的参数。例如,改变它的尺寸、半径、视野和步长.
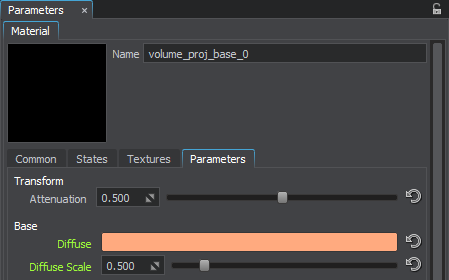
- Assign a material inherited from the volume_proj_base base material.分配从 volume_proj_base 基础材质继承的材质。
-
In the Parameters window of the material, set the color of the light beam the same as for the Volume Sphere and decrease the diffuse scale to 0.5 to make the color less bright.在材质的 Parameters 窗口中,设置颜色光束与 Volume Sphere 相同,并减少弥散尺度到 0.5 以使颜色不那么明亮。
As a result, you get a light sphere and a beam imitating the real light source.结果,您会得到一个光球和一个模仿真实光源的光束。
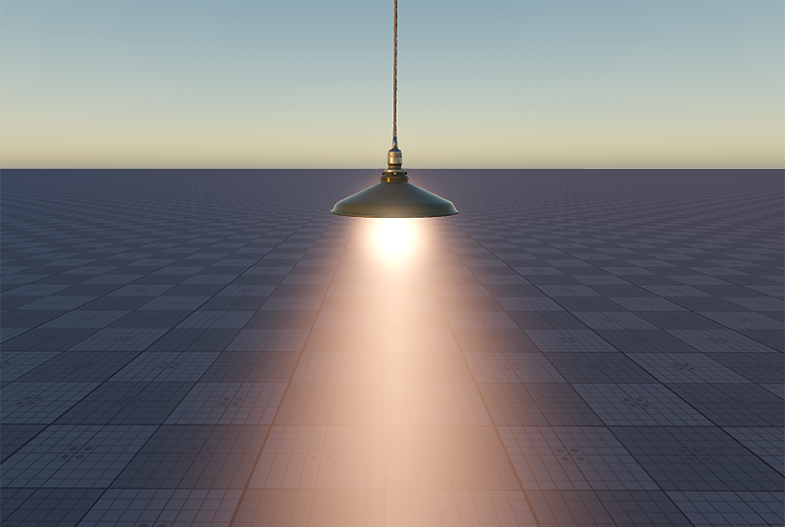
Light simulated by Volume Sphere and Volume Proj objects由 Volume Sphere 和 Volume Proj 对象模拟的光本页面上的信息适用于 UNIGINE 2.20 SDK.