Editor Settings and Hotkeys
Editor Settings#
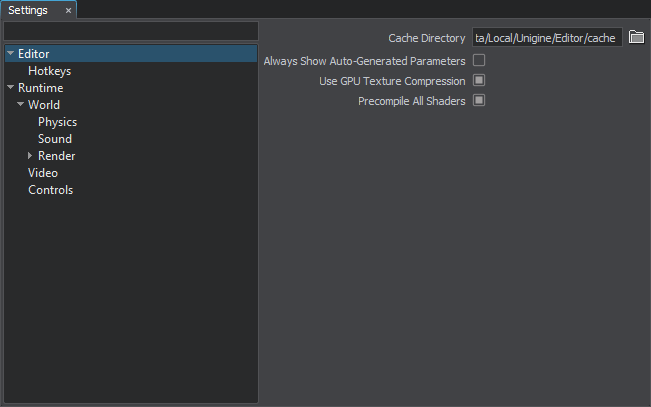
The Editor section of the Settings window displays general settings of the UnigineEditor.
The following window will open:

Editor Hotkeys#
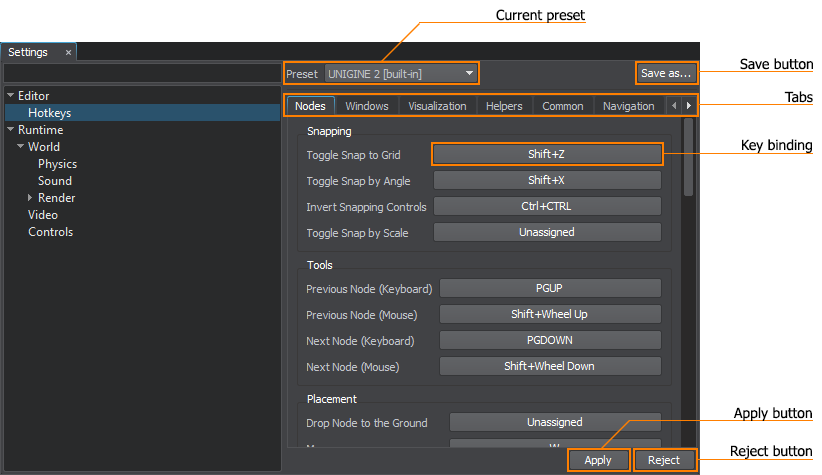
The Hotkeys section of the Settings window displays all hotkeys and key combinations that are used in the UnigineEditor and provides you with an opportunity to assign custom hotkeys and key combinations for the required action.
The following window will open:

Each action is represented by a key or a key combination. Ctrl, Alt, Shift, and mouse buttons are used as modifiers for the key bindings. Some actions can be represented by the modifiers only.
The controls are stored in a preset. There are 2 types of presets that are used in UnigineEditor:
Using Built-in Presets#

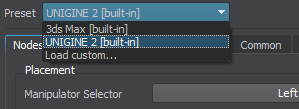
There are 2 built-in presets:
| UNIGINE 2 | The main preset. Hotkeys and key combinations that are used in this preset are usual for many 3D editors, for example, 3D-Coat, Maya, Marmoset, Unreal Engine, Unity, and so on. |
|---|---|
| 3ds Max | This preset contains hot keys that are used in 3ds Max. |
If you change the default hotkey or key combination and click Apply, you will be offered to save your modifications to a custom preset.
Such approach allows you to go back to using the built-in preset at any time.
Creating Custom Presets#
Custom presets are necessary when you want to change some hot keys (or key combinations) and save these changes.
You can create a custom preset by creating a copy of one of the built-in presets. To create a custom preset:
- In the Controls window, choose the built-in preset, on which a new preset will be based.
- Click Save as...

Specify the name for the new preset in the window that opens:

In the Save Preset As file dialog window that opens, specify the name of the *.preset file and where to save it.
- Click Ok. The new preset will be set as the current one.
The new custom preset will contain all the hot keys and key combinations of the built-in preset. You can modify key combinations for any necessary actions and then apply changes by clicking Apply. To discard your changes, click Reject