Creating Routes
UNIGINE has a built-in pathfinding system that includes navigation areas, obstacles and functions of the PathRoute class that are used to calculate the optimal routes among obstacles within navigation areas.
Via UnigineEditor, you can only add a navigation area (a sector or a mesh) to the scene and place obstacles. The 2D or 3D route that is calculated within the navigation area should be created from the code.
Creating a Route within Navigation Area#
To create a route within a navigation area, in which no obstacles are placed, you can use the following:
// create a new route
PathRoute route = new PathRoute();
// set a radius for the point which will move along the route
route.setRadius(2.0f);

// declare points between which the route should be calculated
Vec3 p0 = Vec3(-60.0f,-60.0f,5.0f);
Vec3 p1 = Vec3( 60.0f, 60.0f,5.0f);

// create a 3D route
route.create3D(p0,p1);To visualize the calculated route, call the renderVisualizer() function of the PathRoute class:
route.renderVisualizer(vec4(1.0f));To visualize the navigation area, call the renderVisualizer() functions of the Node class:
sector.renderVisualizer();You can affect route calculation via UnigineEditor by adjusting parameters of the navigation sector or mesh.
Creating a Route within Navigation Area with Obstacles#
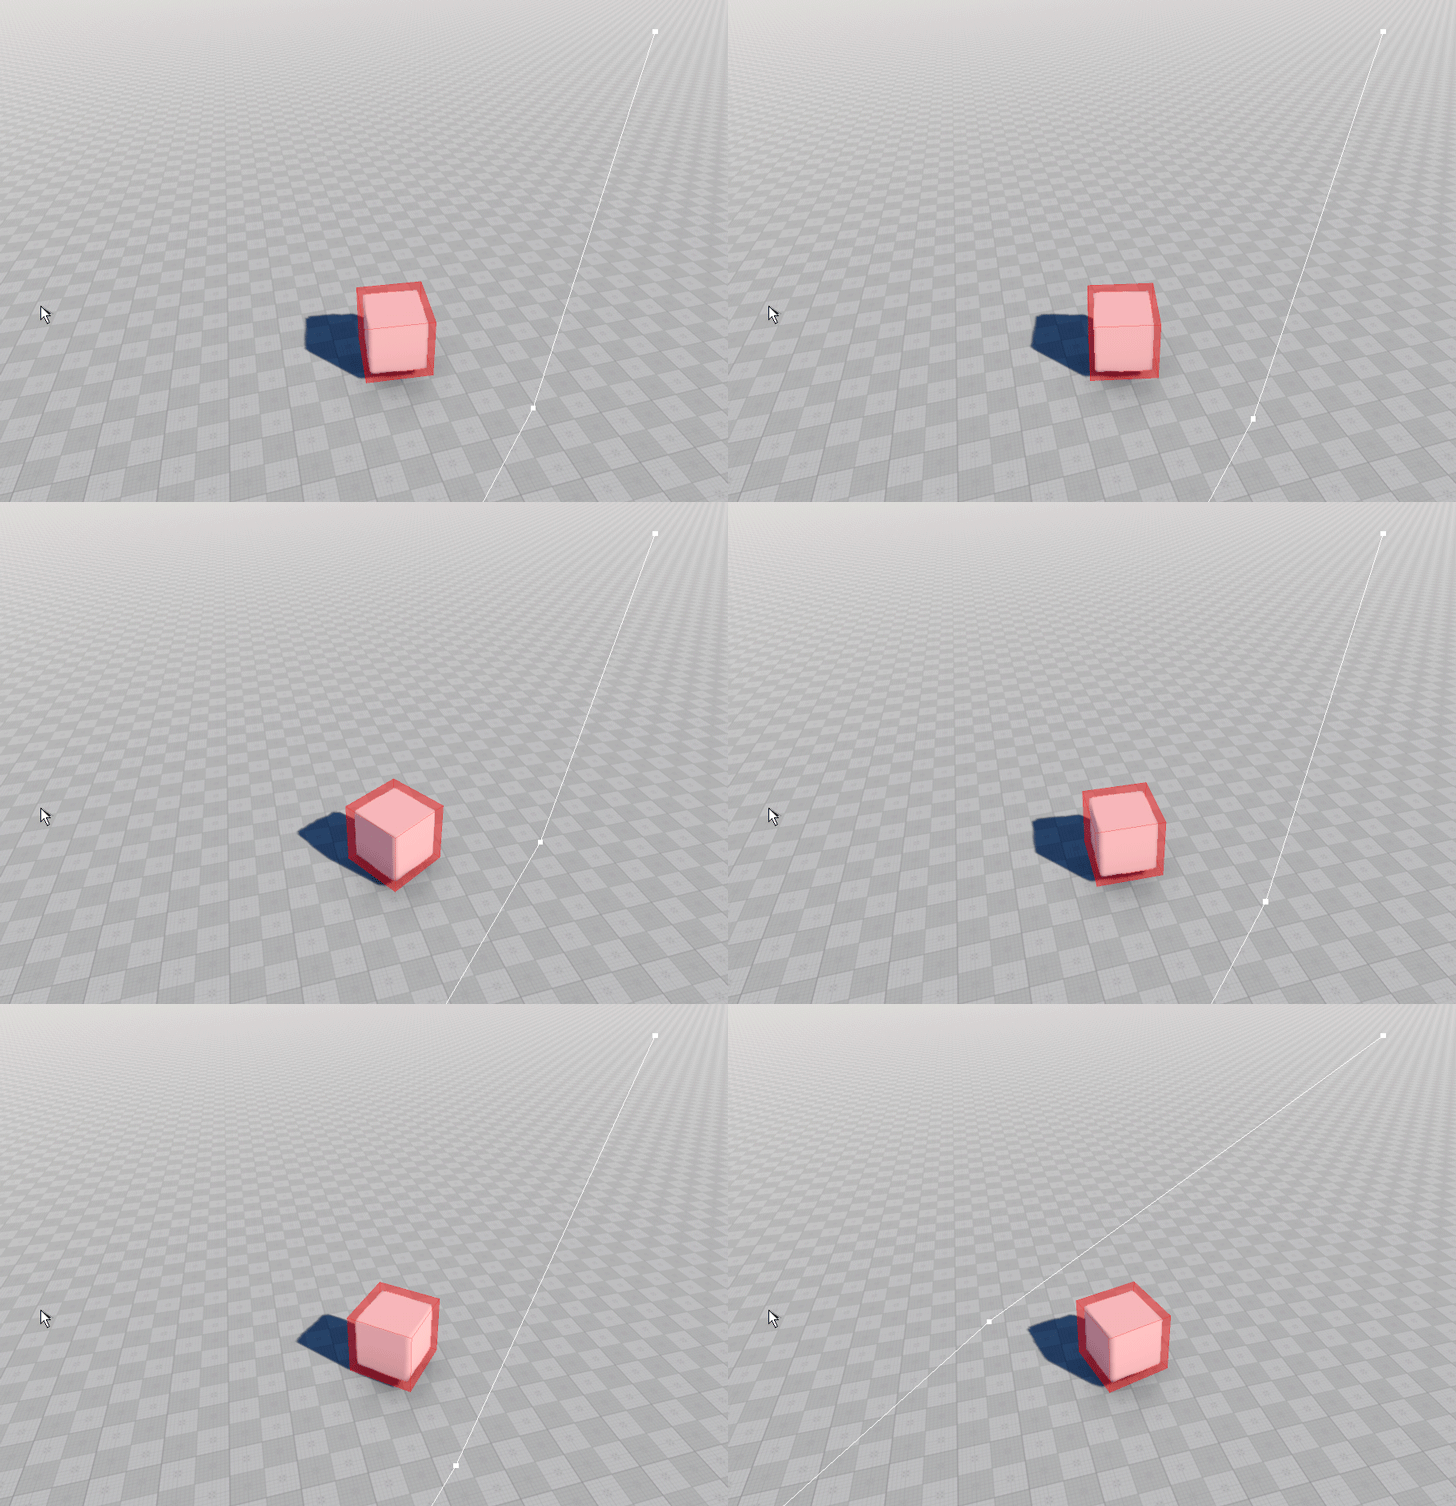
Creating the route within a navigation area with obstacles is similar to creating the route within an empty navigation area. Moreover, the route will be recalculated if the obstacle changes its transformation.
If the obstacle is connected with a dynamically changing node that should be bypassed, this node should be set as a parent node for the obstacle. This will enable simultaneous changing transformation of the node and the obstacle. For example:
ObstacleBox box;
ObjectMeshStatic mesh;
PathRoute route;

Vec3 p0 = Vec3(-60.0f,-60.0f,5.0f);
Vec3 p1 = Vec3( 60.0f, 60.0f,5.0f);
/*
 */
int init() {

	// create a navigation sector within which pathfinding will be performed
	NavigationSector navigation = new NavigationSector(vec3(128.0f,128.0f,8.0f));
	navigation.setWorldTransform(translate(Vec3(1.0f,1.0f,5.0f)));

	// create a mesh that should be bypassed
	mesh = new ObjectMeshStatic("samples/common/meshes/box.mesh");
	mesh.setPosition(Vec3(2.0f,2.2f,1.5f));
	mesh.setScale(Vec3(2.0f,2.0f,2.0f));

	// create an obstacle
	box = new ObstacleBox(vec3(1.2f,1.2f,1.2f));
	box.setPosition(Vec3(0.0f,0.0f,0.0f));
	// add the obstacle as the child node to the mesh in order to change their transformation simultaneously
	mesh.addChild(box);

	// create a new route
	route = new PathRoute();
	// set a radius for the point which will move along the route
	route.setRadius(2.0f);

	return 1;
}
/*
 */
int update() {

	// get the frame duration
	float ifps = engine.game.getIFps();
	// and define the angle of the object's rotation
	float angle = ifps * 90.0f;

	// change transformation of the mesh
	mesh.setTransform(mesh.getTransform() * rotateZ(angle));

	box.renderVisualizer();

	// recalculate the route in the current frame and render its visualizer
	route.create2D(p0,p1);
	route.renderVisualizer(vec4(1.0f));

	return 1;
}In the result, you will have a simple navigation sector, in which the dynamically changing obstacle box is placed.
