Scriptable Materials
A scriptable material is a base material with expressions (fragments of code written in UnigineScript) executed at certain stages of rendering sequence offering you an exceptional flexibility. For example, you can use them to create your own custom post effects such as DoF or Bloom.
Scriptable materials represent an ideal instrument for fast prototyping of any custom effects, as they allow you to:
- write any logic in UnigineScript,
- apply them globally or per-camera,
- have all necessary parameters added to UI automatically.
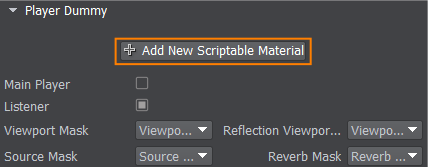
A single or multiple scriptable materials can be applied globally (via the Scriptable Materials section of the Settings window) or attached to a certain camera (via the Parameters window). Expressions assigned to a scriptable material are executed only if the material is enabled. The order of execution is defined by the material's number in the list of appllied scriptable materials (either global or camera-specific). The order can be changed if necessary.
Scriptable material lists are pretty much like the lists of components assigned to nodes, enabling you to adjust all available parameters and control which materials to apply.
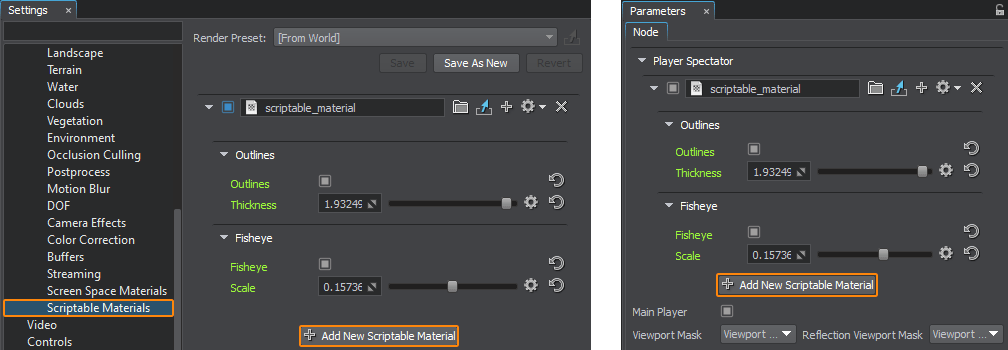
As base materials, scriptable ones are created and edited manually.
See Also#
- UnigineScript API sample <UnigineSDK>/data/samples/shaders/scriptable_00
Creating a Scriptable Base Material with ULON#
The custom scriptable base material is the same as the default one: it is read-only, non-hierarchical, referred by the name and so on.
Let’s write a material in the ULON file format.
Implementing Material Logic#
- Create the post_sobel.basemat text file in the data/materials folder and open it in a plain text editor.
- Specify the name for the base material and attributes for it.
Source Code (ULON)
BaseMaterial post_sobel <options_hidden=1 preview_hidden=1 var_prefix=var texture_prefix=tex> { ... } - Describe material’s resources and parameters.
Source Code (ULON)
// specify an internal texture to be used Texture src_color <source=procedural internal=true> // define the material's states and parameters available in the Editor Group "Sobel operator" { State multiply = false Slider threshold = 1.0 <min=0.0 max=1.0> Slider scale = 1.0 <min=0.0 max=1.0> } - Write the fragment shader for the custom outline render pass.
Source code (UUSL)
// define the outline render pass Pass render_sobel_operator { // write the fragment shader in UUSL or HLSL/GLSL Fragment= #{ #include <core/shaders/common/fragment.h> MAIN_BEGIN(FRAGMENT_OUT, FRAGMENT_IN) // get the inverse resolution of the viewport (1.0 / width, 1.0 / height) float2 offset = s_viewport.zw; // take 3x3 samples OUT_COLOR = TEXTURE_BIAS_ZERO(tex_src_color, IN_UV); float3 c0 = TEXTURE_BIAS_ZERO(tex_src_color, IN_UV + offset * float2( 1, 0)).rgb; float3 c1 = TEXTURE_BIAS_ZERO(tex_src_color, IN_UV + offset * float2( 0, 1)).rgb; float3 c2 = TEXTURE_BIAS_ZERO(tex_src_color, IN_UV + offset * float2( 1, 1)).rgb; float3 c3 = TEXTURE_BIAS_ZERO(tex_src_color, IN_UV + offset * float2( 1, -1)).rgb; float3 c4 = TEXTURE_BIAS_ZERO(tex_src_color, IN_UV + offset * float2(-1, 0)).rgb; float3 c5 = TEXTURE_BIAS_ZERO(tex_src_color, IN_UV + offset * float2( 0, -1)).rgb; float3 c6 = TEXTURE_BIAS_ZERO(tex_src_color, IN_UV + offset * float2(-1, -1)).rgb; float3 c7 = TEXTURE_BIAS_ZERO(tex_src_color, IN_UV + offset * float2(-1, 1)).rgb; // find edge with Sobel filter float3 sobel_x = c6 + c4 * 2.0f + c7 - c3 - c0 * 2.0f - c2; float3 sobel_y = c6 + c5 * 2.0f + c3 - c7 - c1 * 2.0f - c2; float3 sobel = sqrt(sobel_x * sobel_x + sobel_y * sobel_y); // apply threshold float edge = saturate(1.0f - dot(sobel, to_float3(var_threshold))); // apply scale float3 result = saturate(OUT_COLOR.rgb + var_scale) * edge; #ifdef STATE_MULTIPLY OUT_COLOR.rgb *= result; // for colored result #else OUT_COLOR.rgb = result; // for black & white result #endif MAIN_END #} } - Write the Expression callback in Unigine Script to be called after the Post Materials stage (RENDER_CALLBACK_END_POST_MATERIALS) of the render sequence to perform outline render pass with Sobel filter.
Source code (UnigineScript)
// the expression in Unigine Script defines a callback Expression RENDER_CALLBACK_END_POST_MATERIALS = #{ // declare the source texture from the screen frame Texture source = engine.render.getTemporaryTexture(engine.render_state.getScreenColorTexture()); // define the source texture from the screen frame source.copy(engine.render_state.getScreenColorTexture()); //set the color source texture to use it in the shader setTexture("src_color", source); // render the outline result texture to output it to the screen renderPassToTexture("render_sobel_operator", engine.render_state.getScreenColorTexture()); // release the temporaty texture engine.render.releaseTemporaryTexture(source); #} - The full source code for the material is given below. You can copy it to the post_sobel.basemat and save the file.
Source code
BaseMaterial post_sobel <options_hidden=1 preview_hidden=1 var_prefix=var texture_prefix=tex>
{
// specify an internal texture to be used
Texture src_color <source=procedural internal=true>

// define the material's states and parameters available in the Editor
Group "Sobel operator"
{
	State multiply = false
	Slider threshold = 1.0 <min=0.0 max=1.0>
	Slider scale = 1.0 <min=0.0 max=1.0>
}

// define the outline render pass
Pass render_sobel_operator
{
	// write the fragment shader in UUSL or HLSL/GLSL
	Fragment=
	#{
		#include <core/shaders/common/fragment.h>

		MAIN_BEGIN(FRAGMENT_OUT, FRAGMENT_IN)
			// get the inverse resolution of the viewport (1.0 / width, 1.0 / height)
			float2 offset = s_viewport.zw;

			// take 3x3 samples
			OUT_COLOR = TEXTURE_BIAS_ZERO(tex_src_color, IN_UV);

			float3 c0 = TEXTURE_BIAS_ZERO(tex_src_color, IN_UV + offset * float2( 1, 0)).rgb;
			float3 c1 = TEXTURE_BIAS_ZERO(tex_src_color, IN_UV + offset * float2( 0, 1)).rgb;
			float3 c2 = TEXTURE_BIAS_ZERO(tex_src_color, IN_UV + offset * float2( 1, 1)).rgb;
			float3 c3 = TEXTURE_BIAS_ZERO(tex_src_color, IN_UV + offset * float2( 1, -1)).rgb;

			float3 c4 = TEXTURE_BIAS_ZERO(tex_src_color, IN_UV + offset * float2(-1, 0)).rgb;
			float3 c5 = TEXTURE_BIAS_ZERO(tex_src_color, IN_UV + offset * float2( 0, -1)).rgb;
			float3 c6 = TEXTURE_BIAS_ZERO(tex_src_color, IN_UV + offset * float2(-1, -1)).rgb;
			float3 c7 = TEXTURE_BIAS_ZERO(tex_src_color, IN_UV + offset * float2(-1, 1)).rgb;

			// find edge with Sobel filter
			float3 sobel_x = c6 + c4 * 2.0f + c7 - c3 - c0 * 2.0f - c2;
			float3 sobel_y = c6 + c5 * 2.0f + c3 - c7 - c1 * 2.0f - c2;
			float3 sobel = sqrt(sobel_x * sobel_x + sobel_y * sobel_y);

			// apply threshold
			float edge = saturate(1.0f - dot(sobel, to_float3(var_threshold)));

			// apply scale
			float3 result = saturate(OUT_COLOR.rgb + var_scale) * edge;

			#ifdef STATE_MULTIPLY
				OUT_COLOR.rgb *= result; // for colored result
			#else
				OUT_COLOR.rgb = result; // for black & white result
			#endif
		MAIN_END
	#}
}

// the expression in Unigine Script defines a callback
Expression RENDER_CALLBACK_END_POST_MATERIALS =
#{
	// declare the source texture from the screen frame
	Texture source = engine.render.getTemporaryTexture(engine.render_state.getScreenColorTexture());
	// define the source texture from the screen frame
	source.copy(engine.render_state.getScreenColorTexture());
	//set the color source texture to use it in the shader
	setTexture("src_color", source);
	// render the outline result texture to output it to the screen
	renderPassToTexture("render_sobel_operator", engine.render_state.getScreenColorTexture());
	// release the temporaty texture
	engine.render.releaseTemporaryTexture(source);
#}
}
Applying Material and Adjusting Parameters#
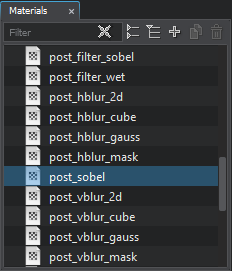
- Launch the UnigineEditor via the SDK Browser. In the Materials tab you will find the imported post_sobel material in the list of base materials.
- To apply the material globally go to Windows -> Settings and in the Scriptable Materials section click Add New Scriptable Material. Assign the post_sobel material by dragging it to the field or by specifying the name of the material.
- Click create a child material to be able to specify states and parameters of the material. The new child material of the post_sobel will be created and assigned here.
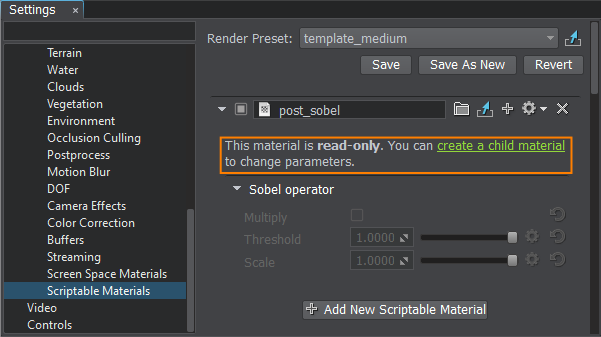
- Check Multiply to make a colorful final image. Adjust the Threshold and Scale values to customize the effect.
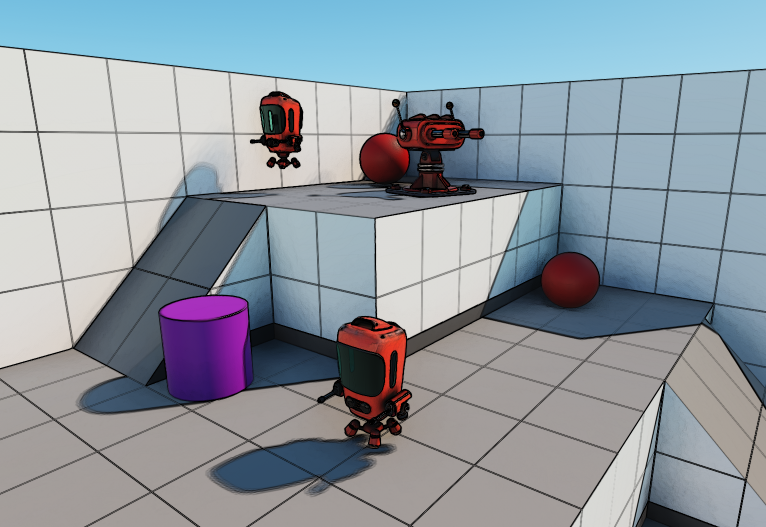 The applied post process outline effect.
That’s it! You have just created a scriptable material for all of the application’s cameras. To apply the post process effect only to a specific camera, go to the Parameters tab of the corresponding Player node and assign the material to it.
