Creating a Custom Shader for Post-Processing
Unigine engine allows you to create your own post-effects by writing custom shaders. To write post-effect shaders, you should use the Scriptable Materials workflow: create the material, write the necessary shaders, and apply it globally or per-camera.
This tutorial explains how to create a post-effect grayscale material, write the shader for it, add a parameter to the material to be able to specify the value from the UnigineEditor.
See Also#
- The article on Material Settings
- The article on Custom Materials
Create a Material#
As in all other shaders tutorials, you should create the material first. Let's add a new base material to your project.
To create post-effect material, you should specify the custom pass for shaders and textures.
The material will have the following structure:
BaseMaterial greyscale <preview_hidden=true var_prefix=var texture_prefix=tex>
{

	Texture color <type="procedural">
	Texture dirt = "core/textures/water_global/foam_d.dds" <anisotropy=true>


	Slider grayscale_power = 0.5 <min=0.0 max=1.0 max_expand=true>
	Slider dirt_power = 0.5 <min=-1.0 max=1.0 max_expand=true>

	/* ... */
	// more code below
}
The key features of this post material are:
- Added the shader and textures for post pass.
- Added the shared grayscale_power and dirt_power parameters.
Save the new material as grayscale.basemat file to the data folder.
Create Fragment Shader#
This section contains the sample code for the fragment shader (also known as pixel shader).
To create the fragment shader for the custom pass, add the following ULON node to the material:
/* ... */

// define the custom render pass
Pass my_pass
{
	Fragment =
	#{
		// Include the UUSL fragment shader header
		#include <core/shaders/common/fragment.h>

		MAIN_BEGIN(FRAGMENT_OUT, FRAGMENT_IN)

			// Get the UV
			float2 uv = IN_DATA(0);

			// Get the scene color
			float4 scene_color = TEXTURE_BIAS_ZERO(tex_color, uv);

			// Get the dirt color
			float4 dirt_color = TEXTURE_BIAS_ZERO(tex_dirt, uv);

			// Calculate the grayscale
			float3 gray_scene_color = to_float3(rgbToLuma(scene_color.rgb));
			scene_color.rgb = lerp(scene_color.rgb, gray_scene_color, var_grayscale_power);

			// add some dirt and calculate the final color
			OUT_COLOR = scene_color + dirt_color * var_dirt_power;

		MAIN_END

		// end
	#}
}

/* ... */
// more code belowWell, let's clarify what is under the hood of this fragment shader:
- We get the texture which was specified in the post-effect material.
- We convert the color of the scene to grayscale.
- By using lerp function (which performs a linear interpolation), we add the custom grayscale_power parameter to adjust the grayscale power.
- We also get the dirt texture and apply it to the final scene color to simulate dirt on camera lens (can also be used for vignette effect etc.)
- A custom dirt_power parameter to adjust intensity of the dirt texture (its impact on the final image).
See Also#
- Grayscale article on Wikipedia.
Perform Custom Render Pass#
Write the Expression callback in Unigine Script which is called after the Post Materials stage (RENDER_CALLBACK_END_POST_MATERIALS) of the render sequence to perform the custom grayscale render pass.
/* ... */

// the expression in Unigine Script defines a callback
Expression RENDER_CALLBACK_END_POST_MATERIALS =
#{
	// declare the source texture from the screen frame
	Texture source = engine.render.getTemporaryTexture(engine.render_state.getScreenColorTexture());

	// define the source texture from the screen frame
	source.copy(engine.render_state.getScreenColorTexture());

	//set the color source texture to use it in the shader
	setTexture("color", source);

	// render the result texture to output it to the screen
	renderPassToTexture("my_pass", engine.render_state.getScreenColorTexture());

	// release the temporaty texture
	engine.render.releaseTemporaryTexture(source);
#}

/* ... */
// more code below
Save the material file and let's proceed to UnigineEditor.
Editing the Material#
Material has been created, the shader has been written, it's time to use it in the project!
- Open UnigineEditor and launch your project.
- Create a new material by inheriting from the recently created grayscale material in the Materials Hierarchy window.
- Open the Settings window by choosing Windows -> Settings from the main menu

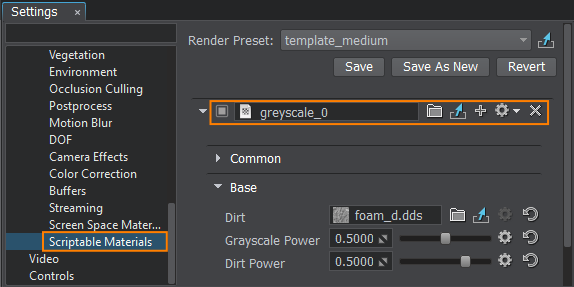
- In the Settings window choose Runtime -> World -> Render -> Scriptable Materials and specify the name of the child grayscale material in the field.

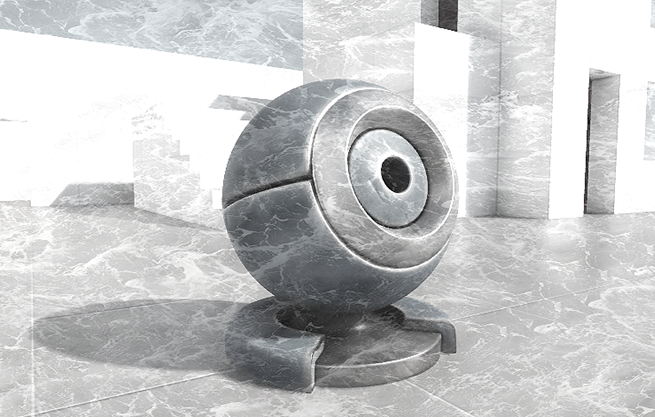
The grayscale post-effect will be applied.
-
Configure your post-effect by adjusting the Grayscale Power and Dirt Power parameters.
 The final scene.