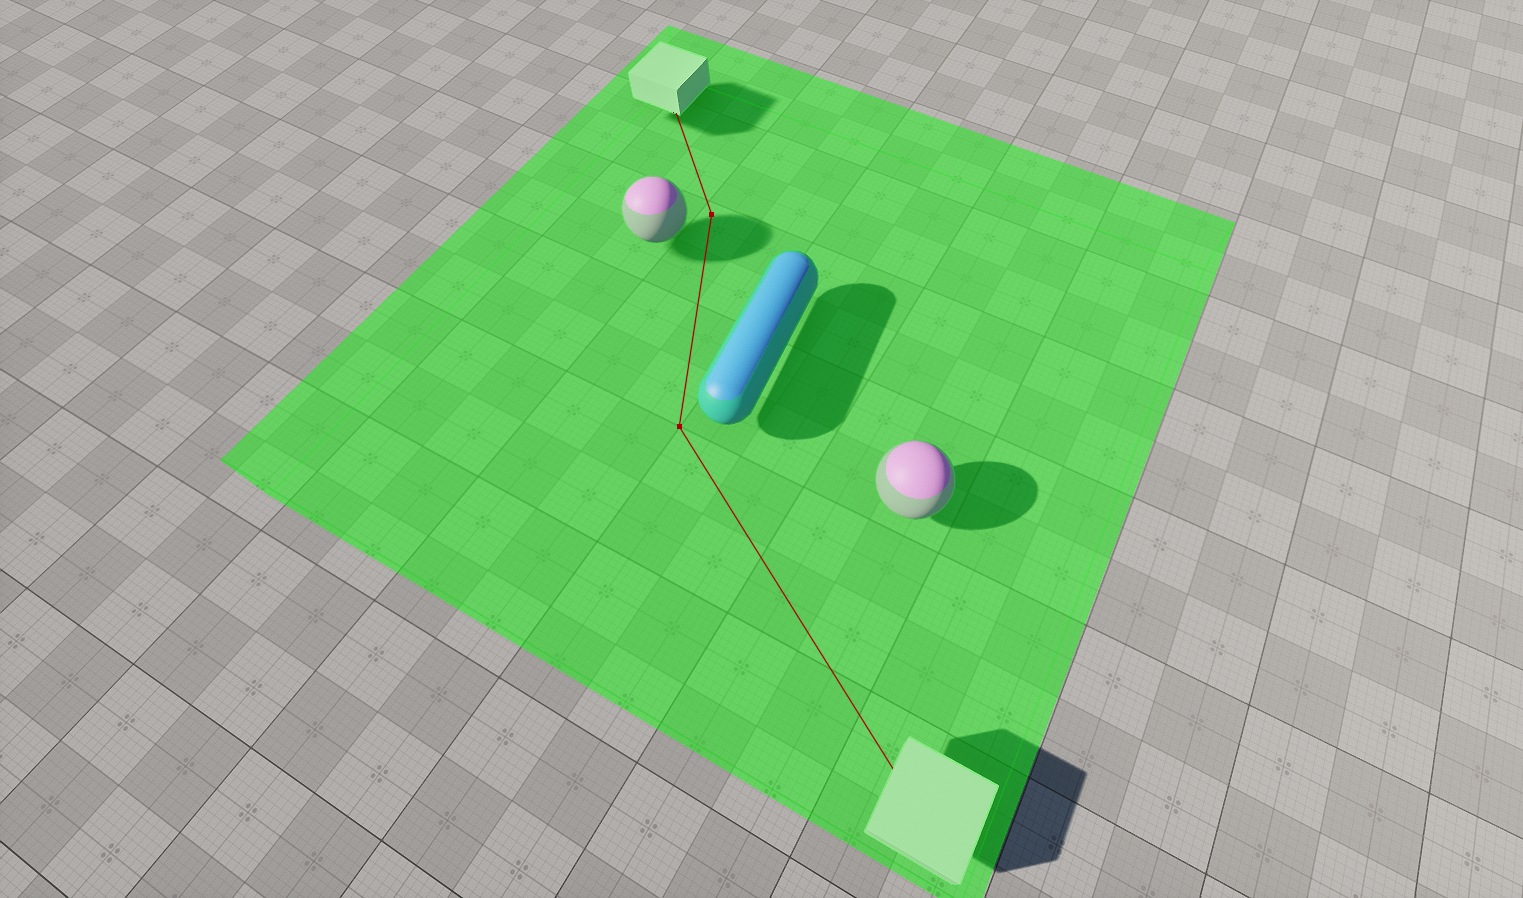
Создание 2D-маршрутов в пределах навигационной зоны с препятствиями
The example guides you through the process of setting up a scene with a simple navigation area and calculating a 2D route within it.В этом примере вы познакомитесь с процессом создания сцены с простой навигационной областью и расчета 2D-маршрута внутри нее.
Preparing SceneПодготовка сцены#
Before calculating routes, we should create a navigation area within which this logic will be executed. Our navigation area will be represented by a single navigation sector with obstacles. Also, we will add some auxiliary nodes that will serve as the start and destination points of the route.Прежде чем рассчитывать маршрут, мы должны создать область навигации, в пределах которой будет выполняться эта логика. Наша область навигации будет представлена одним навигационным сектором с препятствиями. Также мы добавим несколько вспомогательных нод, которые будут служить начальной и конечной точками маршрута.
- Create an empty project via SDK Browser.Создайте пустой проект с помощью SDK Browser.
- Open it in UnigineEditor and remove the unnecessary default nodes.Откройте его в UnigineEditor и удалите ненужные ноды.
-
In the Menu bar, choose Create -> Navigation -> Navigation Sector and place the node above the plane.В строке меню выберите Create -> Navigation -> Navigation Sector и поместите ноду над плоскостью.
ПримечаниеTo facilitate working with the navigation sectors, activate gizmos for Navigation nodes in the Helpers Panel.Чтобы упростить работу с навигационными секторами, включите gizmo для нод Navigation в панели Helpers.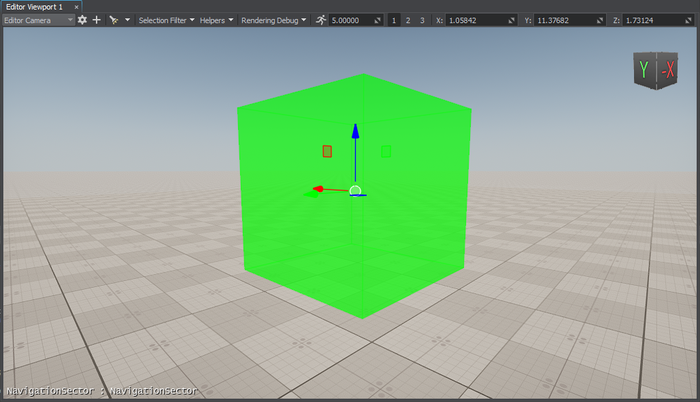
-
Adjust the Size of the sector in the Parameters window.Настройте значение Size для сектора в окне Parameters.

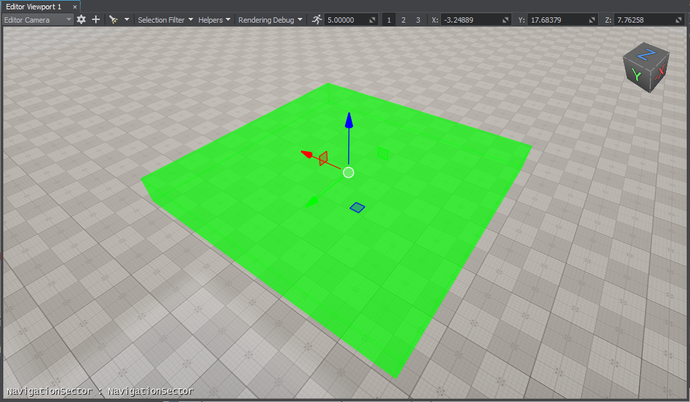
-
Add 2 nodes that will be used as the start and destination points of the route. We will create 2 boxes (Create -> Primitives -> Box), rename them start and finish, and place inside the navigation sector as pictured below.Добавьте 2 ноды, которые будут использоваться в качестве начальной и конечной точек маршрута. Мы создадим 2 кубика (Create -> Primitives -> Box), переименуем их в start и finish и разместим внутри навигационного сектора, как показано на рисунке ниже.
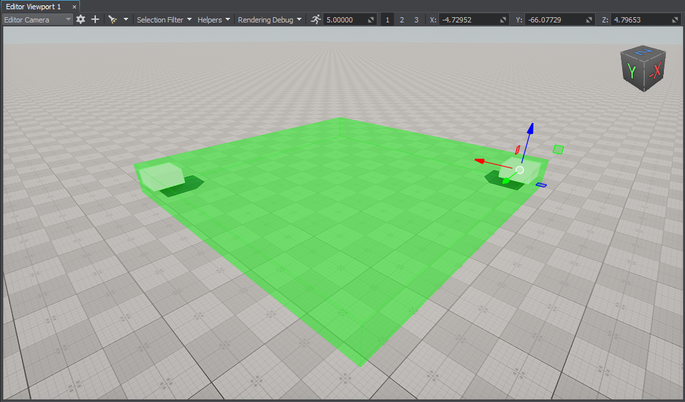
-
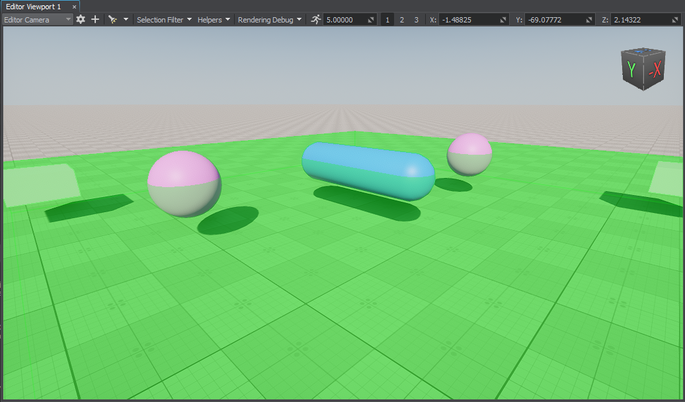
Create several primitives and place them inside the navigation area. We will add a capsule and two boxes.Создайте несколько примитивов и разместите их в области навигации. Мы добавим капсулу и два кубика.
-
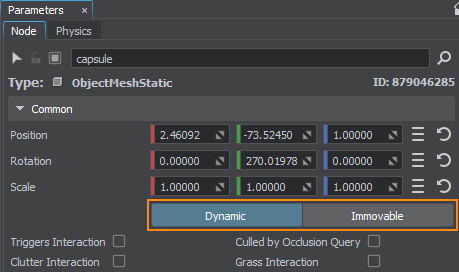
Make them dynamic: switch from Immovable to Dynamic in the Parameters window.Сделайте их динамическими: переключите настройку с Immovable на Dynamic в окне Parameters.
-
For each primitive, create an obstacle of the required type: in the World Hierarchy window, right-click the primitive, choose Create -> Navigation, and select the obstacle. The created obstacle will be added as a child to the primitive node in the hierarchy.Для каждого примитива создайте препятствие требуемого типа: в окне World Hierarchy щелкните правой кнопкой мыши на примитив, выберите Create -> Navigation и выберите препятствие. Созданное препятствие будет добавлено как дочернее к ноде примитива в иерархии.
ПримечаниеIt will allow you to change the node and obstacle transformations at the same time without any extra configuration.Это позволит вам изменять трансформации нод и препятствий одновременно без какой-либо дополнительной настройки.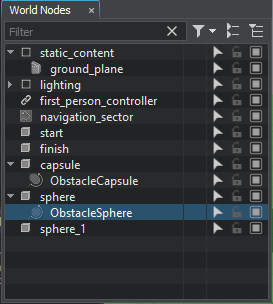
-
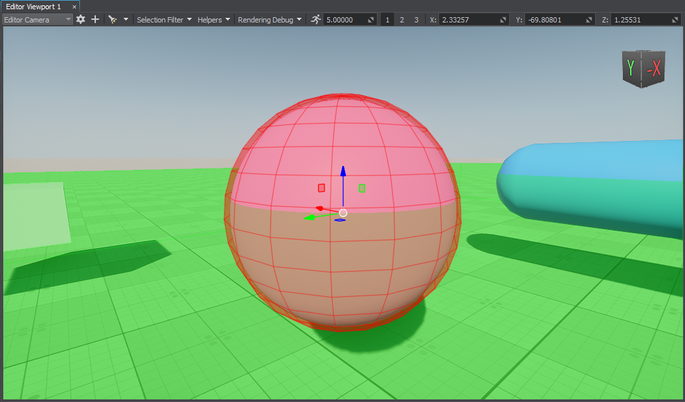
Adjust the size of the created obstacles in the Parameters window if necessary.При необходимости отрегулируйте размер создаваемых препятствий в окне Parameters.
Creating Component for Route CalculationСоздание компонента для расчета маршрута#
The created navigation sector only provides the area within which routes are calculated. The routes themselves must be created from the code. So, let's create the corresponding C++ component for 2D route calculation.Созданный сектор навигации предоставляет только область, в пределах которой рассчитываются маршруты. Сами маршруты должны быть созданы из кода. Итак, давайте создадим соответствующий компонент C++ для расчета 2D-маршрута.
Add a new Route2D class inherited from the ComponentBase class (the *.h and *.cpp files) to the project. The class name will be used as the property name.Добавьте в проект новый класс Route2D, унаследованный от класса ComponentBase (файлы *.h и *.cpp). Имя класса будет использоваться в качестве имени свойства.
Implementing Component LogicРеализация логики компонента#
-
In the Route2D.h file, declare a component class, parameters and a route:В файле Route2D.h объявим класс компонента, параметры и маршрут:
- Two parameters that will accept nodes between which a route should be calculated.Два параметра, которые будут принимать ноды, между которыми должен быть рассчитан маршрут.
- Route color.Цвет маршрута.
Исходный код (C++)#pragma once #include <UnigineComponentSystem.h> #include <UniginePathFinding.h> using namespace Unigine; using namespace Math; // derive the component from the ComponentBase class class Route2D : public ComponentBase { public: // declare constructor and destructor and define a property name. The Route2D.prop file containing all parameters listed below will be saved in your project's data folder COMPONENT_DEFINE(Route2D, ComponentBase); // declare methods to be called at the corresponding stages of the execution sequence COMPONENT_INIT(init); COMPONENT_UPDATE(update); COMPONENT_SHUTDOWN(shutdown); // declare parameters of the component PROP_PARAM(Node, startPoint, NULL); PROP_PARAM(Node, finishPoint, NULL); PROP_PARAM(Color, routeColor, vec4_zero); void init(); void update(); void shutdown(); private: // declare a route PathRoutePtr route; }; -
In the Route2D.cpp file, register the component.В файле Route2D.cpp зарегистрируем компонент.
Исходный код (C++)#include "Route2D.h" REGISTER_COMPONENT(Route2D); -
Create a route and set the radius and height for the point which will move along the route in the init() method. Before creation, check if the nodes to be used as the start and finish points are specified.В методе init() создадим маршрут и зададим радиус и высоту точки, которая будет перемещаться по маршруту. Перед созданием проверьте, указаны ли ноды, которые будут использоваться в качестве начальной и конечной точек.
Исходный код (C++)#include "Route2D.h" #include <UnigineNode.h> #include <UnigineConsole.h> #include <UnigineVisualizer.h> #include <UnigineLog.h> REGISTER_COMPONENT(Route2D); void Route2D::init() { // check if the start and destination nodes are correctly specified via the component interface if (startPoint && finishPoint) { // create a new route route = PathRoute::create(); // set a radius and height for the point which will move along the route route->setRadius(0.1f); route->setHeight(0.1f); } } -
To enable displaying the calculated route at run time, turn on the Visualizer. Additionally, you can output console messages to the application screen. Add the following logic to the init() function:Чтобы включить отображение рассчитанного маршрута во время выполнения, включите функцию Visualizer. Кроме того, вы можете выводить сообщения консоли на экран приложения. Добавьте следующую логику в функцию init():
Исходный код (C++)Console::setOnscreen(true); Visualizer::setEnabled(true); -
In the update() function, calculate the route from the start to destination node:В функции update() вычислим маршрут от начальной ноды до конечной:
Исходный код (C++)void Route2D::update() { if (startPoint && finishPoint) { route->create2D(startPoint->getWorldPosition(), finishPoint->getWorldPosition()); if (route->isReached()) { // if the destination point is reached, render the root in a specified color route->renderVisualizer(routeColor); } else Log::message("PathRoute not reached yet\n"); } }ПримечаниеHere the route is recalculated each frame. However, it is not optimal for application performance. Instead, you can calculate the route once per several frames: pass a delay to the create2D() function as the third argument.Здесь маршрут пересчитывается для каждого кадра. Однако это не оптимально для производительности приложения. Вместо этого можно рассчитать маршрут один раз для нескольких кадров: передадим задержку функции create2D() в качестве третьего аргумента. -
Implement the shutdown() function to disable the Visualizer and onscreen console messages:Реализуйте функцию shutdown(), чтобы отключить Visualizer и экранные сообщения консоли:
Исходный код (C++)void Route2D::shutdown() { Console::setOnscreen(false); Visualizer::setEnabled(false); } -
The component is registered automatically by the Component System upon its initialization. However, you should add the following to the AppSystemLogic::init() method:Компонент регистрируется системой компонентов автоматически при его инициализации. Однако в метод AppSystemLogic::init() следует добавить следующее:
Исходный код (C++)#include "AppSystemLogic.h" #include <UnigineComponentSystem.h> int AppSystemLogic::init() { // initialize ComponentSystem and register all components Unigine::ComponentSystem::get()->initialize(); return 1; } - Build the project and run it once to generate the property for the Route2D component. It will be located in the data/ComponentSystem folder.Создайте проект и запустите его один раз, чтобы сгенерировать свойство для компонента Route2D. Оно будет находиться в папке data/ComponentSystem.
Here is the full code of the component:Вот полный код компонента:
#pragma once

#include <UnigineComponentSystem.h>
#include <UniginePathFinding.h>

using namespace Unigine;
using namespace Math;

// derive the component from the ComponentBase class
class Route2D : public ComponentBase
{
public:

	// declare constructor and destructor and define a property name. The Route2D.prop file containing all parameters listed below will be saved in your project's data folder
	COMPONENT_DEFINE(Route2D, ComponentBase);
	// declare methods to be called at the corresponding stages of the execution sequence
	COMPONENT_INIT(init);
	COMPONENT_UPDATE(update);
	COMPONENT_SHUTDOWN(shutdown);

	// declare parameters of the component
	PROP_PARAM(Node, startPoint, NULL);
	PROP_PARAM(Node, finishPoint, NULL);
	PROP_PARAM(Color, routeColor, vec4_zero);

	void init();
	void update();
	void shutdown();

private:
	// declare a route
	PathRoutePtr route;
};#include "Route2D.h"
#include <UnigineNode.h>
#include <UnigineConsole.h>
#include <UnigineVisualizer.h>
#include <UnigineLog.h>
REGISTER_COMPONENT(Route2D);
void Route2D::init() {
// check if the start and destination nodes are correctly specified via the component interface
if (startPoint && finishPoint)
{
// create a new route
route = PathRoute::create();
// set a radius and height for the point which will move along the route
route->setRadius(0.1f);
route->setHeight(0.1f);
Console::setOnscreen(true);
Visualizer::setEnabled(true);
}
}
void Route2D::update() {

	if (startPoint && finishPoint)
	{
		route->create2D(startPoint->getWorldPosition(), finishPoint->getWorldPosition());
		if (route->isReached())
		{
			// if the destination point is reached, render the root in a specified color
			route->renderVisualizer(routeColor);
		}
		else
			Log::message("PathRoute not reached yet\n");
	}
}
void Route2D::shutdown() {

	Console::setOnscreen(false);
	Visualizer::setEnabled(false);
}Assigning ComponentНазначение компонента#
When the component logic is implemented and the property is generated, you should assign it to a node.Когда логика компонента реализована и свойство сгенерировано, вы должны назначить ее на ноду.
- In UnigineEditor, select Create -> Node -> Dummy and place it in the navigation area.В UnigineEditor создайте ноду Create -> Node -> Dummy и поместите его в область навигации.
- Select the dummy node and assign the Route2D property to it in the Parameters window.Выберите эту ноду и назначьте на нее свойство Route2D в окне Parameters.
-
In the component parameters, specify the start and finish static meshes in the Start Point and Finish Point fields.В параметрах компонента укажите статические меши start и finish в полях Start Point и Finish Point.
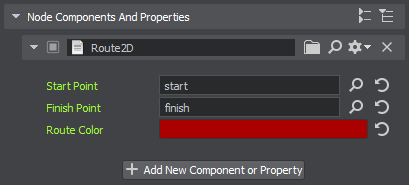
- Change the Route Color, if necessary.При необходимости измените значение Route Color.
Making Obstacles Move DynamicallyСоздание динамических препятствий#
Let's add a bit of complexity to the logic and make the nodes that are used as obstacles dynamically change.Давайте немного усложним логику и заставим ноды, которые используются в качестве препятствий, динамически изменяться.
- Add a new NodeRotator class inherited from the ComponentBase class (the *.h and *.cpp files) to the project.Добавьте в проект новый класс NodeRotator, унаследованный от класса ComponentBase (файлы *.h и *.cpp).
-
Implement rotation logic:Реализуйте логику вращения:
Исходный код (C++)#include <UnigineComponentSystem.h> using namespace Unigine; using namespace Math; class NodeRotator : public ComponentBase { public: COMPONENT_DEFINE(NodeRotator, ComponentBase); COMPONENT_UPDATE(update); // declare a parameter of the component PROP_PARAM(Vec3, angularVelocity, vec3_zero); void update(); };Исходный код (C++)#include "NodeRotator.h" #include <UnigineGame.h> REGISTER_COMPONENT(NodeRotator); void NodeRotator::update() { // calculate the delta of rotation vec3 delta = angularVelocity * Game::getIFps(); // update node rotation node->setRotation(node->getRotation() * quat(delta.x, delta.y, delta.z)); } - Build the project and run it once again to generate the property for the NodeRotator component.Создайте проект и запустите его еще раз, чтобы сгенерировать свойство для компонента NodeRotator.
-
Assign the component to the capsule primitive that should rotate and specify the Angular Velocity:Назначьте на компонент примитив capsule, который должен вращаться, и укажите Angular Velocity:
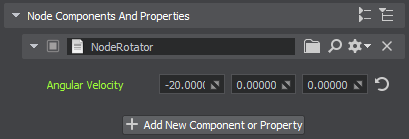
The obstacle will rotate as well.Препятствие также будет вращаться.
-
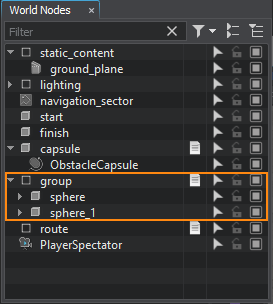
Group the sphere primitives and assign the component to the parent dummy node. It will make the spheres rotate around this parent node (as in the case of a sphere, rotation around its own axis won't affect the route calculation).Объедините в группу примитивы sphere и назначьте компонент родительской Node Dummy. Это заставит сферы вращаться вокруг этой родительской ноды (как и в случае сферы, вращение вокруг собственной оси не повлияет на расчет маршрута).
Visualizing Navigation AreaВизуализация области навигации#
To clearly show how the path is built inside the navigation area, let's implement the AreaVisualizer component that enables displaying the navigation area gizmo at run time:Чтобы наглядно показать, как строится путь внутри области навигации, давайте реализуем компонент AreaVisualizer, который позволяет отображать gizmo области навигации во время выполнения:
- Add a new AreaVisualizer class inherited from the ComponentBase class (the *.h and *.cpp files) to the project.Добавьте в проект новый класс AreaVisualizer, унаследованный от класса ComponentBase (файлы *.h и *.cpp).
-
Implement the logic:Реализуйте логику:
Исходный код (C++)#pragma once #include <UnigineComponentSystem.h> #include <UniginePathFinding.h> using namespace Unigine; class AreaVisualizer : public ComponentBase { public: COMPONENT_DEFINE(AreaVisualizer, ComponentBase); COMPONENT_UPDATE(update); void update(); };Исходный код (C++)#include "AreaVisualizer.h" #include <UnigineVisualizer.h> REGISTER_COMPONENT(AreaVisualizer); void AreaVisualizer::update() { // display the navigation area gizmo node->renderVisualizer(); } - Build the project and run it once again to generate the property for the AreaVisualizer component.Создайте проект и запустите его еще раз, чтобы сгенерировать свойство для компонента AreaVisualizer.
- Assign the component to the navigation sector.Назначьте в компоненте навигационный сектор.
Trying OutПроверка#
Информация, представленная на данной странице, актуальна для версии UNIGINE 2.19 SDK.

