This page has been translated automatically.
Видеоуроки
Интерфейс
Основы
Продвинутый уровень
Подсказки и советы
Основы
Программирование на C#
Рендеринг
Профессиональный уровень (SIM)
Принципы работы
Свойства (properties)
Компонентная Система
Рендер
Физика
Редактор UnigineEditor
Обзор интерфейса
Работа с ассетами
Контроль версий
Настройки и предпочтения
Работа с проектами
Настройка параметров ноды
Setting Up Materials
Настройка свойств
Освещение
Sandworm
Использование инструментов редактора для конкретных задач
Расширение функционала редактора
Встроенные объекты
Ноды (Nodes)
Объекты (Objects)
Эффекты
Декали
Источники света
Geodetics
World-ноды
Звуковые объекты
Объекты поиска пути
Player-ноды
Программирование
Основы
Настройка среды разработки
Примеры использования
C++
C#
UnigineScript
UUSL (Unified UNIGINE Shader Language)
Плагины
Форматы файлов
Материалы и шейдеры
Rebuilding the Engine Tools
Интерфейс пользователя (GUI)
Двойная точность координат
API
Containers
Common Functionality
Controls-Related Classes
Engine-Related Classes
Filesystem Functionality
GUI-Related Classes
Math Functionality
Node-Related Classes
Objects-Related Classes
Networking Functionality
Pathfinding-Related Classes
Physics-Related Classes
Plugins-Related Classes
IG Plugin
CIGIConnector Plugin
Rendering-Related Classes
Работа с контентом
Оптимизация контента
Материалы
Визуальный редактор материалов
Сэмплы материалов
Material Nodes Library
Miscellaneous
Input
Math
Matrix
Textures
Art Samples
Учебные материалы
Внимание! Эта версия документация УСТАРЕЛА, поскольку относится к более ранней версии SDK! Пожалуйста, переключитесь на самую актуальную документацию для последней версии SDK.
Внимание! Эта версия документации описывает устаревшую версию SDK, которая больше не поддерживается! Пожалуйста, обновитесь до последней версии SDK.

Weapon Clipping

The Weapon Clipping sample demonstrates how to use Viewport.RenderNode() to remove the weapon clipping. Two cameras with the same transformation are used. Their viewport masks are set via UNIGINE Editor in the following way: one camera sees everything except the weapon and the other sees the weapon only. The view from the camera that sees only the weapon is rendered atop the view from the main camera that sees everything else.

Accessing Demo Source Code#

You can study and modify the source code of this demo to create your own projects. To access the source code do the following:

  1. Find the C# Component Samples demo in the Demos section and click Install (if you haven't installed it yet).
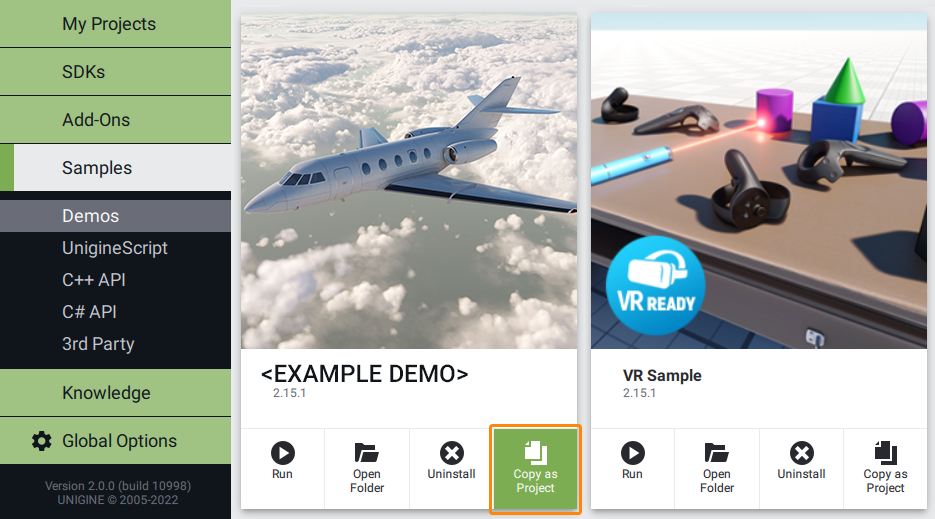
  2. After successful installation the demo will appear in the Installed section, and you can click Copy as Project to create a project based on this demo.
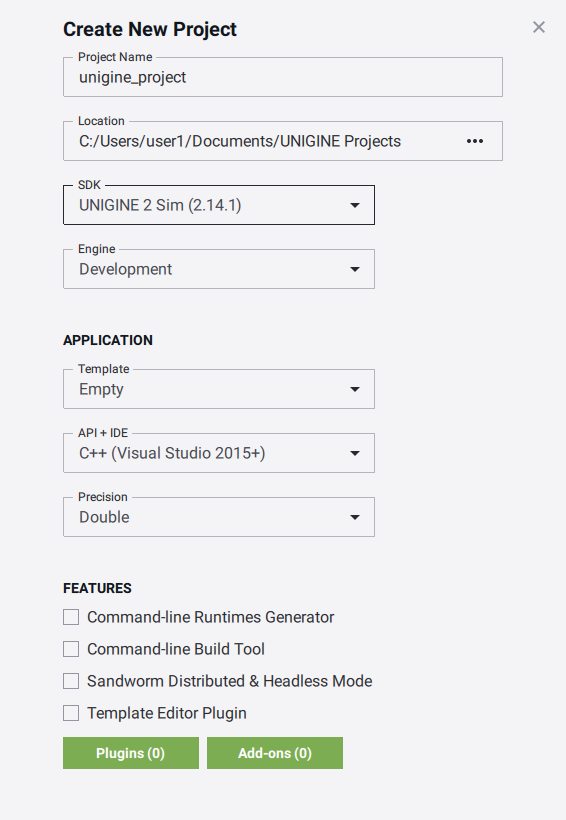
  3. In the Create New Project window, that opens, enter the name for your new project in the corresponding field and click Create New Project.
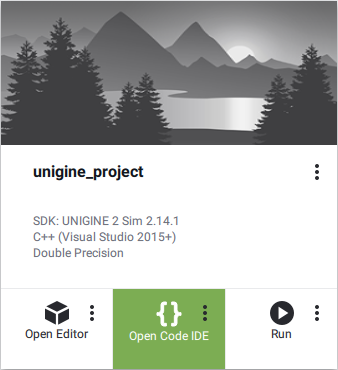
  4. Now you can click Open Code IDE to check and modify source code in your default IDE, or click Open Editor to open the project in the UnigineEditor.
Last update: 23.06.2023
Build: ()