Копирование ассетов из других проектов
 Assets used in one UNIGINE project, both simple and composite (e.g. a material requiring a texture, or a node that requires several materials linked to plenty of textures), can be easily copied to another project using Asset Packages.Ресурсы, используемые в одном проекте UNIGINE, как простые, так и составные (например, материал, требующий текстуры, или узел, которому требуется несколько материалов, связанных с большим количеством текстур), можно легко перенести в другой проект с помощью пакетов ассетов (Packages).
Asset Package is a collection of files and data for UNIGINE projects stored in a single *.upackage file. Asset Package compresses data while preserving the original directory structure. Asset Packages can be used to conveniently transfer content between your projects or exchange data with other users, be it a single model or a scene with a set of objects driven by logic implemented via C# components.Пакет ассетов - это набор файлов и данных для проектов UNIGINE, хранящихся в одном файле *.upackage. Asset Package сжимает данные, сохраняя при этом исходную структуру каталогов. Пакеты ресурсов можно использовать для удобной передачи контента между вашими проектами или обмена данными с другими пользователями, будь то отдельная модель или сцена с набором объектов, управляемых логикой, реализованной через Компоненты C# .
To copy your assets from one project to another:Чтобы скопировать свои ассеты из одного проекта в другой :
- Open your source project in UnigineEditor and export all necessary assets as a package file.Откройте исходный проект в UnigineEditor и экспортируйте все необходимые ассеты в виде пакета (package-файла) .
- Open your target project that requires those assets in UnigineEditor and import your package.Откройте целевой проект, для которого требуются эти ресурсы, в UnigineEditor и импортируйте ваш пакет .
Дополнительная информация
Видеоурок Перенос ассетов в другой проект
Creating a PackageСоздание пакета#
To copy your project contents into a Package file:Чтобы скопировать содержимое вашего проекта в файл пакета:
- Select the assets that you want to add to the Package in the Asset Browser. You can even select the folder containing the whole project, and then deselect the data you don't require.
Выберите ассеты, которые вы хотите добавить в пакет, в Asset Browser. Вы даже можете выбрать папку, содержащую весь проект, а затем отменить выбор данных, которые вам не требуются.
- Right-click on selected asset(s) or folder(s) and choose Export As Package option in the context menu.
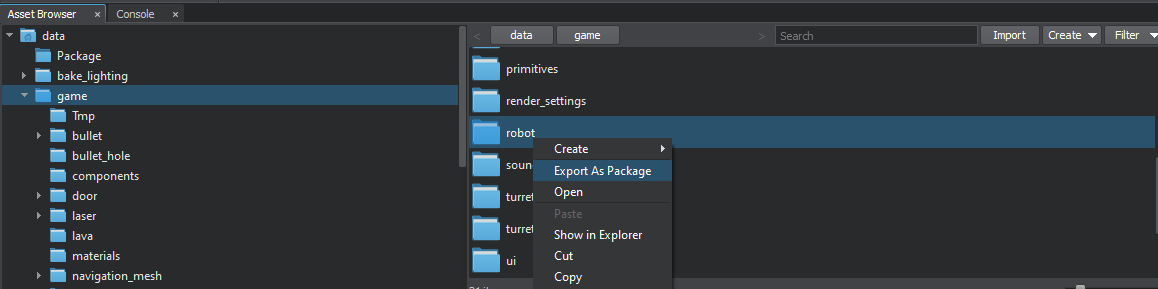 Щелкните правой кнопкой мыши выбранные ресурсы или папки и выберите в контекстном меню параметр Export As Package.
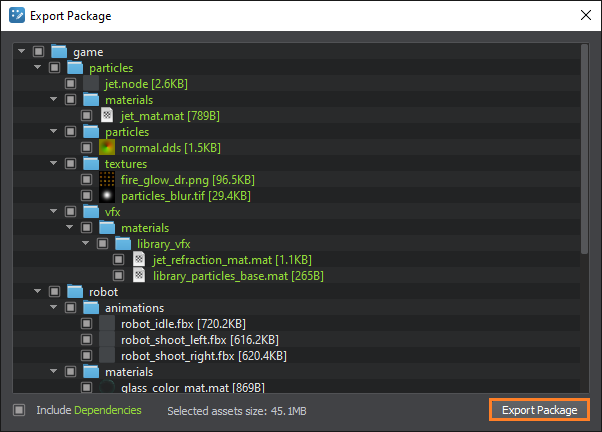
- Now you can select assets to be exported in the Create Package window using a checkbox for each asset.
 ПримечаниеKeep in mind that any single file that you want to include must be less than 2 GB. The Package size is not limited.Core files cannot be included.Теперь вы можете выбрать ассеты для экспорта в окне Create Package, установив флажок для каждого ресурса.
- Keep in mind that any single file that you want to include must be less than 2 GB. The Package size is not limited.Keep in mind that any single file that you want to include must be less than 2 GB. The Package size is not limited.
- Core files cannot be included.Core files cannot be included.
Примечание- Keep in mind that any single file that you want to include must be less than 2 GB. The Package size is not limited.Имейте в виду, что любой отдельный файл, который вы хотите включить, должен быть меньше 2 ГБ. Размер самого пакета не ограничен.
- Core files cannot be included.Основные файлы из ядра (core) не могут быть включены.
- You can automatically add all dependent assets to the package (a texture used by a material, materials assigned to an object, etc.) via the Include Dependencies checkbox (dependent assets are marked green in the list).
 Вы можете автоматически добавить все зависимые ассеты в пакет (текстуру, используемую материалом, материалы, назначенные объекту, и т.д.) С помощью флажка Include Dependencies (зависимые ассеты отмечены в списке зеленым).
- After selecting assets click Export Package to pack them into a new *.upackage file.
 ПримечаниеAt least one asset must be selected to activate the Create Package button.После выбора ассетов нажмите Export Packageчтобы упаковать их в новый файл *.upackage.At least one asset must be selected to activate the Create Package button.At least one asset must be selected to activate the Create Package button.
ПримечаниеAt least one asset must be selected to activate the Create Package button.Для активации кнопки Create Package необходимо выбрать хотя бы один ассет. - In the dialog window that opens, define the name and path to your package and click Save.
В открывшемся диалоговом окне укажите имя и путь к вашему пакету и нажмите Save.
As soon as your Asset Package is successfully created, the location of your *.upackage file will be shown in your file manager.Как только ваш пакет ассетов будет успешно создан, местоположение вашего файла *.upackage будет показано в вашем файловом менеджере.
Importing a PackageИмпорт пакета#
To import contents of an existing package to your project you need to:Чтобы импортировать содержимое существующего пакета в свой проект, вам необходимо:
- Drag it from the File Explorer directly into the Asset Browser or click the Import button and select the *.upackage file. If you have already added the *.upackage file to your targed project, double-click on it.
ПримечаниеThe following window will open:Do not use a file manager of your OS to copy a package to your project's folder, as in this case the package will be displayed in the Asset Browser, but its contents won't be extracted.Do not use a file manager of your OS to copy a package to your project's folder, as in this case the package will be displayed in the Asset Browser, but its contents won't be extracted.
Do not use a file manager of your OS to copy a package to your project's folder, as in this case the package will be displayed in the Asset Browser, but its contents won't be extracted.Перетащите его из проводника прямо в Asset Browser или щелкните значок Import кнопку и выберите файл *.upackage. Если вы уже добавили файл *.upackage в свой целевой проект, дважды щелкните по нему.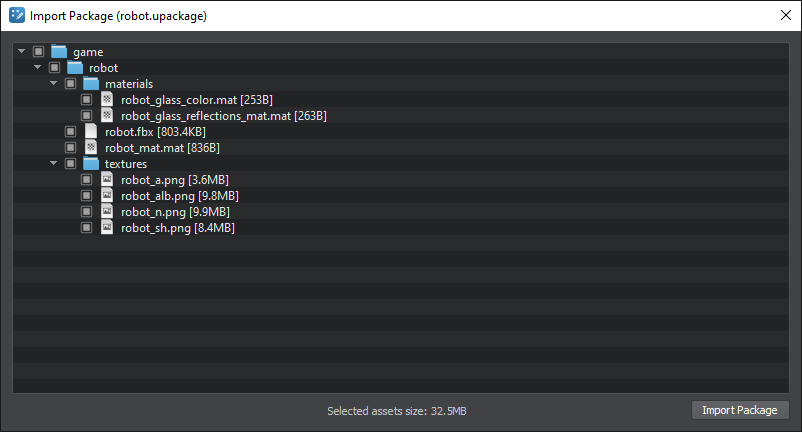 ПримечаниеОткроется следующее окно:Do not use a file manager of your OS to copy a package to your project's folder, as in this case the package will be displayed in the Asset Browser, but its contents won't be extracted.Не используйте файловый менеджер вашей ОС для копирования пакета в папку вашего проекта, так как в этом случае пакет будет отображаться в Asset Browser, но его содержимое не будет извлечено.
 - Check the assets that are going to be imported. Assets in the package can be colored white, red, and yellow:

- White-colored assets can be imported without any changes.White-colored assets can be imported without any changes.
- Yellow-colored assets are imported with a postfix to resolve the name collision.Yellow-colored assets are imported with a postfix to resolve the name collision.
- Red-colored assets cannot be imported due to one of the following reasons:
- The same asset is found in the project.The same asset is found in the project.
- Asset with the same Source Runtime GUID is found in the project.Asset with the same Source Runtime GUID is found in the project.
- Asset with the same Runtime GUID is found in the project.Asset with the same Runtime GUID is found in the project.
- The specified target mount point is read-only.The specified target mount point is read-only.
- White-colored assets can be imported without any changes.ассеты белого цвета можно импортировать без каких-либо изменений.
- Yellow-colored assets are imported with a postfix to resolve the name collision.ассеты желтого цвета импортируются с постфиксом, чтобы разрешить конфликт имен.
- Red-colored assets cannot be imported due to one of the following reasons:
- The same asset is found in the project.The same asset is found in the project.
- Asset with the same Source Runtime GUID is found in the project.Asset with the same Source Runtime GUID is found in the project.
- Asset with the same Runtime GUID is found in the project.Asset with the same Runtime GUID is found in the project.
- The specified target mount point is read-only.The specified target mount point is read-only.
- The same asset is found in the project.Такой же ассет уже имеется в проекте.
- Asset with the same Source Runtime GUID is found in the project.В проекте найден ассет с таким же Source Runtime GUID.
- Asset with the same Runtime GUID is found in the project.Ассет с таким же GUID runtime-файла находится в проекте.
- The specified target mount point is read-only.Указанная целевая точка монтирования доступна только для чтения.
- After selecting all assets required for import, click the Import Package button.После выбора всех ресурсов, необходимых для импорта, нажмите кнопку Import Package.
- Wait for the extraction process. Extraction time depends on the size of the assets selected for the import.
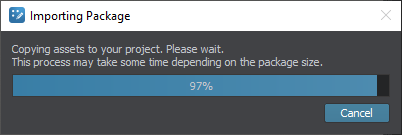 Подождите, пока начнется процесс извлечения. Время извлечения зависит от размера ассетов, выбранных для импорта.
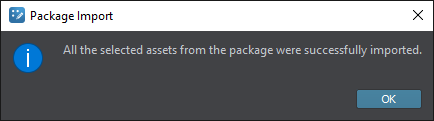
Upon successful package import, a new folder with the corresponding contents will be available in the Asset Browser and the following message will be displayed:После успешного импорта пакета в Asset Browser будет доступна новая папка с соответствующим содержимым, и отобразится следующее сообщение: