Создание C ++ приложения
A UNIGINE-based application can be implemented by means of C++ only, without using UnigineScript.Приложение на основе UNIGINE может быть реализовано только с помощью C ++, без использования UnigineScript.
This article describes how to add logic to your project by using the C++ language. Code written in C++ is the same for all supported platforms: Windows and Linux. The difference is in the way of compiling the project.В этой статье описывается, как добавить логику в ваш проект с помощью языка C ++. Код, написанный на C ++, одинаков для всех поддерживаемых платформ: Windows и Linux. Разница в способе компиляции проекта.
See alsoСмотрите также#
- Articles in the Development for Different Platforms section to learn more on how to prepare the development environment, install the UNIGINE SDK and build the application for different platforms.Статьи в разделе Разработка для различных платформ , чтобы узнать больше о том, как подготовить среду разработки, установить UNIGINE SDK и собрать приложение для разных платформ.
- Examples located in the <UnigineSDK>/source/samples/Api and <UnigineSDK>/source/samples/App folders.Примеры находятся в папках <UnigineSDK>/source/samples/Api и <UnigineSDK>/source/samples/App.
Creating Empty C++ ApplicationСоздание пустого приложения C ++#
It is very easy to start your own C++ project by using UNIGINE SDK Browser:Начать собственный проект на C ++ с помощью UNIGINE SDK Browser очень просто:
- Open the UNIGINE SDK Browser.Откройте браузер UNIGINE SDK.
- Go to the Projects tab and click CREATE NEW.
 Перейдите на вкладку Projects и нажмите CREATE NEW.

- Specify the following parameters:
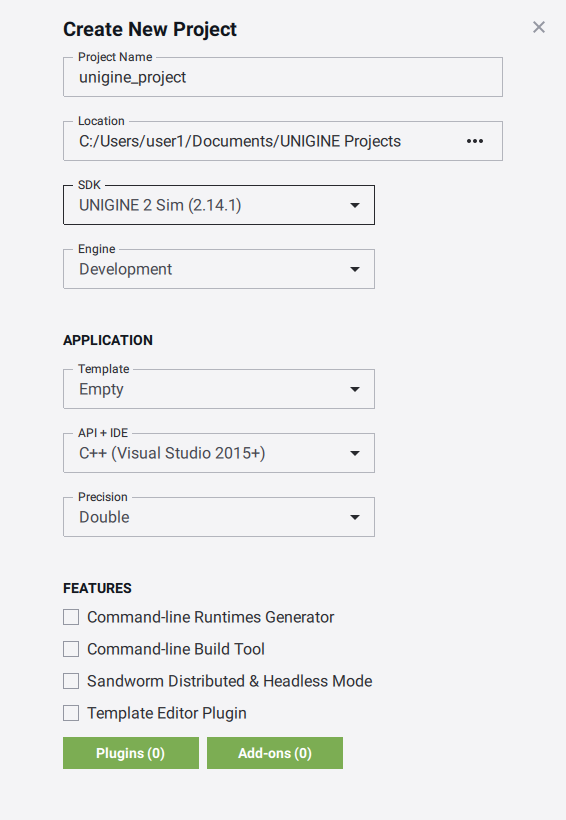
- Project name — specify the name of your project. Project name — specify the name of your project.
- Location — specify the path to your project folder. Location — specify the path to your project folder.
- SDK — choose the UNIGINE SDK edition. SDK — choose the UNIGINE SDK edition.
- API+IDE — choose C++ to start working with the C++ API.
This parameter depends on a platform:This parameter depends on a platform:
- On Windows, you can create C++ Visual Studio 2015 project.On Windows, you can create C++ Visual Studio 2015 project.
- On Linux you can create C++ GNU make project.On Linux you can create C++ GNU make project.
You can also can create C++ CMake projectYou can also can create C++ CMake project
This parameter depends on a platform:On Windows, you can create C++ Visual Studio 2015 project.On Linux you can create C++ GNU make project.You can also can create C++ CMake project API+IDE — choose C++ to start working with the C++ API.This parameter depends on a platform:This parameter depends on a platform:
- On Windows, you can create C++ Visual Studio 2015 project.On Windows, you can create C++ Visual Studio 2015 project.
- On Linux you can create C++ GNU make project.On Linux you can create C++ GNU make project.
You can also can create C++ CMake projectYou can also can create C++ CMake project
- Precision - specify the precision. In this example we will use double precision.Precision - specify the precision. In this example we will use double precision.
ПримечаниеProject name — specify the name of your project. Location — specify the path to your project folder. SDK — choose the UNIGINE SDK edition. API+IDE — choose C++ to start working with the C++ API.Read more about these parameters in this article Read more about these parameters in this articleThis parameter depends on a platform:This parameter depends on a platform:
- On Windows, you can create C++ Visual Studio 2015 project.On Windows, you can create C++ Visual Studio 2015 project.
- On Linux you can create C++ GNU make project.On Linux you can create C++ GNU make project.
You can also can create C++ CMake projectYou can also can create C++ CMake project
This parameter depends on a platform:On Windows, you can create C++ Visual Studio 2015 project.On Linux you can create C++ GNU make project.You can also can create C++ CMake projectPrecision - specify the precision. In this example we will use double precision.Read more about these parameters in this article Укажите следующие параметры:

- Project name — specify the name of your project.Project name - укажите название вашего проекта.
- Location — specify the path to your project folder.Location - укажите путь к папке вашего проекта.
- SDK — choose the UNIGINE SDK edition.SDK - выберите редакцию UNIGINE SDK.
- API+IDE — choose C++ to start working with the C++ API.
This parameter depends on a platform:This parameter depends on a platform:
- On Windows, you can create C++ Visual Studio 2015 project.On Windows, you can create C++ Visual Studio 2015 project.
- On Linux you can create C++ GNU make project.On Linux you can create C++ GNU make project.
You can also can create C++ CMake projectYou can also can create C++ CMake project
This parameter depends on a platform:On Windows, you can create C++ Visual Studio 2015 project.On Linux you can create C++ GNU make project.You can also can create C++ CMake projectAPI+IDE - выберите C ++ , чтобы начать работу с C ++ API.This parameter depends on a platform:Этот параметр зависит от платформы:
- On Windows, you can create C++ Visual Studio 2015 project.В Windows вы можете создать проект C ++ Visual Studio 2015 .
- On Linux you can create C++ GNU make project.В Linux вы можете создать проект C ++ GNU make .
You can also can create C++ CMake projectВы также можете создать проект C ++ CMake
- Precision - specify the precision. In this example we will use double precision.Precision - указать точность. В этом примере мы будем использовать двойную точность .
ПримечаниеRead more about these parameters in this article Подробнее об этих параметрах читайте в этой статье . - Click the CREATE NEW PROJECT button. The project will appear in the projects list.
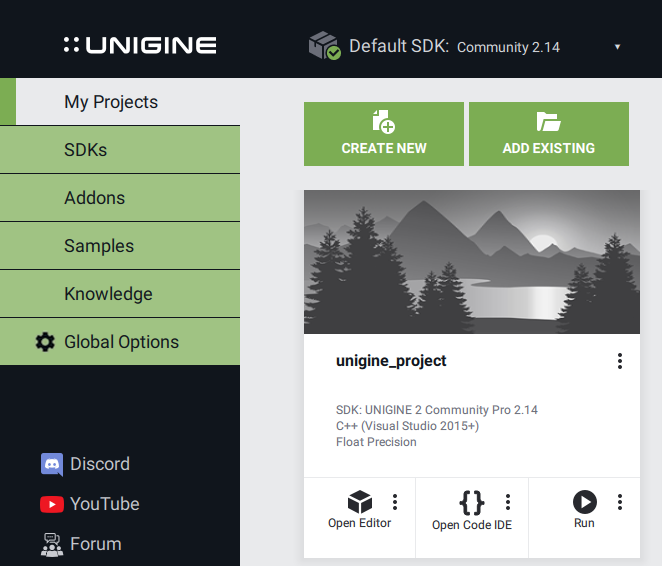 Щелкните кнопку CREATE NEW PROJECT. Проект появится в списке проектов.

You can run your project by clicking the Run button.Вы можете запустить свой проект, нажав кнопку Run.
Implementing C++ LogicРеализация логики C ++#
In this section we will add logic to the empty C++ application project.В этом разделе мы добавим логику к пустому проекту приложения C ++.
The following example shows how to rotate the material ball that was created by default in your project.В следующем примере показано, как вращать материальный шар, созданный по умолчанию в вашем проекте.
-
If you created the C++ project for Visual Studio:Если вы создали проект C ++ для Visual Studio :
- Choose your C++ project in the UNIGINE SDK Browser and click the Open Code IDE button to open the project in IDE.
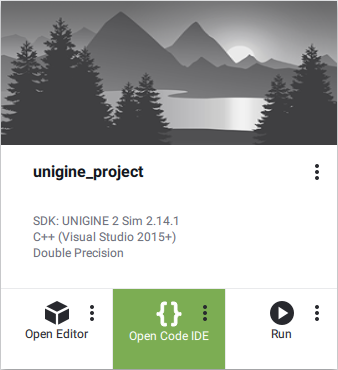 Выберите свой проект C ++ в браузере UNIGINE SDK и нажмите кнопку Open Code IDE, чтобы открыть проект в IDE.

If you created C++ GNU make project:Если вы создали C++ GNU make project:
- On the created C++ project, click on the Other Actions button and then the Open Folder button.
В созданном проекте C ++ нажмите кнопку Other Actions, а затем кнопку Open Folder.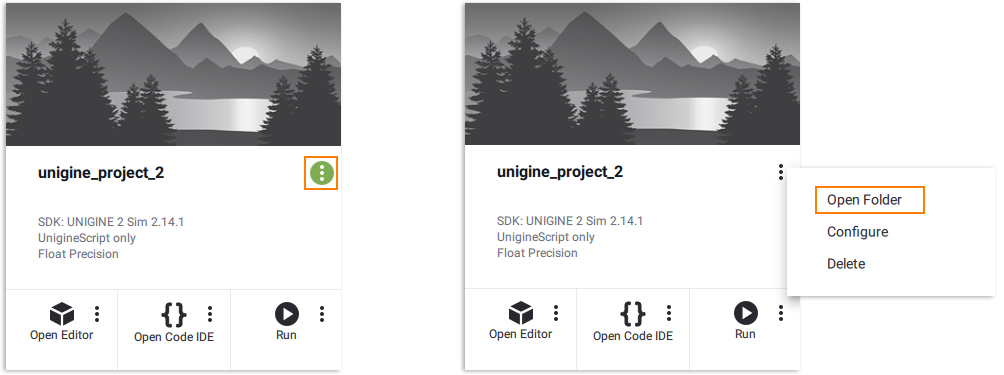

- Go to the <YOUR PROJECT>\source\ folder and open the AppWorldLogic.cpp file with any plain text editor.Перейдите в папку <YOUR PROJECT>\source\ и откройте файл AppWorldLogic.cpp в любом текстовом редакторе.
- Choose your C++ project in the UNIGINE SDK Browser and click the Open Code IDE button to open the project in IDE.
- Write (or copy) the following code in your project's AppWorldLogic.cpp file.
Исходный код (C++)Напишите (или скопируйте) следующий код в файл AppWorldLogic.cpp вашего проекта.
#include "AppWorldLogic.h" #include <UnigineWorld.h> #include <UnigineGame.h> using namespace Unigine; // define pointer to node NodePtr node; AppWorldLogic::AppWorldLogic() { } AppWorldLogic::~AppWorldLogic() { } int AppWorldLogic::init() { // get the material ball node node = World::getNodeByName("material_ball"); return 1; } int AppWorldLogic::shutdown() { return 1; } int AppWorldLogic::update() { // get the frame duration float ifps = Game::getIFps(); // set the angle of rotation double angle = ifps * 90.0f; // set the angle to the transformation matrix Unigine::Math::Mat4 transform = node->getTransform(); transform.setRotateZ(angle); // set new transformation to the node node->setTransform(node->getTransform() * transform); return 1; } int AppWorldLogic::postUpdate() { return 1; } int AppWorldLogic::updatePhysics() { return 1; } int AppWorldLogic::save(const Unigine::StreamPtr &stream) { UNIGINE_UNUSED(stream); return 1; } int AppWorldLogic::restore(const Unigine::StreamPtr &stream) { UNIGINE_UNUSED(stream); return 1; }Исходный код (C++)#include "AppWorldLogic.h" #include <UnigineWorld.h> #include <UnigineGame.h> using namespace Unigine; // define pointer to node NodePtr node; AppWorldLogic::AppWorldLogic() { } AppWorldLogic::~AppWorldLogic() { } int AppWorldLogic::init() { // get the material ball node node = World::getNodeByName("material_ball"); return 1; } int AppWorldLogic::shutdown() { return 1; } int AppWorldLogic::update() { // get the frame duration float ifps = Game::getIFps(); // set the angle of rotation double angle = ifps * 90.0f; // set the angle to the transformation matrix Unigine::Math::Mat4 transform = node->getTransform(); transform.setRotateZ(angle); // set new transformation to the node node->setTransform(node->getTransform() * transform); return 1; } int AppWorldLogic::postUpdate() { return 1; } int AppWorldLogic::updatePhysics() { return 1; } int AppWorldLogic::save(const Unigine::StreamPtr &stream) { UNIGINE_UNUSED(stream); return 1; } int AppWorldLogic::restore(const Unigine::StreamPtr &stream) { UNIGINE_UNUSED(stream); return 1; } -
If you use Visual Studio, do the following: Если вы используете Visual Studio, сделайте следующее:
- Before compiling your code, check that the appropriate platform and configuration settings for your project are set correctly.
 Перед компиляцией кода убедитесь, что для вашего проекта установлены правильные параметры платформы и конфигурации.

- Build your project by clicking Build -> Build Solution in Visual Studio.
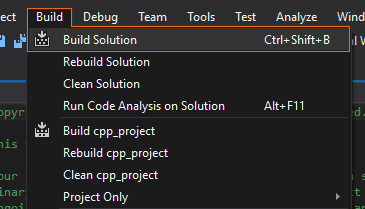 Создайте свой проект, щелкнув Build -> Build Solution в Visual Studio.

- Start your project by clicking Debug -> Start in a proper mode in Visual Studio.
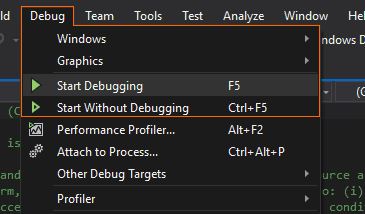 Начните свой проект, щелкнув Debug -> Start в соответствующем режиме в Visual Studio.

If you created a GNU Make project:Если вы создали GNU Make project:
- Execute the make command in the terminal to compile the application.
Shell-командыВыполните команду make в терминале, чтобы скомпилировать приложение.
makeShell-командыmake - Launch the application by using the run script.Запустите приложение с помощью сценария run .
- Before compiling your code, check that the appropriate platform and configuration settings for your project are set correctly.
