World Management
There is a number of optimization techniques and practices relating to world management. They are used to decrease the rendering load without losing much of the image quality.
Levels of Details#
Smooth alpha-blended levels of details (LODs) are used to decrease geometry complexity of 3D objects, when these objects move away from the camera, making it possible to lighten the load on the renderer.
UNIGINE offers two mechanisms of LODs switching:
-
Disable one LOD and enable another at the specified distance defined by two values: maximum visibility distance of the first LOD (Max Visibility) and minimum visibility distance of the second LOD (Min Visibility).

-
Smoothly fade one LOD into another at the specified interval defined by two values: minimum fade distance of the first LOD (Min Fade) and maximum fade distance of the first LOD/minimum fade distance of the second LOD (Max Fade).

Surface LODs are adjusted in the LOD section of the Node tab of the Parameters window. It provides the following parameters:
| Visibility Distances |
The LODs visibility parameters are defined by the visibility range. It is set by two parameters: the minimum visibility and maximum visibility distances measured from the camera. If the surface is within the range specified by these bounds, it is displayed, otherwise, it is hidden.
Notice
Ranges for surfaces that represent different LODs of the same object should not overlap. |
| Fade Distances |
Discrete LODs are likely to have one noticeable and quite distracting artifact - "popping", when one LOD is switched to another. Rather than abruptly switching the LODs, they can be smoothly blended into each other over a fade distance making the transition imperceptible. Notice
Smooth LODs with alpha-blend fading are available only when render_alpha_fade is set to 1 (which is set by default). Just like visibility distances, the range of the fading region is defined by the minimum fade and maximum fade distances:
Although alpha blending between the LODs looks by far better, it also means that within the fade region two versions of the same object are rendered at the same time. For this reason, the fade region should be kept as short as necessary. |
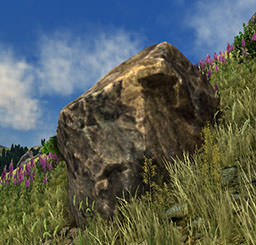 Within distance of surface visibility |
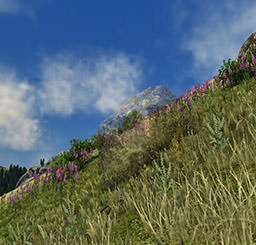 Within fade distance |
Suppose, we have two LODs: high-poly surface_lod_0 and low-poly surface_lod_1, and we need to organize smooth transition between these two LODs.
-
We want the switching distance at 50 units. For that, we need to "dock" visibility distances of surfaces to each other:
- Our first LOD surface surface_lod_0 should be always presented when the camera is close to the object. So, the minimum visibility distance is set to -inf. And 50 units from the camera will be the maximum visibility distance for it.
- Directly following it, comes the second LOD surface surface_lod_1. It is visible from 50 units (which is the minimum visibility distance) - and up to infinity (the maximum visibility distance = inf).
-
Now the LOds are switched but sharply rather then smoothly. To be smoothly blended, the symmetrical fade-out (for the 1st LOD) and fade-in (for the 2nd LOD) distances are set. Let's say, the fading region should be 5 units.
- For the 1st LOD to fade-out, its maximum fade distance is set to 5.
- For the 2nd LOD to fade-in, its minimum fade distance is also set to 5.
In the result, the LODs will be changed in the following manner:
| From the BB of the object
to 50 units |
Only the 1st LOD surface surface_lod_0 is completely visible |
| 50 - 55 units | The 1st LOD fades out, while the 2nd LOD fades in |
| From 55 units and further | Only the 2nd LOD surface surface_lod_1 is completely visible |
Reference Object#
There is one more LOD-related parameter: reference object to measure the distance to switch LODs. It specifies whether the distances should be measured to the surface itself or to any of the surfaces or nodes up the hierarchy branch. There are two reference objects for each surface:
| Min Parent |
Minimum parent is a reference object to measure the minimum visibility distance from:
|
| Max Parent | Maximum parent is a reference object to measure the maximum visibility distance from. The same principle is used to count it. |
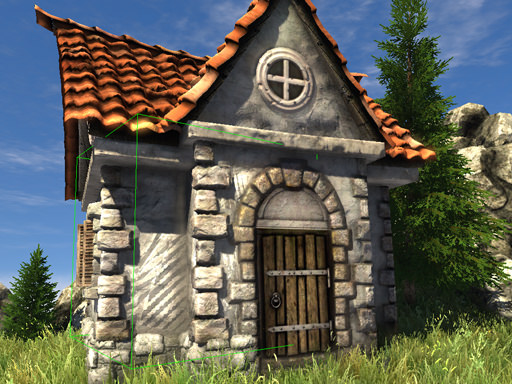
Let's take a model of the house, for example. When the camera is close by, the high-poly detail surfaces are seen, such as the door arch, stone corners, round window and roof tiles. When we move away, all these surfaces should be simultaneously changed by one united low-poly LOD surface.
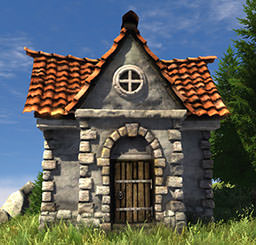
High-poly model
|
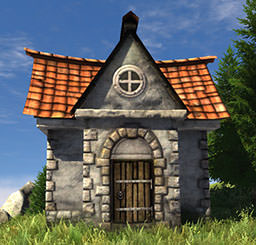
Low-poly model to be used as distant LOD
|
The problem is, all these detailed surfaces have different bounding boxes. So if their distances are checked for themselves (0 as min and max parents), we can have a situation when LODs of different parts of the house are turned on (or off) unequally, because their bounding boxes will be closer to the camera. This may cause z-fighting artifacts. Here the distant corner has not yet switched to a more detailed LOD, while the close one is drawn twice: as a high-poly corner LOD and at the same time the united low-poly house LOD.
If we set a bounding box of the whole house to be a reference object (min and max parent to 1), all surfaces will switch on simultaneously no matter what side we approach the house from.
One more option is to use different reference objects when check. For example, the lower bound (minimum distance) is checked for the surface itself, and the upper bound (maximum distance) is checked for the parent. This may sound complicated, so take a look at the pictures below. The first picture shows a ring, which is split into surfaces according to levels of details.
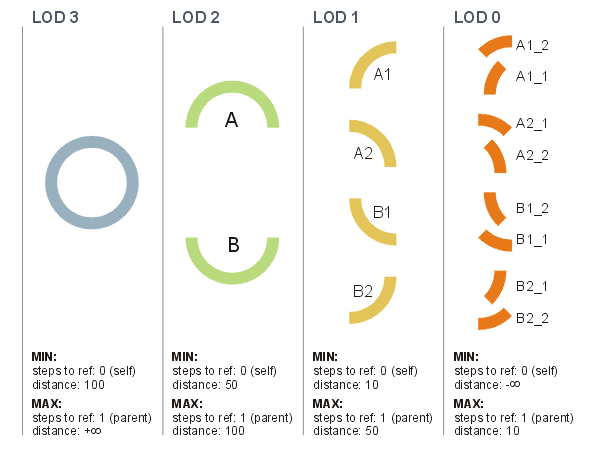
Here, surfaces from the rightmost column will be displayed, when the camera is very close to them. The leftmost surfaces will be displayed, when the camera is very far from them. Merging of several surfaces into one reduces the number of objects to draw, hence, reduces the number of DIP requests and speeds up rendering.
Note that all of the minimum distances here are measured to the surface itself, but almost all of the maximum distances are measured to another reference object, a parent. One more picture will help you to understand, why it is so.
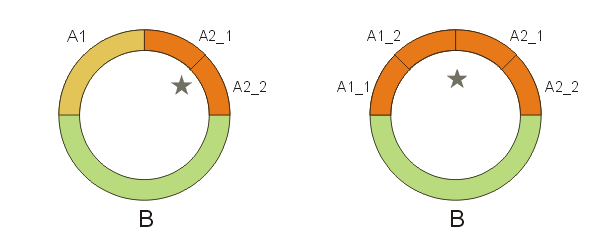
A star is the camera; it doesn't matter now what exactly the camera will be looking at. On both images, required surfaces are drawn according to the camera position and distances from the camera to the corresponding reference objects. For example, on the left image, the upper left part of the ring is a single surface, the upper right part is split in two separate surfaces, and the bottom part is also a single surface. On the right image, the whole upper part is divided into the smallest possible sectors.
Here, distances are measured to different reference objects to properly "turn off" smaller single sectors and display a larger sector instead. The maximum distance is calculated to the parent sector, because the distances to the neighboring subsectors may differ too much. The minimum distance is calculated to the current sector, because we need to show it, if the camera is too close to it.
Bounds#
A bound object represents a spherical or cubical volume enclosing the whole node, used for describing node's size and location. In UNIGINE, this can be an axis-aligned bounding box or a sphere. Bounds are defined only for the nodes that have visual representation or their own size. The following "abstract" objects do not have bounds at all and therefore are excluded from the spatial tree:
- Dummy Node
- Node Reference
- Node Layer
- World Switcher
- World Transform Path
- World Transform Bone
- World Expression
- Dummy Object (if it has no body assigned)
This approach significantly reduces the size of the tree and improves performance due to saving time on bound recalculation when transforming such nodes.
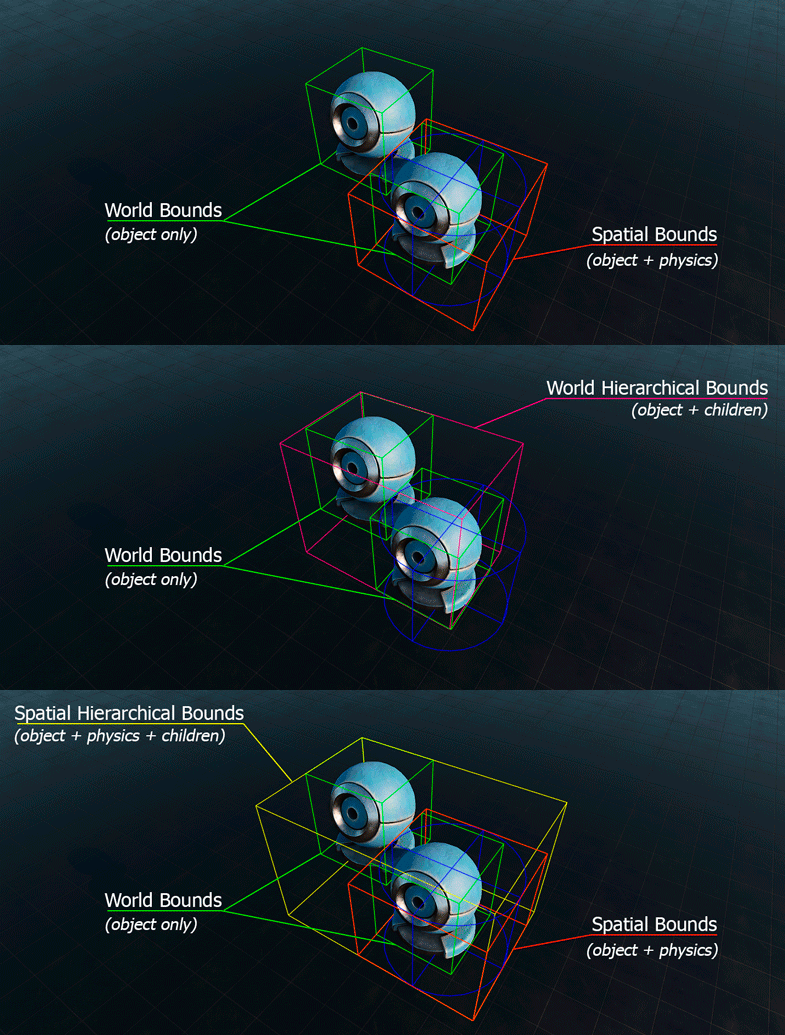
The following types of bounds are used:
- Local Bounds - bound objects with local coordinates which do not take into account physics and children: BoundBox and BoundSphere.
- World Bounds - same as local ones, but with world coordinates: WorldBoundBox and WorldBoundSphere.
- Spatial Bounds - bound objects with world coordinates used by the spatial tree, and therefore taking physics into account (shape bounds, etc.): SpatialBoundBox and SpatialBoundSphere.
And their hierarchical analogues (taking into account all children) to be used where hierarchical bounds are required (they are slow, but offer correct calculations):
- Local Hierarchical Bounds - bound objects with local coordinates taking bounds of all node's children into account: HierarchyBoundBox and HierarchyBoundSphere.
- World Hierarchical Bounds - same as local ones, but with world coordinates: HierarchyWorldBoundBox and HierarchyWorldBoundSphere.
- Spatial Hierarchical Bounds - hierarchical bound objects used by the spatial tree, and therefore taking physics into account (shape bounds, etc.): HierarchySpatialBoundBox and HierarchySpatialBoundSphere.
Outdoor Space#
The techniques that are appropriate for indoor scenes, are not efficient when it comes to managing the vast landscapes. Rendering speed directly depends on the number of entities and polygons drawn in the scene, as well as physics computed for the objects, the count of which is usually very high in the outdoor scenes. So the main goal of managing is to render only the regions that are seen while culling all the rest. If the world cannot be narrowed down to a set of closed areas, the approach called space partitioning becomes relevant.
Space partitioning in Unigine is implemented using adaptive axis-aligned BSP trees.
Binary Space Partitioning#
Binary space partitioning is a method for dividing the scene along the axes into the regions that are dealt with individually and thus are easier to manage. BSP tree is a hierarchical structure obtained by division and organizing all the scene data. The adaptive behavior allows to optimize the BSP algorithm by adjusting sizes of the regions to the processed geometry and distribution of objects in the world.
The BSP tree is built in the following way:
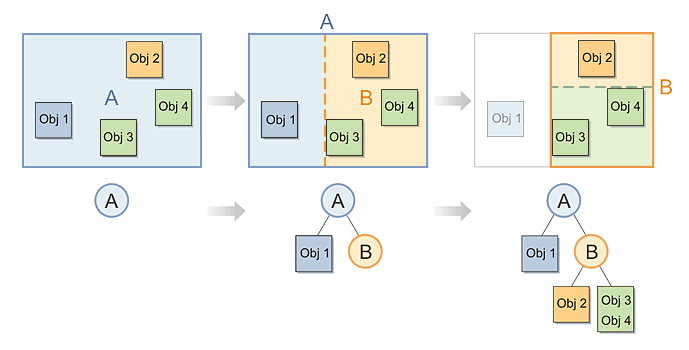
- The root node is created. It is done by simply spanning an axis-aligned bounding box over the whole scene.
- The space of the bounding box is recursively subdivided into two regions by a partitioning plane that is perpendicular to one of the three major axes. As a result, two nodes of the tree are created. Each of these nodes is again enclosed in an axis-aligned bounding box and this step is repeated for each of them until the whole scene geometry is represented.
-
The subdivision is stopped when the level with required number of editor nodes is reached.
NoticeIf the partitioning plane at a certain level splits an object, such object stays at the previous level and does not slide down the tree. It often happens with big and extensive objects, like sky or huge buildings.
During rendering, the engine loops through the BSP nodes to determine whether their bounding boxes are intersected by the viewing frustum. If a node passes this test, the same action is repeated for its children until a leaf node or a node that is outside the viewing frustum is reached. All necessary calculations are performed for visible regions, while the rest of the scene (i.e. objects and their lighting ) is discarded.
The tree is regenerated on the fly each time an object is added or removed from the world as well as when the object changes its status to collider or clutter object. If there were no changes, the tree remains the same. This quality makes adaptive BSP efficient not only when rendering static geometry, but also for handling dynamic objects.
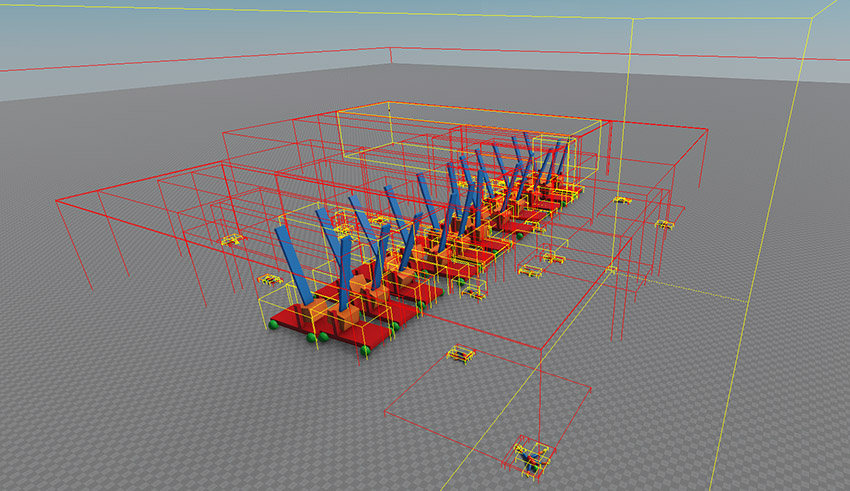
To provide effective management of the scene on the one hand and good tree balancing on the other, separate trees are created for different node types:
- World tree handles all occluders, triggers and clusters.
- Objects tree includes all objects except for collider objects and the ones with the Immovable flag enabled.
- Collider objects form a separate tree to facilitate collision detection and avoid the worst case scenario of testing all the objects against all other objects. This tree contains collider objects. It is clear, that objects can intersect only if they are situated and overlap in the same region of the scene. This tree allows to drastically reduce the number of pair-wise tests and accelerate the calculation.
-
Clutter objects are also separated as they are intended to be used in great numbers, which can disturb the balance of the main object tree.
NoticeThis spatial tree includes static objects with the Immovable flag enabled to optimize node management. - Light tree handles all light sources.
- Decal tree handles decals.
- Player tree handles all types of players.
- Physical node tree handles all physical forces.
- Sound tree handles all sound sources.
Mesh Partitioning#
After the editor node level is reached, there still exists the need for further partitioning of the mesh. Division is based on the same principles: the tree must be binary and axis aligned. The only difference is that these trees are precomputed (they are generated at the time of world loading), because a mesh is a baked object and there is no need for the related trees to change dynamically. The mesh is divided into the following trees:
- Surfaces tree
- Polygon tree
These two mesh-based trees provide the basis for fast intersection and collision calculations with the mesh.
Perspective Projection#
When the human eye views a scene, objects in the distance appear smaller than objects close by - this is known as perspective. While orthographic projection ignores this effect to allow accurate measurements, perspective definition shows distant objects as smaller to provide additional realism.
A viewing frustum (or a view frustum) is a field of view of the virtual camera for the perspective projection; in other words, it is the part of the world space that is seen on the screen. Its exact shape depends on the camera being simulated, but often it is simply a frustum of a rectangular pyramid. The planes of the viewing frustum that are parallel to the screen are called the near plane and the far plane.

As the field of view of the camera is not infinite, there are objects that do not get inside it. For example, objects that are closer to the viewer than the near plane will not be visible. The same is true for the objects beyond the far plane, if it is not placed at infinity, or for the objects cut off by the side faces. As such objects are invisible anyway, one can skip their drawing. The process of discarding unseen objects is called viewing frustum culling.
Orthographic Projection#
When the human eye looks at a scene, objects in the distance appear smaller than objects close by. Orthographic projection ignores this effect to allow the creation of to-scale drawings for construction and engineering.
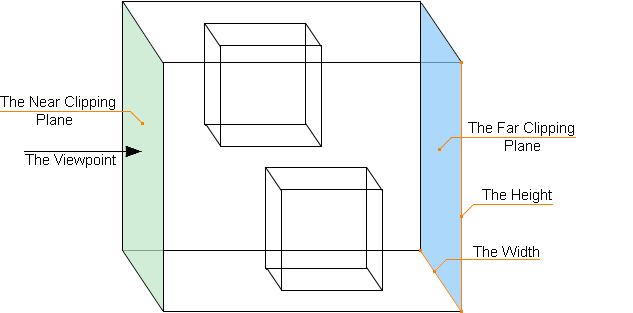
With an orthographic projection, the viewing volume is a rectangular parallelepiped, or more informally, a box. Unlike perspective projection, the size of the viewing volume doesn't change from one end to the other, so distance from the camera doesn't affect how large an object appears.
Occlusion Culling#
Another popular practice is to remove objects that are completely hidden by other objects. For example, there is no need to draw a room behind a blank wall or flowers behind an entirely opaque fence. This technique is called occlusion culling. The particular cases of occlusion culling are the following:
- Occluders
- Potentially visible sets that divide the space in a bunch of regions, with each region containing a set of polygons that can be visible from anywhere inside this region. Then, in real-time, the renderer simply looks up the pre-computed set given the view position. This technique is usually used to speed up binary space partitioning.
Occluders#
In large and complex environments with a lot of objects that occlude each other, culling of the occluded geometry allows significantly increase performance. The most appropriate decision, in this case, is to use occluders. They allow culling geometry that isn't visible behind them.
There are 2 types of occluders: box-shaped occluder and occluder mesh. The type of occluder to be used is defined by geometry to be culled.
However, using occluders to cull large objects with a few surfaces may cause additional performance loss. Moreover, occluders aren't effective in scenes with flat objects, or when a camera looks down on the scene from above. So, when using the occluders, you should take into account peculiarities of objects to be culled.
Hardware Occlusion Queries#
Another way to cull geometry that is not visible in the camera viewport is to use a hardware occlusion query. It allows reducing the number of the rendered polygons therefore increasing performance. To run the hardware occlusion test for the scene before sending data to the GPU, set the Rendering ->Features -> Occlusion query flag. In this case, culling will be performed for all objects with the Culled by occlusion query flag set in the Node tab of the Parameters window.
When culling is enabled for the object, an occlusion query box is rendered for it. Its size coincides with the size of the object's bounding box. If the occlusion query box is in the camera viewport, the object will be rendered; otherwise, it is not.
The hardware occlusion queries should be used only for a few objects that use heavy shaders. Otherwise, performance will decrease instead of increasing. It is recommended to enable queries for water or objects with reflections.
Reduced Rate Update#
Updating each frame a huge number of objects (e.g. smoke, explosions, or crowd simulation) located far away from the camera that are hardly distinguishable or observed as a mass is a waste of resources. To improve performance and avoid the excessive load, simulation of particles, water, cloth, or ropes, and playback of skinned mesh animations can be updated with a reduced framerate.
Periodic update allows saving a great deal of performance. The list of objects that can be optimized this way includes the following:
- Particle Systems
- Skinned Meshes
- Dynamic Meshes (only with a rope, a cloth, or a water body assigned)
- World Expressions
- World Transform Paths
For each of them the Update Distance Limit can be set - a distance from the camera within which the object should be updated.
In addition to that, for Particle Systems, Skinned and Dynamic Meshes, three update rate (FPS) values can be set, which specify how often the simulation should be updated when the object is visible, when only its shadow is visible, or when it is not visible at all.

This feature is enabled with default settings ensuring optimum performance and can be adjusted per-object in UnigineEditor or via API at run time giving you flexibility in optimization.
Asynchronous Data Streaming#
Data streaming is an optimization technique intended to reduce spikes caused by loading of graphic resources. It supposes that not all the data is loaded into random access memory (RAM) at once. Instead, only the required data is loaded and transferred to the GPU in separate asynchronous threads, and all the rest is loaded progressively, on demand.

Streaming system provides asynchronous loading of the following data to RAM:
- All textures, including cubemaps, voxel probe maps and shadow maps of baked shadows.
- ObjectMeshStatic, ObjectMeshClutter, and ObjectMeshCluster.
Streaming system uses texture cache composed of minimized copies generated for all textures with user-defined resolution and stored in the data/.cache_textures folder. These copies are used instead of the originals while they are loaded.
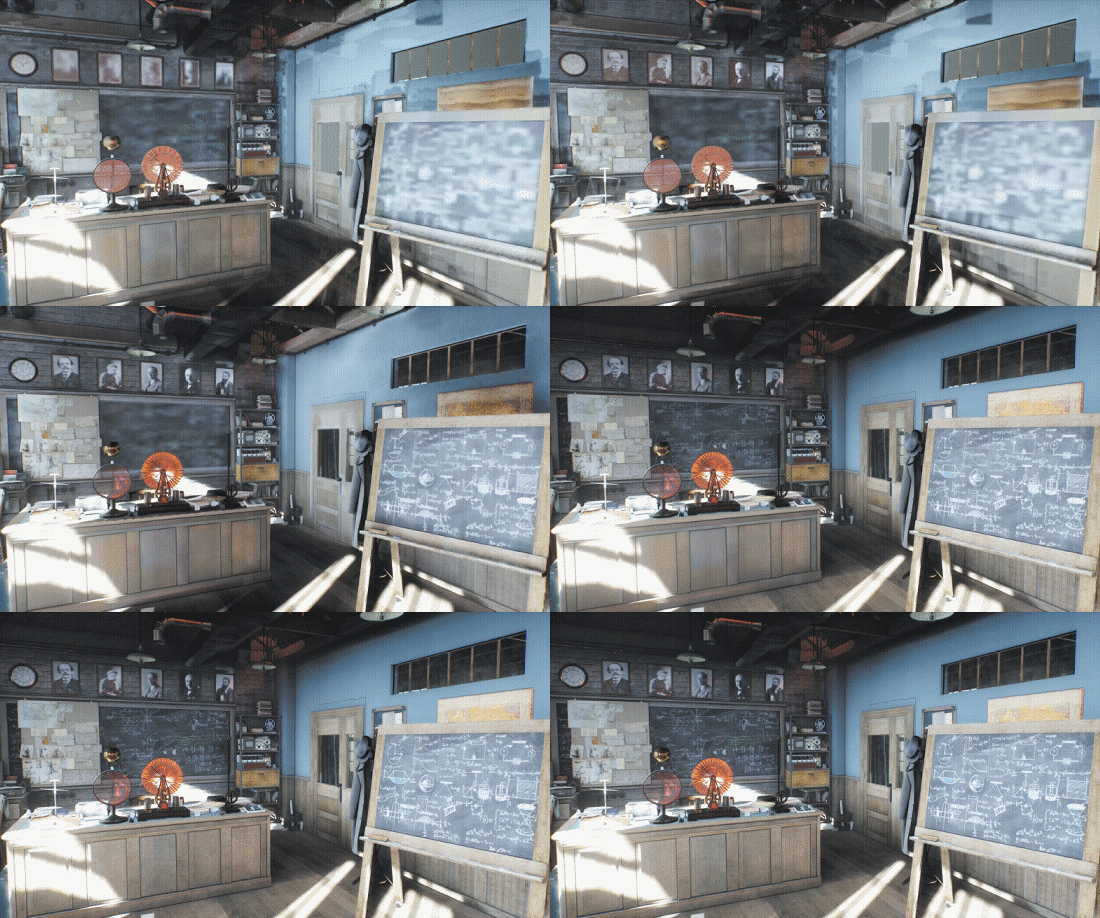
For more information on streaming configuration please refer to the Asynchronous Data Streaming article.
Multi-threaded Update of Nodes#
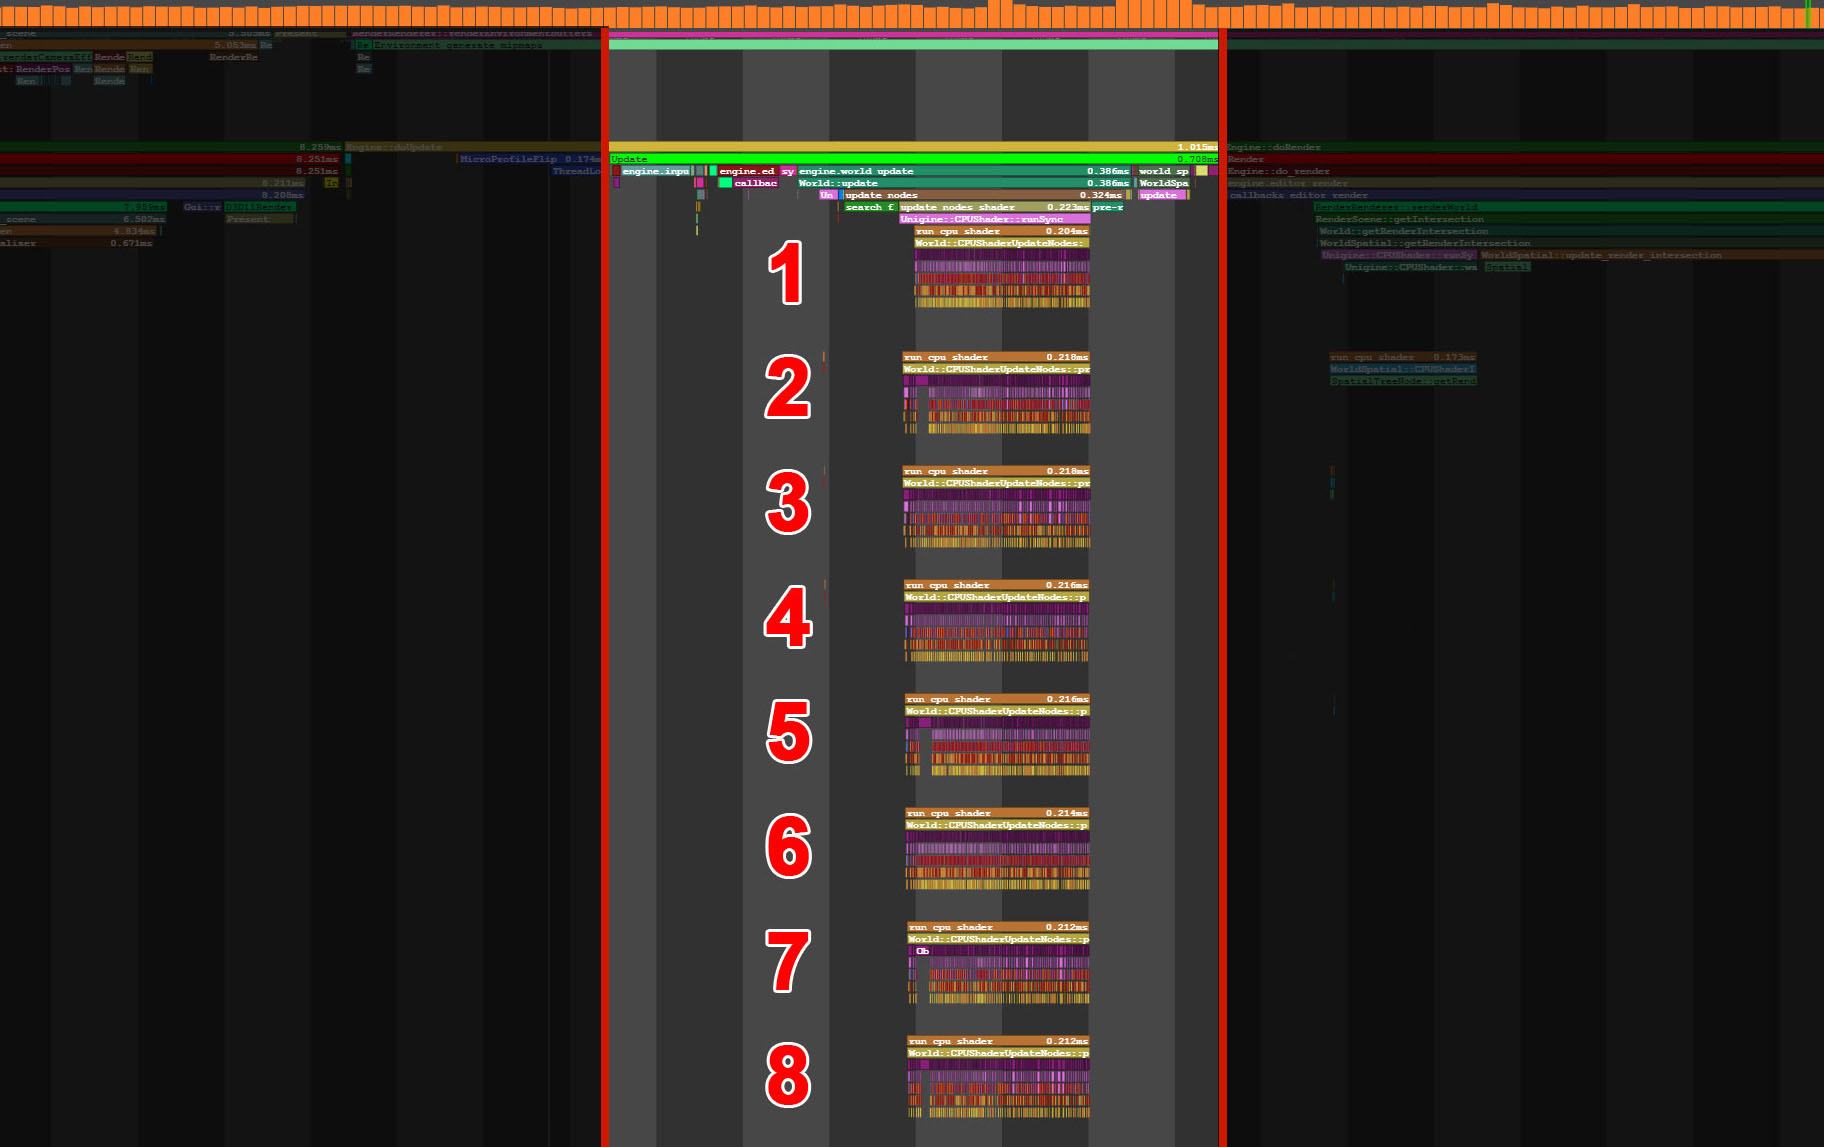
Nodes are updated in the multi-threaded mode, which can substantially increase performance. For example, this can be very handy when a big number of particle systems or dynamic meshes are rendered in the world.
Asynchronous update of nodes in the world depends on their type and hierarchy. It's important to take this into consideration for the most performance-demanding projects.
There are three modes for different types of nodes:
- no update - for nodes that do not change and don’t have to be updated (Mesh Static, NodeDummy, Decals, PlayerDummy, etc.), these nodes are skipped.
-
independent update - for nodes that are guaranteed not to have any hierarchy-based logic, such nodes are put to separate threads automatically, when needed:
- ObjectLandscapeTerrain
- LandscapeLayerMap
- ObjectGrass
- MeshDynamic, (only with a rope, a cloth, or a water body assigned)
- WaterMesh
- PlayerPersecutor
- SoundSource
-
dependent update (hierarchy based) - such nodes can be influenced by similar nodes (a child Particle System is updated in accordance with the update of the parent and so on...), such nodes are grouped and updated in the same threads.
Groups of dependent nodes are built automatically based on the hierarchy. The only thing to take care of is to avoid breaking hierarchies of dependent nodes by inserting an independent or non-updated node between them. E.g. if you have a hierarchy of particle systems that should be updated together in one thread, inserting a NodeDummy between them will break this hierarchy and put them to separate threads.
The following node types are hierarchy dependent:
- PlayerSpectator
- PlayerActor
- ObjectParticles
- ObjectMeshSkinned
- ObjectExtern
- WorldExtern
- WorldTransformPath
- Objects with physical bodies assigned
Nodes can change their update mode at run time, for example, assigning a physical body to an ObjectDummy switches its update mode to dependent. Visibility of an object (be it a particle system or a skinned mesh with animation played) has an impact on how often it is updated.
Extended use of multithreading in combination with an internal task system ensures that load is distributed evenly between all available threads.
Node Caching#
Caching of nodes is used to speed up loading process: a hidden copy of the loaded node (or a hierarchy of nodes) is added to the list of world nodes, thus enabling to simply get clones of cached nodes, instead of parsing the .node file and retrieving data once again.
When the node is cached and you try to access it, take into account the following:
- If the node is loaded by the name — the node gets stored in the cache by its name.
- If the node is loaded from the parent Node Reference — the node is stored in the cache by its GUID.
The information on this page is valid for UNIGINE 2.19.1 SDK.
