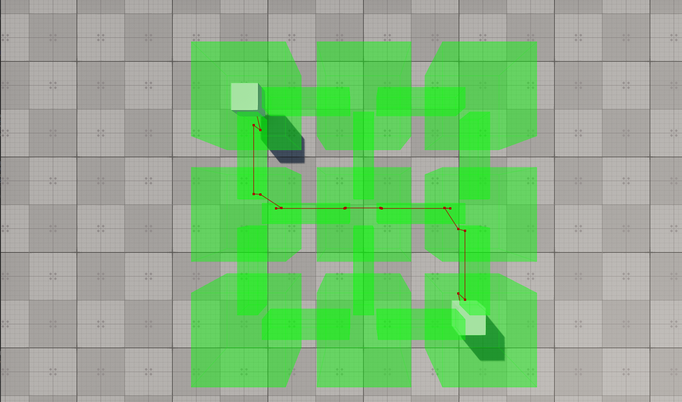
Creating Routes within Connected Navigation Sectors
The example guides you through the process of setting up a scene with a navigation area of a complex form and calculating 2D and 3D routes within it.
In UNIGINE, only Navigation Sectors can be used for calculation of both 2D and 3D routes. The navigation sectors can be easily rearranged, disabled, or enabled on the fly. Moreover, you can specify the sectors that can participate in pathfinding and exclude others. In order to form a unified navigation area, the sectors must intersect with each other.
Let's consider these features in detail.
Preparing Scene#
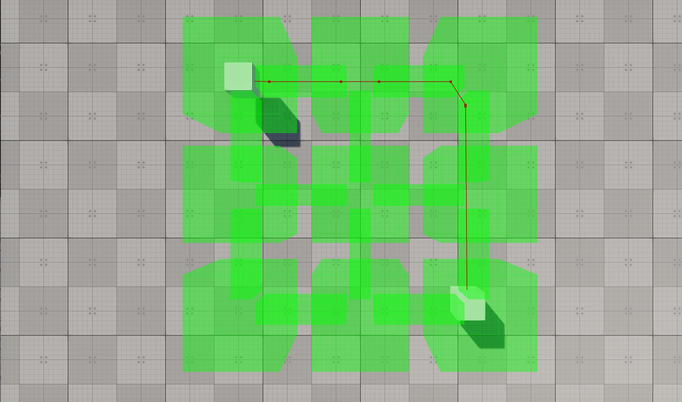
Our scene will include a navigation area that consists of multiple intersecting navigation sectors and primitives indicating the start and destination points of a route.
- Create an empty C# project via SDK Browser.
- Open it in UnigineEditor and remove the unnecessary default nodes.
-
In the Menu bar, choose Create -> Navigation -> Navigation Sector and place the node above the plane.
NoticeTo facilitate working with the navigation sectors, activate gizmos for Navigation nodes in the Helpers Panel.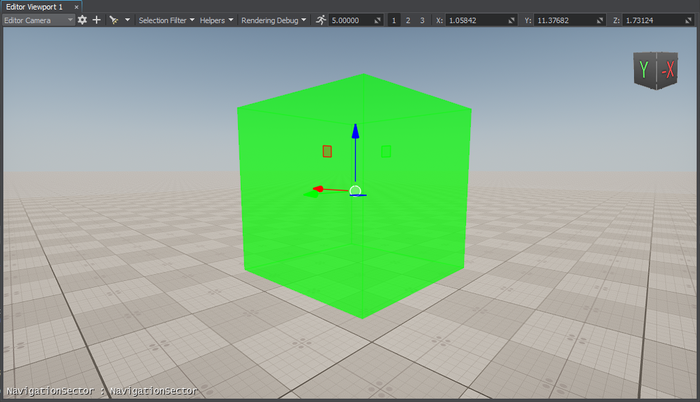
-
Add 8 more navigation sectors to the scene by cloning (Ctrl+D) the existing sector and place them as follows:
NoticeYou can position the sectors manually using manipulators or by specifying the exact position via the Parameters window.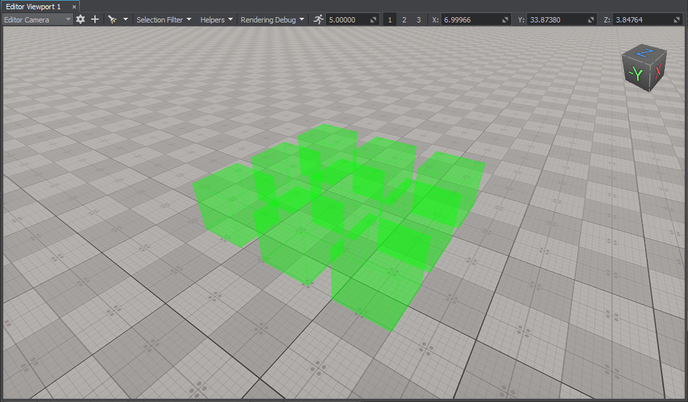
- In the Parameters window, adjust the positions of the nodes along the Z axis so that they are all positioned at the same level above the plane.
-
Add a new sector and adjust its Size in the Parameters window to give it a parallelepiped shape.
 NoticeAt this step, you can approximately set the size of the sector. However, you may need to adjust it later to prevent excluding the navigation sector from pathfinding.
 -
Connect the cuboid-shaped navigation sectors: place the new sector between them.
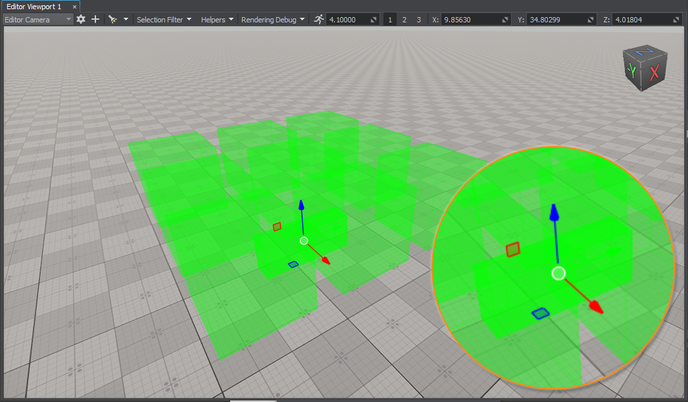 NoticeFor 2D routes, the height difference between the intersecting sectors must not exceed the maximum height set for the 2D route; otherwise, these sectors are discarded from pathfinding. In addition, the intersection area must exceed the radius and height of the route. So, it may be necessary to adjust the size and position of the sector to correct the intersection area.
 -
Add 11 more navigation sectors that connect the cuboid-shaped sectors by cloning (Ctrl+D) the existing sector and place them as follows:
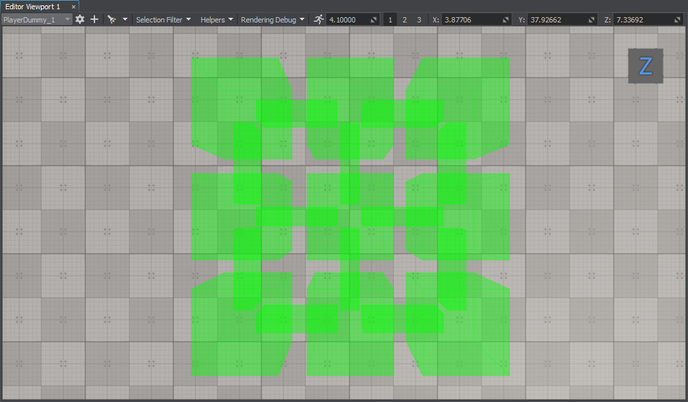
-
Organize the created navigation sectors in a hierarchy. It will allow you to manage the navigation area as a single node. Select all the navigation sectors, right-click, and choose Group in the drop-down list or press Ctrl+G.
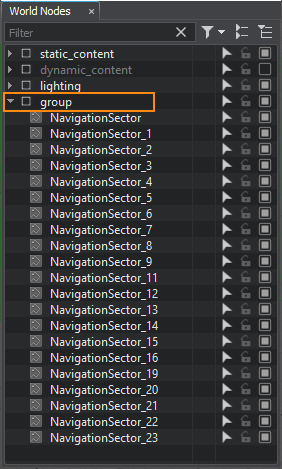
-
Add 2 nodes to be used as the start and destination points of the route. We will create 2 boxes (Create -> Primitives -> Box), rename them start and finish, and then place them inside the navigation sector as pictured below.
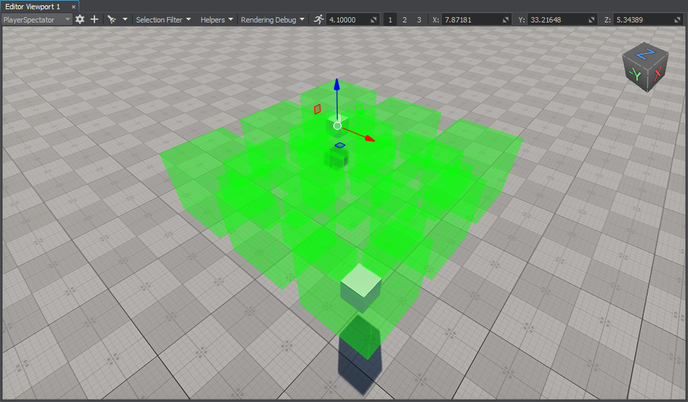
Creating Component for 2D Route Calculation#
The created navigation sectors only provide the area within which routes are calculated. The routes themselves should be created from the code. So, let's create the corresponding C# component for 2D route calculation:
- Create the components folder in the data directory of your project: right-click in the Asset Browser and select Create Folder.
-
In the created folder, create a new component: right-click and select Create Code -> C# Component and specify a name for the component.
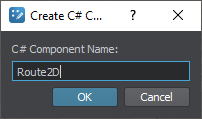
- Open the component in IDE to implement pathfinding logic.
Implementing Component Logic#
-
Declare component parameters:
- Two parameters that will accept nodes between which a route should be calculated
- Route color
Source code (C#)public class Route2D : Component { // a node that will serve as a start point public Node startPoint = null; // a node that will serve as a destination point public Node finishPoint = null; // route color [ParameterColor] public vec4 routeColor = vec4.ZERO; // ... } -
Create a route and set the radius and height that required to move the point along the route in the Init() method. Before creation, check if the nodes to be used as the start and finish points are specified.
NoticeChoosing the radius and height values is essential. If the height or radius exceeds the size of the sector or the intersection area, such sector/area will be excluded from pathfinding. To address this, you can modify the route parameters or adjust the size of the sector or intersection area.Source code (C#)// a route private PathRoute route = null; private void Init() { // check if the start and destination nodes are correctly specified via the component interface if (startPoint && finishPoint) { // create a new route route = new PathRoute(); // set a radius and height for the point which will move along the route route.Radius = 0.1f; route.Height = 0.1f; } } -
To enable displaying the calculated route at run time, turn on the Visualizer. Additionally, you can output console messages to the application screen. Add the following logic to the Init() function:
Source code (C#)// enable the onscreen console messages to display info on route calculation Unigine.Console.Onscreen = true; // enable visualization of the calculated route Visualizer.Enabled = true; -
In the Update() function, calculate the route from the start to destination node:
Source code (C#)private void Update() { // check if the start and destination nodes are correctly specified via the component interface if (startPoint && finishPoint) { // calculate the path from the start to destination point // a destination point of the route is reached route.Create2D(startPoint.WorldPosition, finishPoint.WorldPosition); if (route.IsReached) { // if the destination point is reached, render the root in a specified color if (visualizeRoute) route.RenderVisualizer(routeColor); } else Log.Message($"{node.Name} PathRoute not reached yet\n"); } }NoticeHere the route is recalculated each frame. However, it is not optimal for application performance. Instead, you can calculate the route once per several frames: pass a delay to the create2D() function as the third argument. -
Implement the Shutdown() function to disable the visualizer and onscreen console messages:
Source code (C#)private void Shutdown() { Unigine.Console.Onscreen = false; Visualizer.Enabled = false; }
Here is the full code of the component:
Route2D.cs
using System.Collections;
using System.Collections.Generic;
using Unigine;
[Component(PropertyGuid = "AUTOGENERATED_GUID")] // <-- this line is generated automatically for a new component
public class Route2D : Component
{
// a node that will serve as a start point
public Node startPoint = null;
// a node that will serve as a destination point
public Node finishPoint = null;
public bool visualizeRoute = false;
// route color
[ParameterColor]
public vec4 routeColor = vec4.ZERO;
// a route
private PathRoute route = null;
private void Init()
{
// check if the start and destination nodes are correctly specified via the component interface
if (startPoint && finishPoint)
{
// create a new route
route = new PathRoute();
// set a radius and height for the point which will move along the route
route.Radius = 0.1f;
route.Height = 0.1f;
// enable the onscreen console messages to display info on route calculation
Unigine.Console.Onscreen = true;
// enable visualization of the calculated route
Visualizer.Enabled = true;
}
}
private void Update()
{
	// check if the start and destination nodes are correctly specified via the component interface
	if (startPoint && finishPoint)
	{
		// calculate the path from the start to destination point
		// a destination point of the route is reached
		route.Create2D(startPoint.WorldPosition, finishPoint.WorldPosition);
		if (route.IsReached)
		{
			// if the destination point is reached, render the root in a specified color
			if (visualizeRoute)
				route.RenderVisualizer(routeColor);
		}
		else
			Log.Message($"{node.Name} PathRoute not reached yet\n");
	}
}
private void Shutdown()
{
	Unigine.Console.Onscreen = false;
	Visualizer.Enabled = false;
}
}Assigning Component#
When the component logic is implemented, you should assign it to a node.
- In UnigineEditor, select Create -> Node -> Dummy and place it in the navigation area.
- Select the dummy node and assign the Route2D.cs component to it in the Parameters window.
-
In the component parameters, specify the start and finish static meshes in the Start Point and Finish Point fields.
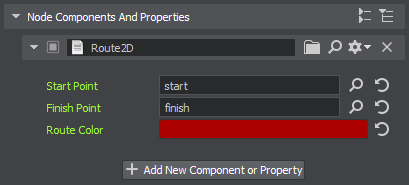
- Change the Route Color, if necessary.
Visualizing Navigation Area#
To clearly show how the path is built inside the navigation area, let's implement the AreaVisualizer component that enables displaying the navigation area gizmo at run time:
-
In the components folder, create the AreaVisualizer component.
NoticeIf you have completed the previous guide on creating routes within a simple navigation sector, you can skip this step and use the implemented AreaVisualizer component. Just copy it to the data/components folder of your project and assign it to all the navigation sectors forming the navigation area. -
Implement rotation logic:
Source code (C#)public class AreaVisualizer : Component { private NavigationSector navigationSector = null; private void Init() { // get the navigation sector to which the component is assigned navigationSector = node as NavigationSector; // enable rendering of the visualizer if (navigationSector) Visualizer.Enabled = true; } private void Update() { // display the navigation area gizmo if (navigationSector) navigationSector.RenderVisualizer(); } private void Shutdown() { // disable rendering of the visualizer Visualizer.Enabled = false; } } - Assign the component to each navigation sector forming the navigation area.
Trying Out#
Click Run to run the component logic and check the result.
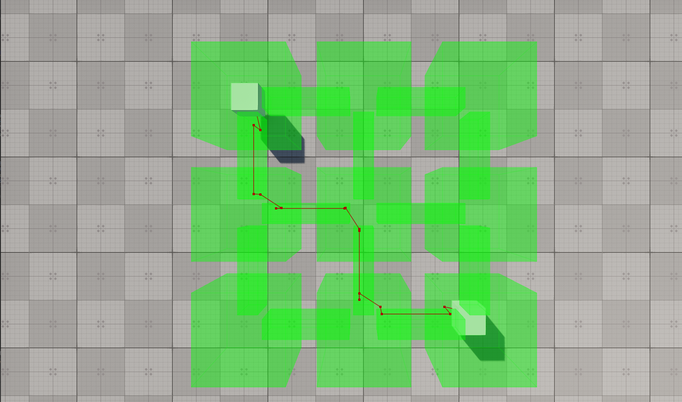
Excluding Sectors from Pathfinding#
Sometimes, it might be necessary to ignore some navigation sectors during pathfinding. For this purpose, you can set the Navigation mask for both the navigation sector and the route so that they don't match.
-
Select one of the navigation sectors participating in pathfinding.
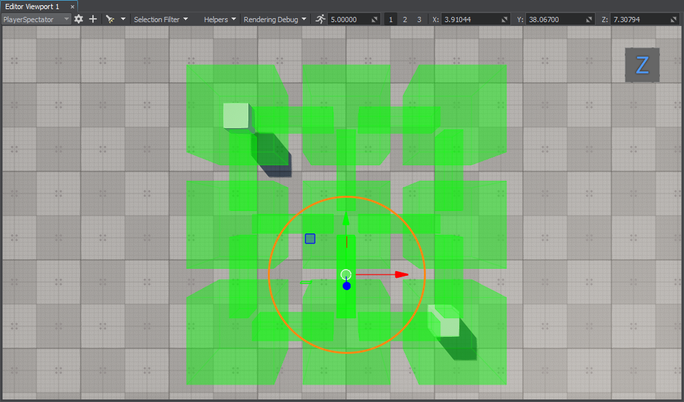
-
Change its Navigation Mask in the Parameters window.
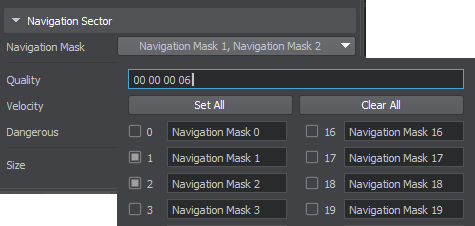
-
Run the application to check how the route is recalculated.
Modifying Component for 3D Route Calculation#
The navigation sector also enables the calculation of 3D routes, with some features that differ from the 2D routes:
- For 3D routes, the point moves in 3 dimensions.
- Only the radius set for the point matters: if the radius set for the point is greater than the size of the navigation sector, it will be discarded.
- The maximum height set for the route determines the upper limit of the point's vertical movement.
You can force the Route2D component to calculate a 3D route within the same navigation area by changing a single line of the code. Replace the route.Create2D() function call with the following:
route.Create3D(startPoint.WorldPosition, finishPoint.WorldPosition);Run the application to check the result.
The information on this page is valid for UNIGINE 2.19.1 SDK.
