Creating C++ Application
A UNIGINE-based application can be implemented by means of C++ only, without using UnigineScript.
This article describes how to add logic to your project by using the C++ language. Code written in C++ is the same for all supported platforms: Windows and Linux. The difference is in the way of compiling the project.
See also#
- Articles in the Development for Different Platforms section to learn more on how to prepare the development environment, install the UNIGINE SDK and build the application for different platforms.
- Examples located in the <UnigineSDK>/source/samples/Api and <UnigineSDK>/source/samples/App folders.
Creating Empty C++ Application#
It is very easy to start your own C++ project by using UNIGINE SDK Browser:
- Open the UNIGINE SDK Browser.
- Go to the Projects tab and click CREATE NEW.

- Specify the following parameters:
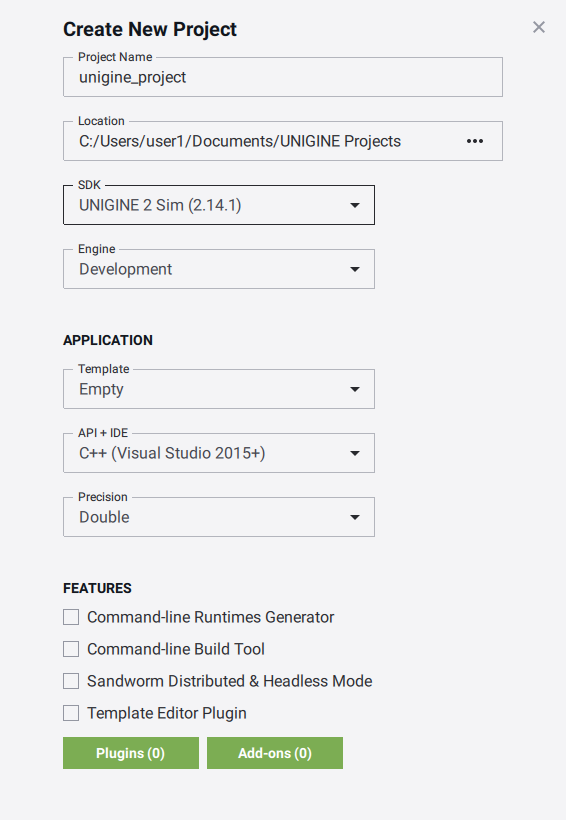
- Project name — specify the name of your project.
- Location — specify the path to your project folder.
- SDK — choose the UNIGINE SDK edition.
- API+IDE — choose C++ to start working with the C++ API.
This parameter depends on a platform:
- On Windows, you can create C++ Visual Studio 2022 project.
- On Linux you can create C++ GNU make project.
You can also can create C++ CMake project
- Precision - specify the precision. In this example we will use double precision.
NoticeRead more about these parameters in this article - Click the CREATE NEW PROJECT button. The project will appear in the projects list.
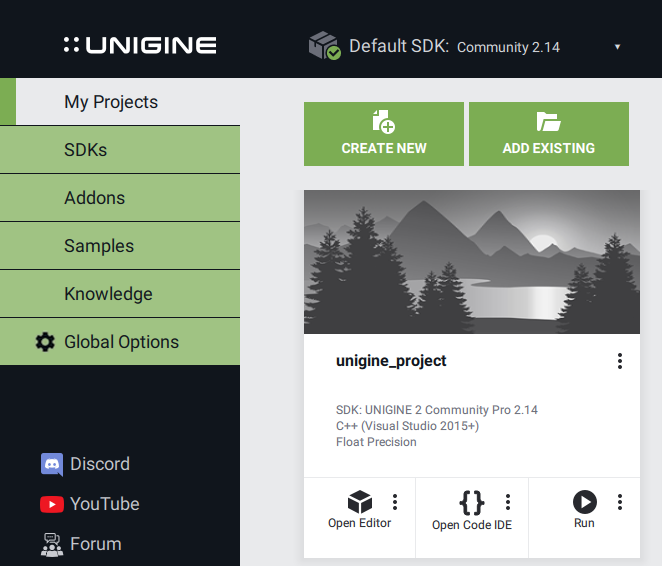
You can run your project by clicking the Run button.
Implementing C++ Logic#
In this section we will add logic to the empty C++ application project.
The following example shows how to rotate the material ball that was created by default in your project.
-
If you created the C++ project for Visual Studio:
- Choose your C++ project in the UNIGINE SDK Browser and click the Open Code IDE button to open the project in IDE.
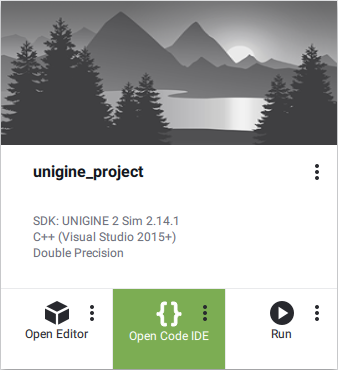
If you created C++ GNU make project:
- On the created C++ project, click on the Other Actions button and then the Open Folder button.
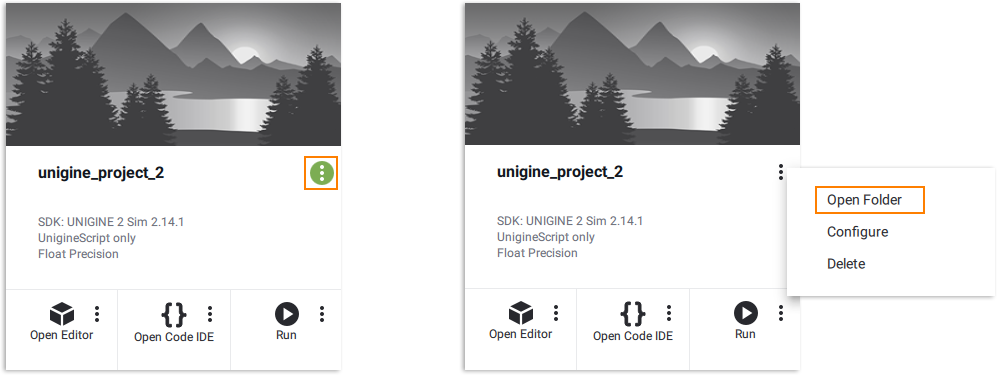
- Go to the <YOUR PROJECT>\source\ folder and open the AppWorldLogic.cpp file with any plain text editor.
- Choose your C++ project in the UNIGINE SDK Browser and click the Open Code IDE button to open the project in IDE.
- Write (or copy) the following code in your project's AppWorldLogic.cpp file.
Source code (C++)
#include "AppWorldLogic.h" #include <UnigineWorld.h> #include <UnigineGame.h> using namespace Unigine; // define pointer to node NodePtr node; AppWorldLogic::AppWorldLogic() { } AppWorldLogic::~AppWorldLogic() { } int AppWorldLogic::init() { // get the material ball node node = World::getNodeByName("material_ball"); return 1; } int AppWorldLogic::shutdown() { return 1; } int AppWorldLogic::update() { // get the frame duration float ifps = Game::getIFps(); // set the angle of rotation double angle = ifps * 90.0f; // set the angle to the transformation matrix Unigine::Math::Mat4 transform = node->getTransform(); transform.setRotateZ(angle); // set new transformation to the node node->setTransform(node->getTransform() * transform); return 1; } int AppWorldLogic::postUpdate() { return 1; } int AppWorldLogic::updatePhysics() { return 1; } int AppWorldLogic::save(const Unigine::StreamPtr &stream) { UNIGINE_UNUSED(stream); return 1; } int AppWorldLogic::restore(const Unigine::StreamPtr &stream) { UNIGINE_UNUSED(stream); return 1; } -
If you use Visual Studio, do the following:
- Before compiling your code, check that the appropriate platform and configuration settings for your project are set correctly.

- Build your project by clicking Build -> Build Solution in Visual Studio.
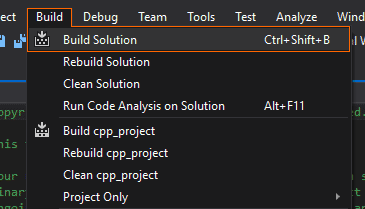
- Start your project by clicking Debug -> Start in a proper mode in Visual Studio.
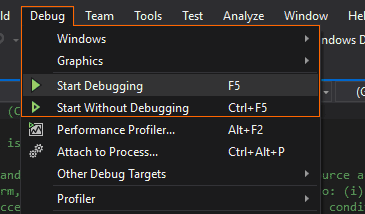
If you created a GNU Make project:
- Execute the make command in the terminal to compile the application.
Shell commands
make - Launch the application by using the run script.
- Before compiling your code, check that the appropriate platform and configuration settings for your project are set correctly.
The information on this page is valid for UNIGINE 2.19.1 SDK.