FBX Import Guide
FBX is a file format owned by Autodesk that is used to provide interoperability between various Digital Content Creation (DCC) applications. Most of modern 3D modelling applications support export to FBX: Autodesk Maya, Autodesk 3ds Max, Blender, Modo, etc.
UNIGINE's FBX import pipeline allows simple transfer of content from any DCC application that supports this format.
The advantages of using FBX Import over other importing methods are:
- Static meshes, skeletal meshes, animations, and morph targets are combined in a single file format.
- Multiple assets can be contained in a single file.
- Import of multiple LODs and morph targets in a single import operation.
- Materials and textures can be imported with and applied to meshes.
- Cameras and light sources can also be imported.
Along with importing data from FBX containers, UNIGINE also provides an ability to export data to .fbx files.
Importing FBX Asset#
When you import an FBX asset (just like importing any other asset), the import settings window appears:

The list of available import options covers all components that can be imported from an FBX scene and includes the following:
Mesh Import Options#
| Import Meshes | Import geometry meshes from the file. |
|---|---|
| Use Instances | Imports FBX with mesh instances. When enabled, a single mesh is imported instead of several identical ones. If you add such FBX to the scene, all meshes in the World Hierarchy will refer to the single mesh stored inside the imported FBX container. |
| Merge Static Meshes | Merges all of the children static meshes into a single one (named after the parent mesh). All surfaces of all meshes surfaces will be copied and shown in the Surfaces hierarchy. |
| Merge Surfaces by Materials | Enables merging surfaces that have the same materials. |
| Split by Grid |
Enables splitting of imported meshes. Too large models having sizes, that exceed 10000 units may have various artefacts (jitter, etc.) associated with positioning errors. You can eliminate such artefacts by splitting your mesh into multiple separate meshes. To do so, just enable this option and set the size of the grid cell (see the Grid Size parameter below) to be used for mesh splitting. Notice
This option does not split surfaces. |
| Grid Size | Size of the grid cell to split imported meshes, in units. |
| Repivot to Center | Places a pivot of generated mesh to its center. Can be used for meshes having their geometry located too far from their pivot, as this may lead to various artefacts (jitter, etc.) associated with positioning errors. |
| Optimize Vertex Cache | Enables vertex cache optimization. This option reorders an indexed triangle list to improve vertex cache utilization at runtime. It can be turned off to accelerate saving process; however, it should always be turned on if saving the final version. |
| Correct Triangulation |
Enables correct triangulation of meshes, NURBS and patches. Notice
Disabling this option decreases import time, but may lead to triangulation errors resulting in incorrect geometry. |
| Import Tangent Space |
Imports built-in tangent space data instead of recalculating it. Notice
If the option is checked, but an FBX asset has no tangent space, it will be calculated with orientation for the right-handed coordinate system. |
| Import Morph Targets | Enables importing morph targets from the file. |
| Morph Target Normals |
The morph target import parameter that defines how the normals of the morph target are imported. Three modes are available:
|
| Use LODs | Defines if Levels of Detail (LODs) are to be used for the imported model, as well as the LOD creation and configuration mode. |
Levels of Detail#
To create several variations of one object with different level of detail (LODs) you should have them as separate surfaces of the object. This will allow you to reduce the number of nodes in the hierarchy and simplify the settings of the LODs visibility.
UNIGINE provides automatic assignment and configuration of Levels of Detail based on the name postfixes, enabling you to create and export different meshes for different LODs of your model in a single FBX file. When naming these meshes, you should add a postfix to specify the LOD each mesh represents. You can also specify visibility and fade distances for each LOD of your model at the importing stage, saving time, as you don't have to adjust these settings for the surfaces on the scene - choose Combine by Postfixes in the Use LODs dropdown.
You can also enable the Merge Static Meshes option for more optimization.
-
Choose Combine by Postfixes in the Use LODs dropdown.
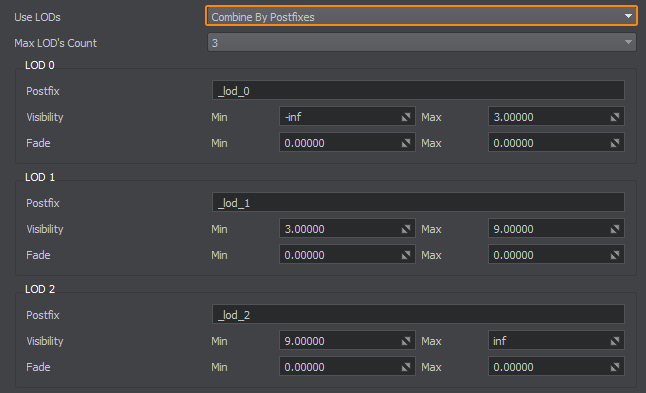
This will show additional LODs settings:
- Select the number of LODs that are stored in the FBX container.
-
For each LOD, define a postfix that will be used to group objects in an FBX file into a corresponding LOD.
NoticeThe postfix must be the same as the one used when creating objects in a 3D editor.The names of generated surfaces will be as follows: material_name + LOD_postfix.
- Specify the minimum and maximum visibility and fade distances for each LOD.
Automatic Generation of LODs#
Automatic LOD Generation feature based on the meshoptimizer library will help in case you only have a high-poly model, saving you a lot of time on preparing levels of detail manually.
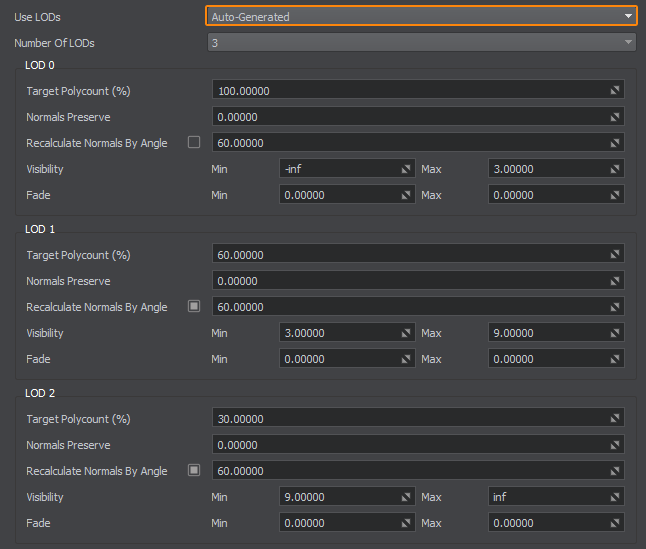
To use the feature choose Auto-Generated in the Use LODs dropdown and configure the settings listed below - the Engine will do the rest, generating all LODs automatically based on your configuration.
Lightmaps Options#
Hierarchy Options#
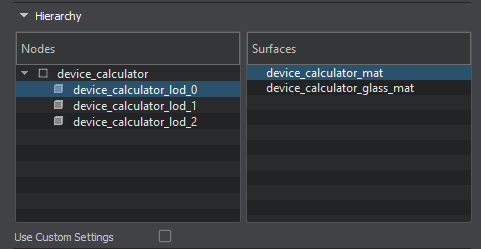
This auxiliary section is available in the Parameters window when selecting an imported FBX asset in the Asset Browser. It enables you to preview the content of the FBX asset according to the current Mesh Import Options.
| Nodes | List of nodes obtained from the FBX asset. |
|---|---|
| Surfaces | List of surfaces of the selected node. |
| Use Custom Settings | Enables custom Lightmaps options for the selected surface(s). |
Material Import Options#
| Import Materials | Enables importing materials from the file. |
|---|---|
| Assets Mode |
Enables to choose whether to use existing materials or to overwrite them with the ones imported. Available options:
|
| Base Materials Mode |
Enables to choose the base material for imported materials. Available options:
|
| Workflow |
Provides an interface to choose a workflow for the imported physically based materials (if any). Available options:
|
| Add Asset Name as Prefix | Enables to add a prefix for imported materials to avoid collision of names. |
| Add Prefix | Enabling this option makes the name of each material have the name of the imported FBX asset as a prefix. |
| Merge Similar Materials | Enables to merge materials with the same settings, but different names. |
Texture Import Options#
| Import Textures | Enables importing textures from the file. |
|---|---|
| Invert G-Channel For Normal Maps | Inverts the G-channel in normal maps. |
Animation Import Options#
| Import Animations | Enables importing animations from the file. |
|---|---|
| Import Bones Without Skin | Enables import of bones that are not attached to the skeleton and do not affect the animation's skin, for example, a weapon held in the character's hands. If disabled, such bone is not imported and bones connected to it, if any, become orphans. |
| Create Transform Bones for Joints | Imports the hierarchy of the joints (bones) for animated FBX assets as a list of World Transform Bones. If this option is disabled, imported animations for a mesh will still work. |
| Joints Reorientation | Enables changing orientation of bones for animations and animated geometry. When enabled, all bones will have the same forward axis as the geometry. This simplifies work with animations via code for programmers reducing excessive axis manipulations: if a mesh has +Y as a forward axis, the bones will have +Y as well. |
| Animation FPS | Number of frames per second of imported animation. |
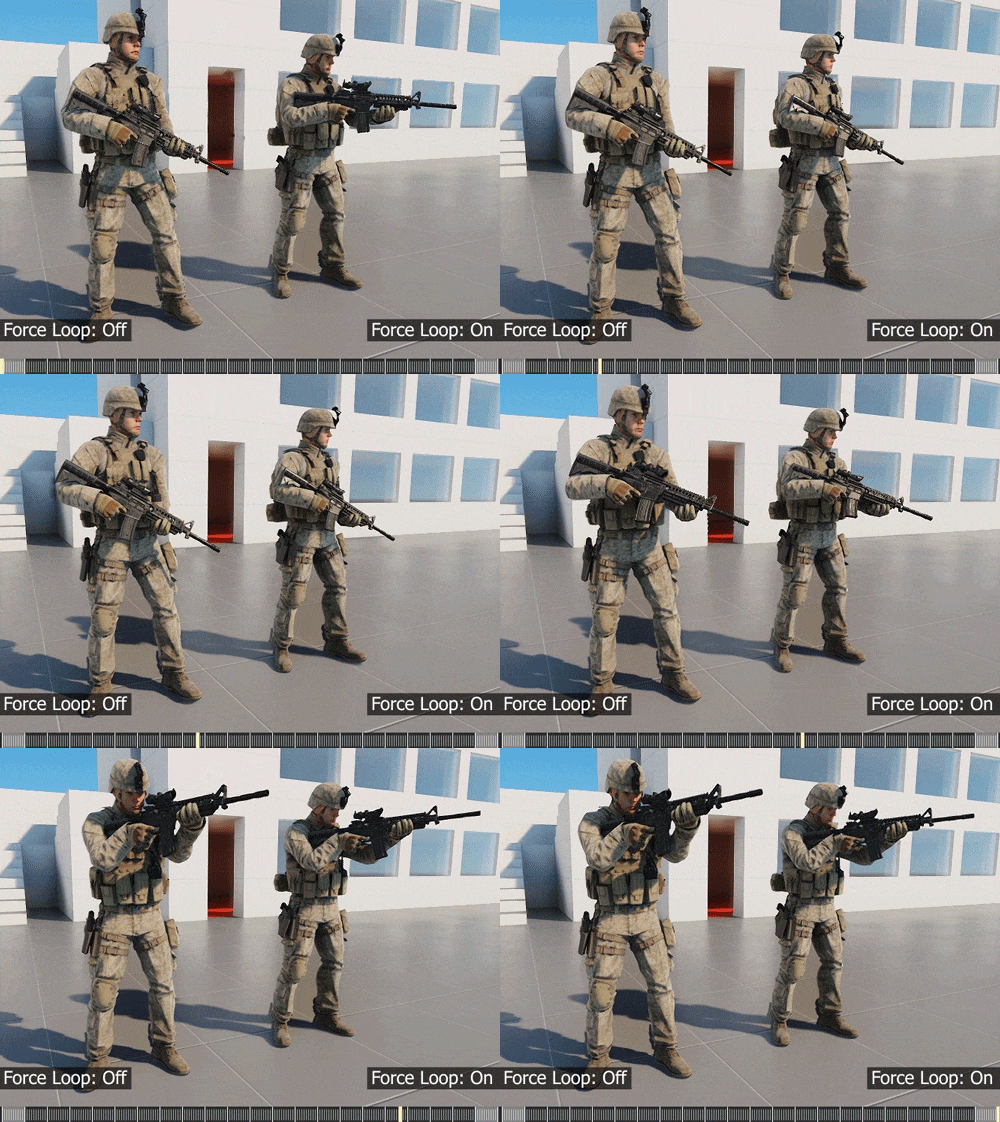
| Force Loop |
Forced smoothing of looped animation playback.
|
| Looped Frames | Number of frames to be used for smoothing of looped animation playback. The specified number of frames is taken from the beginning and from the end of the animation. If the specified value exceeds the (total_number_of_frames)/2, the latter is used instead. |
Other Import Options#
| Import Lights | Imports light sources from an FBX scene. |
|---|---|
| Import Cameras | Imports cameras from an FBX scene. |
| Skip Empty Nodes | Enables skipping empty nodes. Complex CAD models may contain a lot of empty nodes, resulting in an overloaded world hierarchy. You can enable this option to simplify generated hierarchy by ignoring nodes, that do not contain any useful information. |
| Front Axis | Provides an interface to choose an axis to be considered as the forward vector of the World Coordinate System. |
| Up Axis | Provides an interface to choose an axis to be considered as the up vector of the World Coordinate System. |
| Scale |
Geometry scale multiplier. When added to the scene in UNIGINE, your mesh might require scaling to fit properly. However, applying the Scale transformation to the mesh affects its physics — the mesh cannot participate in collision properly in this case. Therefore, it is recommended to define the required scale value using the scale manipulator and then re-import the mesh using the resulting value, which is displayed in the Common Parameters. |
Specific options for various types of data stored in an FBX container are described below.
Geometry#
The most commonly used type of data stored in an FBX container is polygonal geometry.
When importing geometry keep in mind the following mesh limitations set in UNIGINE:
| Maximum number of vertices per mesh | 4,294,967,295 |
| Maximum number of surfaces per mesh | 32,768 |
| Maximum amount of weights per vertex | 4 |
To import 3D geometry data contained in an FBX scene, you should enable the Import Meshes option.
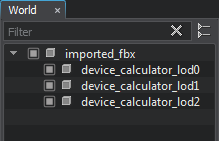 |
Imported geometry (same as any object in the scene) after being added to the world, becomes a node and can be seen in the World Hierarchy window. This node will have the same name as the imported FBX asset and a hierarchy of child nodes representing the hierarchy of static meshes contained in the imported scene. |
You can combine all child objects into a single one by enabling the Merge Static Meshes option. In this case, all surfaces of child meshes will be copied to the single parent mesh and will appear in its Surfaces hierarchy.

You can also merge the surfaces having the same material assigned by enabling the Merge Surfaces by Materials option.

Different measurement systems can be used in different 3D modelling applications. To adjust the scale of imported geometry, you can use the Scale parameter.
It is also possible to optimize the vertex cache when importing geometry. To do so, use the Optimize Vertex Cache option.
The Import Tangent Space option allows importing built-in tangent space data instead of recalculating it.
Materials#
An FBX container can also store materials assigned to the surfaces of the objects in a 3D editor.
To import materials from an FBX container, you should enable the Import Materials option. In this case, the surfaces of the imported model will have the corresponding materials assigned.
The following textures will be imported and assigned (if any):
- Diffuse (albedo) texture
- Normal map or bump map (needs to be converted into 2-channel (RG) for Unigine)
- Specular texture
- Light map
The following material parameters will also be imported (if defined):
- Diffuse color
- Specular color and power
- Emission color
When the Import Materials option is disabled, all surfaces of the model will have the default mesh_base material assigned.
When importing materials, you might have a situation when a material with a given name already exists in the project. You can choose whether to overwrite existing materials (the corresponding assets will be overwritten) or not. For this purpose, the Overwrite Existing Materials option is used. When unchecked, existing materials will be used.
In case when a source model contains lots of objects with many identical materials that just have different names (often happens when an FBX file was exported from a CAD system), it makes sense to combine such materials into a single one. To do so, you should enable the Merge Similar Materials option.
Also you can choose the base material for the imported materials: it can be an autoselected/autogenerated graph-based material or the built-in mesh_base material.
If the Base Materials Mode is set to Inherited Mesh Base, you should use the Workflow option to set the desired one. UNIGINE supports two workflows for PBR materials: Metalness and Specular.
Textures#
When reading the materials data, you are also able to import textures stored in an FBX container. To do so, enable the Import Textures option.
Animation and Morph Targets#
You can import skeletal animations and morph targets from an FBX file.
To import animations from an FBX container:
- Enable the Import Animations option.
- Specify the number of frames per second for imported animation in the Animation FPS field.
To import morph targets just enable the Import Morph Targets option. Morph targets will be imported as child nodes.
If you have an FBX file containing skeletal animation without any geometry, you can import it to your UNIGINE project via the Import Bones Without Skin and use generated .anim files.
Lights#
You can import light sources from an FBX scene (if any) by simply enabling the Import Lights option. Imported light sources will be added as child nodes to the root node. The following conversion will be performed:
- Directional lights are converted into world light sources.
- Point lights are converted into omni light sources.
- Spot lights are converted into projected light sources.
The following parameters of lights are automatically imported into UNIGINE, so there is no need to set them up twice:
- Light color
- Light radius and attenuation
- Light source position and orientation
Cameras#
Cameras can also be imported from an FBX scene (if they exist) by simply enabling the Import Cameras option. They are converted into PlayerDummy (cameras without physical properties). Both types of projection are supported in UNIGINE:
- Orthographic (with Z near and far clipping planes support)
- Perspective (with FOV support)
To view the scene through the imported camera choose its name in the drop-down list in the top left corner of the Editor Viewport window.
Adding Imported FBX Asset to the World#
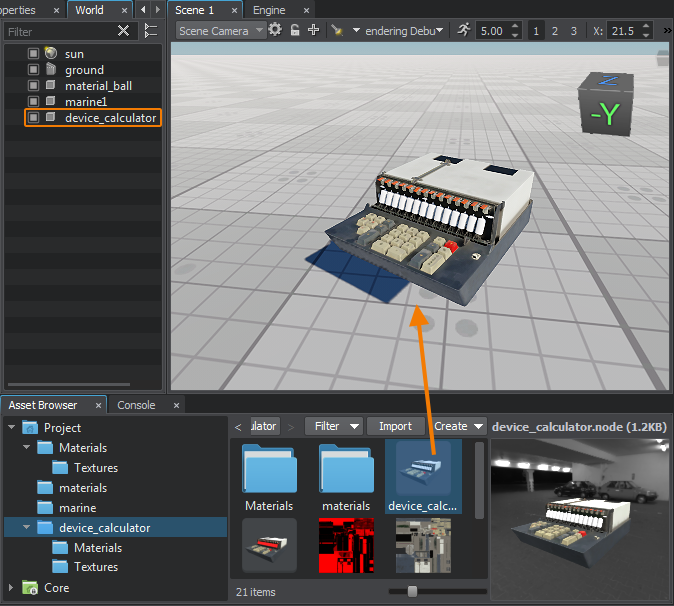
To add a new imported FBX asset to the scene, as any other asset, simply drag it from the Asset Browser to the Viewport window. The corresponding node will be created and displayed in the World Hierarchy window. This node will have the same name as the imported FBX asset and a hierarchy of child nodes representing separate objects contained in the 3D model.
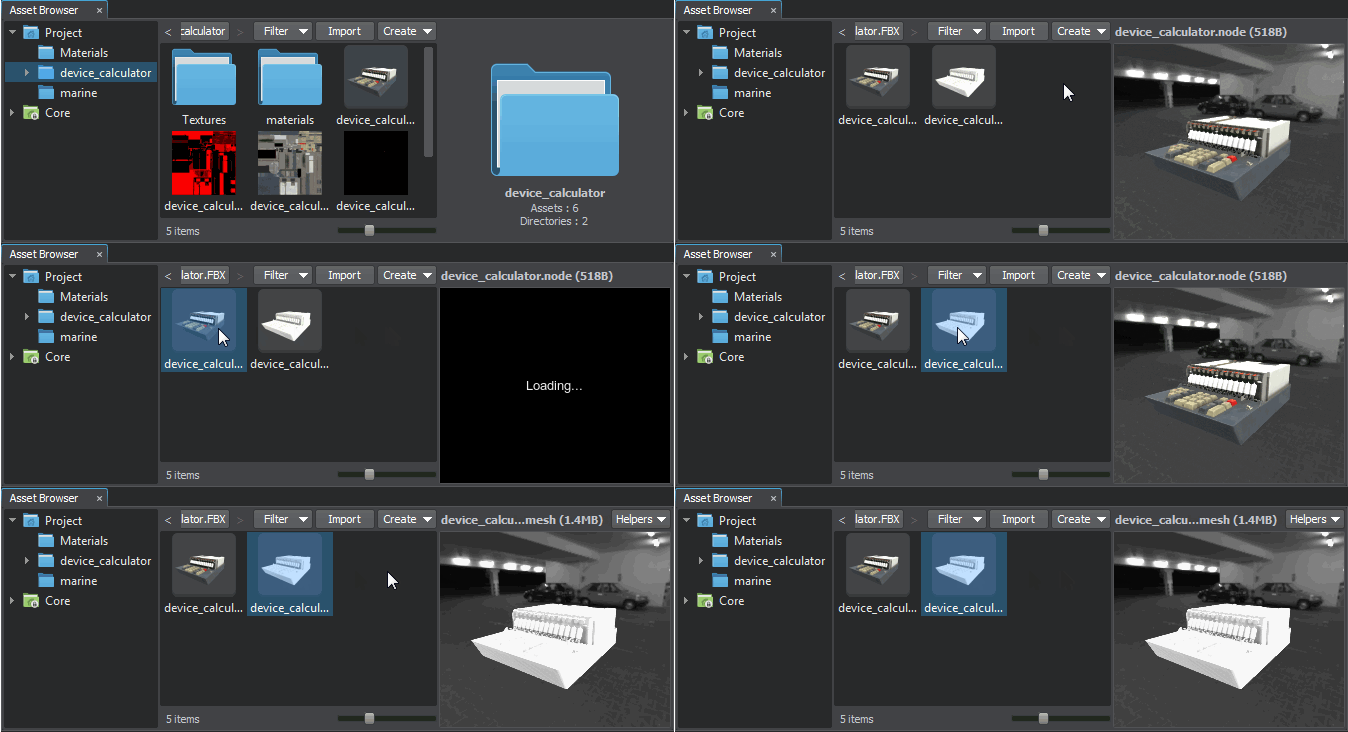
Non-native geometry asset types (fbx, obj, dae, etc.) are containers for meshes. If you double-click such asset in the Asset Browser (or use the right-click Open command), the generated runtime .mesh, .anim and .node files stored in the container asset will be displayed:
Video Tutorial: Importing 3D Models#
The information on this page is valid for UNIGINE 2.19.1 SDK.
