Render to Texture
The Render to Texture set of samples demonstrates how to capture the camera view and render it for various use cases:
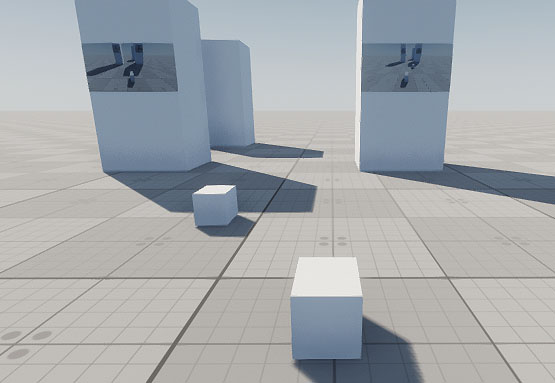
This sample shows how to capture the output of a camera in real time and project it onto a material's albedo texture using Viewport::renderTexture2D().
A renderable 2D texture is created and set as the albedo texture of the material assigned to the plane. Each frame, the active camera's view is rendered into this texture, updating the appearance of the object it's applied to. Texture sampling settings like linear filtering and anisotropy are configured to ensure visual quality. The UV transform is also adjusted to correct for platform-dependent flipping.
This method can be used for features such as security monitors, live camera feeds, dynamic mirrors, portals, or mini-maps in your worlds.
SDK Path: <SDK_INSTALLATION>source/render/camera_to_texture
This sample demonstrates how to render GUI elements into a texture using Gui::render(). Instead of drawing directly to the screen, the GUI is redirected to a custom framebuffer, which isolates its rendering pipeline and allows the resulting texture to be applied to materials.
The GuiToTexture component supports two update modes:
- In Manual mode, the texture is updated only when explicitly calling renderToTexture(). This is used in the WidgetClock example, where the GUI (a digital clock) is re-rendered once per second, only when the displayed time changes.
- Automatic mode is enabled by default and updates the GUI texture every frame. This is demonstrated in the WidgetNoSignal example, where a "No Signal" label moves across the screen like a screensaver. Because the position of the widget changes every frame, the texture must be continuously updated to reflect those changes.
The render flow involves saving and clearing the current render state, binding a texture, configuring the viewport, rendering the GUI widgets, and restoring the render state. Mipmaps are also generated to ensure proper filtering at different scales and distances.
You can use this sample to display dynamic GUI elements on in-game monitors, control panels, or other similar surfaces.
SDK Path: <SDK_INSTALLATION>source/render/gui_to_texture
This sample demonstrates how to render a specific node and its children into a texture using Viewport::renderNodeTexture2D(). Instead of rendering the whole scene, a custom viewport captures only the target node as seen from a camera, and outputs the result into a 2D texture.
The texture is then assigned as the material's albedo texture. To create clean output, the viewport is configured to skip transparent objects, velocity buffers, post-effects, and debugging visualizers. Lighting is inherited from the world, and the environment is overridden to a black cubemap to prevent background influence.
This sample can be useful for rendering character previews, dynamic item thumbnails, or isolated object views directly onto surfaces.
SDK Path: <SDK_INSTALLATION>source/render/node_to_texture
This sample demonstrates how to capture views from two different cameras into separate textures and implement a split-screen layout using the C++ API.
Each camera renders its output to a texture using Viewport::renderTexture2D(). These textures are displayed in a vertical split-screen layout using WidgetSprite elements, and at the same time are applied to surfaces by assigning them to the albedo slot of static mesh materials. The layout adjusts dynamically to screen size changes.
This setup can be used for multiplayer screen sharing, camera comparisons, or in-game monitors rendered from multiple viewpoints.
SDK Path: <SDK_INSTALLATION>source/render/split_screen_texture
In first-person games, weapon models can clip through walls or geometry when the camera gets too close. This sample solves the problem by rendering the weapon separately into a texture and compositing it over the main scene.
Two cameras with identical transforms are used to ensure alignment. Their Viewport masks are set via UNIGINE Editor in the following way: one renders the environment without the weapon, and the other renders only the weapon. The weapon view is drawn into a texture using Viewport::renderTexture2D(), and then overlaid onto the screen with Render::renderScreenMaterial(). The system handles window resizing, render-state isolation, and allows optional settings like skipping shadows in the weapon rendering pass.
This approach keeps the weapon always visible, even when the camera is close to walls, without interfering with the main rendering pipeline.
SDK Path: <SDK_INSTALLATION>source/render/weapon_clipping
Accessing Demo Source Code#
You can study and modify the source code of this demo to create your own projects. To access the source code do the following:
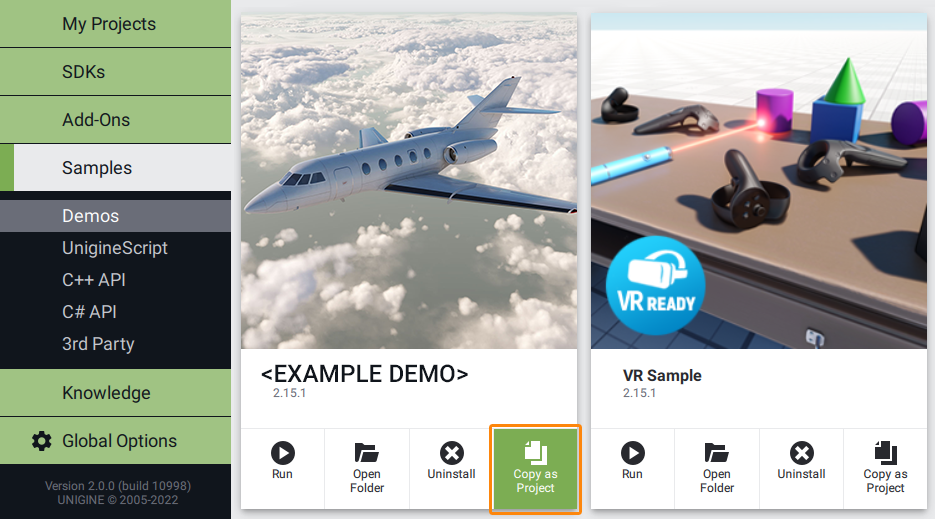
- Find the C++ Samples demo in the Demos section and click Install (if you haven't installed it yet).
- After successful installation the demo will appear in the Installed section, and you can click Copy as Project to create a project based on this demo.
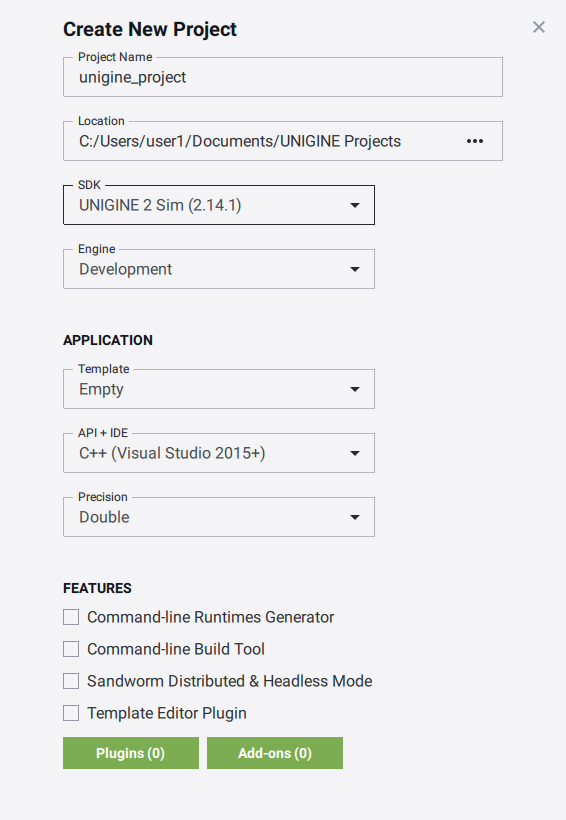
- In the Create New Project window, that opens, enter the name for your new project in the corresponding field and click Create New Project.
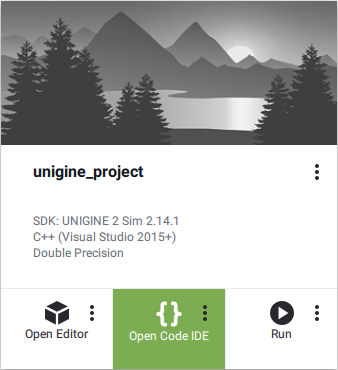
- Now you can click Open Code IDE to check and modify source code in your default IDE, or click Open Editor to open the project in the UnigineEditor.
The information on this page is valid for UNIGINE 2.20 SDK.