Setting Up Viewports
SpiderVision Setup window is the plugin interface that allows configuring the viewports arrangement, size, warping, colors, etc.
By default, this window opens on pressing the F10 button. The hotkey may be reconfigured in the configuration file or via the File -> Settings window of SpiderVision Setup.
The camera in the configurator window is controlled by RMB + mouse movements and WASD buttons. Displays can be selected by cursor both in the viewports tab and in the configurator window, projectors can be selected in the viewport tab only.
Creating Configuration#
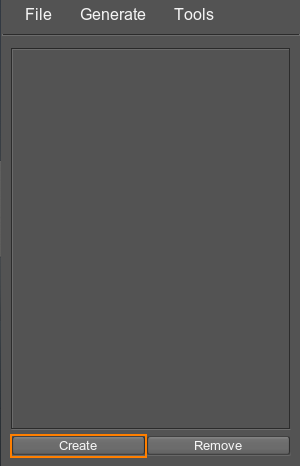
To start creating a setup from scratch, use the Create button.
You can also use the Wall Generator to generate a wall of viewports.
Save the configuration via the menu (File -> Save) and then load it (File -> Load) to initiate rendering of the configured viewports.
By default, at opening the SpiderVision Setup window, either a config file named default.sv or an empty config file is loaded. Thus, you can name your config file default.sv to let it load automatically as you run the project, or use the -config_path start-up command.
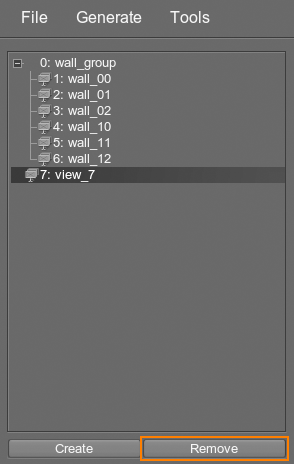
To remove the viewport, select it in the viewports tab and use the Remove button. Keep in mind, that if a viewport is in the wall group, it cannot be removed individually, only the whole group is removed.
Configuring Viewports#
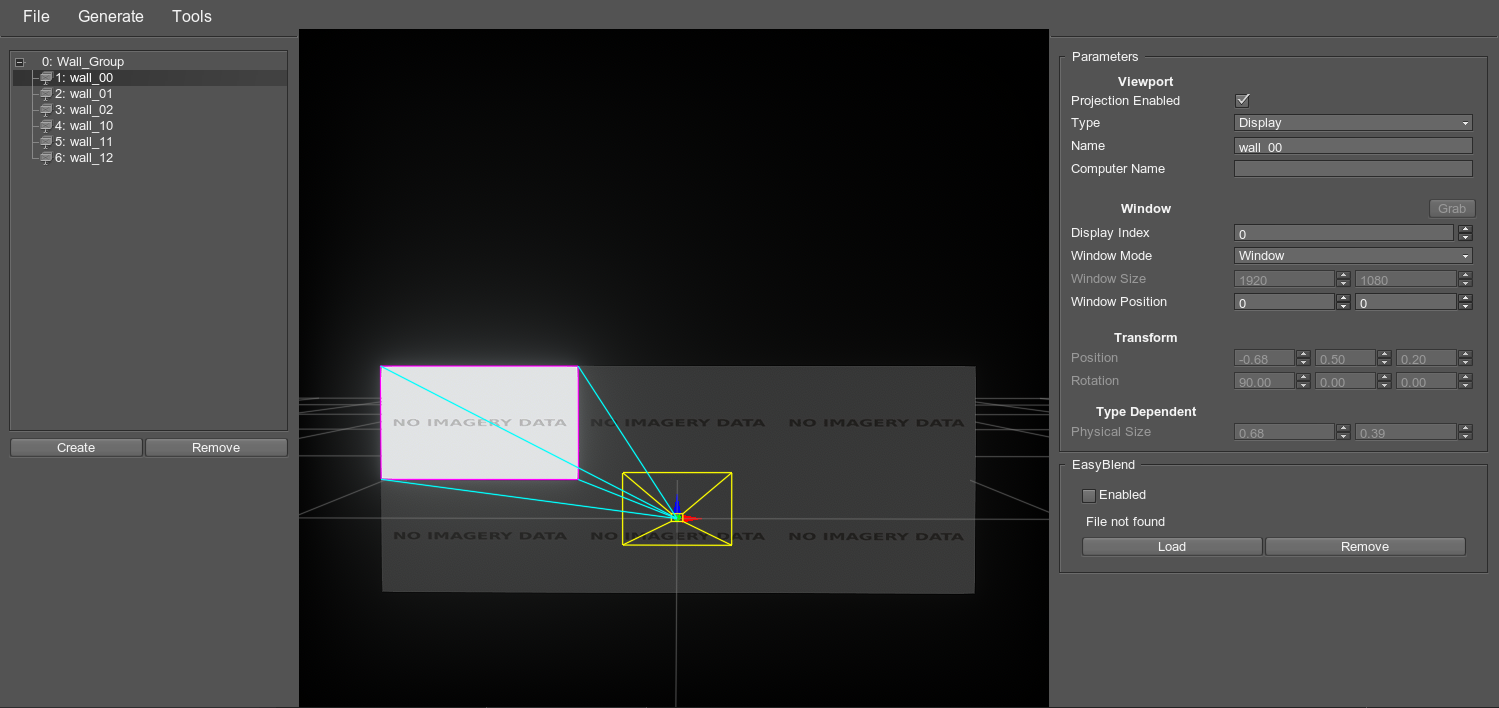
To configure a viewport, select it either in the viewports tab or in the display&projection visualization area. The following settings become available:
| Viewport | |||
| Projection |
Toggles correction of the image in the viewport. If disabled, the image is rendered as seen from the point of view without any distortions (i.e. regardless of the viewport plane position in the configuration space). If enabled, the image takes into account the projection angle (i.e. the viewport plane position relative to the point of view in the configuration space) and distorts the rendered image accordingly.
|
||
|---|---|---|---|
| Type |
Image type rendered in the viewport. The image is rendered differently due to the different approach to the calculation of the projection matrix. Thus, you need to select the image type based on the device which is going to render the image:
|
||
| Name | Viewport name displayed in the window title bar and in the viewports tab on the left side of the SpiderVision Setup window. | ||
| Computer name |
The name of the computer on which the viewport is to be displayed. If the box is empty, the viewport is displayed on any PC. If the name is set, the viewport is only displayed on the PC that has a matching name. The computer name can also be set at the application instance start-up by using the corresponding start-up command. |
||
| Window | |||
| Grab | The button that allows copying the currently set position, display index and window size to the window settings. The option is unavailable for a window controlled by another application instance (for example, when using Syncker) — in such a case you need to open SpiderVision Setup for that instance and grab that window transforms. | ||
| Set as Main Window | The button that makes the window rendering the currently selected projection the main window. The main window is the window that displays the console and allows camera control. | ||
| Display index | OS index of the display on which the viewport should be rendered. If set to the index that exceeds (total number of displays - 1), the viewport is displayed on the monitor with the index 0. | ||
| Window mode |
Mode of the displayed window.
|
||
| Window size | Size of the window on the display (in pixels) if it is in the Window mode. | ||
| Window position | The window position on the screen (screen-space coordinates of the upper left corner). | ||
| Transform | |||
| Position | The viewport plane position relative to the point of view (does not affect runtime if Projection Enabled is disabled). | ||
| Rotation | The viewport plane rotation relative to the point of view (does not affect runtime if Projection Enabled is disabled). | ||
| Type-Dependent | |||
| Display size | Physical size of the display to which the image is rendered (for Display image type). The value is set in meters. | ||
| Offset | Offset of the projected image relative to the viewer (for Projector image type). The value is set in meters. | ||
| Aspect | Width-to-height ratio of the projected image (for Projector image type). | ||
| Vertical FOV | Vertical field of view, in degrees (for Projector image type). | ||
| Horizontal FOV | Horizontal field of view, in degrees (for Projector image type). This value is calculated automatically depending on the Vertical FOV and is provided for information. | ||
| EasyBlend | |||
| Apply EasyBlend Distortion |
Applies the distortion stored in the EasyBlend file (*.ol). SpiderVision plugin allows rendering the UNIGINE-based application on multi-projector setups that are stored in the calibration files created via Scalable Display Manager and set up via EasyBlend SDK. The setup can have a complex shape, such as dome. The supported version is Scalable 7.0. Warning
|
||
| Load / Remove | The buttons that allow managing the EasyBlend file (*.ol) to be used for viewport arrangement. | ||

Configuration File#
The configuration file has the *.sv extension and stores all possible data for all viewports including the synchronized ones (rendering the Syncker data), namely:
- Viewports
- Parameters
- Projections
- Color Correction
- Blend Zones
- Masks
- Wall Groups
- Configuration name
- Hotkey to open the setup window
Thus you can manage these settings either via the SpiderVision plugin interface, or manually via the configuration file.
To reconfigure the hotkey that opens the setup window, change the button to the required one in the following line:
<displays_config show_hotkey="F10" name="unknown">You can load the configuration file on start-up using the following argument:
-config_path file_name.svStart-Up Commands#
The following commands can be used on the application start-up with the SpiderVision plugin:
| -config_path |
Load the configuration file with the specified name (path) on start-up. For the file stored in the project data folder, set the relative path. For the file stored outside the project, set the absolute path. If the specified configuration file is not found or is invalid, the plugin checks for the file named default.sv in the data folder. If default.sv is available, the project runs with the default configuration; otherwise the project is run without any configuration. |
| -computer_name | Set the name of the computer. If the computer name set for the monitor matches the name of the computer (or is empty), the viewport is rendered. |
Using Outdated Configurations#
This plugin has been developed to unify the previously existing Projection plugin (AppProjection), Wall plugin (AppWall), and Syncker multi-display configuration tools.
You can import the outdated configuration files that were previously used by these plugins in your projects (they have the *.cfg extension) by selecting File -> Import in the menu.
Adjust the imported configuration if necessary, and save it as a SpiderVision configuration file (*.sv).
The information on this page is valid for UNIGINE 2.20 SDK.