Importing Height Map from Houdini

Export Settings#
Dimensions#
When exporting a heightmap from Houdini, pay attention to the following settings.
In the HeightField node:
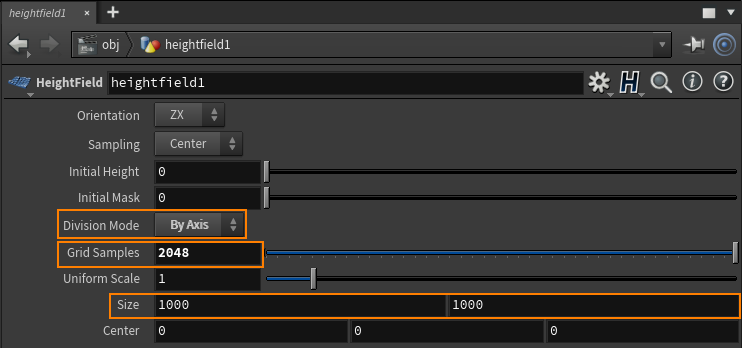
- Recommended Division Mode is By Axis. It allows easily setting the traditional size of the texture (power of two) to be exported.
- Grid Samples — texture size in pixels.
- Size defines the terrain size in meters.
In the HeightField Output node:
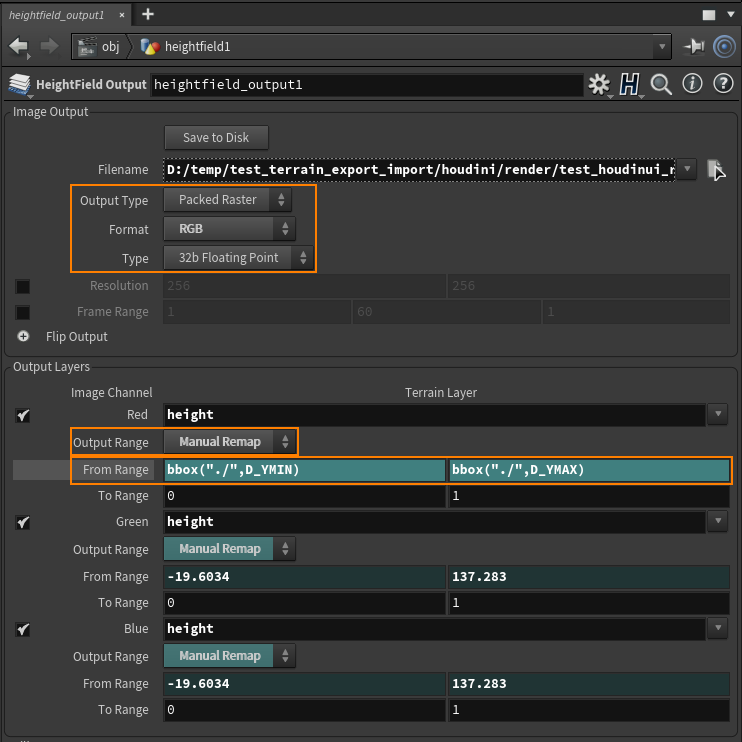
- Output type: Packed Raster
- Format: RGB (to make possible further editing in Photoshop, if required)
- Type: 16b or 32b Floating Point depending on your terrain
- Output Range:
- For unnormalized heightmap — No Remapping
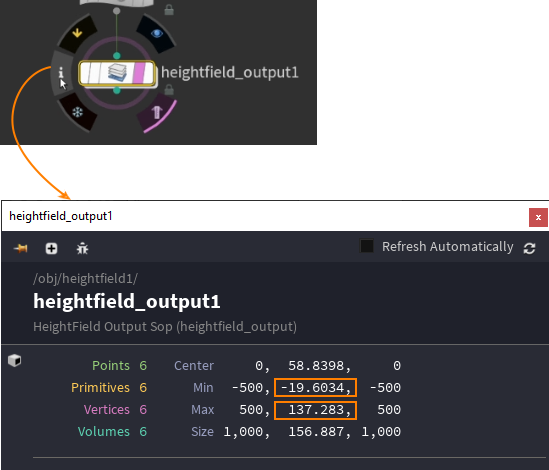
- For normalized heightmap — Manual Remap, and define the range using the expressions bbox (“./”, D_YMIN) and bbox (“./”, D_YMAX) to calculate the Min and Max height automatically, or take this data from the node info:
Tiling#
For large-scale terrains (more than 8K), export in tiles is recommended, this helps to avoid RAM limitations, especially when using 32 bit textures. The minimum recommended tile size is 1024 to avoid visual tiling artifacts. To do that, in the export settings for the heightmap, enable Divide into tiled maps, set the preferable Tile Size and select XY tile as the File Naming method:

Export Format#
When exporting the terrain, select the suitable export format. UNIGINE allows importing 8, 16, and 32-bit heightmaps.
Importing#
The exported heightmap is imported to UNIGINE as follows. In the Landscape Layer Map:
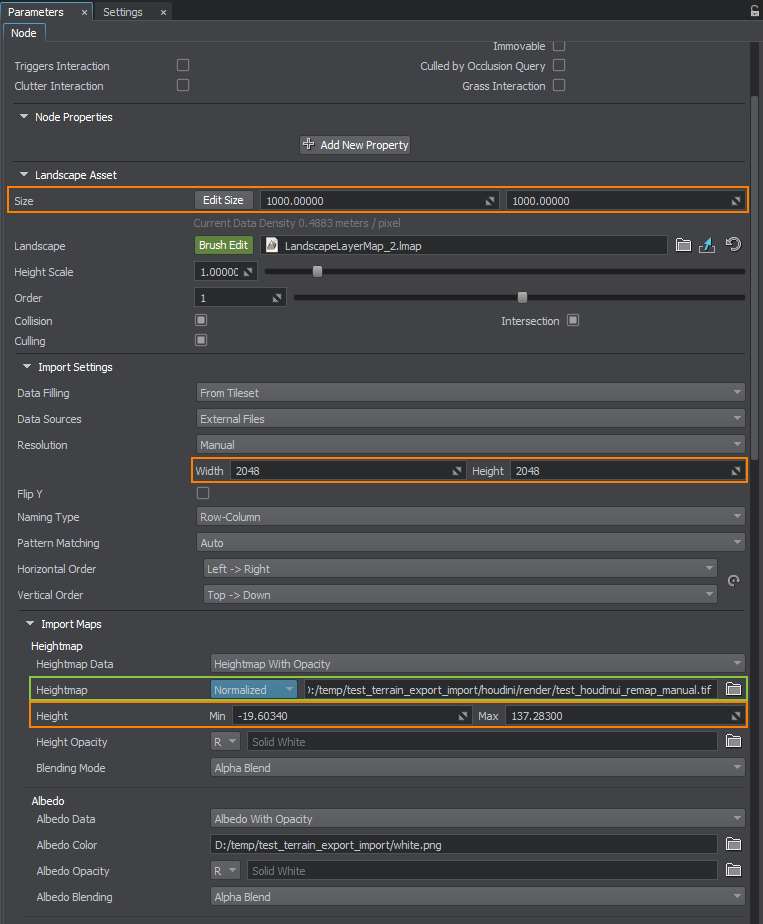
- In the Import Maps section, select the heightmap file you want to import.
- For the normalized heightmap, indicate the minimum and maximum height values.
- The unnormalized map does not require setting the height values.
- In the Landscape Asset section, set the actual size of your terrain in meters, the same as in Size in Houdini.
- In the Import settings section, check the Resolution values. They define the resolution of the heightmap. They are set automatically in most cases, but can also be adjusted, if required.
If the heightmap is represented by a tileset, set the corresponding data-filling pattern.
Click Reimport.
The information on this page is valid for UNIGINE 2.20 SDK.