Importing Terrain from Gaea 2
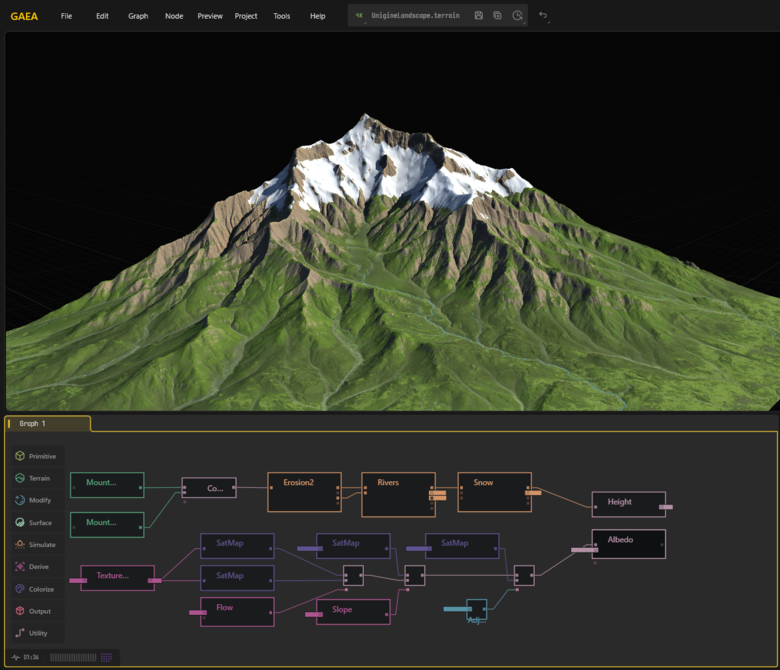
Once you've finished creating your terrain in Gaea 2, you can export it to UNIGINE.
Marking Nodes for Export#
Make sure you have nodes set up for both the heightmap (terrain elevation) and the albedo (terrain color).
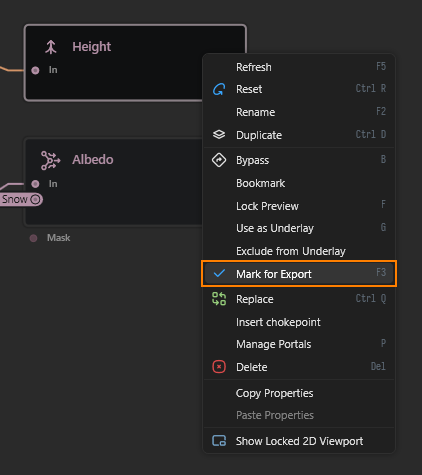
Give the nodes clear and descriptive names (e.g., “Height” and “Albedo”) so the exported files are easily identifiable. Then mark these nodes for export.
Usually, the height map is the last node where terrain modifications were made, while the albedo is the very last node in the graph, after all coloring has been applied.
Export Settings#
To begin setting up your project, open the Build Settings window from the Project menu.
Resolution and Tiling#
Set the terrain resolution. The resolution determines the number of pixels in the exported height and albedo maps and directly affects the detail level of your terrain.
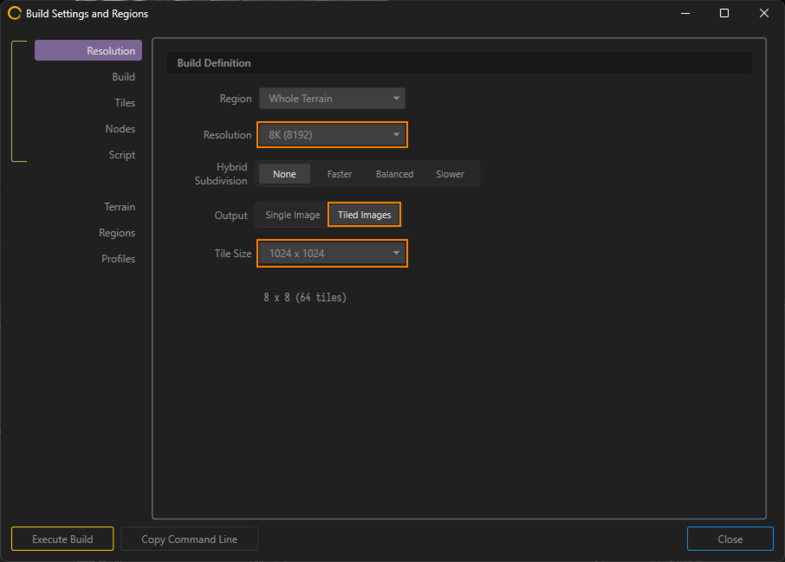
For resolutions above 8192 x 8192, exporting in tiles is recommended as this helps to avoid RAM limitations, especially when using 32-bit textures. To do that, in the Build Settings, select Tiled Images and define the Tile Size. Gaea will produce multiple tiles to cover the full terrain.
For example, exporting a terrain at 8192 x 8192 resolution with 1024px tiles will produce an 8 x 8 grid of tiles (64 tiles total).
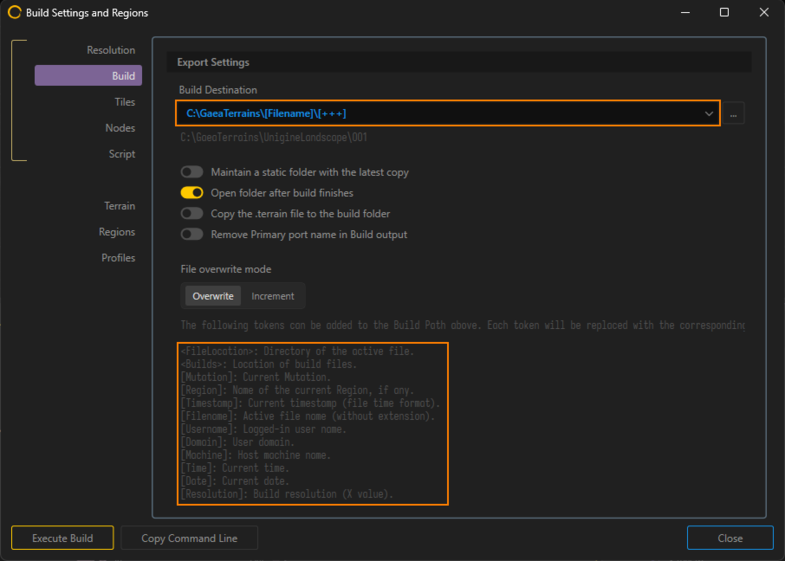
Setting the Build Folder#
Specify your build destination folder. You can use predefined tokens in the folder path to dynamically generate names based on project data.
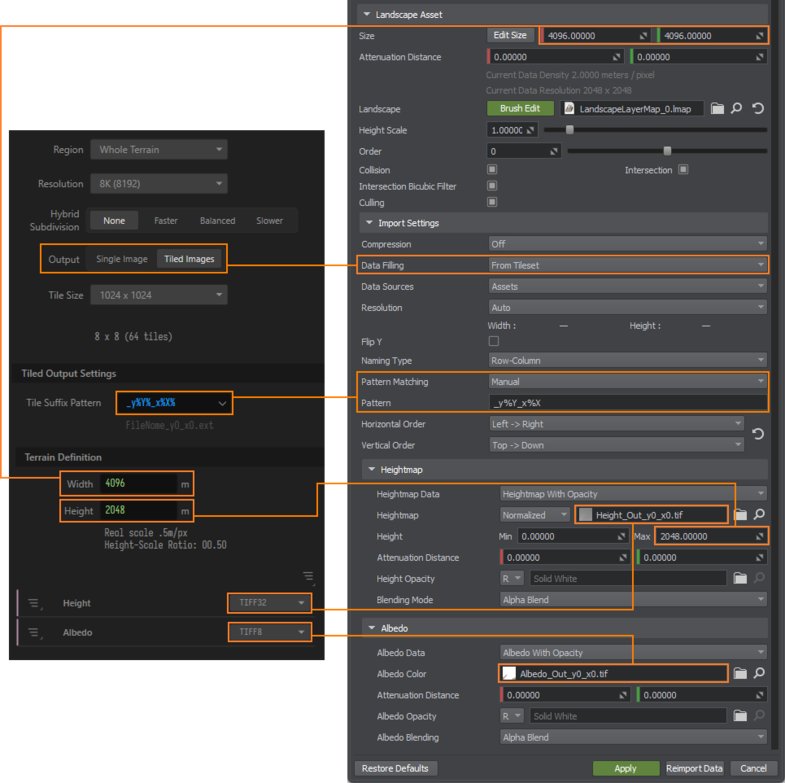
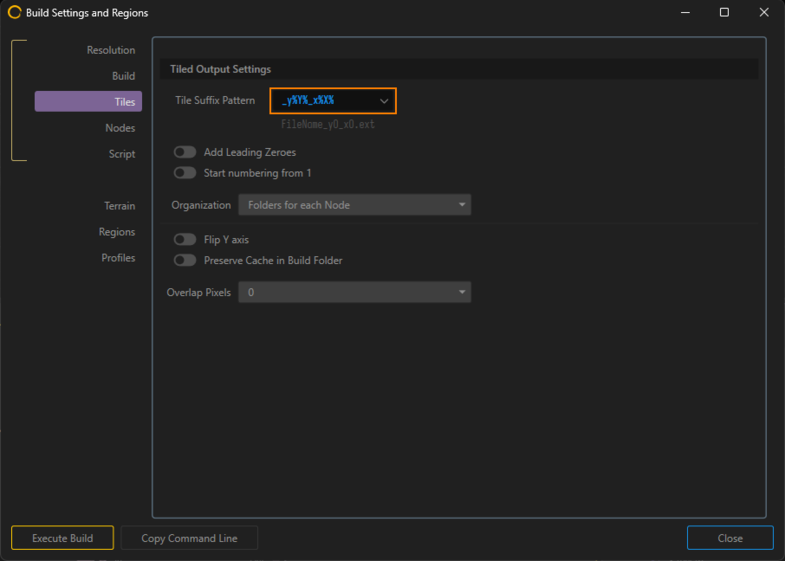
Tile Suffix Pattern#
If you're using tiling, configure the tile suffix pattern correctly.
Here's how the default patterns compare:
- "_y%Y%_x%X%" (for Gaea 2)
- "_%X_%Y" (for UNIGINE)
You can change the pattern in either Gaea 2 or UNIGINE, just make sure they match exactly to ensure correct tile loading and alignment.
Export Format#
Select the suitable export format. UNIGINE allows importing 8, 16, and 32-bit maps.
For heightmaps better use 32-bit to preserve elevation accuracy. Lower bit depths (8 or 16-bit) can bring visible artifacts, especially on large-scale terrains.

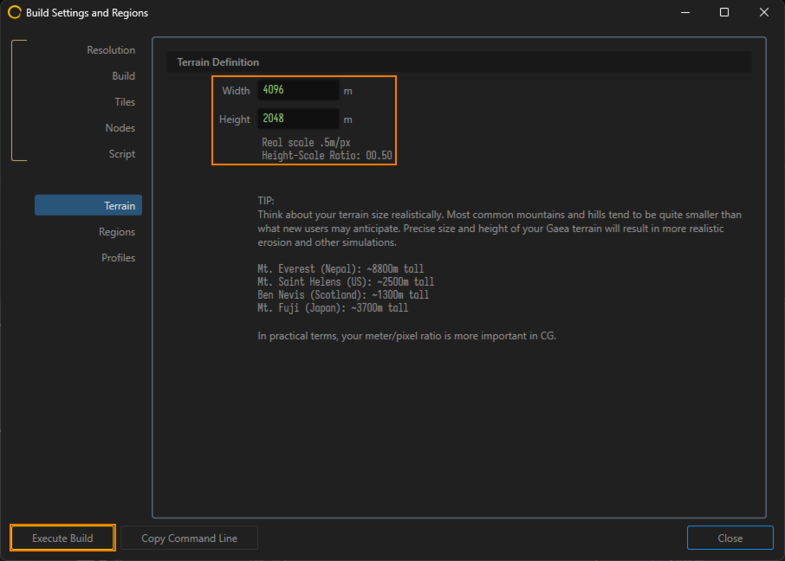
Terrain Size#
Define your terrain's physical Height (vertical range) and Width (horizontal size) in meters.
Pay attention to:
- Real Scale: Meters per pixel, defines detail density by showing how many meters are represented by each pixel. Сalculated as output resolution divided by width. (e.g. 4096 / 8192 = 0.5m/px)
- Height-Scale Ratio: Defines the vertical exaggeration of the terrain. Calculated as height divided by width. (e.g. 2048 / 4096 = 0.5)
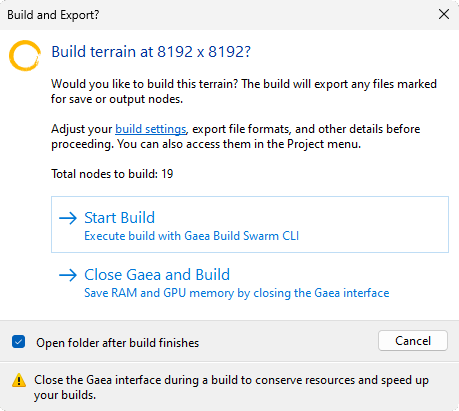
Start Build#
Once all settings are configured, click Execute Build to start the export process.
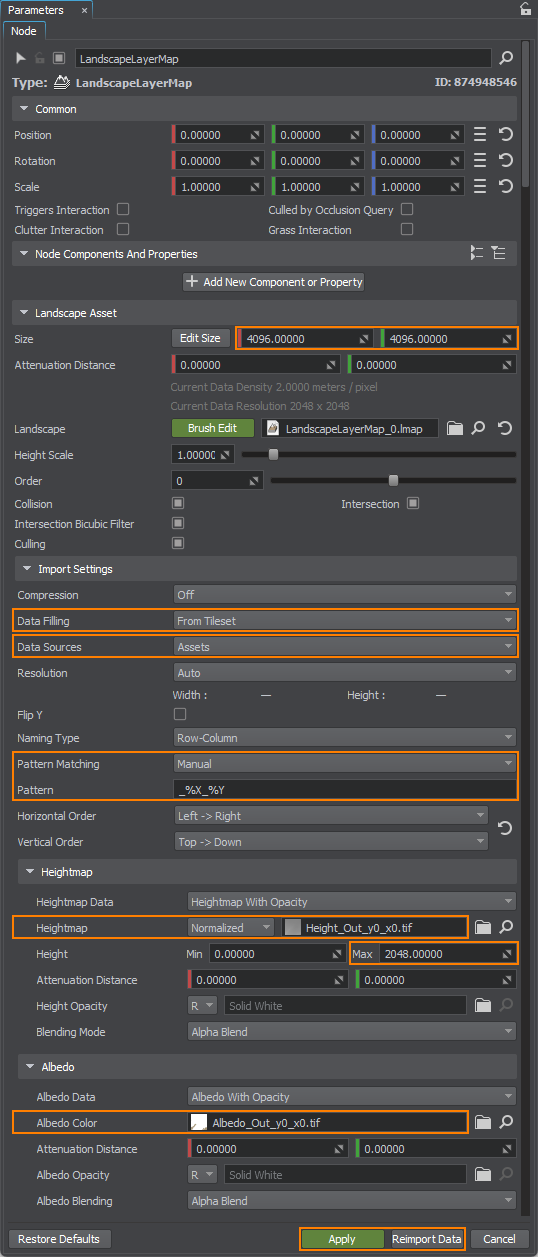
Importing#
To import the exported heightmap into UNIGINE, use the Landscape Layer Map as follows:
-
Landscape Asset
- Size - Set the size of the Landscape terrain to match the size specified in the Gaea 2 export settings
-
Import Settings
- Data Filling - Choose From Tileset
- Data Sources - You can use either External Files or Assets. For better efficiency and faster loading times, it's recommended to import textures as assets
-
Heightmap
- Heightmap - Select the first tile of your heightmap (or the only one, if you didn't use tiling in Gaea 2)
- Height - Set the Height value to match the one specified in your Gaea 2 export settings.
-
Albedo
- Albedo Color - Select the first tile of your albedo map (or the only one, if you didn't use tiling in Gaea 2)
Click Apply and then Reimport Data to load the terrain into your world.

The information on this page is valid for UNIGINE 2.20 SDK.