纹理编辑器
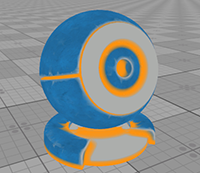
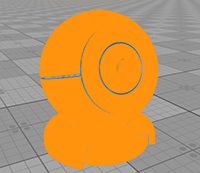
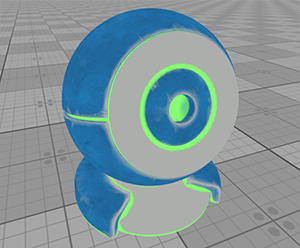
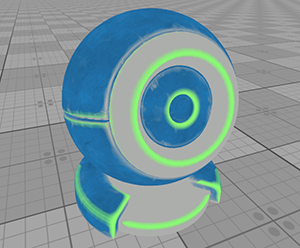
Texture Editor allows painting textures of the materials applied to objects directly in the scene. It is mainly used for painting masks, but also helps editing the existing textures: adding details or fixing mistakes. Moreover, the Texture Editor allows creating a new surface custom texture and paint it from scratch.纹理编辑器允许直接在场景中绘制应用于对象的材质纹理。它主要用于绘制蒙版,但也有助于编辑现有纹理:添加细节或修复错误。此外,纹理编辑器允许创建一个新的表面自定义纹理并从头开始绘制它。
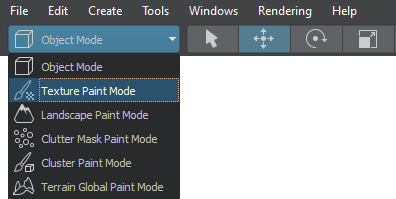
The Texture Editor is available when the Texture Paint Mode is selected on the toolbar:当在工具栏上选择Texture Paint Mode时,纹理编辑器可用:
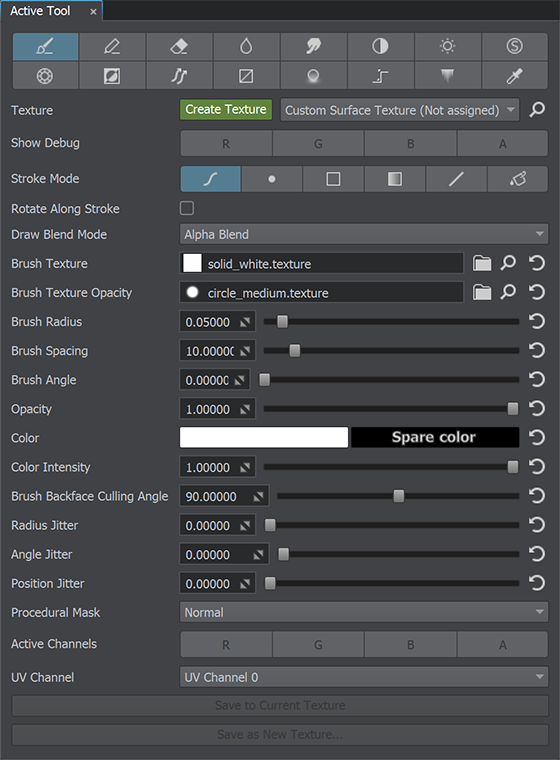
The Active Tool window provides access to the tools of the Texture Editor:Active Tool窗口提供了对纹理编辑器工具的访问:
Painting Texture with Texture Editor用纹理编辑器绘制纹理#
Painting Existing Texture绘制现有纹理#
To edit a texture via the Texture Editor, do the following:要通过纹理编辑器编辑纹理,请执行以下操作:
- Select an object, a texture of which should be edited.选择一个对象,其纹理应该被编辑。
-
In the Texture field of the Texture Editor, choose the required texture in the drop-down list.在纹理编辑器的Texture字段中,在下拉列表中选择所需的纹理。

-
Paint directly on the object using the available tools.使用可用的工具直接在对象上绘制。
注意When painting, the original asset is edited.绘画时,原始资源被编辑。
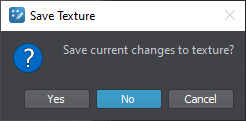
To undo all changes, select another object in the scene and decline saving changes in the window that opens:要撤销所有更改,请在场景中选择另一个对象,并在打开的窗口中拒绝保存更改:
Painting New Surface Custom Texture绘制新的表面自定义纹理#
The Texture Editor allows creating a surface custom textures for static meshes.纹理编辑器允许为静态网格创建一个表面自定义纹理。
To create such texture, do the following:要创建这样的纹理,请执行以下操作:
- Select a surface of a static mesh for which you want to create a texture.选择要为其创建纹理的静态网格的表面。
-
In the Texture field of the Texture Editor, click Create Texture.在纹理编辑器的Texture字段中,单击Create Texture。

In the Texture Creator window that opens, specify the Size, Channels and Depth for the new texture and click OK.在打开的Texture Creator窗口中,为新纹理指定Size、Channels和Depth,然后单击OK。
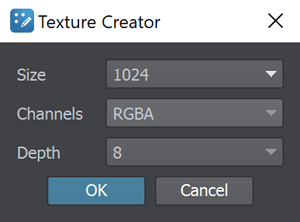
Then specify the texture name and save it.然后指定纹理名称并保存它。
The new texture will be automatically applied to the selected surface. Go to the Surface Custom Texture section of the Parameters window to check it.新纹理将自动应用于所选表面。转到Parameters窗口的Surface Custom Texture部分进行检查。
- In the Texture field of the Texture Editor, choose Custom Surface Texture in the drop-down list.在纹理编辑器的Texture字段中,在下拉列表中选择Custom Surface Texture。
Paint directly on the surface using the available tools.使用可用的工具直接在表面上绘制。
注意When painting, the original asset is edited.绘画时,原始资源被编辑。
Saving Changes保存更改#
To save changes, choose one of the following options:要保存更改,请选择以下选项之一:

If you choose Save as New Texture..., specify a name and a texture format in the dialog window that opens.如果选择Save as New Texture...,请在打开的对话框窗口中指定名称和纹理格式。
Tools工具#
The following tools are available:已准备的工具如下:
 Brush tool (B hotkey) allows painting arbitrary shapes on the texture.
 Brush 工具(B热键)允许在纹理上绘制任意形状。
 Pencil tool allows painting hard-edged texels on the texture.
 Pencil 工具允许在纹理上绘制硬边纹理。
 Eraser tool (E hotkey) removes changes.
 Eraser 工具(E热键)删除更改。
 Smooth tool (V hotkey) blurs texels of the texture.
 Smooth 工具(V热键)模糊纹理的纹理。
 Smudge tool smudges the texture.
 Smudge 工具涂抹纹理。
 Contrast tool changes the texture contrast.
 Contrast 工具更改纹理对比度。
 Brightness tool changes the texture brightness.
 Brightness 工具改变纹理亮度。
 Saturation tool changes intesity of the texture colors.
 Saturation 工具改变纹理颜色的强度。
 Replace Color tool replaces all texture colors with the specified one.
 Replace Color 工具用指定的颜色替换所有纹理颜色。
 Invert tool inverts texture colors.
 Invert 工具反转纹理颜色。
 Draw Flowmap tool allows painting a flow map.
 Draw Flowmap 工具允许绘制流程图。
 Draw Mesh Data tool allows drawing textures that store mesh data (positions, mesh normals).
 Draw Mesh Data 工具允许绘制存储网格数据(位置,网格法线)的纹理。
 Ambient Occlusion tool allows drawing an ambient occlusion texture.
 Ambient Occlusion 工具允许绘制环境遮挡纹理。
 Curvature tool allows painting a curvature texture.
 Curvature 工具允许绘制曲率纹理。
 Leaks tool allows painting leaks.
 Leaks 工具允许绘画流痕。
 Color Picker tool allows picking a texture color.
 Color Picker 工具允许选择纹理颜色。
Common Settings常见的设置#
Depending on the selected tool, a set of available settings varies. However, there are settings common for most of the tools:根据所选工具的不同,一组可用的设置会有所不同。然而,大多数工具都有一些共同的设置:
| Texture | Texture to be edited.要编辑的纹理。 | ||||||||||
|---|---|---|---|---|---|---|---|---|---|---|---|
| Show Debug | Show per-channel changes.显示每个频道的变化。 | ||||||||||
| Stroke Mode |
笔画模式:
注意
The set of tool settings changes depending on the Stroke Mode. See the Stroke Mode Specific Settings chapter for details.工具设置集的变化取决于Stroke Mode。具体请参见笔画模式特定设置章节。 |
||||||||||
| Rotate Along Stroke |
Orients the brush marks to follow the stroke direction.调整笔刷标记以遵循笔画方向。
|
||||||||||
| Brush Texture |
Texture that defines shape of the brush.定义笔刷形状的纹理。
|
||||||||||
| Brush Texture Opacity | 1-channeled opacity texture that controls application of the Brush Texture. White areas of the texture make the corresponding areas of the Brush Texture fully visible, black ones make them fully transparent.1通道不透明度纹理,控制画笔纹理的应用。纹理的白色区域使画笔纹理的相应区域完全可见,黑色区域使它们完全透明。 | ||||||||||
| Brush Radius |
Radius of the brush.画笔的半径。 注意
You can change the brush radius by scrolling the mouse wheel.您可以通过滚动鼠标滚轮来更改笔刷半径。
|
||||||||||
| Brush Spacing |
Distance between the brush marks in the stroke, in percent. 0 means the brush mark is drawn each frame (i.e. no spaces).笔画中笔画痕迹之间的距离,以百分数表示。0表示每帧绘制画笔标记(即没有空格)。
|
||||||||||
| Brush Angle |
Angle of the brush marks, in degrees.刷痕的角度,以度为单位。
|
||||||||||
| Opacity |
Strength of the brush. Higher values create more opaque bush strokes. Multiple applications of the brush with low opacity to the same place create a more opaque image. It can be used for drawing smooth gradients.笔触的力度。更高的值会产生更不透明的笔触。在同一位置多次使用低不透明度的笔刷创建一个更不透明的图像。它可以用来绘制平滑的渐变。
|
||||||||||
| Color | Color of the brush. You can specify the Main and the Spare color and switch them by pressing X when painting the texture. To pick a texture color, press C or click the Pick Screen Color button in the Select Color window and sample the color.画笔的颜色。您可以指定Main和Spare颜色,并在绘制纹理时按X来切换它们。要选择纹理颜色,请按C或单击Select Color窗口中的Pick Screen Color按钮并对颜色进行采样。 | ||||||||||
| Color Intensity |
Intensity of the brush color. It allows changing shades of the same color: the lower the value, the darker the result. 笔刷颜色的强度。它允许改变相同颜色的深浅: 值越低,结果越深。
|
||||||||||
| Brush Backface Culling Angle |
Normal angle at which the surface is ignored by the brush. It allows you to avoid painting across certain surfaces.画笔忽略表面的法线角度。它可以让您避免在某些表面上作画。
|
||||||||||
| Radius Jitter |
Random radius of the brush marks in the stroke. 0 means no randomness.笔画中画笔痕迹的随机半径。0表示没有随机性。
|
||||||||||
| Angle Jitter |
Random rotation angle of the brush marks in the stroke (in degrees). 0 means no randomness.笔画中刷痕的随机旋转角度(以度为单位)。0表示没有随机性。
|
||||||||||
| Position Jitter |
Random position offset of the brush marks in the stroke (in units). 0 means no randomness.笔画中笔刷标记的随机位置偏移(单位)。0表示没有随机性。
|
||||||||||
| Procedural Mask |
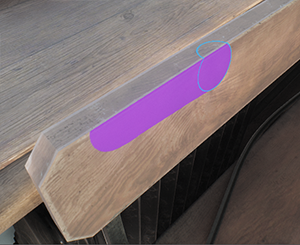
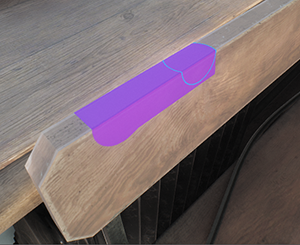
Limits brush application to a certain area:将刷子的使用范围限制在一定范围内;
Painting the cavity/convex area can be useful when, for example, you need to paint a cavity/convexity mask for a huge building.例如,当您需要为一个巨大的建筑绘制一个凹面/凸面蒙版时,绘制凹面/凸面区域是很有用的。 |
||||||||||
| Active Channels | Channels that are modified when painting the texture.绘制纹理时修改的通道。 | ||||||||||
| UV Channel |
UV channel that is used when painting the texture.在绘制纹理时使用的UV通道。
There are no specific requirements for the number of UV channels — you can have either one or both. Just make sure to choose the correct channel when painting: you should know in advance which UV channel the texture will use. For example, if a mask for blending materials uses 2nd UV channel, you will choose UV Channel 1 when editing this mask.对于UV通道的数量没有特定的要求;您可以有一个或两个。只要确保在绘画时选择正确的通道:您应该提前知道纹理将使用哪个UV通道。例如,如果用于混合材质的蒙版使用第二个UV通道,则在编辑此蒙版时将选择UV Channel 1。 注意
Painting the texture using both channels will produce the incorrect result.使用两个通道绘制纹理会产生不正确的结果。 By default, textures use the 1st UV channel. If necessary, you can change it in the material via the Material Editor.默认情况下,纹理使用第一个UV通道。如果需要,您可以通过材质编辑器在材质中更改它。 If you want to use the 2nd UV channel when painting, but it is empty, you can perform automatic unwrapping for this channel when importing the model into UNIGINE.如果您想在绘画时使用第二个UV通道,但它是空的,您可以在将模型导入UNIGINE时执行自动展开该通道。 |
Stroke Mode Specific Settings笔画模式特定设置#
The Rectangle and Linear Gradient stroke modes have additional specific settings described below.Rectangle和Linear Gradient笔划模式具有下面描述的其他特定设置。
| Depth Limit | Depth limit for filling areas of the object that are not visible in the current viewport (i.e. occluded by other objects).填充当前视口中不可见的物体区域的深度限制(即被其他物体遮挡)。 | ||||
|---|---|---|---|---|---|
| Depth Limit Gradient Length | Size of the gradient along the edges of the filled area.沿填充区域边缘的渐变大小。 | ||||
| Rectangle Texture |
Texture that fills the selected rectangular area. Available for the Rectangle mode only.填充所选矩形区域的纹理。仅对Rectangle模式可用。
|
||||
| Rectangle Texture Opacity | 1-channeled opacity texture that controls application of the Rectangle Texture. White areas of the texture make the corresponding areas of the Rectangle Texture fully visible, black ones make them fully transparent.控制矩形纹理应用的1通道不透明度纹理。纹理的白色区域使矩形纹理的相应区域完全可见,黑色区域使其完全透明。 |
本页面上的信息适用于 UNIGINE 2.19.1 SDK.

 Brush — draw a stroke of brush marks.
 Stamp — draw a sigle brush mark.
 Lasso — fill the selected rectangular area with a specified color. By default, areas of the object that are visible in the current viewport are filled.
 Gradient — draw a linear gradient.
 Line — draw a line. It can be used, for example, to align edges of a mask.
 Fill — fill the texture with a specified color.