Настройка проекций
Syncker provides the projection setup mode that allows you to create any setup for your project by adding and adjusting views to be displayed by Master and Slave PCs. For each view you can use a display or projector. After creating views you can set up required image warping and edge blending parameters for each of them. All changes will be transferred over the network and applied automatically. Syncker предоставляет режим настройки проекции, который позволяет вам создавать любые настройки для вашего проекта, добавляя и настраивая виды, которые будут отображаться на ПК Master и Slave. Для каждого вида вы можете использовать дисплей или же проектор . После создания представлений вы можете настраивать требуемые параметры деформации изображения и смешивания краев для каждого из них. Все изменения будут переданы по сети и применены автоматически.
To enable the setup mode, run the syncker_setup console command from Master or Slave as follows:Чтобы включить режим настройки, запустите консольную команду syncker_setup из Master или Slave следующим образом:
syncker_setup 1The setup mode can also be enabled via the System Menu:Режим настройки также можно включить через System Menu:
- Open the System Menu by pressing Esc.Откройте системное меню, нажав Esc.
-
Go to the Plugins tab and enable the Show projections configuration option in the Syncker group:Перейдите на вкладку Plugins и включите опцию Show projections configuration в группе Syncker:
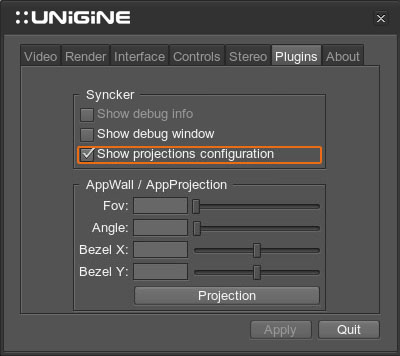
The setup mode will become available:Станет доступен режим настройки:
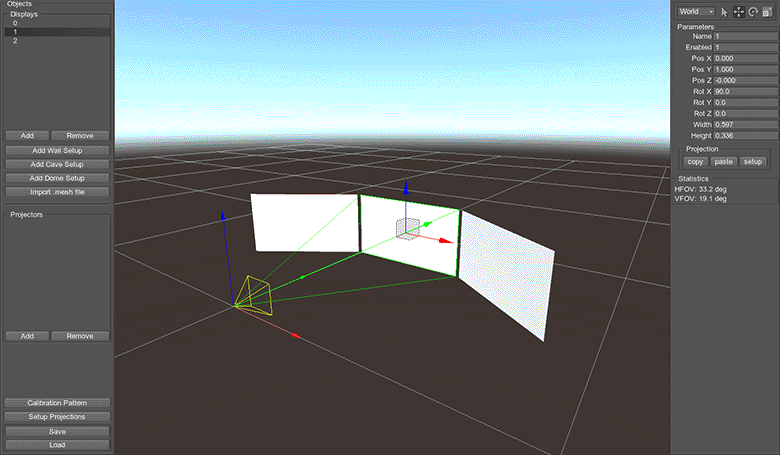
To navigate the scene, use the way like that of the Editor Scene navigation.Навигации по сцене осуществляется аналогично навигации по сценам в редакторе.
If a display or projector is selected, you can focus the camera on it by pressing F key.Если выбран дисплей или проектор, вы можете сфокусировать камеру на нем, нажав кнопку F.
The viewer is positioned in the center of the scene and corresponds to the main master camera.Зритель располагается в центре сцены и соответствует главная Master-камера .
To set up a projection configuration, you should perform the following steps:Чтобы настроить конфигурацию проекции, необходимо выполнить следующие действия:
- Add the required number of displays or projectors.Добавьте необходимое количество дисплеев или проекторов.
- Form the projection setup by adjusting the required parameters of the displays or projectors.Сформируйте настройку проекции, настроив необходимые параметры дисплеев или же проекторы .
- Click Setup Projections and adjust the required projections.Щелкните Setup Projections и скорректируйте требуемые проекции .
Configuration RequirementsТребования к конфигурации#
Screen/projection configuration for Syncker should meet the following requirements:Конфигурация экранов / проекций для Syncker должна соответствовать следующим требованиям:
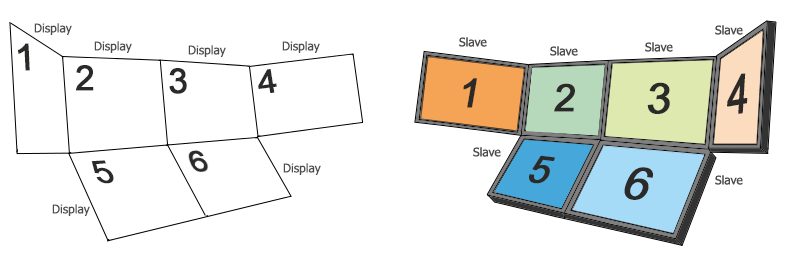
- Each display in the configuration should correspond to one of the monitors/projectors.Каждый дисплей в конфигурации должен соответствовать одному из мониторов / проекторов.
- Position and orientation of each display/projector must be relative to the main master camera. The closer the monitor is to the viewer, the higher is the FOV value.Положение и ориентация каждого дисплея / проектора должны быть относительно главной Master-камеры . Чем ближе монитор к зрителю, тем выше значение FOV.
Create Displays and ProjectorsСоздание дисплеев и проекторов#
If you are going to use a multi-monitor setup, you need to add the required number of displays or projectors and adjust its transformation and size.Если вы собираетесь использовать схему с несколькими мониторами , вам необходимо добавить нужное количество дисплеев или проекторов и настроить их трансформации и размеры.
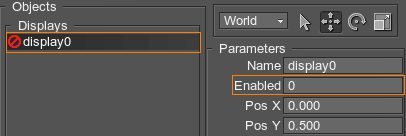
To add a new display, press the Add button on the Objects panel. The default display named display0 will be added. Each display corresponds to one of the monitors/projectors.Чтобы добавить новый дисплей, нажмите кнопку Add на панели Objects. Будет добавлен дисплей по умолчанию с именем display0. Каждый дисплей соответствует одному из мониторов / проекторов.
It is also possible to generate automatic virtual environment setups.Также возможна автоматическая генерация настроек виртуальной среды.
Wall SetupСхема с настенным креплением экранов#
The Wall preset is useful to generate a multi-monitor setup of displays formed as an array.Предварительная установка стены полезна для создания конфигурации с несколькими мониторами, состоящих из дисплеев, сформированных в виде массива.
Choose Add Wall Setup to open the Wall Generator window.Выберите Add Wall Setup, чтобы открыть окно Wall Generator.
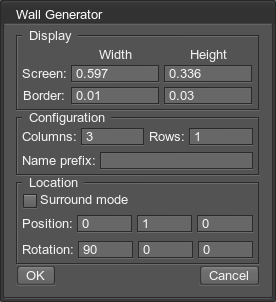
The Wall Generator has the following parameters:Генератор стен имеет следующие параметры:
| Screen Width, Screen Height | Size of each display in setup.Размер каждого дисплея в настройке. |
|---|---|
| Border Width, Border Height | Distance between displays along the axis corresponding to displays' width and height.Расстояние между дисплеями по оси, соответствующее ширине и высоте дисплеев. |
| Columns | Number of columns.Число столбцов. |
| Rows | Number of rows.Количество рядов. |
| Name Prefix | Name prefix for each display in setup.Префикс имени для каждого дисплея в настройке. |
| Surround Mode | Defines whether displays are placed on a flat surface or on a sphere, while being oriented to the viewer.Определяет, размещаются ли дисплеи на плоской поверхности или на сфере, обращенные к зрителю. |
| Position |
Position offset for the group of displays.Смещение позиции для группы дисплеев. Примечание
This parameter is available if Surround Mode is disabled.Этот параметр доступен, если Surround Mode отключен. |
| Radius |
Radius of the sphere which the displays should be placed on.Радиус сферы, на которой должны быть размещены дисплеи. Примечание
This parameter is available if Surround Mode is enabled.Этот параметр доступен, если включен Surround Mode. |
| Rotation | Rotation of the group of displays along all axes.Вращение группы дисплеев по всем осям. |
Click OK to generate setup.Щелкните OK, чтобы произвести настройку.
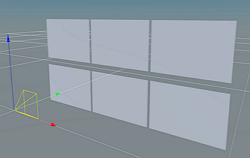
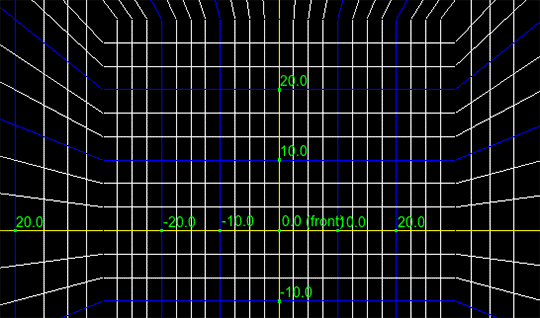
Flat modeПлоский режим
|
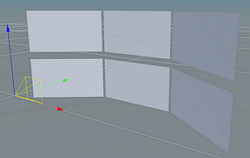
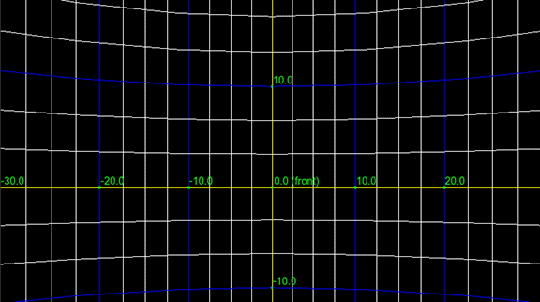
Surround modeРежим объемного звучания
|
CAVE SetupНастройка CAVE-системы#
The CAVE (Cave Automatic Virtual Environment) multi-projector setup generation is supported:Поддерживается генерация настройки мультипроектора CAVE (Cave Automatic Virtual Environment):
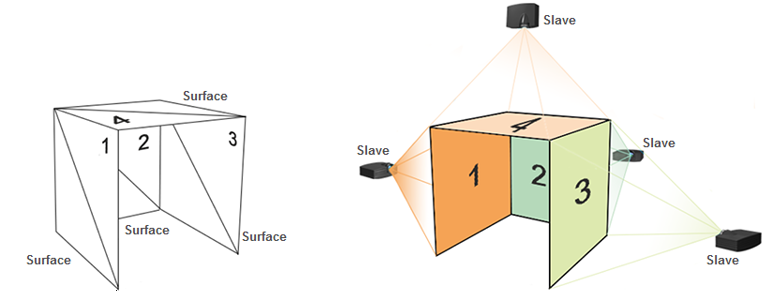
Choose Add Cave Setup to open the Cave Generator window.Выберите Add Cave Setup, чтобы открыть окно Cave Generator.
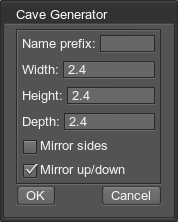
Cave Generator has the following parameters:Cave Generator имеет следующие параметры:
| Name Prefix | Name prefix for each display in setup.Префикс имени для каждого дисплея в настройке. |
|---|---|
| Width | Width of the whole setup.Ширина всей установки. |
| Height | Height of the whole setup.Высота всей установки. |
| Depth | Depth of the whole setup.Глубина всей установки. |
| Mirror Sides | Defines whether side displays should be flipped horizontally.Определяет, следует ли переворачивать боковые дисплеи по горизонтали. |
| Mirror Up/Down | Defines whether up and down displays should be flipped horizontally.Определяет, нужно ли переворачивать дисплеи вверх и вниз по горизонтали. |
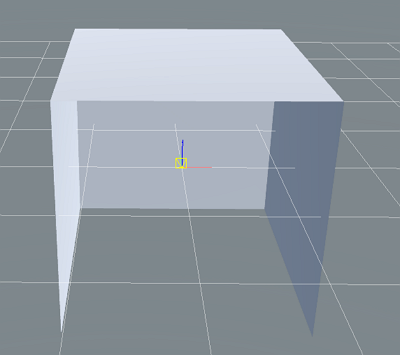
Click OK to generate setup.Щелкните OK, чтобы произвести настройку.
Import MeshИмпорт сетки#
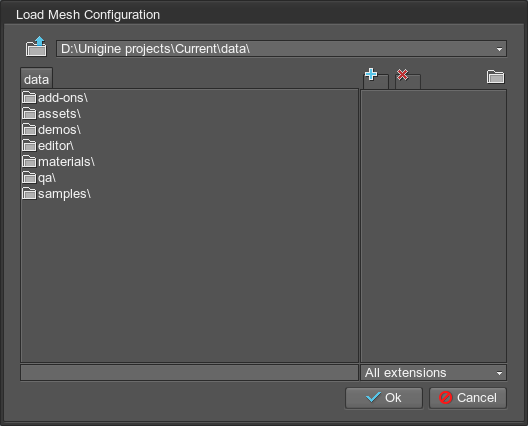
Configurations from the previous versions of the Syncker plugin are also supported. To import configuration in the *.mesh format, choose Import Mesh on the Objects panel and then select the desired file in the Load Mesh Configuration dialog window.Также поддерживаются конфигурации из предыдущих версий плагина Syncker. Чтобы импортировать конфигурацию в формате *.mesh, выберите Import Mesh на панели Objects, а затем выберите нужный файл в диалоговом окне Load Mesh Configuration.
Configuring Displays and ProjectorsНастройка дисплеев и проекторов#
Selecting and Positioning DisplaysВыбор и расположение дисплеев#
To select a single display, choose  on the toolbar or by pressing Q on the keyboard and perform left mouse click on the display. You can also select a display by using the Objects panel.Чтобы выбрать один дисплей, выберите
  на панели инструментов или нажмите Q на клавиатуре и щелкните левой кнопкой мыши по дисплею. Вы также можете выбрать отображение с помощью панели Objects.
The Ctrl key can be used for multi-selecting displays either in the list or in the view window. The Shift key can be used for immediate selection of more than two items in the list.Клавишу Ctrl можно использовать для множественного выбора дисплеев в списке или в окне просмотра. Клавишу Shift можно использовать для немедленного выбора более двух элементов в списке.
Use the transform tools to manually transform a display or several displays the same way as in UnigineEditor.Используйте инструменты преобразования, чтобы вручную преобразовать дисплей или несколько дисплеев так же, как в UnigineEditor.

Use the pivot tool to choose between the pivot modes: World or Local, so you can transform displays just the same way as in UnigineEditor.Используйте инструмент поворота, чтобы выбрать режим поворота : World или Local, поэтому вы можете преобразовывать дисплеи точно так же, как в UnigineEditor.

Display ParametersПараметры отображения#
To configure the selected display, adjust parameters on the Parameters panel:Чтобы настроить выбранный дисплей, настройте параметры на панели Parameters:
Positioning and Configuring ProjectorsРазмещение и настройка проекторов#
Projectors are created by using the Add button in the Projectors window.Проекторы создаются с помощью кнопки Add в окне Projectors.
To manipulate a projector, select it from the Projectors list and move the required manipulator in the viewpoint.Чтобы управлять проектором, выберите его из списка Projectors и переместите требуемый манипулятор в точку обзора.
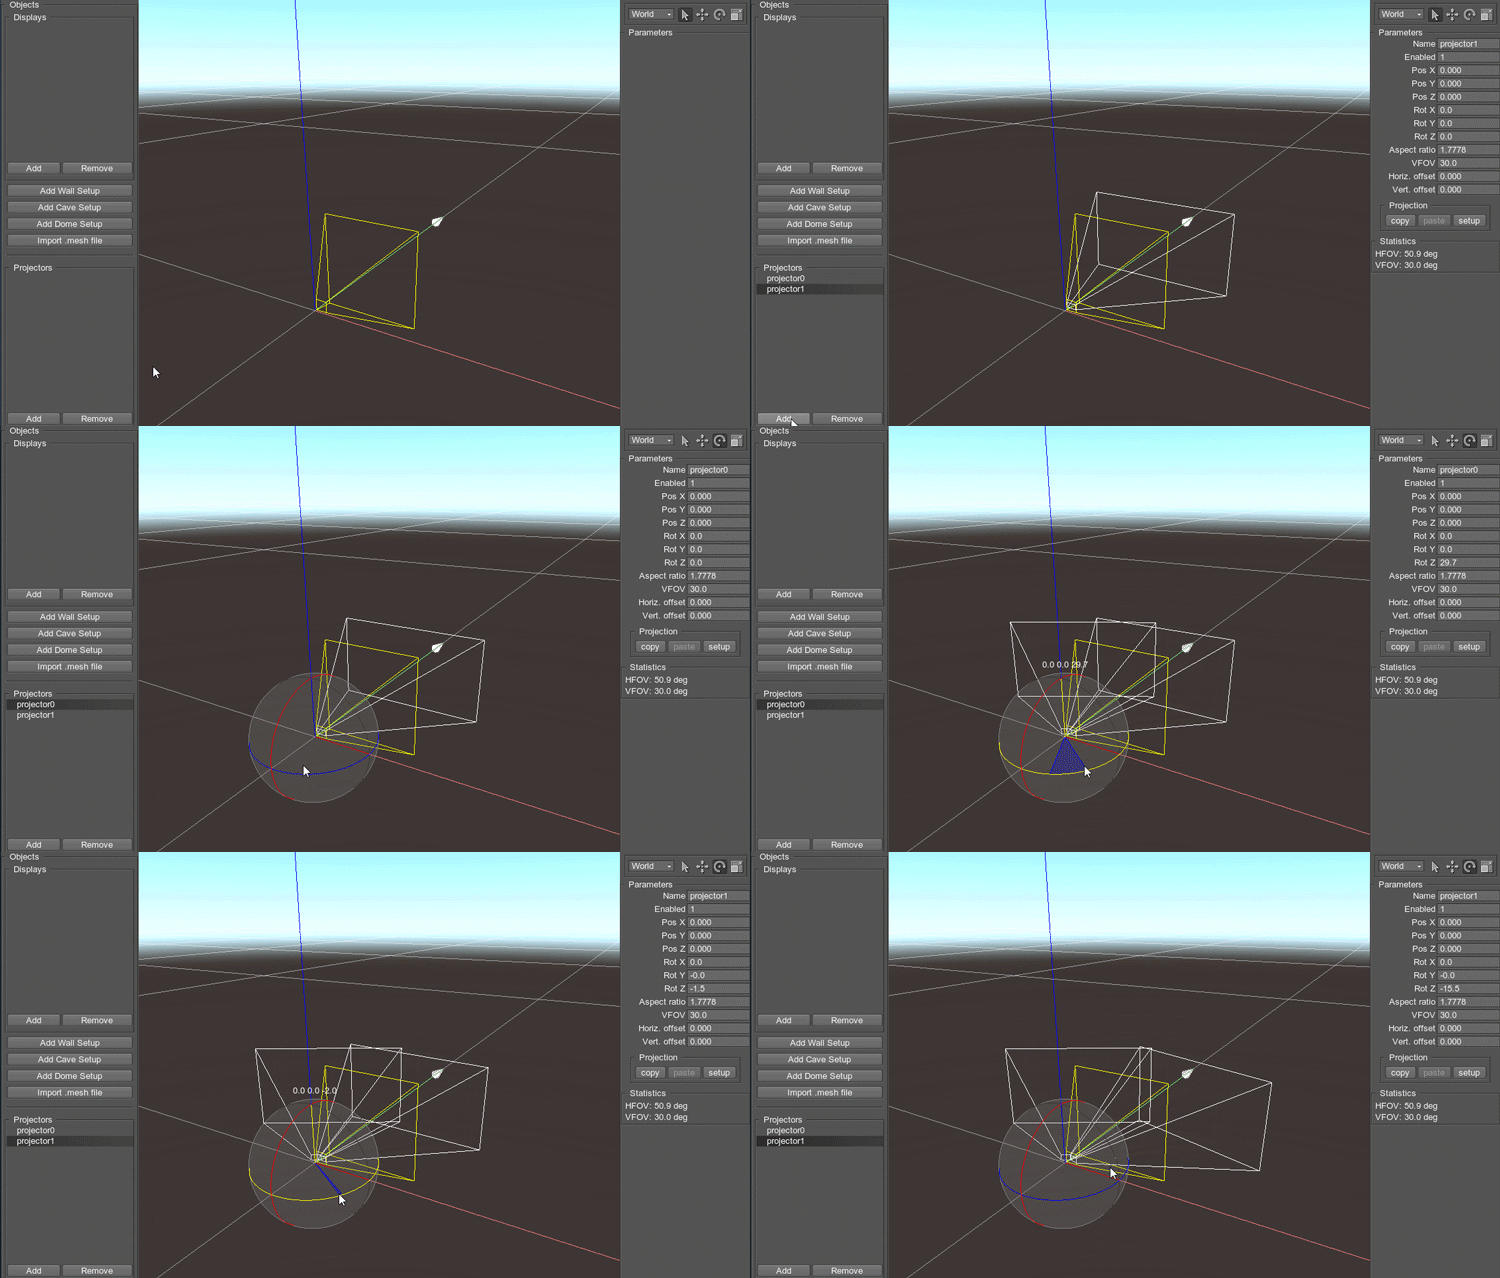
In addition to the parameters available for displays, projectors have the following parameters:Помимо параметров, доступных для дисплеев, проекторы имеют следующие параметры:
Display ParametersПараметры дисплея#
To delete a display, press the Remove button or Delete key.Чтобы удалить отображение, нажмите кнопку Remove или Delete.
Setting Up ProjectionsНастройка проекций#
A projection for the display or projector is adjusted via the Projection Configurator window that is opened by pressing the Setup Projections button on the Objects panel:Проекция для дисплея или проектора настраивается через окно Projection Configurator, которое открывается нажатием кнопки Setup Projections на панели Objects:
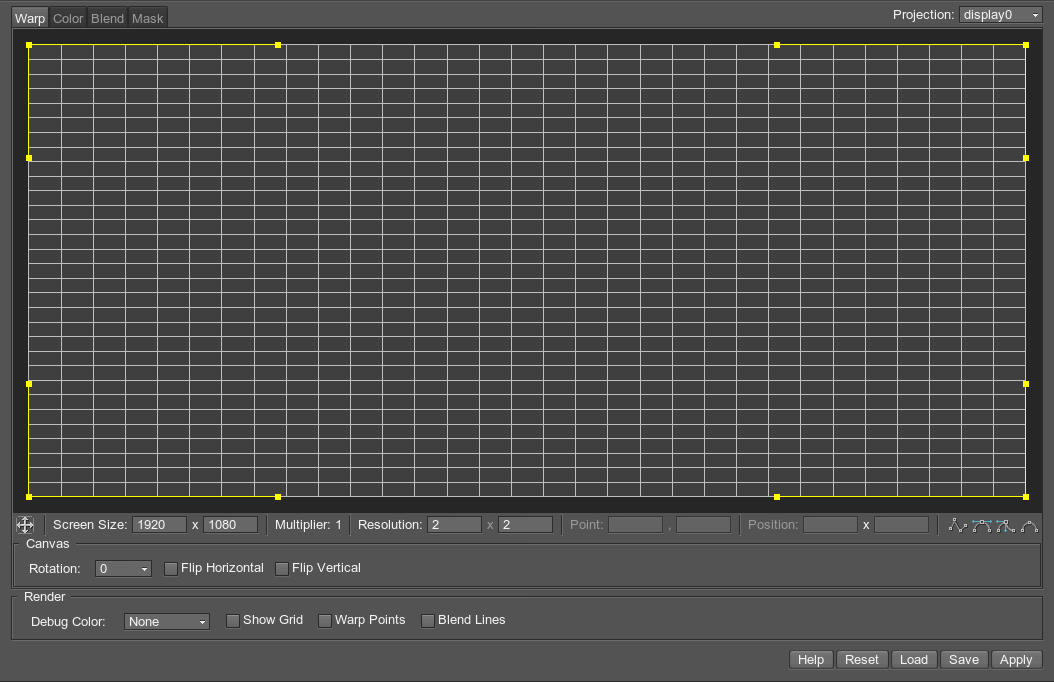
- Any changes made via this interface are immediately applied to the specified projection.Любые изменения, внесенные через этот интерфейс, немедленно применяются к указанной проекции.
- For displays, the projection is set up relative to the viewer's position (as it is fixed).Для дисплеев проекция настраивается относительно позиции зрителя (как фиксированная).
Use the following buttons in the Projection group on the Parameters panel to:Используйте следующие кнопки в группе Projection на панели Parameters, чтобы:
- Copy the projection configuration of the selected display.Скопируйте конфигурацию проекции выбранного дисплея.
- Paste the projection configuration to the selected display(-s).Вставьте конфигурацию проекции на выбранный дисплей (-и).
- Setup the projection configuration of the selected display.Настройте конфигурацию проецирования выбранного дисплея.

A projection can be saved to the .proj file: each file stores a single projection. All projections used in the configuration are saved to the .sync file.Проекцию можно сохранить в файл .proj: в каждом файле хранится отдельная проекция. Все проекции, используемые в конфигурации, сохраняются в файле .sync.
CalibrationКалибровка#
The Calibration Pattern button on the Objects panel displays the Calibration Grid Setup. Using this setup, you can enable and configure the grid pattern to fit your projection shape or fill in the projection with a certain color for fine-tuning the displayed image and avoiding its distortion.Кнопка Calibration Pattern на панели Objects отображает настройку калибровочной сетки. Используя эту настройку, вы можете включить и настроить шаблон сетки в соответствии с формой вашей проекции или заполнить проекцию определенным цветом для точной настройки отображаемого изображения и предотвращения его искажения.
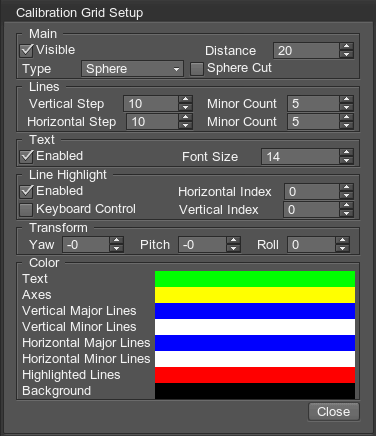
The following groups of calibration-related options are available:Доступны следующие группы параметров, связанных с калибровкой:
| Main | Control the general view of the calibration pattern.
|
|---|---|
| Lines |
Define the distance between the lines and the number of minor (auxiliary) lines.Определяет расстояние между линиями и количество второстепенных (вспомогательных) линий.
|
| Text | Toggle on and off the text on the calibration grid and define its size.Включает и выключает текст на калибровочной сетке и определяет его размер. |
| Line Highlight |
Enable highlighting of one horizontal and one vertical line. The lines are invisible, when their indices are set to zero.Включает выделение одной горизонтальной и одной вертикальной линии. Линии невидимы, если их индексы равны нулю. If Keyboard Control is enabled, you can move the vertical highlight using J and L, and the horizontal one — using I and K.Если Keyboard Control включен, вертикальное выделение можно перемещать с помощью J и L, а по горизонтали - с помощью I и K. |
| Transform | Transform the grid along the vertical, transverse, and longitudinal axes. Only the grid is transformed, the projected image is not transformed.Преобразует сетку по вертикальной, поперечной и продольной осям. Трансформируется только сетка, проецируемое изображение не трансформируется. |
| Color | Select colors for corresponding elements of the grid.Выбор цвета для соответствующих элементов сетки. |
Saving and Loading ConfigurationsСохранение и загрузка конфигураций#
After the screen/projection configuration is set up, it can be saved into a .cfg file to be loaded at any time:После настройки конфигурации экрана / проекции ее можно сохранить в файл .cfg для загрузки в любое время:
- To save the configuration, press the Save button on the Objects panel.Чтобы сохранить конфигурацию, нажмите кнопку Save на панели Objects.
- To load the configuration for editing, press the Load button on the Objects panel.Чтобы загрузить конфигурацию для редактирования, нажмите кнопку Load на панели Objects.
Информация, представленная на данной странице, актуальна для версии UNIGINE 2.18.1 SDK.

