This page has been translated automatically.
Video Tutorials
Interface
Essentials
Advanced
How To
Rendering
Professional (SIM)
UnigineEditor
Interface Overview
Version Control
Settings and Preferences
Working With Projects
Adjusting Node Parameters
Setting Up Materials
Setting Up Properties
Lighting
Sandworm
Using Editor Tools for Specific Tasks
Extending Editor Functionality
Built-in Node Types
Nodes
Objects
Effects
Decals
Light Sources
Geodetics
World Nodes
Sound Objects
Pathfinding Objects
Players
Programming
Fundamentals
Setting Up Development Environment
Usage Examples
C++
C#
UnigineScript
UUSL (Unified UNIGINE Shader Language)
Plugins
File Formats
Materials and Shaders
Rebuilding the Engine Tools
GUI
VR Development
Double Precision Coordinates
API
Animations-Related Classes
Containers
Common Functionality
Controls-Related Classes
Engine-Related Classes
Filesystem Functionality
GUI-Related Classes
Math Functionality
Node-Related Classes
Objects-Related Classes
Networking Functionality
Pathfinding-Related Classes
Physics-Related Classes
Plugins-Related Classes
IG Plugin
CIGIConnector Plugin
Rendering-Related Classes
VR-Related Classes
Content Creation
Content Optimization
Materials
Material Nodes Library
Miscellaneous
Input
Math
Matrix
Textures
Art Samples
Tutorials

Exporting 3D Models From Autodesk 3ds Max

This article describes how to export your 3D Model from Autodesk 3ds Max so that it would have proper scaling, position, and orientation when imported to UnigineEditor.

See Also#

Pre-Export Arrangement#

Before the export, do the following:

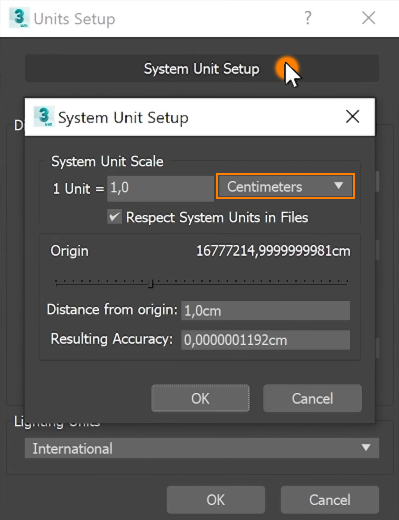
  • Select Customize -> Units Setup and check that Centimeters are set as System Units.

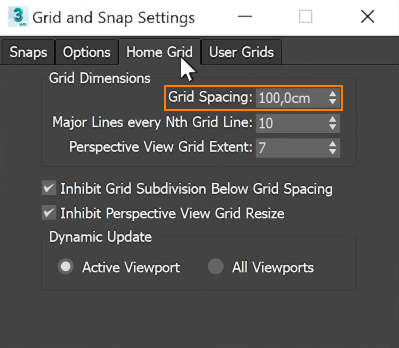
    For convenience, you can set the grid cell size equal to 1 meter:

    Go to Tools -> Grids and Snaps -> Grid and Snap Settings -> Home Grid.

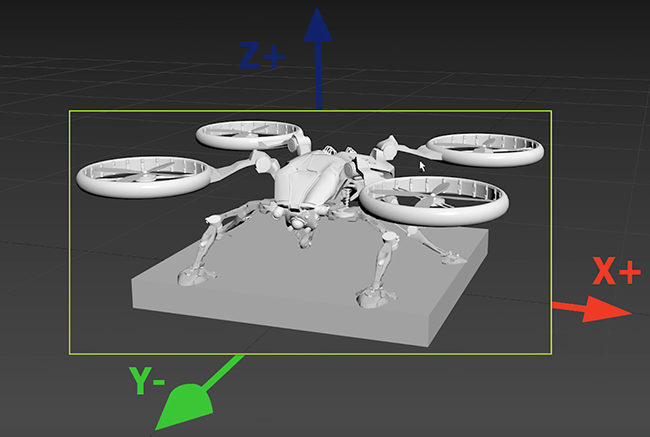
  • Orient the model towards the negative direction of the Y axis, which is the front direction in Autodesk 3ds Max.

  • Set the actual model size.
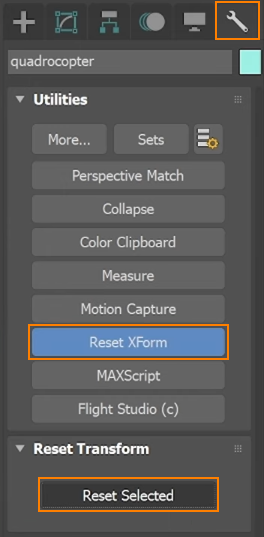
  • Reset all transforms (Utilities -> Reset XForm).

  • Check that materials are ready for export.

Export Settings#

As soon as your model is ready for export, click File -> Export. Save as type: Autodesk (*.FBX), click Save.

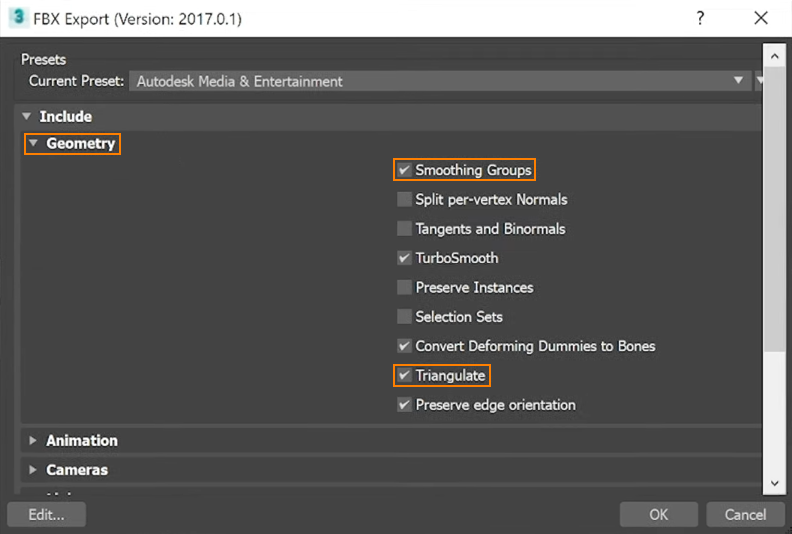
In FBX Export window, select Geometry and enable Smoothing Groups and Triangulate.

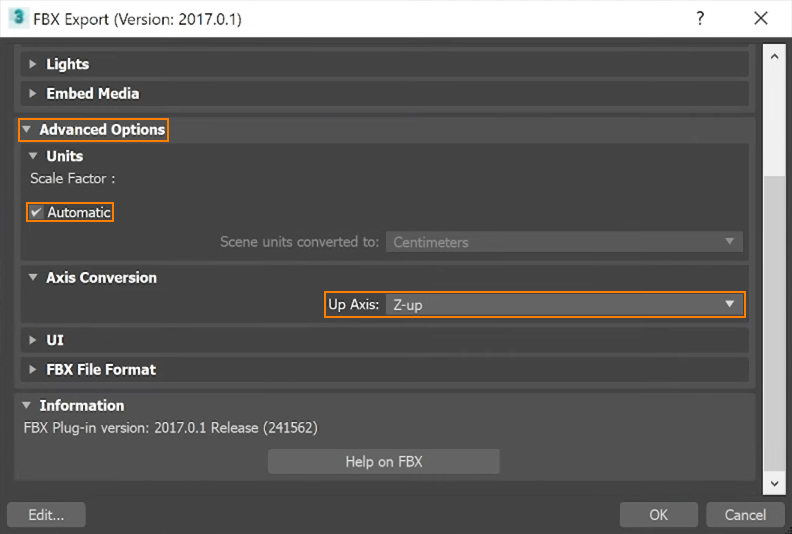
In the Advanced Options, enable Automatic scale factor and select Z-up as the Up Axis.

Last update: 2023-12-19
Build: ()