Adding Terrain
Learn how to create a terrain in Unigine Editor using the existing Height map generated in some third-party application.
We are going to assign to the terrain additional detail materials to get high resolutional textures when viewing close-by. Keep in mind that the detail materials always blend with diffuse colors of terrain. Using such an approach your terrain will never look dull and tiled. Instead, you will easily create a realistically looking terrain, that varies its coloring without any effort from artists. Once we have created a properly colored diffuse texture, the same detail material of the grass will be green on the low ground - and yellowish and withered in the mountains. Fast, easy and performance-wise!
Also you will learn how to optimize the rendering of the big terrain in the few steps by means of Terrain Occluder.

Step 1. Preparation
For this tutorial you will need the following textures:
- Height map
- Diffuse texture
- Mask texture
If you have not yet created your own terrain textures, you can simply export this 3 textures from the terrain_00 sample to go through the tutorial.
- Detail materials
Detail materials can be found in samples/common/terrains/materials folder.
- Terrain Occluder Texture
Use the same texture as for Heigt map but downsized (use ImageDDS for it).
Textures Exporting
We will export Height, Diffuse and Mask textures from the terrain_00 sample to apply this textures in the tutorial. If you already have your own prepared textures, skip this part.
- Run Unigine Editor.
-
Click Open world button.

-
Open samples/objects directory, select terrain_00 scene and press Ok.

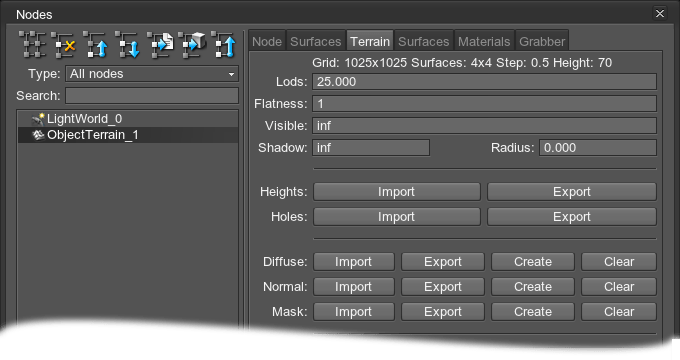
- In the loaded world click the Nodes tab on the Editor interface panel or press N.
- Select ObjectTerrain_1 and go to the Terrain tab.
- To export the textures click Export:
- Heights to export the Height map
- Diffuse to export the Diffuse texture
- Mask to export the Mask texture for the details
- Save the textures under Unigine evaluation/data folder.
- Close Nodes tab.
Create a New World
- To create a new world, click Create new world button on the editor interface panel, or press CTRL + N.
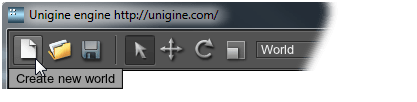
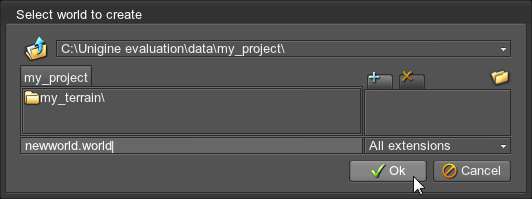
- Choose the directory and a File Name for the new world. It must be created under <Unigine>/data folder.
A new world with the default sun node is created.
Step 2. Add Terrain
- On the editor panel, click Add an object button and choose Terrain in the rollout.
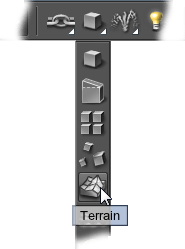
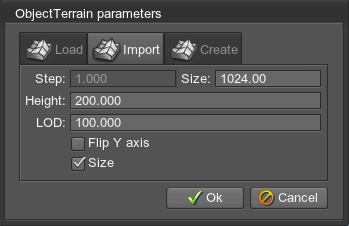
- Choose Import tab to create a terrain on the base of a Height map. Set the following parameters:
- Step - the size of a terrain grid cell in units, can be left the same
- Height of the terrain depends on the imported Height map and cannot be changed afterwards. It determines the minimum gradation in heights, so it is better not to set bigger than necessary value, so set it to 200
- LOD distance, from where the first LOD starts, will be tweaked later
- Size specifies the size of the created terrain in units. According to our Height map, set to 1024
- Flip Y allows to flip a Height map around Y-axis, if checked. We do not need to check it
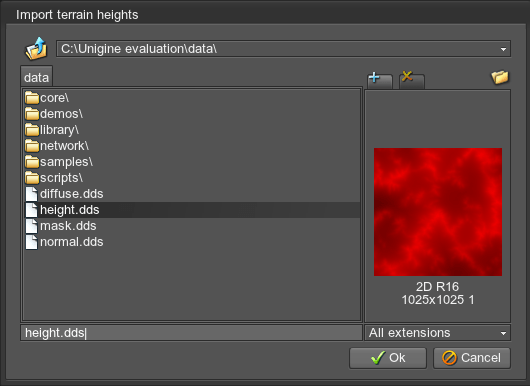
- Choose the Height map to be imported.
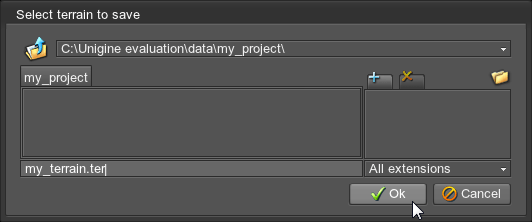
- Set a name and a path for the created terrain.
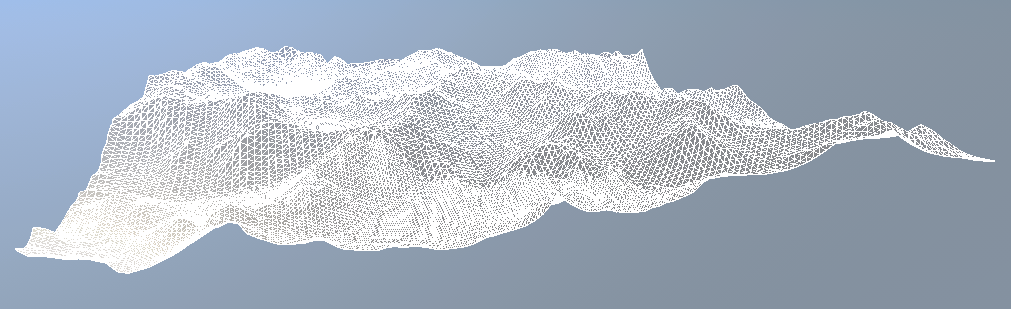
After clicking Ok, place the terrain somewhere in the world. To focus a camera on it, press F. Terrain will appear in grey and will be shown in wireframe mode.
Step 3. Add Terrain Textures and Detail Materials
To make the terrain look realistic and variegate, we will add basic terrain textures and additional detail materials.
- In the Nodes settings, select the terrain, go to the Terrain tab and select the Diffuse: Import option.
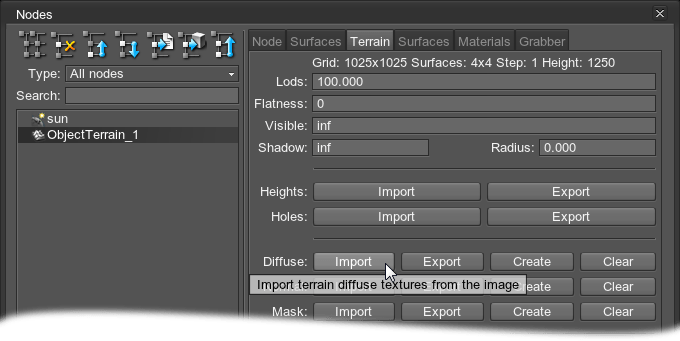
- Select a path to the Diffuse texture.

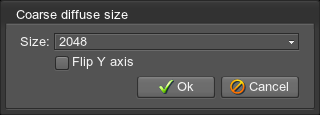
- Choose the size of a coarse Diffuse texture, which will be used for the furthest LOD of terrain.
NoticeAvoid setting too big size, because this texture is always loaded in the memory; however, too low resolution will result in terrain being too blurry in the distance.
We will set the size to 2048.
 NoticeYou can regenerate the coarse Diffuse texture of appropriate size later by modifying Update coarse diffuse option.
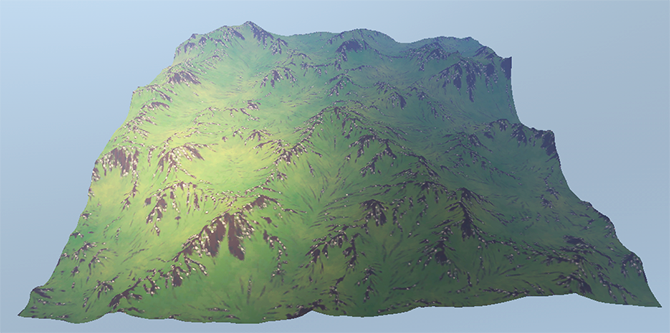
 - The big Diffuse texture will be split into small patches each corresponding to one terrain surface.
The result we'll have:
- Select Normal: Import option to import normals for the terrain.

- Choose the size of a coarse normal map, just like for a Diffuse texture.
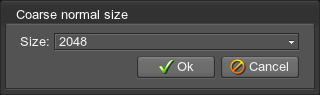
- The normal map will be also split into small patches on the per-surface basis.
The terrain becomes lit up. The specular component (alpha channel of the Diffuse texture) is also revealed.
At the bottom of the Terrain tab you can find both coarse textures. (Split diffuse textures and normal maps are displayed for each surface on the Surfaces tab).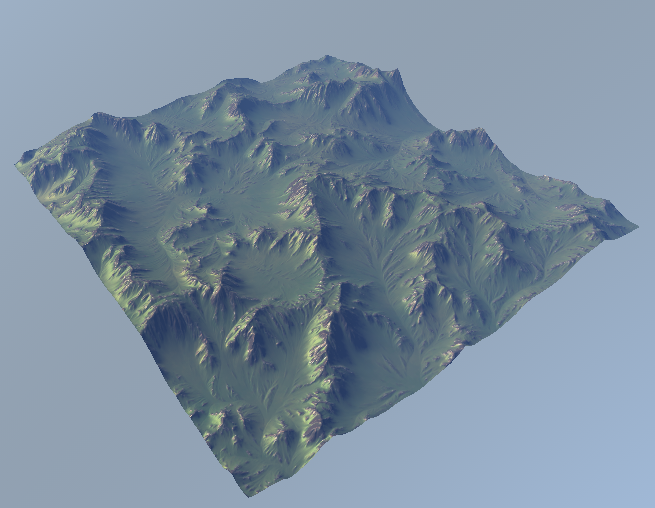

- Now we can add detail materials that will be used across the terrain. They should be added in the order of masking.
Go to the Materials tab and select Add option.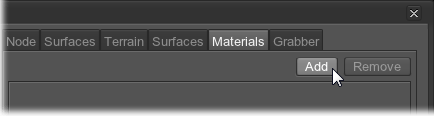 NoticeThe number of detail materials across the whole terrain is unlimited; however, each surface can take no more than 4.
 - Set the name for this new material.

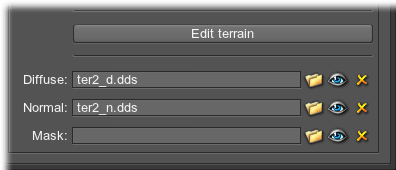
- Load a Diffuse texture for the material by clicking the folder icon.
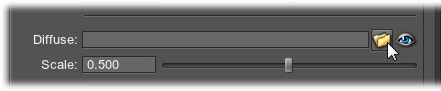
- Choose compressed texture to load.
For material textures neither Compress terrain textures option nor automatic compression works. Textures can be compressed manually with ImageDDS tool.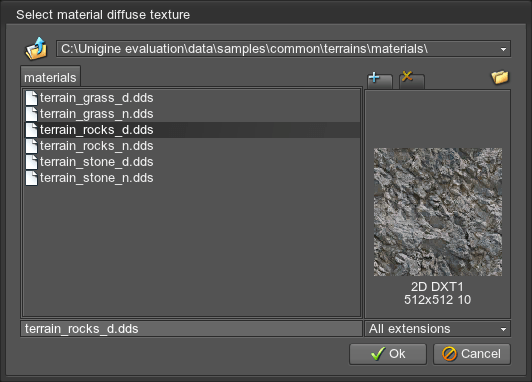
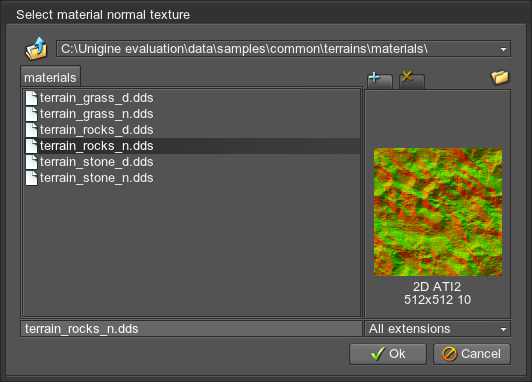
- Load a normal map.

- Choose compressed normal map to load.
Load all other detail materials of the terrain in the same way.
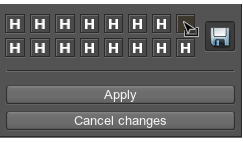
After that, we can import a material mask according to which materials will be revealed. Each channel of this mask controls the visibility of one detail material (according to their order on Materials tab):
- R channel defines the visibility of the 1st material
- G channel - of the 2nd material
- B channel - of the 3rd material
- A channel - of the 4th material.
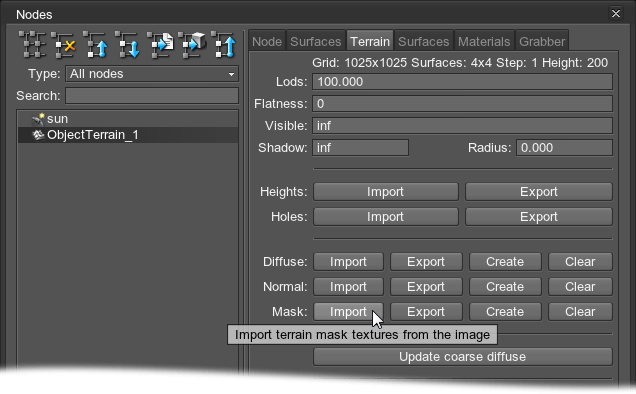
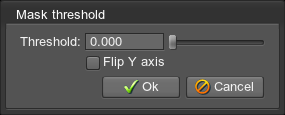
- Select a path to the Mask texture.
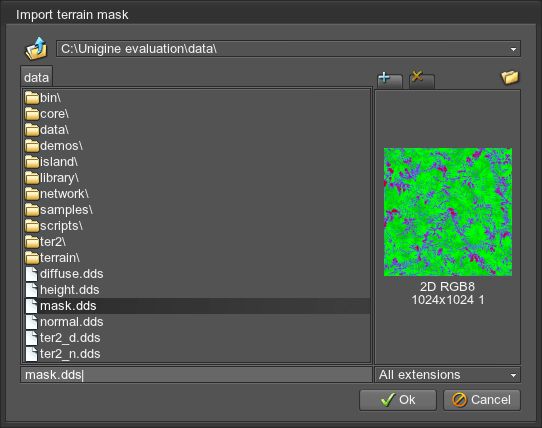
- Set the Threshold for the mask. It is useful when there are more than 4 material textures on the terrain. In our case, there are only 3, so 0 is set.
- The Mask texture is also split per-surface.
Detail materials are seen only on the four closest LOD levels: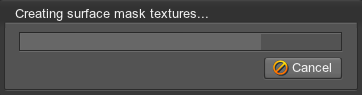
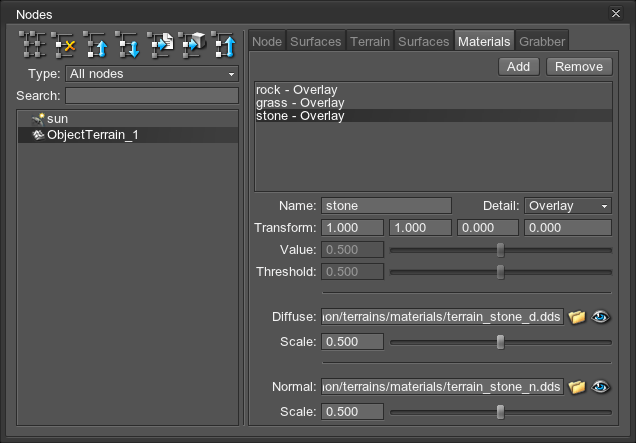
- Now materials can be tweaked.
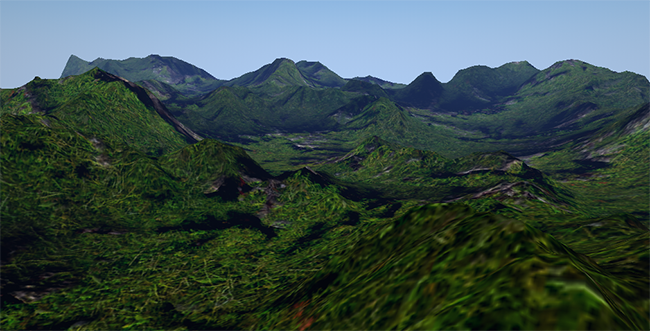
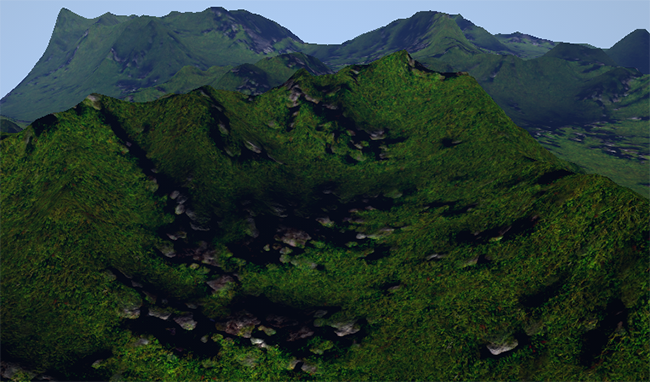
Go back to the Materials tab, choose a material and set a texture tile along X and Y axes in the Transform fields. The higher the value, the smaller and more repetitive the tile. Set Transform to 5.0 to both X and Y axes for every material.
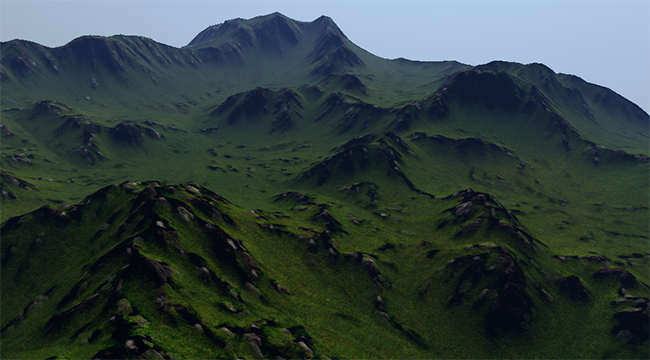
Here, all materials are tiled with the respect of the mountains scale:
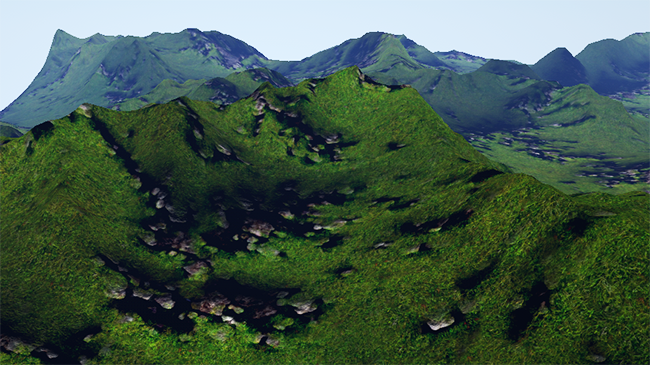
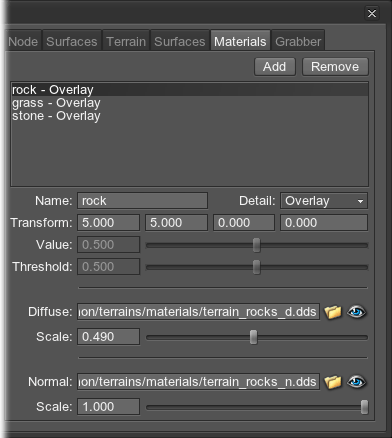
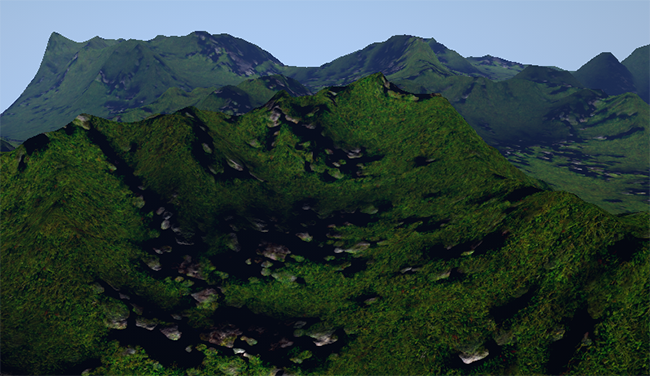
- Use Diffuse scale to increase the color intensity of the material.
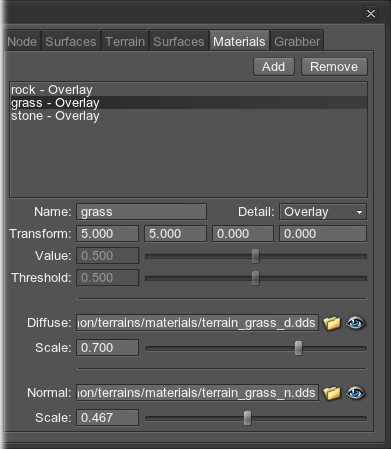
- Use Normal scale to create more prominent relief.
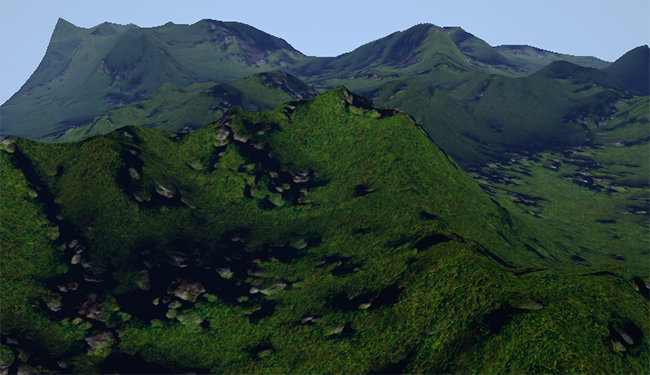
- The terrain is almost set, so let's gain some productivity. The relief of the furthest mountains does not need to be so sharp for a such a far distance.
Go back to the Terrain tab and decrease the Lods distance until noticeable.
The mountains on the horizon became less refined, while the FPS increased: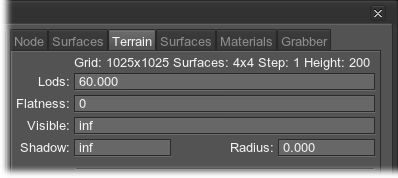
- Increase the Flatness within reasonable limits. This will allow to decrease the number of rendered triangles on the flat terrain areas. (It is strongly recommended to rebake a Height map with new flattened relief. For more details, see here).
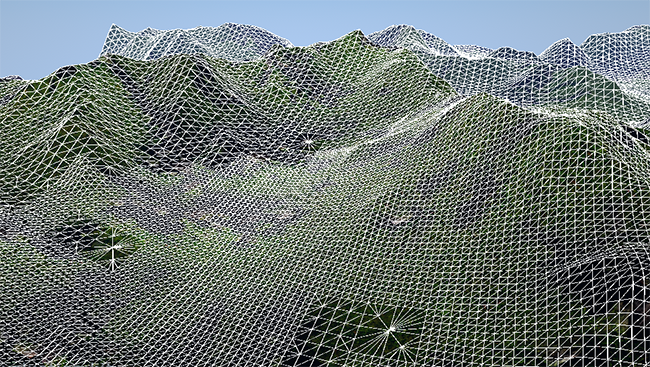
Toggle the wireframe mode on by pressing 2 to see the result: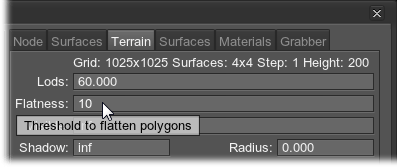
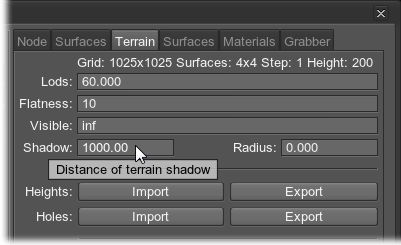
- Set the Shadow range to 1000. After that the terrain relief will cast shadows from any of the light sources only within 1000 units from the camera. It is almost unnoticeable, while the performance increases.
- If the terrain will not be modified any more, go to the compression step.
Step 4. Assign Terrain Material
Terrain material allows to control the terrain shading. When creating the terrain, terrain_base material is assigned by default. However, to tweak its parameters, it is necessary to create a tweakable child material inherited from the base one.
- Press M to open Materials settings. For further actions, you should already have a material library associated with the world (see how to add a new material library, steps 1-5).
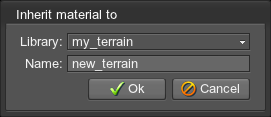
- Select a basic (and therefore unchangeable) terrain_base material in the list and click inherit the material.

- Choose the world-associated material library where to save a new material and specify its name. (If there are none, you should create one first).
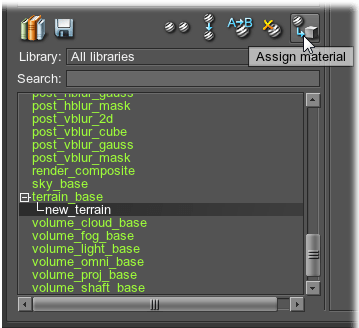
- Clicking the Assign material icon will assign the material to the currently selected node (in the Nodes settings) — the terrain, in our case.
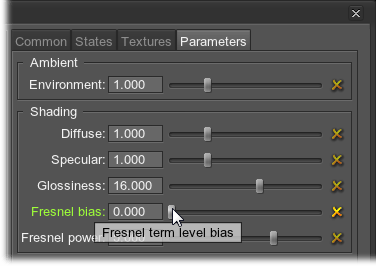
- Now we can tweak the material. Right now our terrain is too shiny:
Go to Parameters tab. Decrease the Fresnel bias to 0 so that it becomes matt.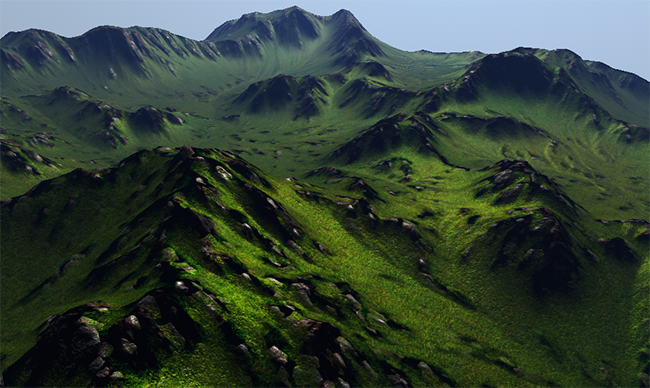
Step 5. Edit Terrain
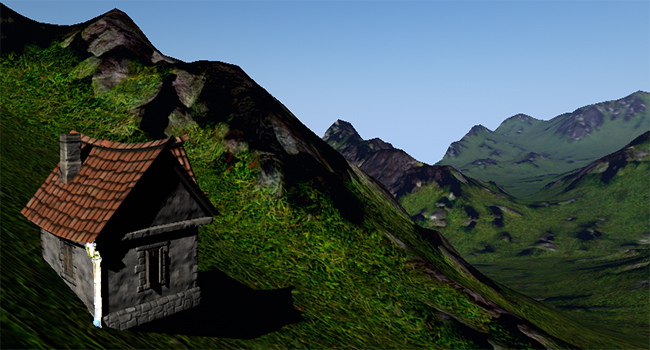
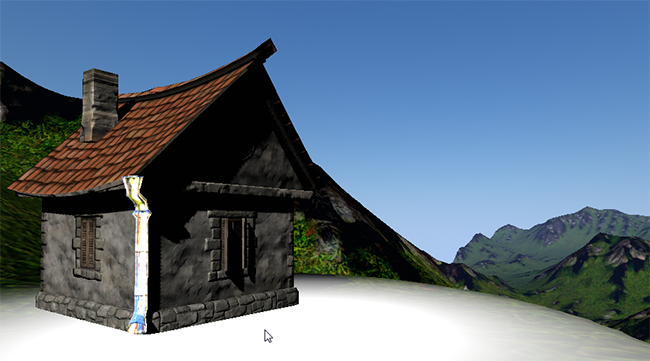
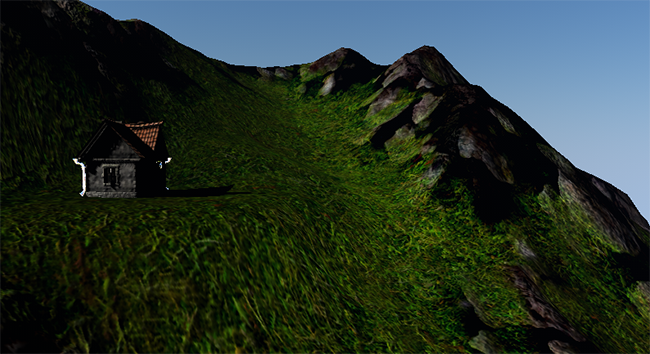
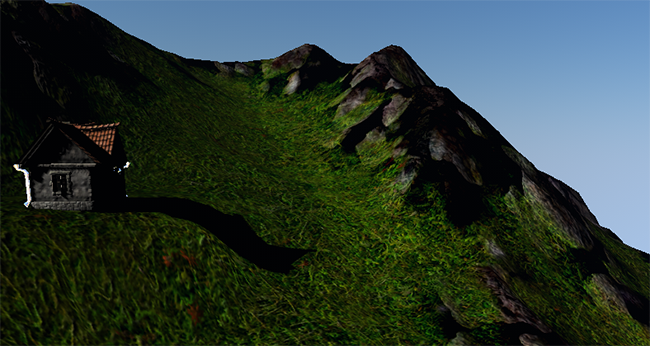
We can edit terrain on the spot, for example, to ensure that objects stand firmly on it. In our case, we added a house into the world and now it needs to be placed at the slope of the mountain.
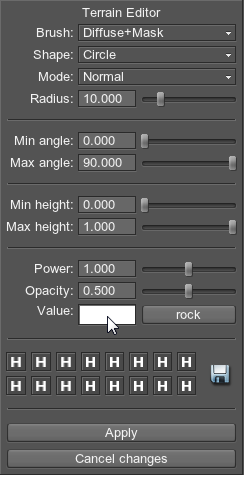
- Go to the Terrain tab to open the Terrain Editor and click Edit terrain button.
- Choose Heights brush to change the terrain relief.

- Press CTR + LMB to grab the current height value of the slope where the house stands. It will be reflected in the Value field.
- Drag a slider or press ] to set a bigger Radius of the brush.
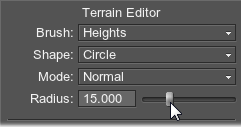
- Press ALT + LMB to use the brush.
- Change the brush mode to the Dilate. It allows to raise the ground covered by the brush up to its upper point (regardless of the brush value).
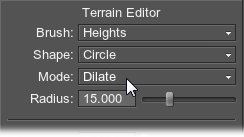
- Decrease the Opacity to apply the brush slower. Also increase the Radius.
Press ALT + LMB to use the brush. It has given the bottom of the plateau a more natural appearance: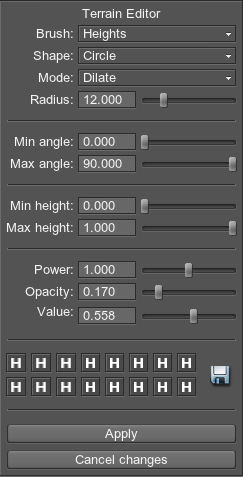
- Change the brush mode to the Erode. This brush will lower the ground covered by the brush down to its lower point.
Change the top of the plateau:
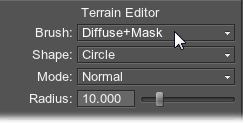
- Now we'd want to modify the colors for the plateau. Change the brush to Diffuse + Mask to edit both Diffuse texture and material mask simultaneously.
- Grab the color and material by pressing CTR + LMB.
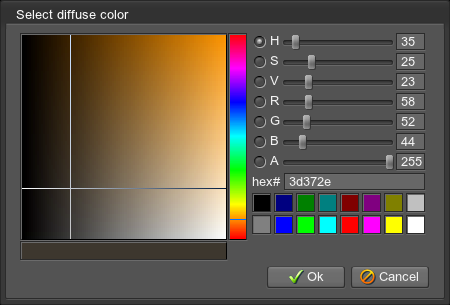
- To change the color, press on the Value color field.
- Choose the color to paint with:
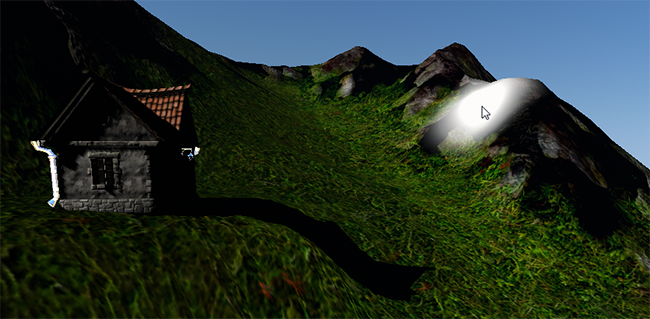
- Change the opacity of the brush for more subtle coloring, and alter the brush radius.
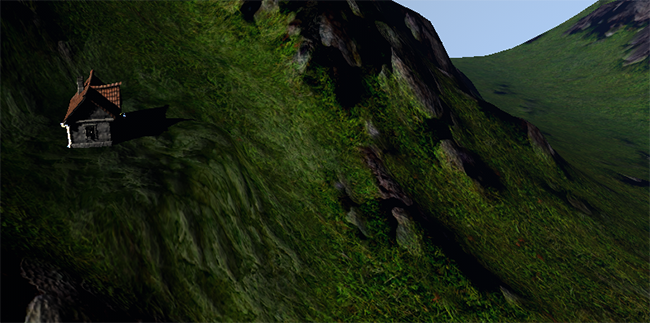
The result of applying the brush: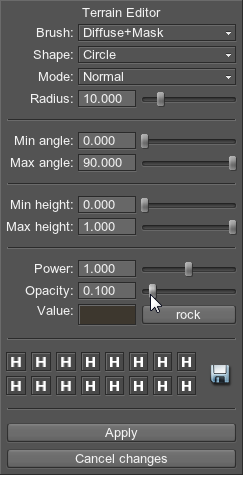
- To save the brush so it could be used, later click on the Save icon and drag it onto the palette slot while holding the mouse button pressed.
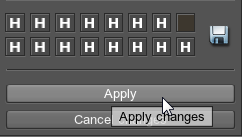
- After the editing is finished, press Apply to save the changes and exit the terrain editor.
- It is necessary to regenerate coarse textures; otherwise, the color changes would not be seen on the far LODs, but only on the closest ones (1-4 LODs).
Go to the Nodes settings -> Terrain tab and choose the Update coarse diffuse option to regenerate a coarse diffuse. Again, set its size.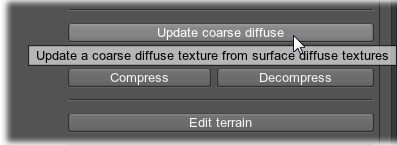
- Select also the Create normals option to properly light newly added terrain vertices. Set its size to 2048.
At last, the result: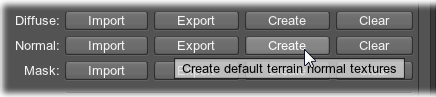
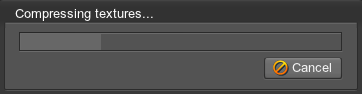
- If the work with the terrain is finished, and and there will be no further editing of terrain textures, choose the Compress option.
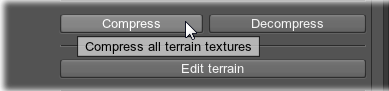
- All terrain textures, except for material textures, will be compressed to save the memory.
Step 6. Add the Terrain Occluder
To speed up the rendering of the large-scaled terrain with a lot of objects placed on it, Terrain Occluder should be added.
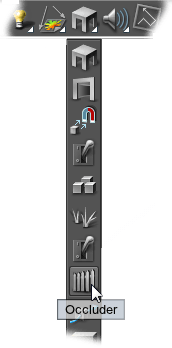
- On the editor panel, click Add a world object button, and then choose Occluder in the rollout.
- Choose the OccluderTerrain tab and set the same dimensions for the occluder as the terrain has: its width, length and height.
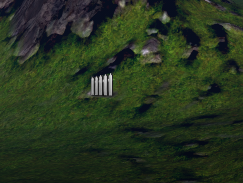
Place the occluder somewhere in the world: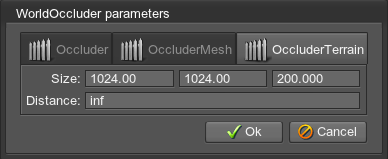
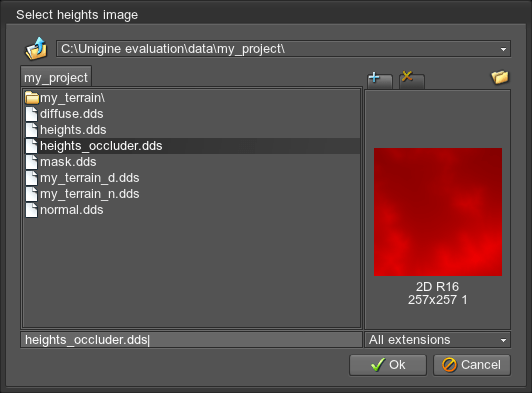
Downsize the Height map used for terrain. As only rough approximation is required, we will use 257x257 occluder texture.
NoticeFor more details on textures sizes see Terrain Occluder Texture article.- Go to Nodes Settings -> OccluderTerrain tab to load the downsized Height map.

- Select a path to the downsized Height map.
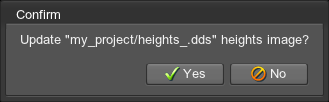
- It may take some time, while the engine generates the occluder texture. Press Ok to rewrite the texture with generated one:
- Let's position the occluder properly.
Make the occluder a child node of the terrain: in the Nodes Settings hierarchy select the occluder, press ALT and drag it to the terrain node.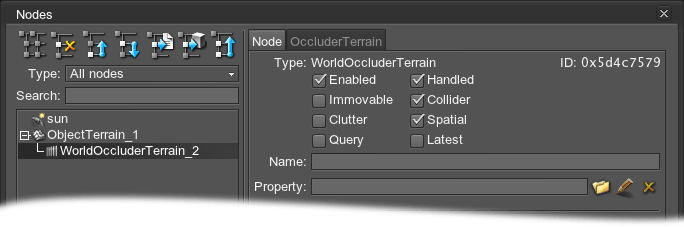
- Reset coordinates of the occluder to 0. As a child node, it will be positioned relative the parent terrain.
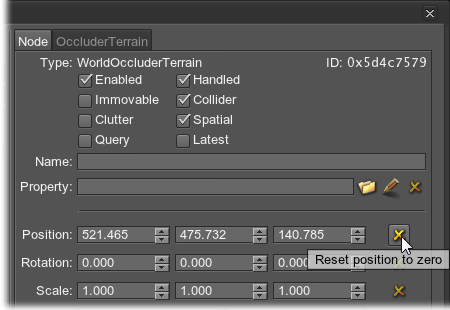
- Right now the occluder due to its low texture resolution can cull the visible areas by mistake:
This artifact can be easily avoided. Position the occluder slightly lower than the terrain.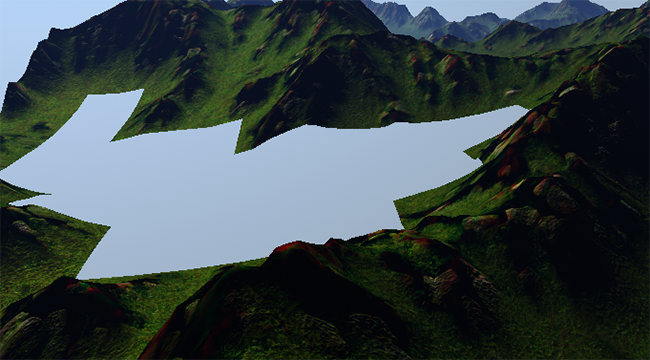
Now our terrain is properly occluded: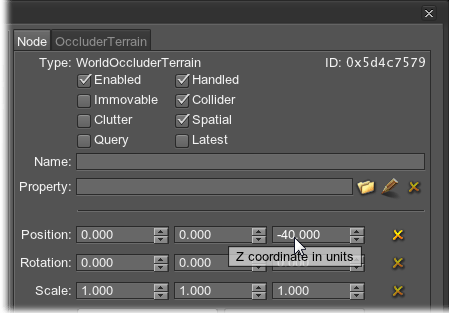
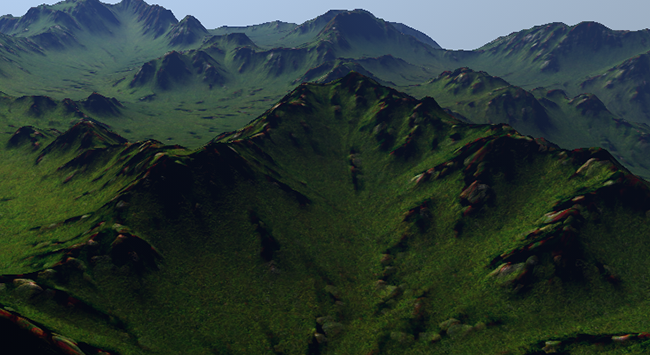
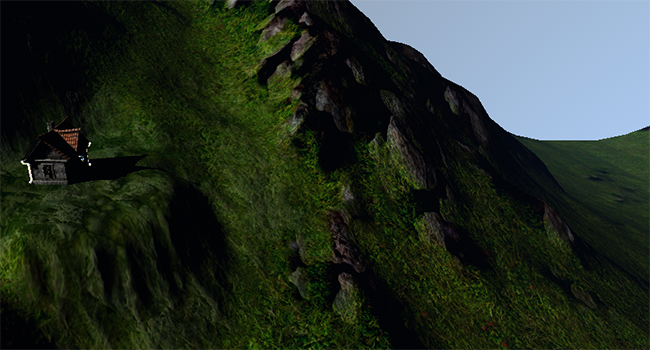
Step 7. See the Result
Set up light scattering in the scene, so that distant montains look foggy. And that would be our final result: