Objects
Objects are the major building blocks that construct the world. They are a stage settings for representing the visual idea and should be carefully placed to provide compositional coherence and deliver the holistic experience from the scene. Objects can be of such types:
- Mesh or smesh (skinned mesh)
- Dynamic mesh
- Terrain
- Water
- Sky
- Grass
- Billboards
- Dummy object
In addition to this listing, the following special effects also belong to objects:
- Particle system
- Volumetric objects
- GUI elements
- Decals
Whether it is a mesh, modelled in a dedicated program, or innate Unigine editor object that serves as a basis for further tailoring, the available properties depend on the type of object being edited.
Surfaces Options
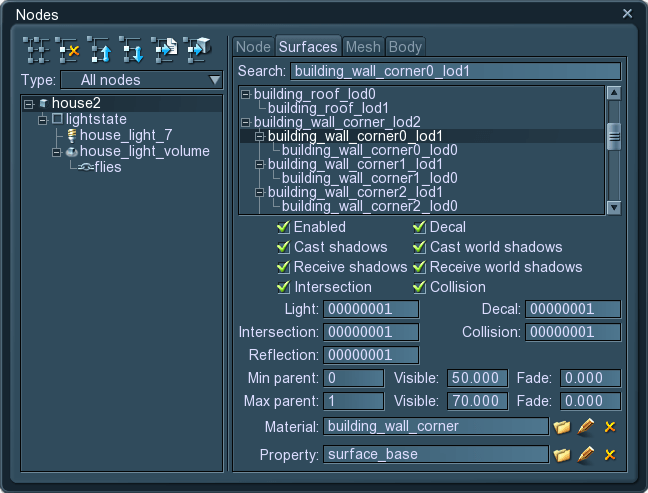
All objects share common options for their surfaces. Each surface can be enabled or disabled for rendering, as needed. They are organized in a hierarchy, with their node being a root. While the surfaces' hierarchal order can be freely changed (by dragging the node with ALT pressed), they themselves cannot be added, deleted, or otherwise altered in Unigine editor. The reason is that surfaces are formed during object creation in an external 3D editor. So to change them, one needs to re-export the object.
The surfaces use a separate material and a property, both of which are loaded from their libraries.
 |
Clicking this icon allows to edit a instanced material or a property on the spot. That means, a child material/property is created, and only its changed parameters (if compared to the parent) are stored in the world file. |
Surfaces often represent LODs of the same object. For the detailed description of Min parent, Max parent, Visible and Fade distances parameters, see Level of detail.
Bit Masking
To start with, let's review what bit masking is. Bit masking is a really flexible mechanism. After double clicking on the mask field, it is possible to specify a 32 bit mask. Each of 32 bits can either be turned on (1) or off (0) when clicking on the bit number. The resulting mask is displayed in the field as hexadecimal characters. After that, two masks are compared bitwise using binary operator and. It means, the first bit of the first mask is compared to the first bit of the second mask, the second bit - to the second one etc. If at least one pair of corresponding bits is 'on' at the same time, the masks match.
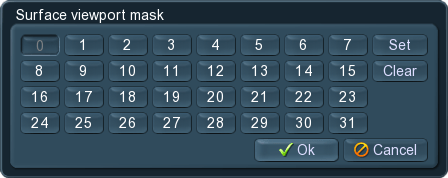
- Set option turns all the bits in the mask to 'on'.
- Clear option turns all the bits in the mask to 'off'.
Rendering in the Viewport
Objects (as well as decals and lights) can be selectively dispalyed in the viewport. To be dispalyed, the following is necessary:
the Viewport mask set for the camera (Tools -> Camera tab) should be matching with:
- Object surface viewport mask
- Material viewport mask to render the object material
- Light viewport mask to light the object (otherwise, the whole scene will be black)
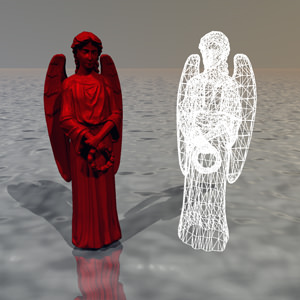
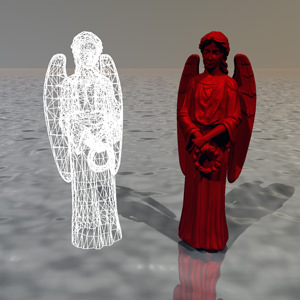
Let's take two objects with the same material. How do we make one of the object appear in the viewport, while the other is not rendered? It is easy: we change the viewport mask. In both variants it shares a bit (1) with all the required mask, except for one of the surface masks:
What is demonstrated above is only an example. There are other ways to achieve the same result by editing these masks.
Reflections from Objects
Reflections from objects can also be selectively rendered into the viewport: an object can be rendered without reflection or only reflection without an object itself. For that, the camera's Reflection mask should match with:
- Reflection mask of the reflecting material (Materials -> Parameters tab -> Reflection Mask). Pay attention that all turned on bits (1) of the player's reflection mask should be turned on this mask.
- Viewport mask of the reflecting material
- Viewport mask of the reflected material
- Object surface viewport mask
- Light viewport mask
Just like with viewport masking, all objects will be rendered with reflection by default. Let's discuss reflection masking for two cases: an object without a reflection and reflection without an object.
- To render an object without reflection, simply either its surface Viewport mask or its material Viewport mask should not match the camera Reflection mask.
- To render a reflection without a surface, its surface Viewport mask or its material Viewport mask should not match with camera Viewport mask.
| Object without reflection | Reflection without an object | ||||||||||||||||||||||||||||||||
|
|
||||||||||||||||||||||||||||||||
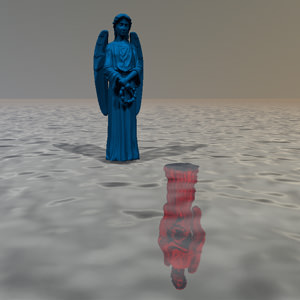
Masked reflections
|
|||||||||||||||||||||||||||||||||
Light Mask
For the surface to be illuminated only by the chosen light sources, a bit mask is used. Matching this mask to the one of light source (one bit, at least), allows to control the intensity of the object illumination.
Physical Interaction
Most objects are not static decorations placed in the scene, they actively interact with each other, as the real object is the object of physics. It is unnatural and quite disappointing for the viewer to see the solid object inappropriately penetrating another one. Increasing the level of realism is thus unthinkable without proper approximation of the physical properties. On the other hand, there are still objects that do not require comprehensive modelling of their dynamics. The same duality goes for objects composite of many surface shapes. To compromise this fact, physical interaction is enabled on per-surface basis.
Collision Detection
Occupying a certain area in space, bouncing off the obstacles and even simply staying on the ground requires the collision detection. After checking the collision box, the surface participates in detecting, whether other objects come in contact with it and reacts correspondingly to the specified settings.
Collision Mask
For the collision detection to be more selective and at the same time alleviate the computational load, collision mask is set. For example, the object is indifferent to other objects actions and does not contribute to physical picture of the virtual world. Still, we want it to lie on the terrain, not to fall through it. Matching the bit masks of this object and the terrain (at least one bit in the masks should match), will get the desired effect.
Intersection Detection
Intersection serve a little different purposes, than collision. Intersection ray from one point to another allows lightweight and faster computing, if the surface is intersected. For example, computing collision of car wheels takes time and decreases manoeuvrability. If intersection will be used, the wheels are not represented with the properly reacting physical spheres, but rather rays, coming from the car body to the ground. And the problem of the plausible simulation will be solved.
Intersection Mask
Bit intersection mask allows to define the exact objects to be considered, when computing intersection, and disregard all the others, that have unmatched masks. It is a flexible tool, because only one bit in the masks should match. That means one object can easily participate in several different intersections simultaneously.
See also: article about Physics.
Shadows
The importance of lighting for the scene perception was already dwelt upon in the corresponding articles. The following checkboxes define the shadowing by and of the surface:
- Cast shadows — the surface will cast shadows if lit by any of the light sources, except for the world lights.
- Receive shadows — the surface will be shadowed, if between it and the light source appears the casting-shadow obstacle. This also concerns any sources, except for the world lights.
- Cast world shadows — the surface will cast shadows from the world lights. This option is separated, as this type of sources use a different shadowing technique (PSSM).
- Receive world shadows — the surface will be shadowed, if the incident world light will be occluded by some casting-shadow obstacle.
Split
Split option allows to skip rendering of high-detail shadow splits from World light source. (It is useful for small objects like pebble, twigs, scraps, etc.)
- The maximum value of 4 means there is no optimization. The objects is rendered in all four shadow splits.
- The values of 3 and 2 means that a shadow from an object surface is rendered only in 3 or 2 smaller shadow maps, respectively.
- The minimum value of 0 results in no shadows from an object surface.
Reflection
If the object is placed somewhere near the reflective material, it can contribute to its reflection. This means, if the reflection box is checked, the object visibility and color contribution will be computed when rendering the material. However it should be kept in mind, that while adding reflection effect is very convincing realism-wise, it can also make the rendering rate for the scene drop down. So it begs the question of optimizations:
- Usually the small objects are disregarded, as they are not quite noticeable because of their size. However, it depends on the reflectivity of the material: if it is highly reflective the trick will not do. If the reflection is fuzzy, or the material has prominent bump mapping, the contour-giving objects can be enough to form reflection.
- Minding planar orientation is also helpful. For example, if the object is reflected in water, all the horizontal surfaces can be disabled for reflecting without hesitation.
