Реализация цветовой зоны
 Now we can implement the zones to throw the objects into. We will make holes in the floor, implement zone visualization, and add a trigger volume that will destroy objects entering it.Теперь мы можем реализовать зоны, в которые можно бросать объекты. Мы сделаем отверстия в полу, реализуем визуализацию зоны и добавим область-триггер, которая будет уничтожать попадающие в нее объекты.
Step 1. Unpack Node References to Make Holes in the FloorШаг 1. Распакуйте Node Reference, чтобы сделать отверстия в полу#
To make some floor nodes invisible and non-colliding (objects will fall through them), while keeping the character's turning working smoothly, we must unpack some floor node references. The unpacking means breaking the link to the node file on disk and changing its parameters.Чтобы сделать некоторые ноды пола невидимыми и неколлизионными (объекты будут падать сквозь них), сохраняя при этом плавное вращение персонажа, мы должны распаковать некоторые Node Reference пола. Распаковка означает разрыв ссылки на файл ноды на диске и изменение ее параметров.
- To create Color Zones select some floor tiles in a group (holding the Shift hotkey), right-click and choose Unpack To Node Content.Чтобы создать цветовые зоны, выберите несколько плиток пола из группы (удерживая горячую клавишу Shift), щелкните правой кнопкой мыши и выберите Unpack To Node Content.
- Then disable Collisions for these nodes but make sure that Intersection is enabled, so that the character's turning works correctly.Затем отключите Collision для этих нод, но убедитесь, что включен Intersection, чтобы поворот персонажа работал правильно.
-
To make them invisible, go to Viewport Mask and click Clear All. This way all bits of mask are set to 0 and they will not match the Camera's Viewport Mask.Чтобы сделать их невидимыми, перейдите к маске Viewport и нажмите Clear All. Таким образом, все биты маски устанавливаются в 0, и они не совпадают с маской Viewport камеры.
- Disable Collision option for the ground node. Now, physical objects can fall through the holes and the ground.Отключите опцию Collision для ноды ground. Теперь физические объекты могут проваливаться сквозь отверстия и землю.
Step 2. Implement Zone VisualizationШаг 2. Визуализируйте зону#
Let's create a plane with an emission material to represent the Color Zone.Давайте создадим плоскость с эмиссионным материалом для представления цветовой зоны.
- Choose Create->Mesh->Static and search for plane.mesh.Выберите Create->Mesh->Static и выполните поиск plane.mesh.
- Place it in the world via the Viewport.Поместите его в мир через окно просмотра.
- Rename the node to color_zone.Переименуйте ноду в color_zone.
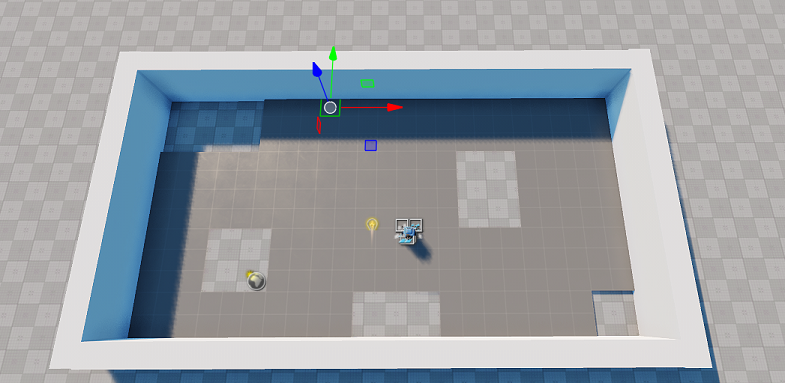
- Scale it to the size of the play area and position it between the floor and the ground, so it is visible only through the holes.Увеличьте ее до размера игровой площадки и расположите между полом и землей, чтобы она была видна только через отверстия.
-
Create a color_zone_mat material inherited from mesh_base and assign it to the plane surface.Создайте материал color_zone_mat, унаследованный от mesh_base, и назначьте его поверхности plane.
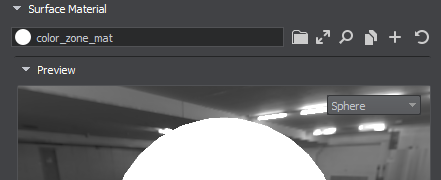
-
In the States tab, check the Emission option.На вкладке States установите флажок Emission.
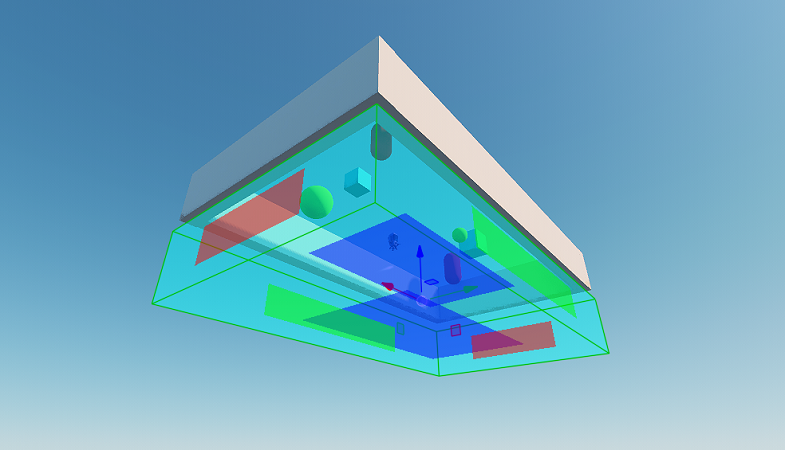
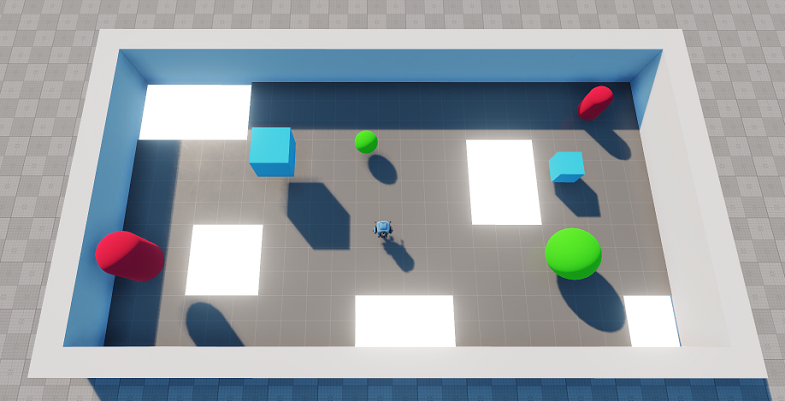 Color Zone VisualizationВизуализация цветовой зоны
Step 3. Make the Colors Change Over TimeШаг 3. Сделайте изменение цвета с течением времени#
The Color Zone must be easy to spot. Let's create a dynamic material that changes color emission over time using linear interpolation.Цветовую зону должно быть легко определить. Давайте создадим динамический материал, который изменяет цветовое излучение с течением времени, используя линейную интерполяцию.
- Create a new C++ component and call it ColorChanger.Создайте новый компонент C++ и назовите его ColorChanger.
- The code, that changes the material emission color for the Color Zone over time, is given below.
ColorChanger.h (C++)
#pragma once #include <UnigineComponentSystem.h> #include <UnigineMathLib.h> #include <UnigineGame.h> class ColorChanger : public Unigine::ComponentBase { public: // declare constructor and destructor for our class and define a property name. COMPONENT_DEFINE(ColorChanger, ComponentBase) // declare methods to be called at the corresponding stages of the execution sequence COMPONENT_INIT(init); COMPONENT_UPDATE(update); protected: void init(); void update(); private: float changeSpeed = 1.5f; Unigine::MaterialPtr color_zone_mat; };Код, который со временем изменяет цвет материала emission для материала цветовой зоны, приведен ниже.ColorChanger.cpp (C++)#include "ColorChanger.h" using namespace Unigine; using namespace Math; REGISTER_COMPONENT(ColorChanger); void ColorChanger::init() { ObjectMeshStaticPtr mesh = checked_ptr_cast<ObjectMeshStatic>(node); // get the color zone's material color_zone_mat = mesh->getMaterial(0); } void ColorChanger::update() { if (color_zone_mat != nullptr) { // calculate the interpolation coefficient for this frame float k = (Math::sin(Game::getTime() * changeSpeed) + 1) / 2.0f; //interpolate between two colors with given coefficient and set it to the first surface's material color_zone_mat->setParameterFloat4("emission_color", Math::lerp(vec4(1.0f, 1.0f, 0.0f, 1.0f), vec4(0.0f, 1.0f, 1.0f, 1.0f), k)); //interpolate between two values of emission intensity with given coefficient and set it to the first surface's material color_zone_mat->setParameterFloat("emission_scale", Math::lerp(1.0f, 4.0f, k)); } }ColorChanger.h (C++)#pragma once #include <UnigineComponentSystem.h> #include <UnigineMathLib.h> #include <UnigineGame.h> class ColorChanger : public Unigine::ComponentBase { public: // declare constructor and destructor for our class and define a property name. COMPONENT_DEFINE(ColorChanger, ComponentBase) // declare methods to be called at the corresponding stages of the execution sequence COMPONENT_INIT(init); COMPONENT_UPDATE(update); protected: void init(); void update(); private: float changeSpeed = 1.5f; Unigine::MaterialPtr color_zone_mat; };ColorChanger.cpp (C++)#include "ColorChanger.h" using namespace Unigine; using namespace Math; REGISTER_COMPONENT(ColorChanger); void ColorChanger::init() { ObjectMeshStaticPtr mesh = checked_ptr_cast<ObjectMeshStatic>(node); // get the color zone's material color_zone_mat = mesh->getMaterial(0); } void ColorChanger::update() { if (color_zone_mat != nullptr) { // calculate the interpolation coefficient for this frame float k = (Math::sin(Game::getTime() * changeSpeed) + 1) / 2.0f; //interpolate between two colors with given coefficient and set it to the first surface's material color_zone_mat->setParameterFloat4("emission_color", Math::lerp(vec4(1.0f, 1.0f, 0.0f, 1.0f), vec4(0.0f, 1.0f, 1.0f, 1.0f), k)); //interpolate between two values of emission intensity with given coefficient and set it to the first surface's material color_zone_mat->setParameterFloat("emission_scale", Math::lerp(1.0f, 4.0f, k)); } } - Build and run the solution to generate a property file for the component.Создайте и запустите решение, чтобы сгенерировать файл свойств для компонента.
-
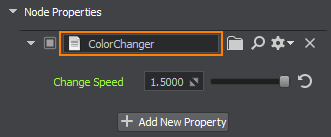
Switch back to the UnigineEditor and attach the ColorChanger property to the color zone visualization (color_zone).Переключитесь обратно на UnigineEditor и присоедините свойство ColorChanger к визуализации цветовой зоны (color_zone).
Step 4. Add a World TriggerШаг 4. Добавьте World Trigger#
To get rid of objects that were thrown in the Color Zone, let's use a World Trigger. The trigger defines an area into which a physical object will fall and a callback that fires when an object gets inside.Чтобы избавиться от объектов, которые были выброшены в цветовую зону, давайте используем World Trigger. Триггер определяет область, в которую упадет физический объект, и обратный вызов, который срабатывает, когда объект попадает внутрь.
- Create a new World Trigger by choosing Create->Logic->World Tigger and place it in the world.Создайте новый World Trigger, выбрав Create->Logic->World Tigger, и поместите его в мир.
-
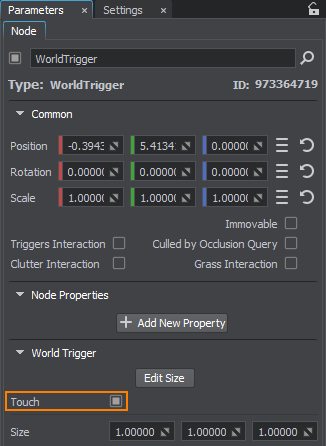
Check the Touch option in the Parameters window of the World Trigger node to make the trigger fire callbacks on partial contact with another node.Установите флажок Touch в окне Parameters ноды World Trigger, чтобы триггер запускал обратные вызовы при частичном контакте с другой нодой.
-
Position it beneath the ground and adjust its size so it covers the whole play area by going to Parameters and clicking Edit Size. Adjust the size of the World Trigger in the Viewport.Расположите его под землей и отрегулируйте его размер так, чтобы он покрывал всю игровую площадку, перейдя в раздел Параметры и нажав Edit Size. Отрегулируйте размер World Trigger в окне просмотра.
-
Create a new C++ component in your IDE and call it KillZone and copy the following code to the corresponding files. The trigger callback will delete any entering object. Don't forget to save your code.Создайте новый компонент C++ в вашей IDE и назовите его KillZone и скопируйте следующий код в соответствующие файлы. Обратный вызов триггера удалит любой попавший в него объект. Не забудьте сохранить свой код.KillZone.h (C++)
#pragma once
#include <UnigineComponentSystem.h>

#include <UnigineWorlds.h>

class KillZone : public Unigine::ComponentBase
{
public:
	// declare constructor and destructor for our class and define a property name.
	COMPONENT_DEFINE(KillZone, ComponentBase)
	// declare methods to be called at the corresponding stages of the execution sequence
	COMPONENT_INIT(init);

protected:
	void init();

	void enterEventHandler(const Unigine::NodePtr &target);

private:
	// the area into which an object should fall
	Unigine::WorldTriggerPtr trigger;
};
KillZone.cpp (C++)#include "KillZone.h" using namespace Unigine; REGISTER_COMPONENT(KillZone); void KillZone::init() { trigger = checked_ptr_cast<WorldTrigger>(node); // subscribe for the Enter event (when an object enters the area) if (trigger) trigger->getEventEnter().connect(this, &KillZone::enterEventHandler); } void KillZone::enterEventHandler(const NodePtr &target) { target.deleteLater(); } - Build and run the solution to generate a property file for the component.Создайте и запустите решение, чтобы сгенерировать файл свойств для компонента.
-
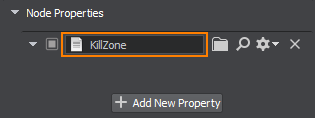
Switch back to UnigineEditor and add the KillZone component to the previously created World Trigger.Переключитесь обратно на UnigineEditor и добавьте компонент KillZone к ранее созданному World Trigger.
- Save changes to the world. Go to File->Save World or press Ctrl+S hotkey.Сохраните изменения в мире. Перейдите к File->Save World или нажмите горячую клавишу Ctrl+S.
-
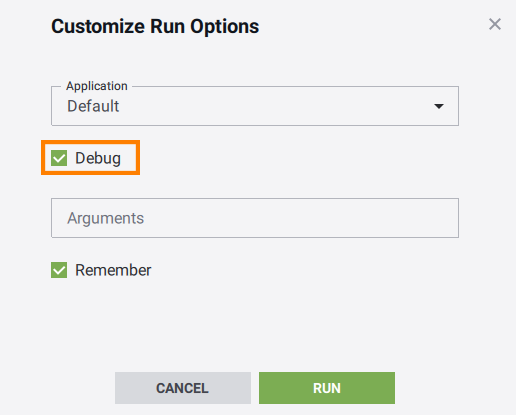
To run the project via the SDK Browser, click on the ellipsis beneath the Run button to open the Customize Run Options window. By default your IDE builds a Debug version of your applications, while the SDK Browser is configured to launch the Release one. So, before clicking Run you should check the Debug option to run the proper executable to check out your progress while developing your application.
Чтобы запустить проект с помощью SDK Browser, нажмите на многоточие под кнопкой Run, чтобы открыть окно Customize Run Options. По умолчанию ваша среда IDE создает версию ваших приложений Debug, в то время как браузер SDK настроен на запуск версии Release. Итак, прежде чем нажать Run, вы должны установить флажок Debug, чтобы запустить соответствующий исполняемый файл, чтобы проверить ваш прогресс при разработке вашего приложения.
Информация, представленная на данной странице, актуальна для версии UNIGINE 2.19.1 SDK.