Mask Editor
UnigineEditor provides a useful tool for painting image masks directly in the scene - Mask Editor. It allows editing the existing image masks and creating new ones.
See Also#
- The chapter on Image Mask for the Grass Field
- The Adding Grass tutorial.
- The chapter on Masking Areas with Objects for Mesh Clutters and World Clutters.
Creating Mask with Mask Editor#
To create a new image mask by means of the mask editor:
- Run UnigineEditor 2.
- Add ObjectGrass, ObjectMeshClutter or WorldClutter to the scene by choosing the required object via the Menu bar (the Create menu item).
- Specify all the required settings for the added object.
- Choose Windows -> Toggle World Hierarchy to open the World Hierarchy window.
- In the World Hierarchy window, select an ObjectGrass, ObjectMeshClutter or WorldClutter node. In the Parameters window open the Grass, MeshClutter, or Clutter tab correspondingly.
- Here, click
 next to the
Mask Image field.
next to the
Mask Image field.

- Specify the size and the format of the mask in the window that opens and click OK.
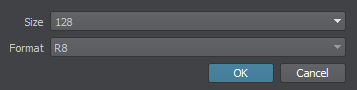
- In the file dialog window that opens, specify the mask name, choose the folder within your project to save the mask and click OK. An empty image mask will be created.
- Perform Steps 4-7 described below to paint the mask.
Editing Mask with Mask Editor#
To edit an image mask by means of the mask editor:
- Run UnigineEditor 2.
- Choose Windows -> Toggle World Hierarchy to open the World Hierarchy window.
- In the World Hierarchy window, select an ObjectGrass, ObjectMeshClutter or WorldClutter node. In the Parameters window open the Grass, MeshClutter, or Clutter tab correspondingly.
- Here, click
 next to the
Mask Image field.
next to the
Mask Image field.
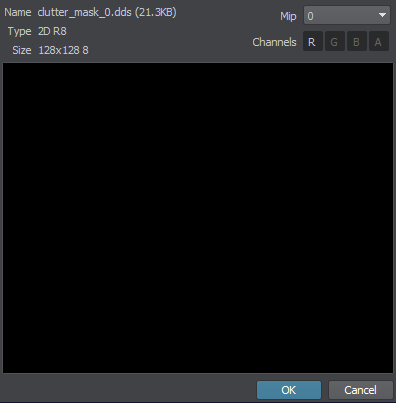
The Mask Editor will open.
- Specify the required brush settings.
- Hold Alt + Left Mouse Button to paint the mask in the scene.
Mask Editor Options#
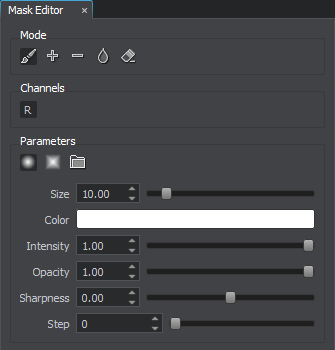
| Mode | Available modes:
|
|---|---|
| Brushes | Shape of the brush:
|
| Size | Size of the brush. |
| Color | Color of the brush. |
| Intensity | Intensity of the brush. |
| Opacity | The rate to apply the brush. |
| Sharpness | Tip of the brush. The lower the value, the sharper and smaller the tip. The higher the value, the flatter and bigger the tip. |
| Step | The distance between the brush marks in a stroke, in pixels. |
 Replace - replace pixel values of the image mask with the current values set for the brush.
 Add - add pixels to the image mask (in other words, add areas to the image mask where grass or clutter objects should be placed).
 Subtract - subtract the current values set for the brush from pixel values of the image mask.
 Smooth - blur pixels of the image mask, making boundaries softer.
 Erase - erase pixels of the image mask.
 - circular shape
 - square shape
 .
.
Last update:
29.04.2021
Помогите сделать статью лучше
Была ли эта статья полезной?
(или выберите слово/фразу и нажмите Ctrl+Enter