Cleaner
While working with a project, you create, copy, move, inherit, rename, and delete assets. As a result, an enormous amount of unnecessary files can be created.
Cleaner is a tool used to optimize your project and save disk space by deleting assets that won’t later be used in the final build. Cleaner also checks for corrupted references to assets.
- Cleaner checks only the file types that are considered assets in terms of UNIGINE.
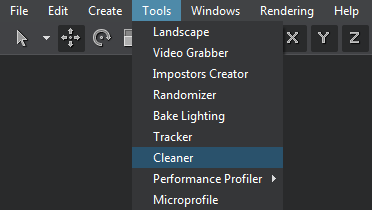
- To open the Cleaner tool, choose Tools -> Cleaner on the Menu Bar.
- To learn how to use the tool, watch this video tutorial.
Cleaner checks each asset that your project contains and displays irregularly used assets divided in three parts:
-
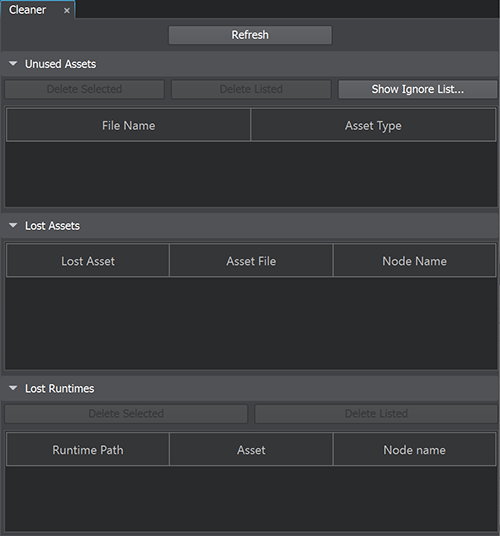
Unused Assets — the assets not used in any of the files included in your project (worlds, layers, nodes, meshes, materials) but available in the project.
Cleaner shows the file name and asset type for unused assets. As you click an unused asset in Cleaner, it is displayed in the Asset Browser and the Parameters window.
You can delete any or all of the displayed assets by using the Cleaner functionality.The Unused Assets list includes also all assets that were referenced from the unused assets.
-
Lost Assets — the assets referenced to by GUID but are not available in the project.
As you click a lost asset, the asset containing a reference to it, is displayed in the Asset Browser and the Parameters window. Fixing of lost assets is possible only manually.
The table in the Lost Assets section has three columns:
- Lost Asset — shows the GUID of the lost asset.
- Asset File — shows the name of the file containing the reference to the lost asset.
- Node Name — shows the name of the node, if the file containing the reference includes the node that actually has a reference to the lost asset.
-
Lost Runtimes — the runtime files generated for the assets that are not available in the project, but referenced by a node/nodes in the scene.
The table in the Lost Runtimes section has three columns:
- Runtime Path — shows the path to the lost runtime file.
- Asset — shows the name of the file containing the reference to the asset, for which the lost runtime file was generated.
- Node Name — shows the name of the node, if the file containing the reference includes the node that actually has a reference to the asset, for which the lost runtime file was generated.
Using Cleaner#
To open the Cleaner window, choose Tools -> Cleaner on the Menu Bar of UnigineEditor.
The Cleaner window will open:
Recommended Workflow#
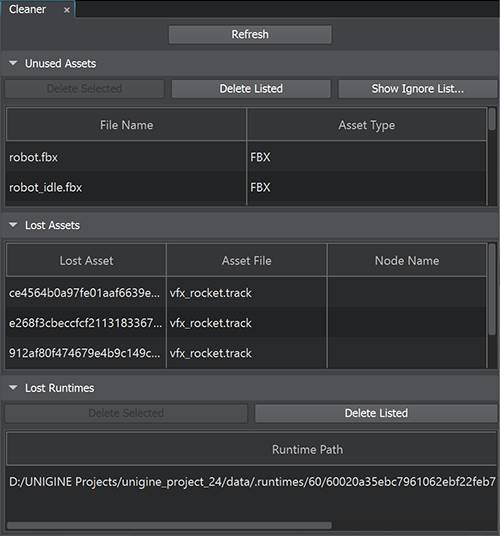
- Click Refresh to check the project for lost and unused assets. After analyzing assets in your project, Cleaner shows the following details.
-
Manage Unused Assets using the buttons available in the top part of the section:
- Delete Selected — deletes only the selected assets from the list of unused assets. This option is also available by right-clicking the selected files in Cleaner.
- Delete Listed — deletes the whole list of currently displayed assets.
WarningUse delete buttons carefully. Deleted assets cannot be restored.
-
Show Ignore List… — displays the ignore list that already contains the default list of wildcards used to define the scope of check by Cleaner. This list can be extended by the user.
WarningIf a filename in your project is generated in code (for example, a string concatenated from several words), add such cases to the Ignore List. Otherwise, such files will be deleted.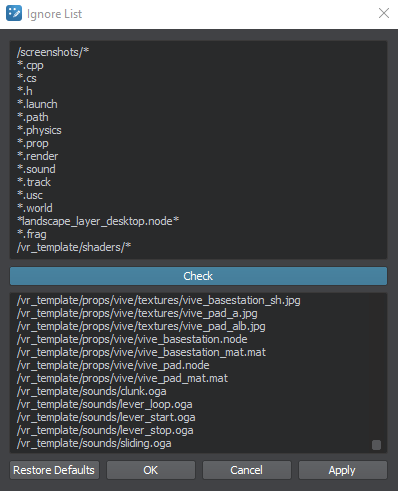
Upon clicking the Check button, all project files left after applying the ignore list (i.e. the ones that are not ignored by Cleaner and, thus, will be checked) are displayed in the bottom part of the Ignore List window.
- Click Refresh to update the list. Deleting unused assets can reduce the number of lost assets.
- Fix Lost Assets. Fixing of lost assets is possible only manually — by checking each asset displayed in the second or third column.
- Manage Lost Runtimes using the buttons available in the top part of the section. The buttons are the same as for the Unused Assets:
- Delete Selected — deletes only the selected runtimes from the list of unused runtimes. This option is also available by right-clicking the selected files in Cleaner.
- Delete Listed — deletes the whole list of currently displayed runtimes.
WarningUse delete buttons carefully. Deleted files cannot be restored.
Video Tutorial#
Watch the video below to learn how to delete unused assets with the Cleaner tool.