This page has been translated automatically.
Video Tutorials
Interface
Essentials
Advanced
How To
Professional (SIM)
UnigineEditor
Interface Overview
Assets Workflow
Settings and Preferences
Working With Projects
Adjusting Node Parameters
Setting Up Materials
Setting Up Properties
Lighting
Sandworm
Using Editor Tools for Specific Tasks
Extending Editor Functionality
Built-in Node Types
Nodes
Objects
Effects
Decals
Light Sources
Geodetics
World Nodes
Sound Objects
Pathfinding Objects
Players
Programming
Fundamentals
Setting Up Development Environment
Usage Examples
C++
C#
UnigineScript
UUSL (Unified UNIGINE Shader Language)
Plugins
File Formats
Materials and Shaders
Rebuilding the Engine Tools
GUI
Double Precision Coordinates
API
Containers
Common Functionality
Controls-Related Classes
Engine-Related Classes
Filesystem Functionality
GUI-Related Classes
Math Functionality
Node-Related Classes
Objects-Related Classes
Networking Functionality
Pathfinding-Related Classes
Physics-Related Classes
Plugins-Related Classes
IG Plugin
CIGIConnector Plugin
Rendering-Related Classes
Content Creation
Content Optimization
Materials
Material Nodes Library
Miscellaneous
Input
Math
Matrix
Textures
Art Samples
Tutorials
Warning! This version of documentation is OUTDATED, as it describes an older SDK version! Please switch to the documentation for the latest SDK version.
Warning! This version of documentation describes an old SDK version which is no longer supported! Please upgrade to the latest SDK version.

Blend By Height Sample
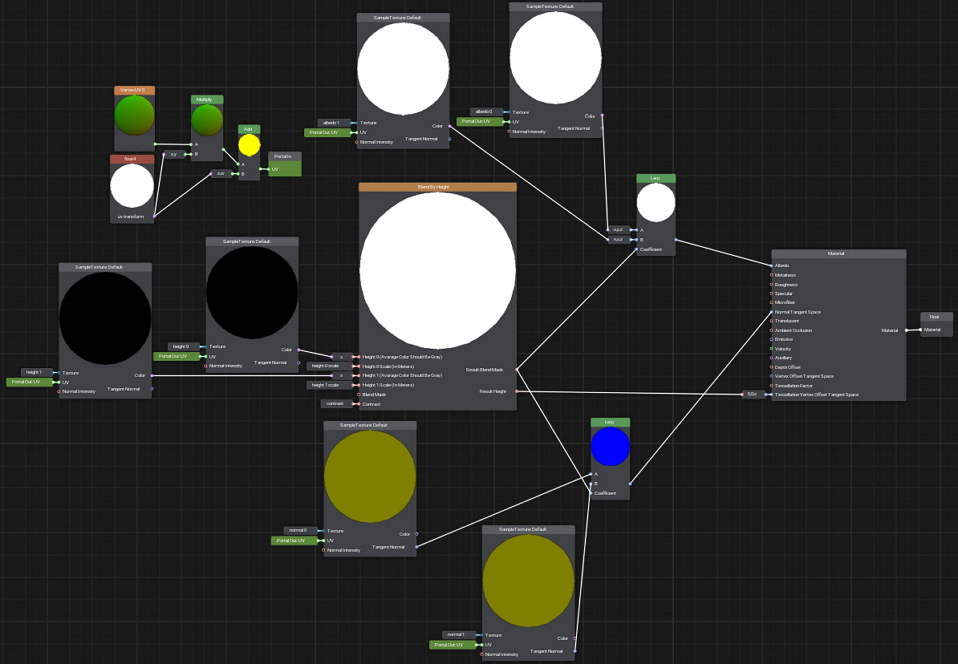
This material graph sample demonstrates how to perform blending based on heightmaps when creating materials.

Texture coordinates taken via the Vertex UV 0 node are multiplied by the first two components of the UV Transform float4 parameter, representing UV tiling adjustment, and increased by its last two components that represent a UV offset. The modified UV coordinates are connected to all Sample Texture nodes via portals for ease of access.

Two height values sampled from the corresponding textures in accordance with the modified UVs are passed to the Blend By Height node. Height 0 Scale, Height 1 Scale, and Contrast values are taken from parameter Sliders enabling you to adjust these values via the Parameters panel.

The Result Height is connected to the Tessellation Vertex Offset Tangent Space port of the material via the 0,0,x port adapter (meaning that the value shall control displacement along the Z-axis only, keeping X and Y as they are). The Result Blend Mask is used as a blending coefficient for the Lerp nodes performing linear interpolation between two sets of Albedo and tangent-space Normal textures.
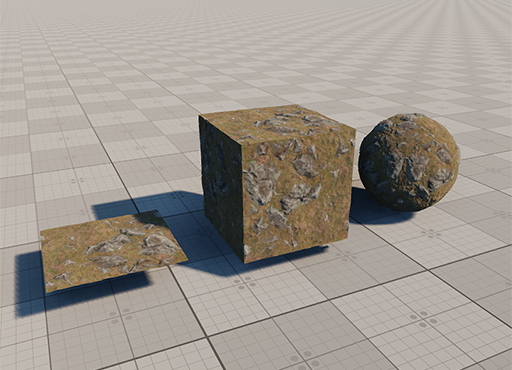
Blend By Height sample
Last update: 2022-12-14
Build: ()