This page has been translated automatically.
Video Tutorials
Interface
Essentials
Advanced
How To
Professional (SIM)
UnigineEditor
Interface Overview
Version Control
Settings and Preferences
Working With Projects
Adjusting Node Parameters
Setting Up Materials
Setting Up Properties
Lighting
Sandworm
Using Editor Tools for Specific Tasks
Extending Editor Functionality
Built-in Node Types
Nodes
Objects
Effects
Decals
Light Sources
Geodetics
World Nodes
Sound Objects
Pathfinding Objects
Players
Programming
Fundamentals
Setting Up Development Environment
Usage Examples
C++
C#
UnigineScript
UUSL (Unified UNIGINE Shader Language)
Plugins
File Formats
Materials and Shaders
Rebuilding the Engine Tools
GUI
Double Precision Coordinates
API
Containers
Common Functionality
Controls-Related Classes
Engine-Related Classes
Filesystem Functionality
GUI-Related Classes
Math Functionality
Node-Related Classes
Objects-Related Classes
Networking Functionality
Pathfinding-Related Classes
Physics-Related Classes
Plugins-Related Classes
IG Plugin
CIGIConnector Plugin
Rendering-Related Classes
Content Creation
Content Optimization
Materials
Material Nodes Library
Miscellaneous
Input
Math
Matrix
Textures
Art Samples
Tutorials
Warning! This version of documentation is OUTDATED, as it describes an older SDK version! Please switch to the documentation for the latest SDK version.
Warning! This version of documentation describes an old SDK version which is no longer supported! Please upgrade to the latest SDK version.

Texture Import Guide

You can import textures in convenient formats (such as .tga, .jpg, .png, .hdr, etc.). As you import a texture via the Asset Browser, using drag and drop or the Import button, the following import settings are displayed. These settings can also be changed later via the Parameters window.

Import settings for a texture asset

Common Parameters#

Unchanged

Defines whether the texture is to be used "as is" or a runtime will be created for it in accordance with the specified import options.

Notice
When this option is enabled, the texture is used by the Engine and added to the final build "as is". E.g., you can use this option for your custom HDR texture.
Texture Preset

This preset determines what sort of texture is to be generated, it defines compression algorithms and color channels to be used. The list of available presets includes the following:

  • Albedo (RGB) — for 3-channel albedo textures (postfix: _alb)
  • Albedo (RGB — color, A — opacity) — for 4-channel albedo textures (postfix: _alb)
  • Diffuse (RGB) — for 3-channel diffuse textures (postfix: _d)
  • Diffuse (RGB — color, A — opacity) — for 4-channel diffuse textures (postfix: _d)
  • Shading (R — metalness, G — roughness, B — specular) — for 3-channel shading textures (postfix: _sh)
  • Shading (R — metalness, G — roughness, B — specular, A — microfiber) — for 4-channel shading textures (postfix: _sh)
  • Specular (RGB — specular, A — gloss) — for 4-channel specular textures (postfix: _s)
  • Normal Map (RG) — for 2-channel normal textures (postfix: _n)
  • Normal Map (RG — normals, B — opacity) — for 3-channel normal textures (postfix: _nrgb)
    Notice
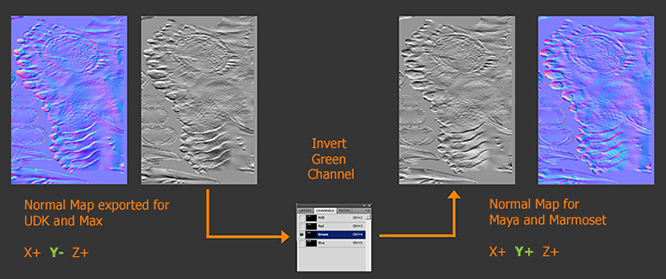
    Unigine Engine expects a normal map in DirectX format. If your normal map is in OpenGL format, tick Invert G Channel in the import menu. As a general rule, if the lighting seems weird, try inverting the G Channel and see if it gets better.
  • Ambient Occlusion — for ambient occlusion textures (postfix: _a)
  • Emission — for emission textures (postfix: _e)
  • Parallax — for parallax height maps (postfix: _h)
  • Mask (R) — for 1-channel mask textures (postfix: _m)
  • Mask (RG) — for 2-channel mask textures (postfix: _m)
  • Mask (RGB) — for 3-channel mask textures (postfix: _m)
  • Mask (RGBA) — for 4-channel mask textures (postfix: _m)
  • Cube Map — for cubemap textures, that can be used for your world's environment or for Environment Probes (postfix: _c)
  • Voxel Probe — for 3D lighting textures used for Voxel Probes (postfix: _vp)
  • Volume — for 3D textures, that can be used for volumetric effects or color variations (postfix: _v)
  • Light Map — for 3-channel light maps (postfix: _l)
  • IES — for IES light profile textures (postfix: _ies)
  • 3D LUT — for color correction textures
Image Type

Type of the texture to be generated. Available options are:

  • 2D — 2D texture. This is the most commonly used type of texture. These textures are used in various materials and be mapped to 3D meshes, GUI elements, etc.
  • 3D — 3D texture. This type of textures can be used for volumetric effects or color variations.
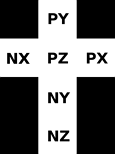
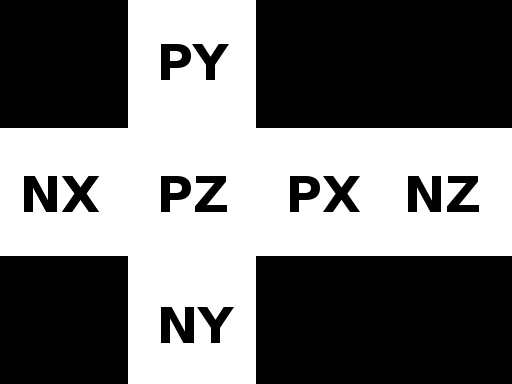
  • Cube — cubemap texture. It can be used for your world's environment, sky dome or Environment Probe. The imported cubemap will be oriented the following way:

    The following layouts of source cubemaps are supported:

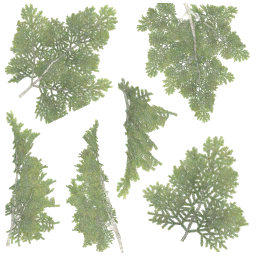
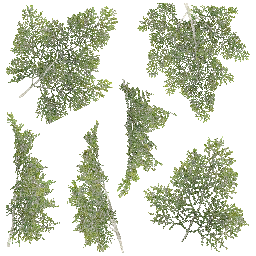
    Horizontal cross layout Vertical cross layout Cylindrical Panorama
  • 2D Array — array of 2D textures. These textures can be used for terrain details, etc.
Image Format

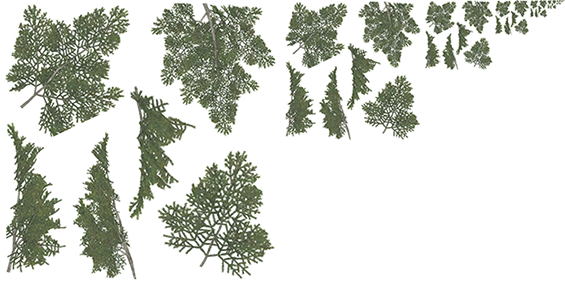
Defines the image pixel format: bit depth and channels used. Compressed formats are supported. The default format is RGB8.

The drop-down menu contains all possible formats. However, if an unsuitable format is selected for the texture, the image would not be imported properly. For example, the normal texture accepts ATI2 files only. For more details on formats, see the description of the texture asset format.

Mipmap Type

Type of filtering to be used for mipmap generation. Available options are:

  • Box — choose this type to use simple box filter for mipmap generation.

    Notice
    If a texture contains very narrow features (e.g., lines), then aliasing artifacts may be very pronounced. In this case it might be better to choose the Combined option.
  • Point — choose this type to use point filtration for mipmap generation.

  • Combine — choose this type to get mipmaps from the source image.

    Notice
    If the width and/or height of the source image are not power of 2, set the corresponding resolution parameter to Original.
Mipmaps SRGB Correction Enables sRGB gamma correction for mipmaps.

Resolution Parameters#

Width

Texture width (a power of 2).

  • Original — source image width is used.
  • Auto (default) — the power of 2 value closest to the source image width is used.
Height

Texture height (a power of 2).

  • Original — source image height is used.
  • Auto (default) — the power of 2 value closest to the source image height is used.
Notice
If the original width or height is not equal to a power of 2 and is selected as an import setting, the imported texture would fail to be compressed.

Other Parameters#

Invert G Channel

Enable inversion of the green channel of the imported image. Depending on the game engine or 3D software package you use, normal maps can be handled differently. This option is used to simplify conversion of normal maps from different source platforms.

Texture Postfixes#

Texture postfix is important, as it defines compression algorithms and color channels to be used. Postfixes correspond to certain texture presets. The list of available postfixes includes the following ones:

  • texture_alb for albedo textures (RGB — color, A — opacity). Other possible postfixes are: _al, _albedo, _albedomap, _albedo_map, _albedotexture, _albedo_texture, _col, _color, _colormap, _color_map, _colortexture, _color_texture.
  • texture_d for diffuse textures (RGB — color, A — opacity). Other possible postfixes are: _d, _dif, _diff, _diffuse, _diffusemap, _diffuse_map, _diffusetexture, _diffuse_texture.
  • texture_n for normal textures (RG — surface normal components). Other possible postfixes are: _nrm, _norm, _nrml, _normal, _normalmap, _normal_map, _normaltexture, _normal_texture.
  • texture_nrgb for normal textures that store opacity in the B channel (RG — normals, B — opacity.
  • texture_s for specular textures (RGB — specular, A — gloss). Other possible postfixes are: _sp,_ spec, _specular, _specularmap, _specular_map, _speculartexture, _specular_texture.
  • texture_sh for shading textures (R — metalness, G — roughness, B — specular, A — microfiber).
  • texture_a for ambient occlusion textures (R — AO map). Other possible postfixes are: _ao, _oc, _aomap, _ao_map, _aotexture, _ao_texture, _ambient, _occlusion, _aocclusion, _occlusionmap, _occlusion_map, _occlusiontexture, _occlusion_texture, _ambientocclusion, _ambient_occlusion.
  • texture_h for parallax height maps (parallax effect) (R — height map). Other possible postfixes are: _p, _pa, _par, _parallax, _parallaxmap, _parallax_map, _parallaxtexture, _parallax_texture, _height, _heightmap, _height_map, _heighttexture, _height_texture, _dis, _disp, _displacement, _displacementmap, _displacement_map, _displacementtexture, _displacement_texture.
  • texture_l for light maps (RGB — light color).
  • texture_e for emission textures (RGB — glow color). Other possible postfixes are: _em, _emis, _emission, _emmap, _em_map, _emtexture, _em_texture, _emissionmap, _emission_map, _emissiontexture, _emission_texture.
  • texture_m for image mask textures.
  • texture_c for cubemap textures used as the world environment or environment probe.
  • texture_vp for 3D lighting textures used for voxel probes.
  • texture_v for 3D textures used for volumetric effects or color variations.
  • texture_ies for IES light profile textures.

You can define default import options for a texture by simply adding a postfix to its name.

Notice
When you import a texture with a postfix, make sure that it corresponds to the texture's type and purpose. E.g. if you name an albedo texture as "color_n.jpg", it will be imported as a 2-channel normal map by default.

Assigning Imported Texture#

To assign the imported texture to a material, you can choose one of the following ways:

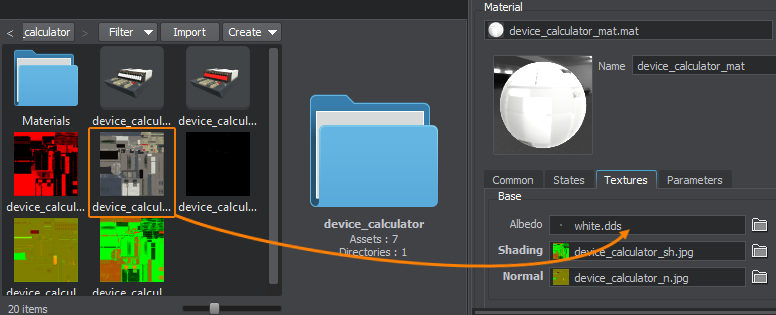
  • Drag the icon of the texture asset from the Asset Browser window to the destination field in the Parameters window.
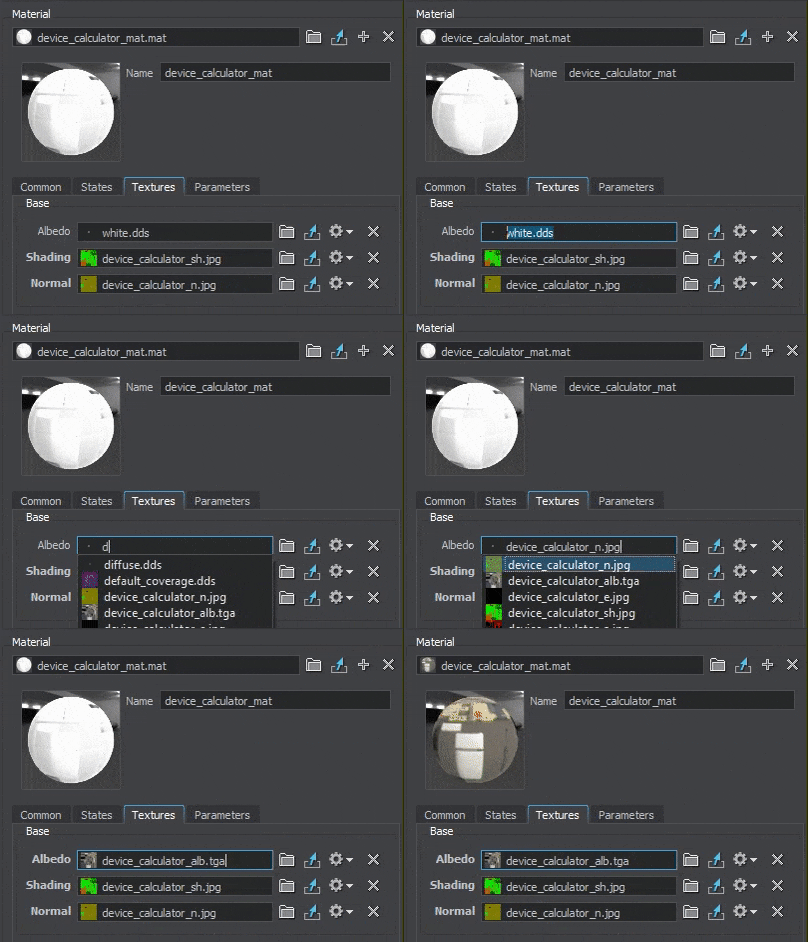
  • Use the button next to the destination field in the Parameters window to select the desired asset.

  • Type the name of the asset to the destination field in the Parameters window manually. If an asset with the specified name exists in the project it will be shown while you type.
Texture Conversion#

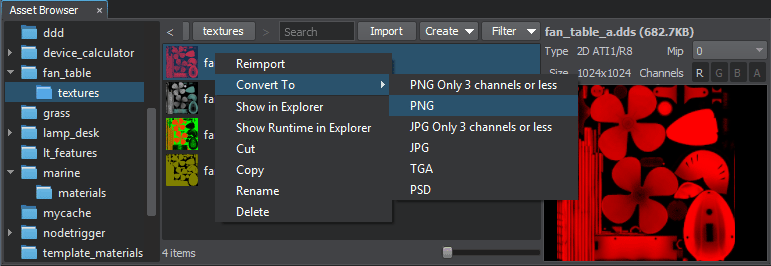
Texture Conversion is a feature that allows optimizing a texture at a later stage of the project without changing the asset GUID, thus preserving all necessary links. Any texture asset used in your project can be converted to one of the available formats.

To convert a texture, right-click the texture in the Asset Browser to open the context menu, and select Convert To and the required file format. The file immediately will be converted to a selected format.
Last update: 2023-06-23
Build: ()