Docker容器配置
 This article describes the Docker container configuration process. Docker enables you to develop or run your UNIGINE-based application in different environments in isolation inside the container. Your computer needs to have an NVIDIA graphic card and Linux system with Ubuntu to replicate all necessary steps.本文介绍Docker容器配置过程。Docker使您能够在容器内隔离的不同环境中开发或运行基于UNIGINE的应用程序。您的计算机需要有一个NVIDIA图形卡和Linux系统与Ubuntu复制所有必要的步骤。
To work within other distributions, like Amazon, Open Suse, Debian, Centos, or RHEL, please refer to the NVIDIA Container Toolkit documentation.要在Amazon、Open Suse、Debian、Centos或RHEL等其他发行版中工作,请参阅NVIDIA Container Toolkit文档。
System Requirements系统要求#
You need to shut down all the programs playing sound. The ALSA driver should be installed in the system to play the sound correctly.您需要关闭所有播放声音的程序。应在系统中安装ALSA驱动程序才能正确播放声音。
The Docker daemon binds to a Unix socket, not a TCP port. By default it's the root user that owns the Unix socket, and other users can only access it using sudo (read more). The Docker daemon always runs as the root user.Docker守护程序绑定到Unix套接字,而不是TCP端口。默认情况下,拥有Unix套接字的是root用户,其他用户只能使用sudo访问它(阅读更多)。Docker守护程序始终以root用户身份运行。
If you don't want to preface the docker command with sudo, create a Unix group called docker and add users to it (read more). When the Docker daemon starts, it creates a Unix socket accessible by members of the docker group.如果您不想在docker命令的前面加上sudo,请创建一个名为docker的Unix组并向其添加用户(阅读更多)。当Docker守护程序启动时,它会创建一个可由docker组的成员访问的Unix套接字。
Docker ConfigurationDocker配置#
To configure Docker perform the following steps:要配置Docker,请执行以下步骤:
- Install NVIDIA Container Toolkit安装NVIDIA容器工具包
- Get the Docker container image or assemble it yourself.获取Docker容器镜像或者自己组装。
- Run a Docker container in test mode.在测试模式下运行Docker容器。
NVIDIA Container Toolkit InstallationNVIDIA容器工具包安装#
-
Configure NVIDIA Container Toolkit according to its configuration documentation. Install the package repository and the GPG key, type the command line for that:根据其配置文档,配置NVIDIA Container Toolkit。安装包存储库和GPG键,键入命令行:输出
$ distribution=$(. /etc/os-release;echo $ID$VERSION_ID) \ && curl -fsSL https://nvidia.github.io/libnvidia-container/gpgkey | sudo gpg --dearmor -o /usr/share/keyrings/nvidia-container-toolkit-keyring.gpg \ && curl -s -L https://nvidia.github.io/libnvidia-container/$distribution/libnvidia-container.list | \ sed 's#deb https://#deb [signed-by=/usr/share/keyrings/nvidia-container-toolkit-keyring.gpg] https://#g' | \ sudo tee /etc/apt/sources.list.d/nvidia-container-toolkit.list -
Install nvidia-docker2:安装nvidia-docker2:输出
$ sudo apt-get update
$ sudo apt-get install -y nvidia-docker2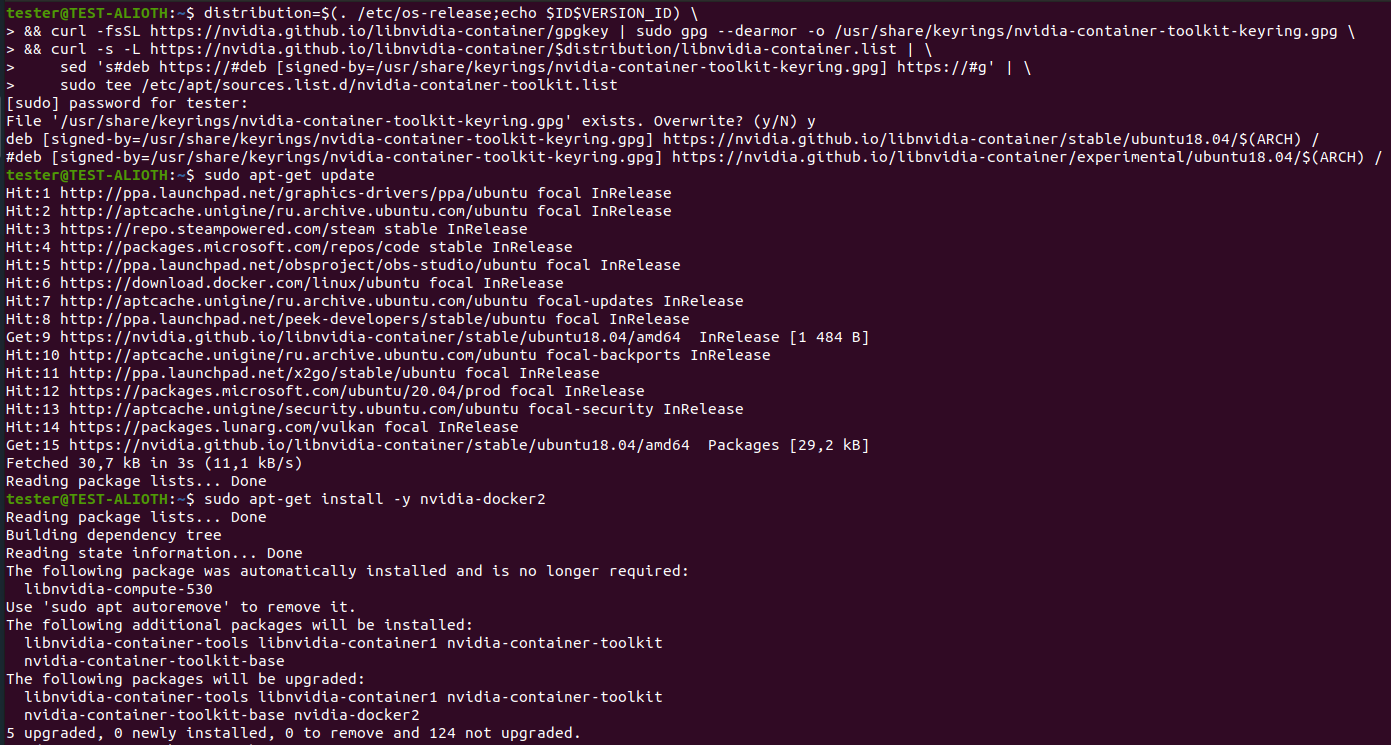
-
Restart Docker:重启Docker:输出
$ sudo systemctl daemon-reload
$ sudo systemctl restart docker
Preparing Container Image准备容器映像#
There is a ready-to-use container image that we have prepared for you on the Docker Hub - check out the following link run-unigine-in-docker and use the following command:在Docker Hub上有一个我们为您准备的即用型容器映像:查看以下链接run-unigine-in-docker并使用以下命令:
docker pull unigine/run-unigine-in-dockerIn case for any reason instead of using the container image from the Docker Hub you want to prepare and assemble your container image manually please follow the instructions in the spoiler below:如果出于任何原因,您想要手动准备和组装容器映像,而不是使用Docker Hub的容器映像,请按照以下说明进行操作:
-
Create a folder to work with the container:创建要使用容器的文件夹:输出
$ mkdir ~/unigine-in-docker -
Create a Dockerfile text file inside the unigine-in-docker/ folder:在unigine-in-docker/文件夹内创建一个Dockerfile文本文件:输出
$ cd ~/unigine-in-docker $ touch Dockerfile -
Add the following lines to the Dockerfile file and save it:将以下行添加到Dockerfile文件并保存:输出
FROM nvidia/opengl:base-ubuntu20.04 VOLUME /tmp/.X11-unix RUN apt update && apt upgrade -y # linux-headers- hardcoded, if it don't build - try update version of linux-headers RUN DEBIAN_FRONTEND=noninteractive apt-get update && DEBIAN_FRONTEND=noninteractive apt install -y \ python3 \ wget gnupg \ xvfb \ x11-xserver-utils \ python3-pip \ libegl1-mesa \ libgl1-mesa-dev \ libxv1 \ gcc g++ make ccache \ libxrandr-dev \ libxinerama-dev \ libopenal1 \ libxrender-dev \ libxext-dev \ libc6-dev \ libx11-dev \ libxi-dev \ libxml2-dev \ cmake \ nano vim \ lshw \ libglu1-mesa \ mesa-utils \ glmark2 \ xxd \ # for sdk bro2 \ libxcb-shape0 \ libxcb-xkb1 \ libxcb-icccm4 \ libxcb-image0 \ libxcb-keysyms1 \ libxcb-render-util0 \ libxkbcommon-x11-0 \ linux-headers-5.4.0-135-generic \ lxterminal \ # sound \ alsa-base \ alsa-utils \ libsndfile1-dev COPY ./asound.conf /etc/ RUN python3 -m pip install pyinotify ENV XDG_RUNTIME_DIR=/tmp/.X11-unix # install dotnet and runtime # if it don't build - try to find more recent versions of dotnet at https://dotnet.microsoft.com/en-us/download/dotnet/6.0 RUN wget -O dotnet.tar.gz https://download.visualstudio.microsoft.com/download/pr/01292c7c-a1ec-4957-90fc-3f6a2a1e5edc/025e84c4d9bd4aeb003d4f07b42e9159/dotnet-sdk-6.0.418-linux-x64.tar.gz RUN wget -O dotnet-runtime.tar.gz https://download.visualstudio.microsoft.com/download/pr/b63daa46-51f4-480e-ad03-ef2c5a6a2885/ae059763456991305109bf98b3a67640/aspnetcore-runtime-6.0.26-linux-x64.tar.gz RUN mkdir /usr/local/etc/dotnet-sdk-6.0 RUN tar -xzf dotnet.tar.gz -C /usr/local/etc/dotnet-sdk-6.0 RUN tar -xzf dotnet-runtime.tar.gz -C /usr/local/etc/dotnet-sdk-6.0 RUN rm -rf /usr/bin/dotnet RUN ln -s /usr/local/etc/dotnet-sdk-6.0/dotnet /usr/bin/dotnet # path to libraries ENV LD_LIBRARY_PATH="/opt/project/bin" -
Create a new asound.conf file:创建一个新的asound.conf文件:输出
$ sudo vi asound.conf -
Write the following script to the asound.conf file:将以下脚本写入asound.conf文件:输出
pcm.!default { type plug slave { pcm "hw:0,0" } } ctl.!default { type hw card 0 } pcm.mixed-analog { type plug slave.pcm "dmix-analog" hint { show on description "Mixed Analog Output - Use analog outputs, converting samples, format, and rate as necessary. Allows mixing with system sounds." } } # Control device (mixer, etc.) for the card ctl.mixed-analog { type hw card 0 } -
Assemble the Docker image (inside the unigine-in-docker folder):组装Docker映像(在unigine-in-docker文件夹内):输出
$ docker build --rm --tag run_unigine_in_docker:latest -f Dockerfile .
Docker Test RunDocker测试运行#
-
Launch the container in trial mode to view GPU characteristics:在试用模式下启动容器以查看GPU特性:输出
$ cd ~/unigine-in-docker/
$ docker run -it --rm --network host \
--runtime=nvidia --gpus 0 -e NVIDIA_VISIBLE_DEVICES=0 \
-e DISPLAY=${DISPLAY} \
-e NVIDIA_DRIVER_CAPABILITIES=display,compute \
-v /tmp/.X11-unix:/tmp/.X11-unix \
 run_unigine_in_docker:latest \
 /bin/bash
# nvidia-smi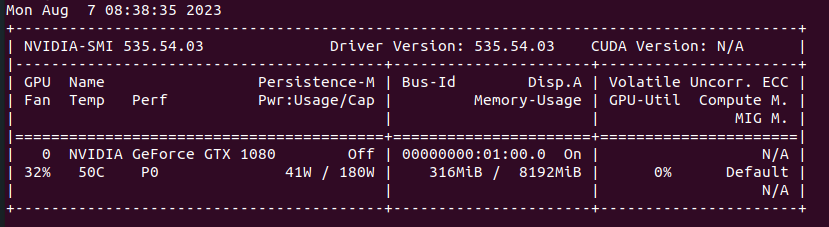
-
Check selected GPU drivers with the following command: glxinfo | grep "OpenGL". You will see the full information about your GPU. Or use the command glxinfo | grep "OpenGL renderer" to display the model name of the GPU used. An example of the response:使用以下命令检查选定的GPU驱动程序:glxinfo | grep "OpenGL"。您将看到有关GPU的完整信息。或者使用命令glxinfo | grep "OpenGL renderer"显示所用GPU的型号名称。响应的一个例子:

Using Docker Container使用Docker容器#
As You have successfully built and run GPU-accelerated Docker container you can do the following:当您成功构建并运行GPU加速的Docker容器时,您可以执行以下操作: