Planar Reflection Probe
Planar Reflection Probe represents a planar surface that captures and projects a reflection relative to the camera onto a surface just like a mirror. For each visible Planar Reflection Probe on the scene a new temporary texture is created every frame.
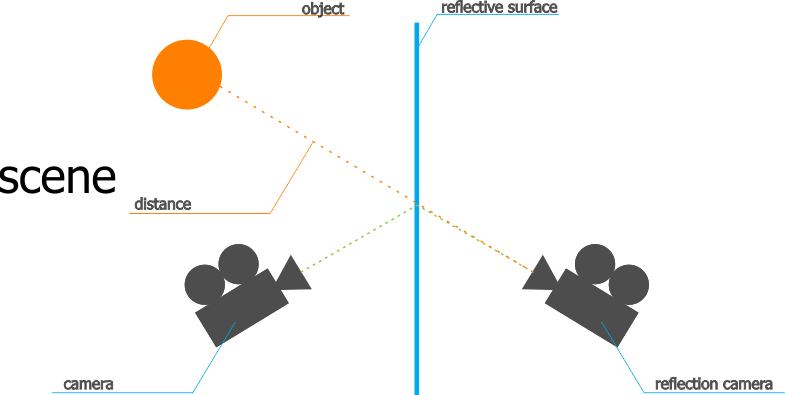
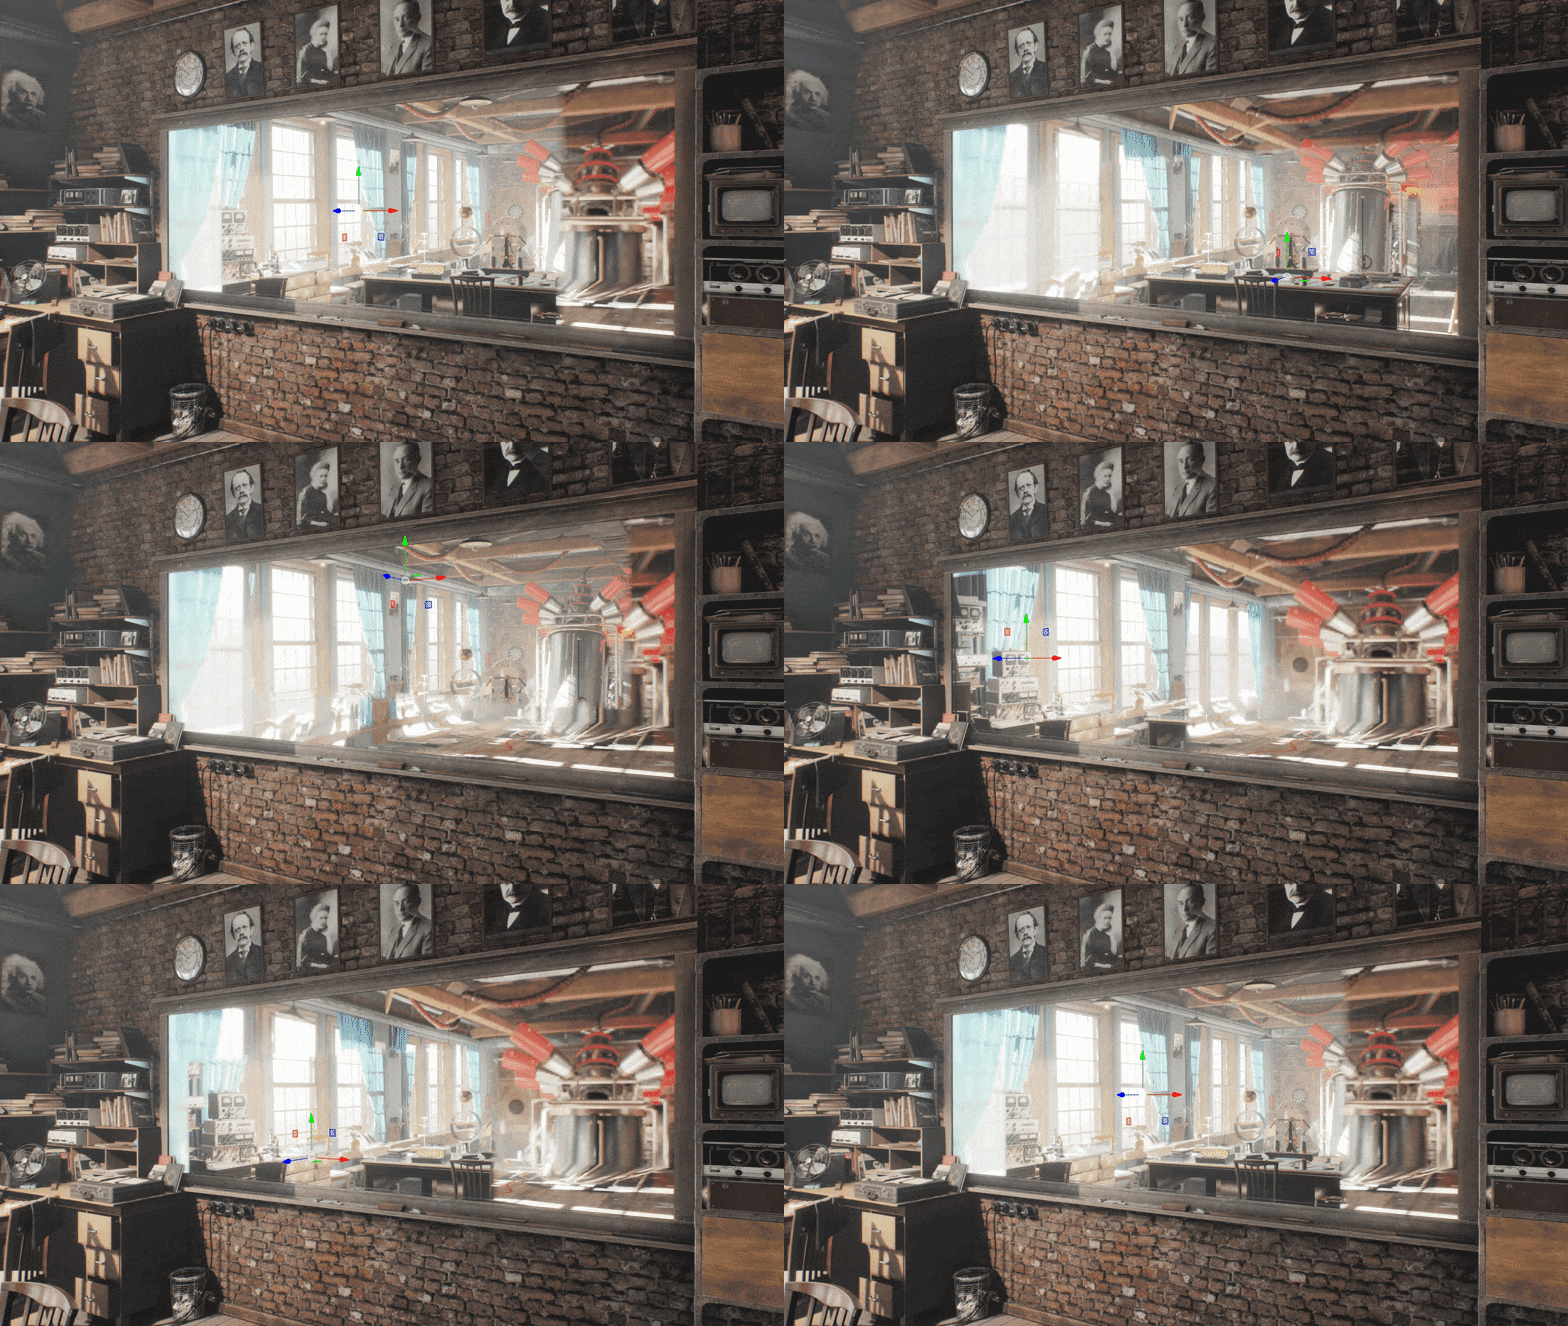
The texture is projected on a surface placed behind the Planar Reflection Probe. With Planar Reflection Probe you can create flat mirrors and flat dynamic reflective surfaces: parquet, flat varnished surfaces, etc.
See also#
- The Light Planar Probe class to manage planar probes via API.
- An article on Reflections.
- An article on Dynamic Reflections Optimization.
- An article on SSR.
Adding a Planar Reflection Probe#
To add a Planar Reflection Probe node to the scene via UnigineEditor, do the following:
- On the Menu bar, click Create -> Lights -> Planar Reflection Probe.
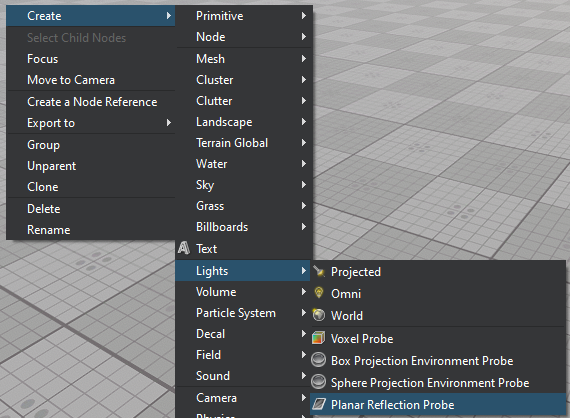
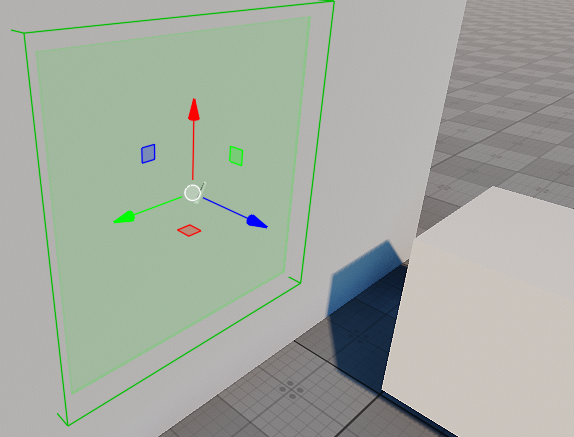
- Place the Planar Reflection Probe onto the surface that you want to make reflective so that the probe would intersect the surface.
- Decrease the Roughness parameter of the surface so that it doesn't go beyond the Roughness Visibility Min and Roughness Visibility Max range.
- Adjust the Metalness parameter of the surface material: higher values make the reflection more visible.
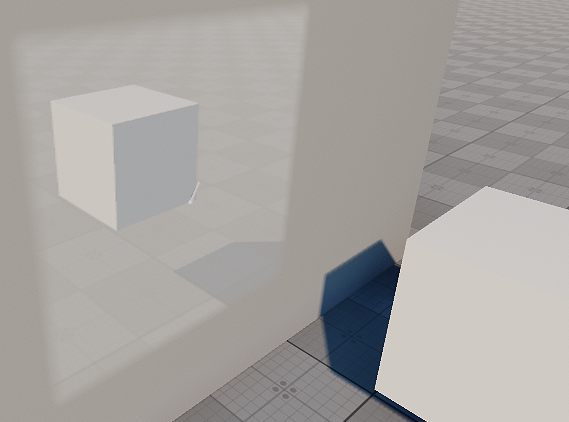
- Adjust Planar Reflection Probe settings to achieve the desired reflection result. Available parameters are described below.
NoticeEach Planar Reflection Probe renders the scene one more time, thus, using multiple reflections may significantly affect performance.
Planar Reflection Probe Settings#
The Planar Reflection Probe settings can be found in the Node tab of the Parameters window. This tab includes both the parameters attributable to all light sources and the parameters specific for the probe. Planar Reflection Probe parameters are split into:
- Common Parameters for light and rendering configuration.
- Planar Reflection Parameters for reflection configuration.
Common Parameters#
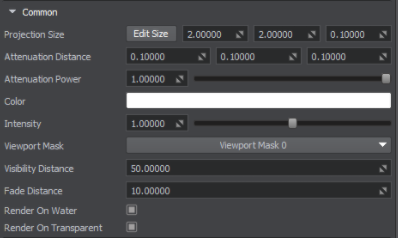
| Projection Size | Defines the box-shaped influence volume around the probe, in units, in which reflective surfaces (having the appropriate roughness values) shall use the results captured by the probe. |
|---|---|
| Attenuation Power | Sets the attenuation power for the projection. The higher the value, the faster the projection decays within the attenuation area. |
| Attenuation Distance | The attenuation distance specifies how far the projection can reach any surfaces from the Probe position. It also specifies the attenuation area around the Probe at which the projection starts to fade out at the specified rate. |
| Color | Sets the color modifier in the RGBA format for the projection that works like a filter. It can be useful when you need to artificially paint over the reflection in some color, or darken it. But if you need a physically correct reflection, then the color has to be strictly white. |
| Intensity |
Sets the light color multiplier, which provides fine control over color intensity of the projection:
|
| Viewport Mask | Sets the viewport mask for the Planar Reflection Probe. |
| Visibility Distance | Distance from the camera in units, up to which reflected projection will be rendered. |
| Fade Distance | Distance from the camera in units, starting from which the Planar Reflection Probe starts to fade out gradually. |
| Render on Water | Toggles rendering of reflections on the water surface. |
| Render on Transparent | Toggles rendering of reflections on transparent objects. |
Planar Reflection Parameters#
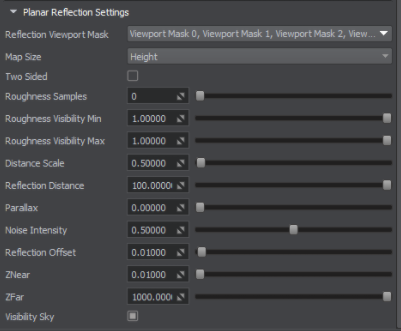
| Reflection Viewport Mask | The reflection mask that controls rendering of the Planar Reflection Probe reflections into the reflection camera viewport. Objects with matching viewport masks will be rendered. |
|---|---|
| Map Size |
Specifies the reflection’s texture resolution in pixels. The texture is squared (height and width are equal). Notice
Using high-resolution maps for reflections may significantly affect performance, as dynamic reflections are rendered each frame. |
| Two Sided | Enables projection for both sides. If this parameter is on, then the reflection will be projected from both sides of the Planar Reflection Probe in opposite directions. |
| Roughness Samples |
Sets the number of samples used to adjust quality of the blurring effect for the reflection on rough surfaces.
Notice
Rougher materials require more samples for smoother blurring reflection, but setting too high number of samples may cause a performance drop. |
| Roughness Visibility Min | Lower surface roughness limit, starting from which the reflection starts to fade out gradually. |
| Roughness Visibility Max | Upper surface roughness limit, starting from which the reflection completely disappears. |
| Distance Scale | Global distance multiplier within the range of [0.0f;100.0f] for the reflection LODs visibility distance. Distance Scale is applied to the distance measured from the reflection camera to the node (surface) bound.
Notice
This option enables rendering of less detailed LODs for reflections to increase performance. |
| Reflection Distance | The render distance for the reflection that specifies how far from the camera the reflection will be rendered. |
| Parallax |
Degree of reflection distortion within the range of [0;1]. Distortion depends on an angle between the probe plane and the surface onto which the probe projects reflection. Increasing the value amplifies visual distortion as a result of increasing this angle. |
| Noise Intensity | Additional jitter for roughness samples that creates a noise effect on the reflection. Higher values make the noise effect more noticeable. |
| Reflection Offset | Z axis offset (relative to the probe local coordinate system) for the reflection. Can be used to change the viewpoint of the reflection camera moving it forward or backwards relative to the probe. |
| ZNear | Distance to the near clipping plane defining a frustum to be used for grabbing reflections. |
| ZFar | Distance to the far clipping plane defining a frustum to be used for grabbing reflections.
Notice
The higher the value, the more distant objects will be rendered, therefore high values are not recommended due to possible performance hit. |
| Visibility Sky | Renders sky in the reflection. Can be used, when the reflection is supposed to reflect closeby objects only. |