设置环境以开发编辑器插件
This article describes the process of configuring development environment required to develop plugins for UnigineEditor depending on your operating system.本文描述了根据您的操作系统配置为 UnigineEditor 开发插件所需的开发环境的过程。
UnigineEditor is an application written entirely in C++ relying a lot on the Qt5 framework infrastructure. So, in order to extend its functionality not only C++ programming skills are required, but you should also be familiar with the Qt5 framework, CMake build system.UnigineEditor 是一个完全用 C++ 编写的应用程序,很大程度上依赖于 Qt5 框架基础架构。因此,为了扩展其功能,不仅需要 C++ 编程技能,还应该熟悉 Qt5 框架、CMake 构建系统。
Windows Environment视窗环境#
The following actions are to be performed to prepare your environment on Windows:要在 Windows 上准备环境,需要执行以下操作:
- Download an offline installer for the Qt open-source 5.12.3 from the official web-site for Windows operating system.从官方网站下载 Qt open-source 5.12.3 的离线安装程序适用于 Windows操作系统。
- Run the installer and click Next in the window that opens.运行安装程序并在打开的窗口中单击 Next。
-
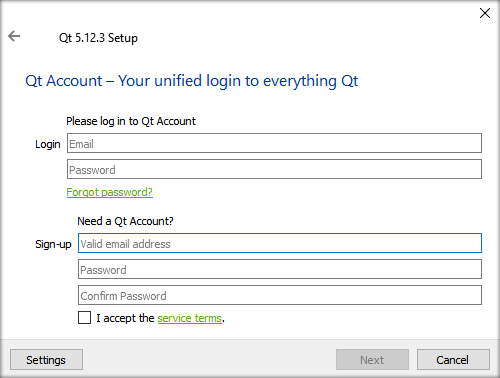
To start the installation process you will need to enter you Qt account credentials (if you already have an account) or you'll can Sign-up for a new account right in the installer by filling the fields offered, accepting the service terms and clicking Next.要开始安装过程,您需要输入 Qt 帐户凭据(如果您已经有帐户),或者您可以通过填写提供的字段、接受服务条款并单击来直接在安装程序中注册一个新帐户Next。
- Before proceeding to the next step you'll have to confirm your email, so check your inbox for the new email verification message from the Qt Company and click verification link provided.在继续下一步之前,您必须确认您的电子邮件,因此请检查您的收件箱以获取来自 Qt Company 的新电子邮件验证消息,然后单击提供的验证链接。
-
After clicking the link you will be redirected to your Qt account at https://login.qt.io/login and prompted to fill other required fields and click Confirm.单击该链接后,您将被重定向到位于 https://login.qt.io/login 的 Qt 帐户,并提示您填写其他必填字段并单击 Confirm。
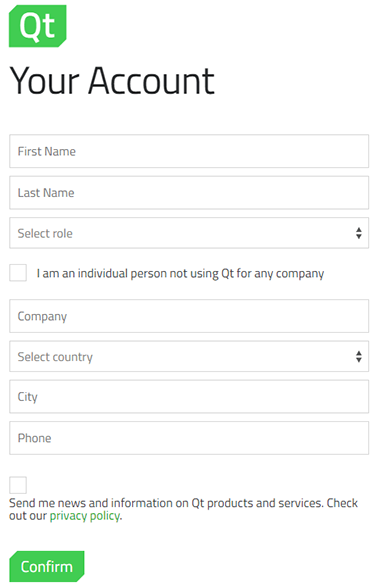
As you confirm you may return to your offline installer and click Next, the welcome message shall be displayed, click Next again and the installation process shall continue.当您确认可以返回离线安装程序并单击 Next 时,将显示欢迎消息,再次单击 Next 并继续安装过程。
-
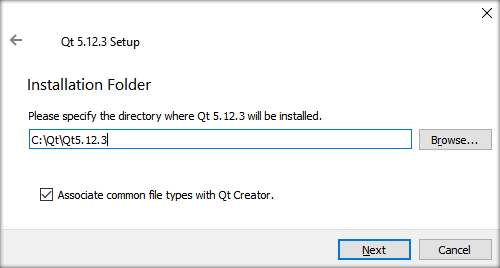
At the next stage specify installation directory and click Next to proceed to the Select Components stage.在下一个阶段指定安装目录,然后单击 Next 进入 Select Components 阶段。
-
Select Components to be installed.选择要安装的组件。
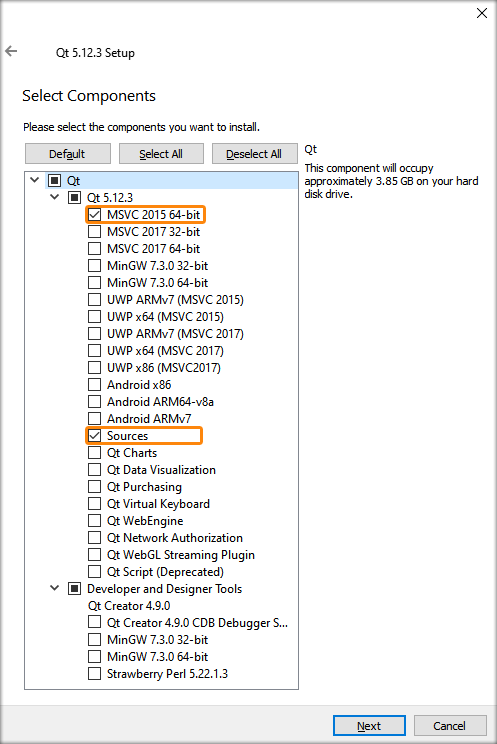 注意The Sources component is optional, so tick it only if you need to browse through the Qt source code.Sources 组件是可选的,因此只有在需要浏览 Qt 源代码时才勾选它。
 - Read and confirm that you accept the License agreement and click Next to continue the installation process.阅读并确认您接受许可协议,然后单击 Next 继续安装过程。
-
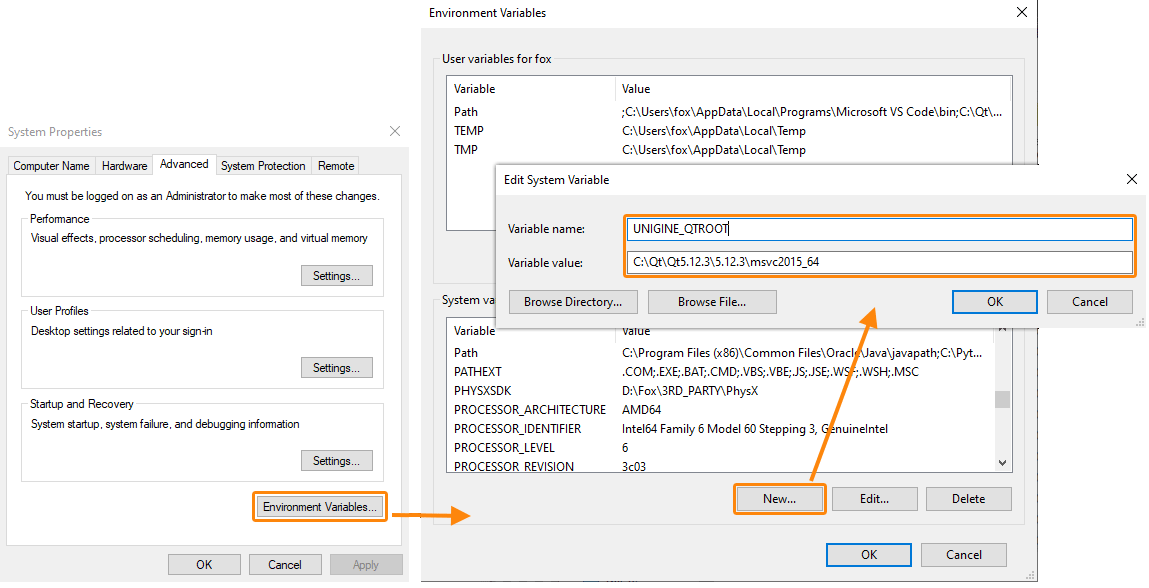
After successful installation of the Qt Framework 5.12.3 you should add a new environment variable named UNIGINE_QTROOT and set its value so that it points to the folder, where the MSVC2015 64bit compiler kit is located.成功安装 Qt Framework 5.12.3 后,您应该添加一个名为 UNIGINE_QTROOT 的新环境变量并设置其值,使其指向 MSVC2015 64bit 编译器工具包所在的文件夹。
On Windows the path should be as follows:
<YOUR_QT_INSTALLATION FOLDER>\5.12.3\msvc2015_64.在 Windows 上,路径应如下所示:
<YOUR_QT_INSTALLATION FOLDER>\5.12.3\msvc2015_64。In our case, for example, "C:\Qt\Qt5.12.3\5.12.3\msvc2015_64"例如,在我们的例子中, "C:\Qt\Qt5.12.3\5.12.3\msvc2015_64"
- Open Control Panel → System and select Advanced System Settings打开 Control Panel → System 并选择 Advanced System Settings
-
Follow the instructions given in the picture below.请按照下图中的说明进行操作。
- Click OK and close the Control Panel.单击 OK 并关闭控制面板。
注意If you're using CMake, it's enough to have a path to Qt5.12.3 installation directory in the PATH variable.如果您使用的是 CMake,那么在 PATH 变量中有一个 Qt5.12.3 安装目录的路径就足够了。 - Restart your IDE, so that the information on environmental variables is updated.重新启动 IDE,以便更新有关环境变量的信息。
- Now you are ready to start developing your first plugin for UnigineEditor!现在您可以开始为 UnigineEditor 开发您的第一个插件了!
Linux EnvironmentLinux 环境#
The following actions are to be performed to prepare your environment on Linux:要在 Linux 上准备环境,需要执行以下操作:
- Download an offline installer for the Qt open-source 5.12.3 from the official web-site for Linux operating system.从官方网站下载Qt 开源 5.12.3的离线安装程序适用于 Linux操作系统。
- Run the installer and click Next in the window that opens.运行安装程序并在打开的窗口中单击 Next。
-
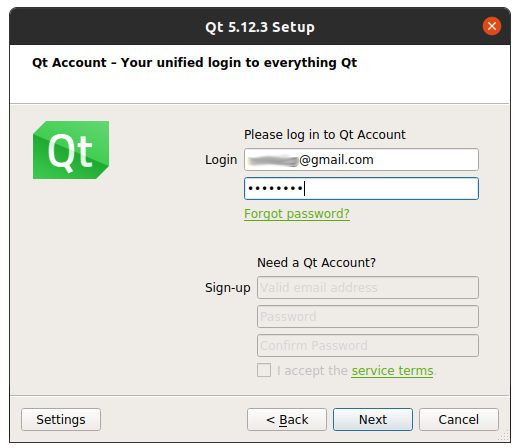
To start the installation process you will need to enter you Qt account credentials (if you already have an account) or you'll can Sign-up for a new account right in the installer by filling the fields offered, accepting the service terms and clicking Next.要开始安装过程,您需要输入 Qt 帐户凭据(如果您已经有帐户),或者您可以通过填写提供的字段、接受服务条款并单击来直接在安装程序中注册一个新帐户Next。
- Before proceeding to the next step you'll have to confirm your email, so check your inbox for the new email verification message from the Qt Company and click verification link provided.在继续下一步之前,您必须确认您的电子邮件,因此请检查您的收件箱以获取来自 Qt Company 的新电子邮件验证消息,然后单击提供的验证链接。
-
After clicking the link you will be redirected to your Qt account at https://login.qt.io/login and prompted to fill other required fields and click Confirm.单击该链接后,您将被重定向到位于 https://login.qt.io/login 的 Qt 帐户,并提示您填写其他必填字段并单击 Confirm。

As you confirm you may return to your offline installer and click Next, the welcome message shall be displayed, click Next again and the installation process shall continue.当您确认可以返回离线安装程序并单击 Next 时,将显示欢迎消息,再次单击 Next 并继续安装过程。
-
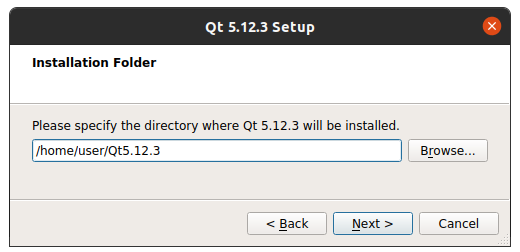
At the next stage specify installation directory and click Next to proceed to the Select Components stage.在下一个阶段指定安装目录,然后单击 Next 进入 Select Components 阶段。
-
Select Components to be installed.选择要安装的组件。
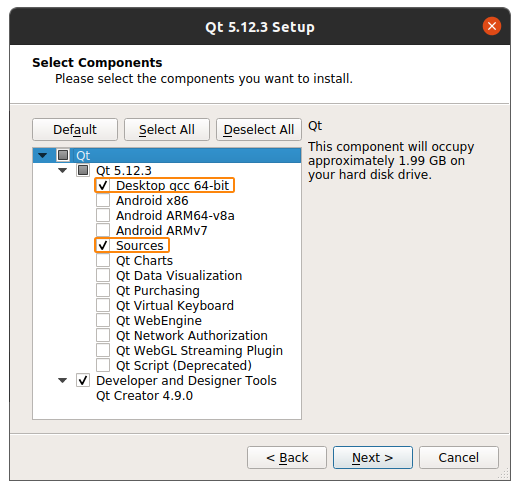 注意The Sources component is optional, so tick it only if you need to browse through the Qt source code.Sources 组件是可选的,因此只有在需要浏览 Qt 源代码时才勾选它。
 - Read and confirm that you accept the License agreement and click Next to continue the installation process.阅读并确认您接受许可协议,然后单击 Next 继续安装过程。
-
After successful installation of the Qt Framework 5.12.3 you should add a new environment variable named UNIGINE_QTROOT and set its value so that it points to the folder, where the GCC 64bit compiler kit is located.成功安装 Qt Framework 5.12.3 后,您应该添加一个名为 UNIGINE_QTROOT 的新环境变量并设置其值,使其指向 GCC 64bit 编译器工具包所在的文件夹。
注意If you're using CMake, it's enough adding a path to Qt5.12.3 installation directory to $PATH.如果您使用的是 CMake,将 Qt5.12.3 安装目录的路径添加到 $PATH 就足够了。On Linux the path should be as follows:
<YOUR_QT_INSTALLATION FOLDER>/5.12.3/gcc_64.在 Linux 上,路径应如下所示:
<YOUR_QT_INSTALLATION FOLDER>/5.12.3/gcc_64。-
Open the current user's profile into a text Editor在文本编辑器中打开当前用户的个人资料
源代码vi ~/.bash_profile -
Add the export command for your environment variable.为您的环境变量添加导出命令。
源代码export UNIGINE_QTROOT=<YOUR_QT_INSTALLATION FOLDER>/5.12.3/gcc_64 - Save your changes.保存您的更改。
注意Adding the environment variable to a user's bash profile alone will not export it automatically, the variable will be exported the next time the user logs in. To immediately apply all changes to bash_profile, use the source command.将环境变量单独添加到用户的 bash 配置文件不会自动导出,该变量将在用户下次登录时导出。要立即将所有更改应用到 bash_profile,请使用 source 命令。
源代码source ~/.bash_profile -
- Now you are ready to start developing your first plugin for UnigineEditor!现在您可以开始为 UnigineEditor 开发您的第一个插件了!
