实例化节点

The virtual world, that you're building, may contain a lot of identical objects, that should always look the same, such as electricity pylons, planes, wheels, boxes, etc.您正在构建的虚拟世界可能包含许多相同的对象,这些对象应该始终看起来相同,例如电塔,飞机,轮子,盒子等。
When you clone these objects and place them in your world, multiple separate copies are created. Thus, if you decide to change something (e.g., the geometry or materials of some parts of the pylons) you'll have do that for each copy individually.当您克隆这些对象并将它们放置在您的世界中时,会创建多个单独的副本。因此,如果您决定更改某些内容(例如,定向塔某些部分的几何形状或材料),则必须分别为每个副本进行更改。
建议不要制作一个对象的副本,而建议制作一个对象的实例。这种方法可确保更改重复使用的对象的参数时的完整性,尤其是当它们复杂且复杂时。为此, 您可以简单地添加多个Node References来引用单个*.node文件,然后仅编辑一个节点引用以更新所有节点。
Below is the typical workflow for node instancing based on Node References.以下是基于Node References的节点实例化的典型工作流程。
1. Creating a Hierarchy of Nodes1.创建节点层次结构#
First of all we should prepare the basic hierarchy, that will represent our object. Suppose we have organized the nodes hierarchy for a helicopter, that we are going to reuse several times in our world (see the picture below)首先,我们应该准备基本的层次结构,它将代表我们的对象。假设我们已经为直升机配置了节点层次结构,我们将在世界中多次重用(请参见下图)

2. Converting the Hierarchy of Nodes2.转换节点的层次结构#
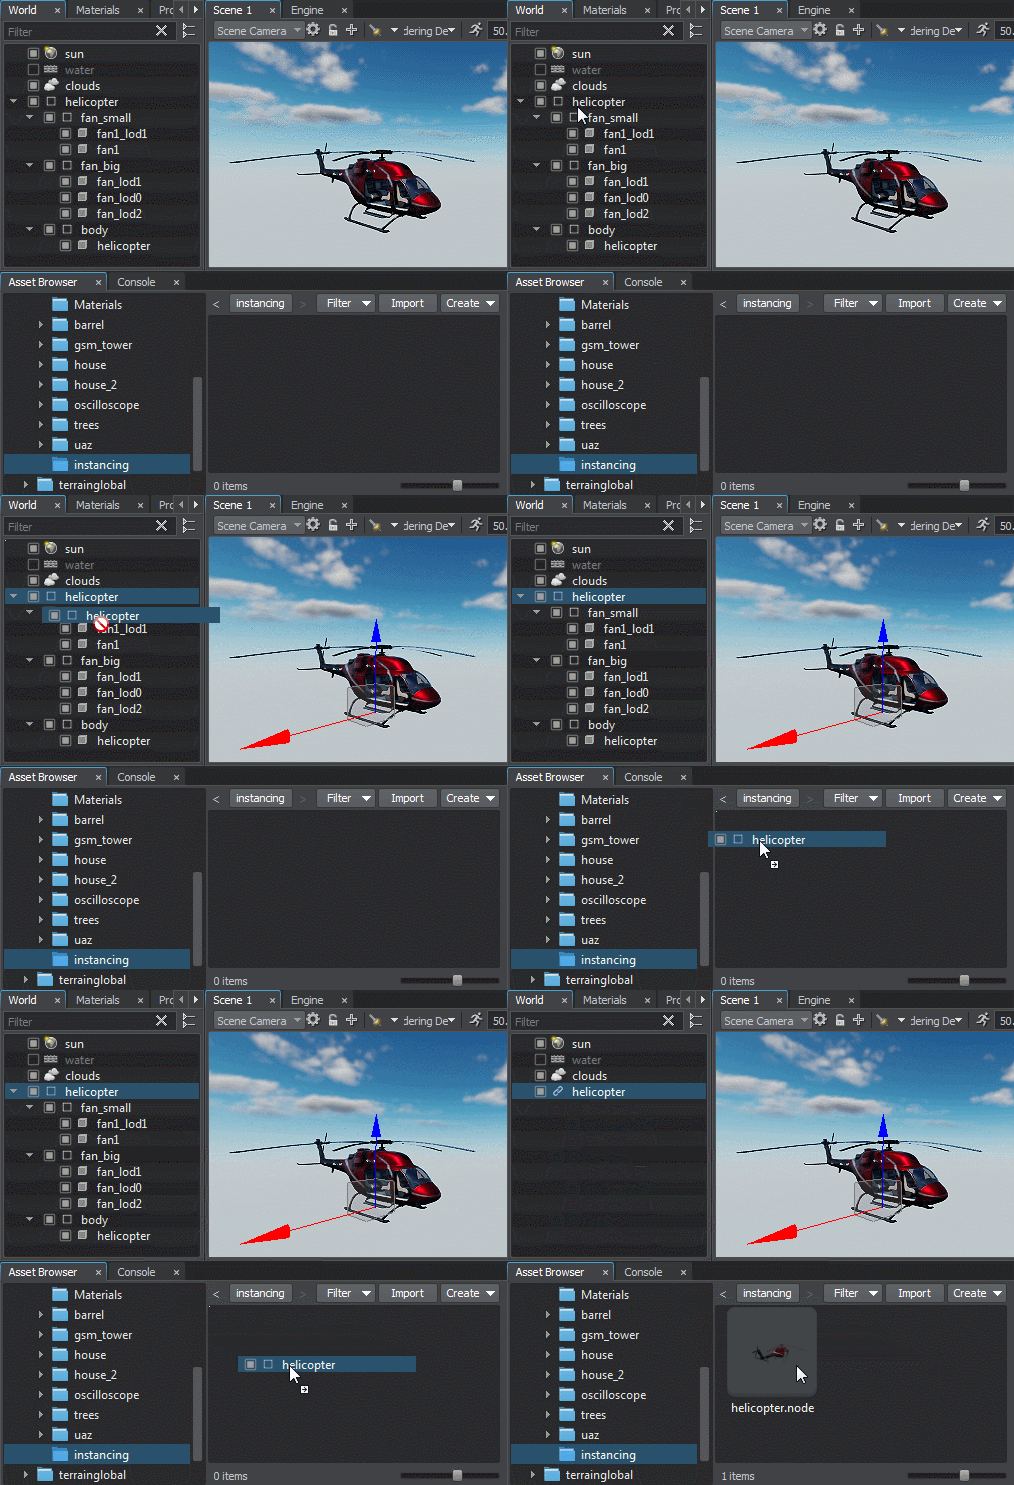
The second step is to convert the hierarchy of nodes to a Node Reference. You can do that by simply dragging the root node of the hierarchy to the desired folder in the Asset Browser. A corresponding *.node asset (source), containing the hierarchy, will be created in the folder. The node hierarchy will be replaced with a reference to this asset.第二步是将节点的层次结构转换为Node Reference。您只需将层次结构的根节点拖到 资产浏览器 中的所需文件夹中即可。包含层次结构的对应*.node资产(源)将在文件夹中创建。节点层次结构将被对此资产的引用替换。

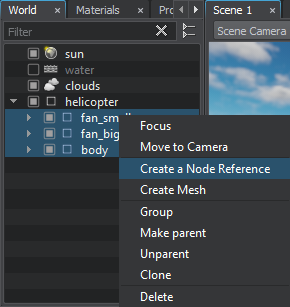
You can also convert a single node or a group of selected nodes in the World Nodes Hierarchy window via the context menu. To do so, select the desired node(s) in the World Nodes Hierarchy window, right-click on the selected node and choose Create a Node Reference. A corresponding *.node asset (source), containing the selected node (or a group of nodes as children with a Dummy Node as the root), will be created in the current folder opened in the Asset Browser. Selected nodes will be replaced with a reference to this asset.您还可以通过上下文菜单在 World Nodes Hierarchy 窗口中转换单个节点或一组选定的节点。为此,请在World Nodes Hierarchy窗口中选择所需的节点,右键单击所选节点,然后选择Create a Node Reference。将在资产浏览器中打开的当前文件夹中创建一个包含选定节点(或一组节点的子节点,其根为Dummy Node)的对应*.node资产(源)。所选节点将被对此资产的引用替换。

3. Placing Instances3.放置实例#
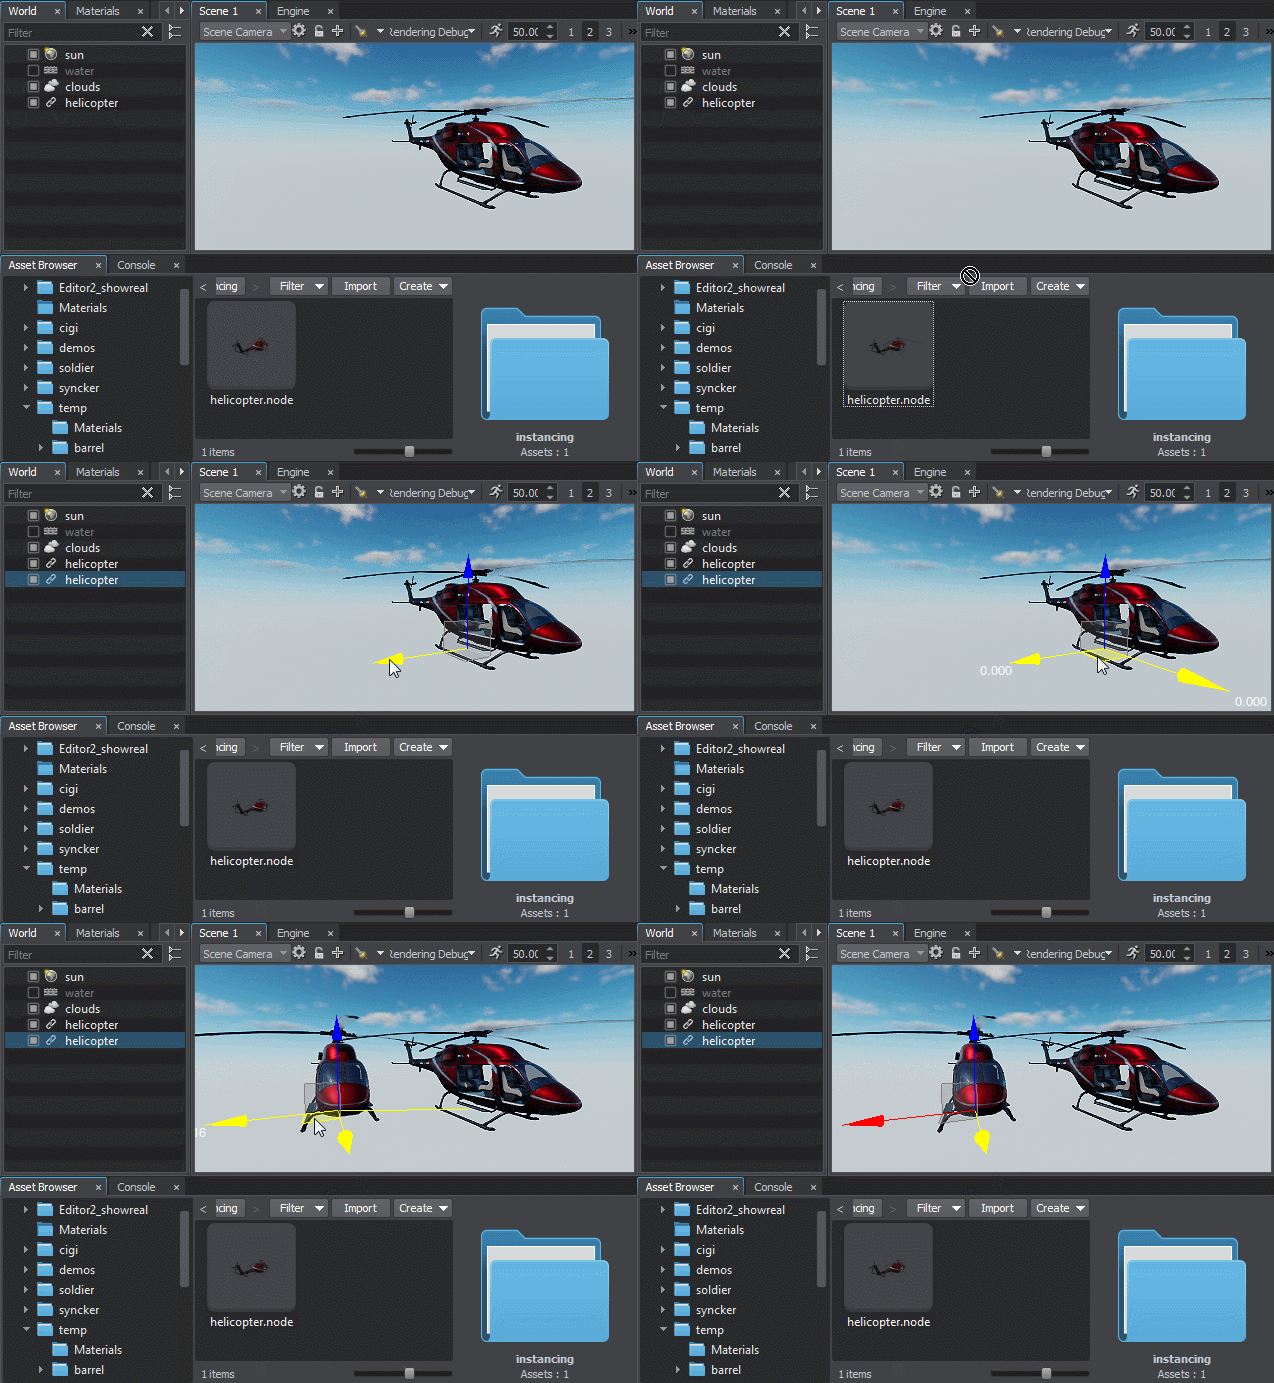
So, we already have the first instance in the world. It's the one, that replaced the hierarchy, when we dragged it to the Asset Browser. To add other instances to the world, we can simply drag the desired *.node asset from the Asset Browser directly to the Scene Viewport.因此,我们已经在世界上拥有一审。当我们将层次结构拖动到资产浏览器时,它取代了层次结构。要向世界添加其他实例,我们只需将所需的*.node资产从资产浏览器直接拖到Scene Viewport。
Or you can simply clone a node reference, as any other node, via the Scene Viewport by moving it with a manipulator while holding the Shift key. In this case a new instance will be placed exactly where you point to.或者,您可以通过按住Shift键的同时使用操纵器移动它,通过Scene Viewport像其他节点一样,克隆一个节点引用。 在这种情况下,新实例将准确放置在您指向的位置。

4. Editing the Source Node from its Instances4.从实例中编辑源节点#
If you decide to change something in the source node, you can do that by editing any of its instances. To do so, perform the following steps:如果决定更改源节点中的某些内容,则可以通过编辑其任何实例来进行。为此,请执行以下步骤:
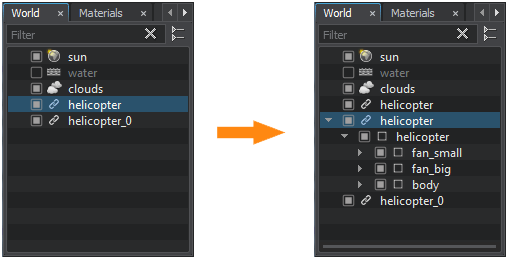
Select any instance in the world via the Scene Viewport or the World Nodes Hierarchy window. The parameters of the node reference will be displayed in the Parameters window.通过Scene Viewport或World Nodes Hierarchy窗口选择世界上的任何实例。节点引用的参数将显示在Parameters窗口中。

Click Edit. The hierarchy of the source node will be displayed in the World Nodes Hierarchy window.单击Edit。源节点的层次结构将显示在World Nodes Hierarchy窗口中。

Edit the source node. You can make any changes: modify materials, add new nodes, remove existing ones, etc.编辑源节点。您可以进行任何更改:修改材质,添加新节点,删除现有节点等。
Click Apply to save changes made to the source node or Cancel to discard them. The changes will be applied to all instances at once.单击Apply保存对源节点所做的更改,或单击Cancel放弃它们。所做的更改将立即应用于所有实例。


