生成详细信息
 Details serve to achieve a realistic visual representation of the terrain. You can treat them as layers (or masks) specifying where the additional features (such as rocks, sand, etc.) are located on the primary surface. To generate details, you need to use landcover data.细节有助于实现地形的逼真视觉表现。它们可以被看作是指定附加特征(如岩石、沙子等)在基本表面上的位置的层(或掩膜)。详细信息是根据可用的土地覆盖数据生成的。
Let's review the process of generating details.让我们回顾一下生成细节的过程。
This article assumes that you have already added the data required for the terrain surface.假设您已经添加了所需的数据地形表面.The process, in general, can be seen as picking the specific data from the data source with the help of filters to create a mask.该过程通常可以看作是在标签的帮助下从数据源中挑选特定数据以创建掩码。
1. Adding a Landcover Data Source1. 添加 Landcover 数据源#
-
In the Sandworm window, Sources panel:在 Sandworm 窗口、Inputs 面板:
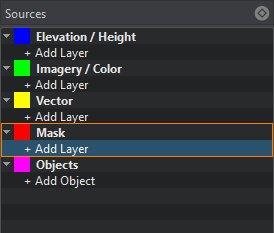
- 点击 Mask 打开添加插槽的窗口。槽被设计成将数据组织到不同的地形掩模中。
- Clicking on + Add Layer provides the toolset for uploading landcover data.点击 + Add Layer 提供了上传土地覆盖数据的工具集。
-
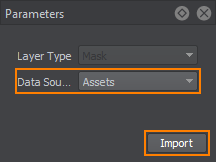
When adding a layer, define the type of Data Source to be used: Assets or External Files and click Import.当添加一个层,定义数据源类型要使用的:Assets 或 External Files,然后单击 Import。
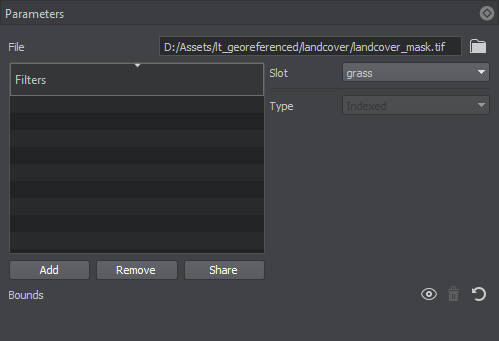
- In the window that opens, select the landcover data source to be used as a Mask. R8 and RGB8 Mask textures are supported.在打开的窗口中,选择要用作掩码的土地覆盖数据源。支持 R8 和 RGB8 蒙版纹理。
When the Mask is added, its image is displayed atop all the layers in the Preview panel (you may change the order of layers display by RMB click on a layer in the list of sources), and the Mask layer parameters become available.添加蒙版后,其图像将显示在“预览”面板中所有图层的顶部(图层显示的顺序可以通过鼠标右键单击源列表中的一个图层来改变),并且 Mask 图层参数变为可用。
2. Specifying Filters2. 指定过滤器#
-
Add filters that will select the areas from the data source for each type of landcover object you will generate. Click the Add button in the Filters window of the Parameters panel.添加过滤器,从数据源中为您将要生成的每种类型的土地覆盖对象选择区域。单击 Parameters 面板的 Filters 窗口中的 Add 按钮。
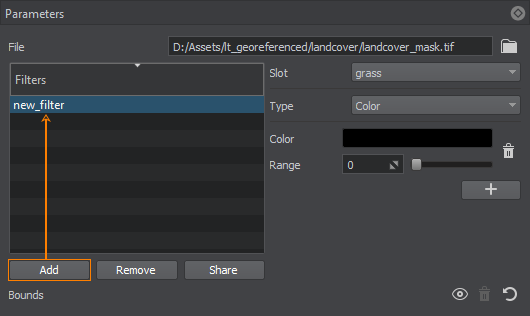 Double-click on the filter to specify a filter name. To remove a filter, use the Remove button. You can add as many filters as necessary.双击过滤器以指定过滤器名称。要删除过滤器,请使用 Remove 按钮。您可以根据需要添加任意数量的过滤器。The Share button allows shared use of the filter among Masks. Select the Mask that will share this filter in the pop-up window. Changes in a shared filter will be applied to it in all Masks.Share 按钮允许在掩码之间共享使用过滤器。在弹出窗口中选择共享此过滤器的掩码。共享过滤器中的更改将应用于所有遮罩中。
 - 从您创建的槽中选择一个槽 (Sources -> Mask)。槽被设计成将数据组织到不同的地形掩模中。
-
For every filter, set a type to select particular data from the landcover data source. The following types of filters are available:对于每个过滤器,类型应该设置为从土地覆盖数据源中选择某些数据。以下类型的过滤器是可用的:
-
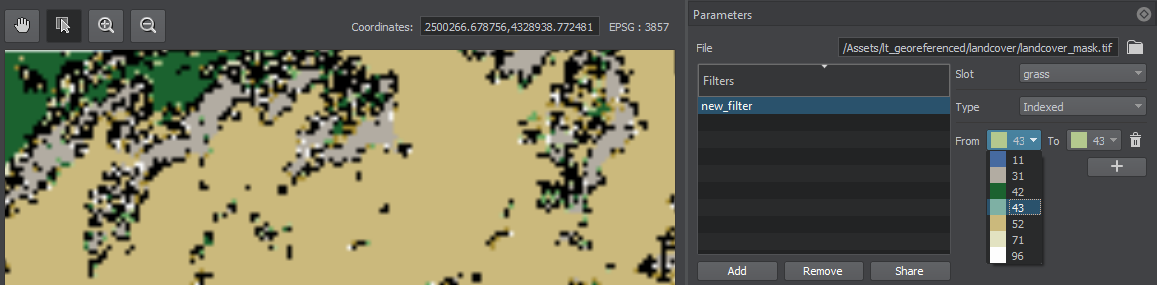
Indexed — select a particular color index from the list of available ones in the source raster image. You can also specify the color range by indices (from color to color).Indexed — 从源光栅图像的可用索引列表中选择一个特定的颜色索引。您还可以通过索引(从颜色到颜色)指定颜色范围。
-
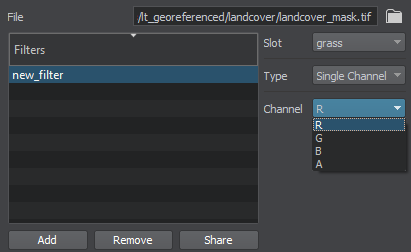
Single Channel — select a channel of the source raster image.Single Channel — 选择源光栅图像的通道。
-
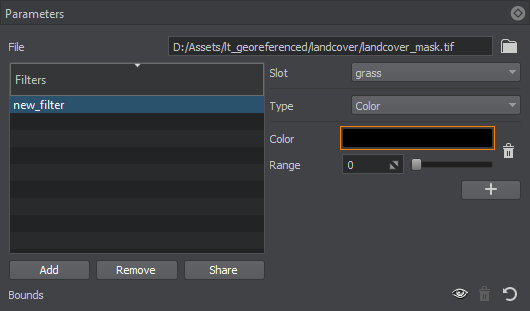
Color — set a particular color taken from the source raster image and adjust the Range for it, thus defining the suitable deviation from the specified color within the range [0, 255].Color — 设置从源光栅图像中提取的特定颜色,并为其调整 Range,从而定义与指定颜色的适当偏差。Click the color to open the color settings:点击颜色打开颜色设置:
 Select the color from available or click Pick Screen Color to select the color from the image in the Preview panel:从可用颜色中选择颜色或单击 Pick Screen Color 以从 Preview 面板中的图像中选择颜色:
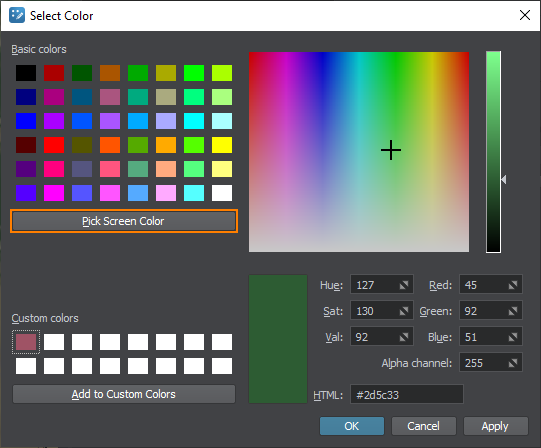
-
This is it. The data for details are ready, and after terrain generation, they will be available as the terrain details.就是这个。详细资料已准备就绪。在地形生成后,他们将作为地形细节可用。
Generating Details生成详细信息#
Now you need to configure the output settings and generate (or regenerate) the details by clicking the Generate button.现在你需要配置输出设置和产生(或者再生) 通过单击 Generate 按钮查看详细信息。
The generated details are available in your project and can be configured as you need, depending on the output terrain object selected:生成的详细信息在您的项目中可用,并且可以根据需要进行配置,具体取决于输出地形对象选择:
- Configuring details of Object Landscape Terrain配置详情Object Landscape Terrain
- Configuring details of Object Terrain Global:
 video tutorialObject Terrain Global 的配置细节: video 教程