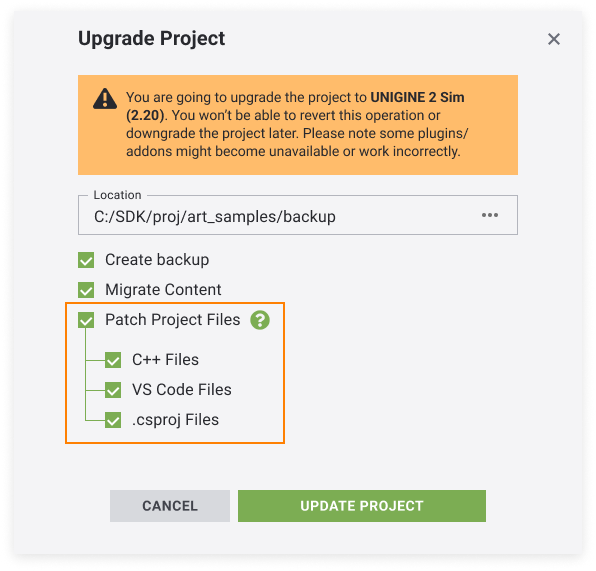
Patching Project Files
Upgrading your project to a newer version may sometimes require changes to project files (such as adding new files) or source files (such as adding include directives). These changes are most commonly related to integrating new third-party libraries.
To save you from having to make these modifications manually, the SDK includes built-in functionality to assist with migration. When updating your project, you can select which files should be automatically patched.

By default, all files are selected for patching.
Manual Patching#
To upgrade the project or source files in the manual mode, do the following:
- Put the binary executable <UnigineSDK>/bin/usc_x64.exe to the <UnigineSDK>/utils/upgrade_project folder that contains the upgrade script.
NoticeUse usc_x64.exe from the SDK version you are migrating to.
- In the command prompt, run the upgrade.usc with the corresponding arguments.
The following arguments are available:
| Description: Path to the project - the SDK version from which the project will be migrated is taken from this project. Example: usc_x64.exe upgrade.usc --project_path D:/SDK_Browser/projects/unigine_project/project_name_2_19_1.project | |
| Description: Path to the project - the SDK version from which the project will be migrated is taken from this project. Example: usc_x64.exe upgrade.usc --project_path D:/SDK_Browser/projects/unigine_project/project_name_2_19_1.project | |
| Description: Path to source files. Example: usc_x64.exe upgrade.usc --source_paths D:/SDK_Browser/projects/unigine_project/source | |
| Description: Path to *.csproj files. Example: usc_x64.exe upgrade.usc --csproj_path D:/SDK_Browser/projects/unigine_project/source/unigine_project.csproj | |
| Description: Set the SDK version from which the project will be migrated, if it can't be set by --project_path. | |
| Description: C++ files won't be patched. | |
| Description: VS Code files won't be patched. | |
| Description: *.csproj files won't be patched. |
Here's an example with skipping several types of files:
usc_x64.exe upgrade.usc --project_path path/to/.project --skip_source_paths --skip_csproj_pathIn this case, only VS Code files will be patched.
The information on this page is valid for UNIGINE 2.20 SDK.