实现颜色区
 Now we can implement the zones to throw the objects into. We will make holes in the floor, implement zone visualization, and add a trigger volume that will destroy objects entering it.现在我们可以实现将对象放入的区域。我们将在地板上挖洞,实现区域可视化,并添加一个 trigger volume来销毁进入其中的对象。
Step 1. Unpack Node References to Make Holes in the Floor步骤1。拆包节点参考在地板上打孔#
To make some floor nodes invisible and non-colliding (objects will fall through them), while keeping the character's turning working smoothly, we must unpack some floor node references. The unpacking means breaking the link to the node file on disk and changing its parameters.为了让某些楼层节点不可见且不发生碰撞(物体会穿过它们),同时保持角色的转动顺畅,我们必须分解一些楼层节点引用。解包意味着断开到磁盘上的节点文件的链接,并更改其参数。
- To create Color Zones select some floor tiles in a group (holding the Shift hotkey), right-click and choose Unpack To Node Content.要创建颜色区域,在一组中选择一些地砖(按住Shift热键),右键单击并选择Unpack To Node Content。
- Then disable Collisions for these nodes but make sure that Intersection is enabled, so that the character's turning works correctly.然后为这些节点禁用Collisions,但确保Intersection是启用的,以便字符的旋转工作正常。
-
To make them invisible, go to Viewport Mask and click Clear All. This way all bits of mask are set to 0 and they will not match the Camera's Viewport Mask.要使它们不可见,请转到Viewport蒙版,然后单击Clear All。这样所有的掩码位都被设置为0,它们将不会匹配相机的Viewport掩码。
- Disable Collision option for the ground node. Now, physical objects can fall through the holes and the ground.为ground节点禁用Collision选项。现在,物理物体可以从洞里掉到地上。
Step 2. Implement Zone Visualization步骤2。实现区域可视化#
Let's create a plane with an emission material to represent the Color Zone.让我们用发射材质创建一个平面来代表颜色区域。
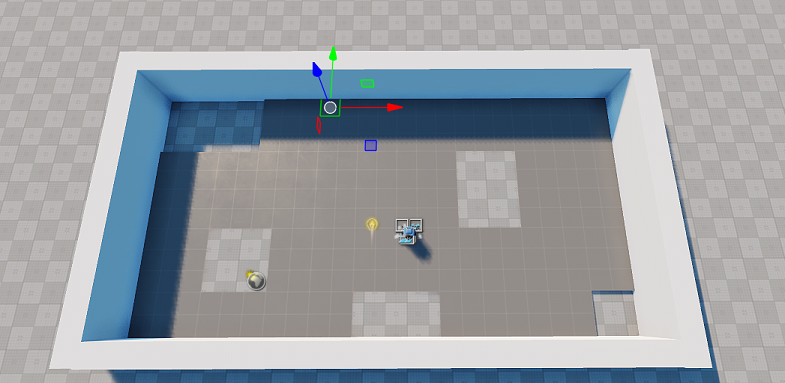
- Choose Create->Mesh->Static and search for plane.mesh.选择Create->Mesh->Static并搜索plane.mesh。
- Place it in the world via the Viewport.通过Viewport将其放置在世界中。
- Rename the node to "color_zone".将节点重命名为"color_zone"。
- Scale it to the size of the Play Area and position it between the floor and the ground, so it is visible only through the holes.将其缩放到游戏区域的大小,并将其定位在地板和地面之间,这样它就只能通过孔可见。
-
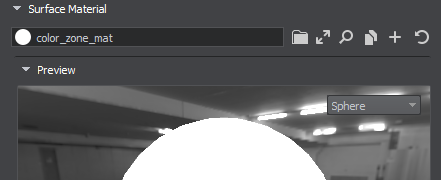
Create a child material for the plane surface and call it color_zone_mat. In the States tab check the Emission option.为plane表面创建子材质,并将其命名为color_zone_mat。在States选项卡中,检查Emission选项。
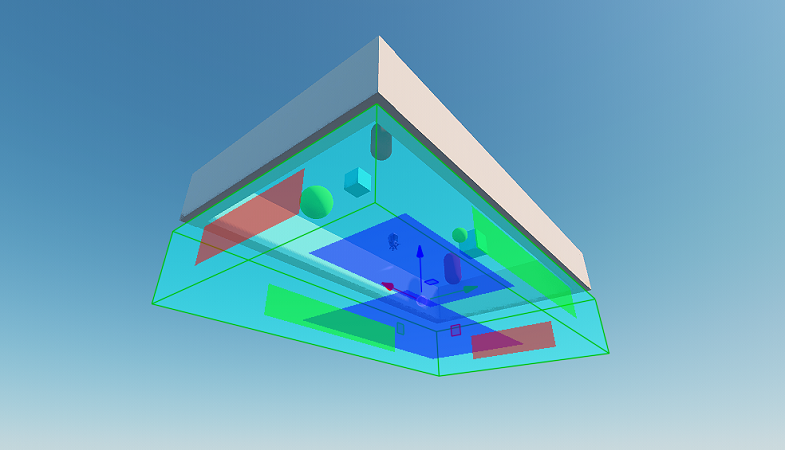
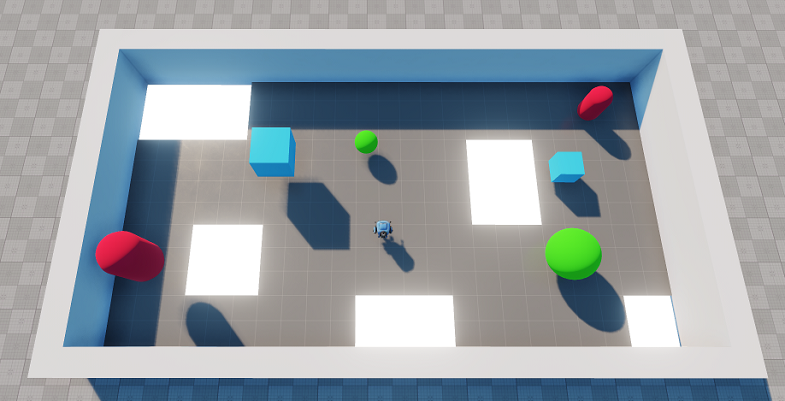 Color Zone Visualization颜色区域可视化
Step 3. Make the Colors Change Over Time步骤3。颜色随时间变化#
The Color Zone must be easy to spot. Let's create a dynamic material that changes color emission over time using linear interpolation.颜色区域必须容易被发现。让我们创建一个动态材质随着时间的推移改变颜色发射使用线性插值。
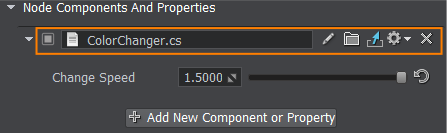
- Create a new C# component and call it ColorChanger.创建一个新的 C#组件,命名为ColorChanger。
-
Edit the Color Zone node and add a ColorChanger component to it.编辑 Color Zone 节点并向其添加 ColorChanger 组件。
- The code, that changes the material emission color for the Color Zone's material over time, is given below. Open an IDE and write the code. Save your code in an IDE to ensure it's automatic compilation on switching back to UnigineEditor.随着时间的推移,改变颜色区材质emission颜色的代码如下所示。打开一个IDE并编写代码。将你的代码保存在IDE中,以确保它在切换回UnigineEditor时自动编译。
using System;
using System.Collections;
using System.Collections.Generic;
using Unigine;

[Component(PropertyGuid = "AUTOGENERATED_GUID")] // <-- this line is generated automatically for a new component
public class ColorChanger : Component
{
	public float changeSpeed = 1.5f;

	Material color_zone_mat;

	void Init()
	{
		ObjectMeshStatic mesh = node as ObjectMeshStatic;
		// get the color zone's material
		color_zone_mat = mesh.GetMaterial(0);
	}

	void Update()
	{
		if (color_zone_mat != null)
		{
			// calculate the interpolation coefficient for this frame
			float k = (MathLib.Sin(Game.Time * changeSpeed) + 1) / 2.0f;
			//interpolate between two colors with given coefficient and set it to the first surface's material
			color_zone_mat.SetParameterFloat4("emission_color", MathLib.Lerp(new vec4(1.0f, 1.0f, 0.0f, 1.0f), new vec4(0.0f, 1.0f, 1.0f, 1.0f), k));
			//interpolate between two values of emission intensity with given coefficient and set it to the first surface's material
			color_zone_mat.SetParameterFloat("emission_scale", MathLib.Lerp(1.0f, 4.0f, k));
		}
	}
}
Step 4. Add a World Trigger步骤4。添加一个世界触发器#
To get rid of objects that were thrown in the Kill Zone, let's use a World Trigger. The trigger defines an area into which a physical object will fall and a callback that fires when an object gets inside.为了摆脱被扔进杀戮区的物体,让我们使用 World Trigger。 触发器定义了一个物理对象将落入的区域,以及一个在对象进入时触发的 callback。
- Create a new World Trigger by choosing Create->Logic->World Tigger and place it in the world.通过选择Create->Logic->World Tigger创建一个新的World Trigger,并将其放到世界中。
-
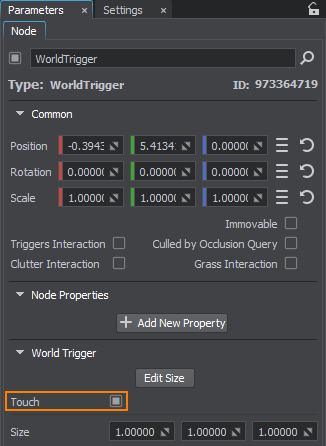
Check the Touch option in the Parameters window of the World Trigger node to make the trigger fire callbacks on partial contact with another node.检查World Trigger节点的Parameters窗口中的Touch选项,使触发器在与另一个节点部分接触时触发回调。
-
Position it beneath the ground, then set its size to cover the whole play area by going to Parameters and clicking Edit Size and adjusting the size of the World Trigger in the Viewport.位置在地面和调整其大小所以它覆盖整个区域的参数并单击Edit Size。调整World Trigger在视窗的大小。
- Create a new C# component and call it KillZone. Add the KillZone component to the previously created World Trigger.创建一个新的 C# 组件 并将其命名为 KillZone。 将 KillZone 组件添加到之前创建的 World Trigger。
-
Double-click on the KillZone in the Asset Browser to open an IDE and copy the code below, which adds a callback for the trigger that deletes the entered object from the world. Save your code in an IDE to ensure it's automatic compilation on switching back to UnigineEditor.双击Asset Browser中的KillZone打开一个IDE并复制下面的代码,这将为将输入的对象从世界中删除的触发器添加一个回调。将你的代码保存在IDE中,以确保它在切换回UnigineEditor时自动编译。KillZone.cs
using System; using System.Collections; using System.Collections.Generic; using Unigine; [Component(PropertyGuid = "AUTOGENERATED_GUID")] // <-- this line is generated automatically for a new component public class KillZone : Component { // the area into which an object should fall WorldTrigger trigger; void Init() { trigger = node as WorldTrigger; if (trigger != null) trigger.EventEnter.Connect(Enter); // set the handler to be executed when an object enters the area } void Enter(Node target) { target.DeleteLater(); } } - Save changes to the world, go to File->Save World or press Ctrl+S hotkey.拯救世界的变化,去File->Save World or按Ctrl+S热键。
-
To run the project via the SDK Browser, click on the ellipsis beneath the Run button to open the Customize Run Options window. Specify the debug binary of the project to run the executable and see the changes made.要通过SDK Browser运行项目,请单击Run按钮下面的省略号以打开Customize Run Options窗口。指定项目的 debug二进制文件来运行可执行文件并查看所做的更改。
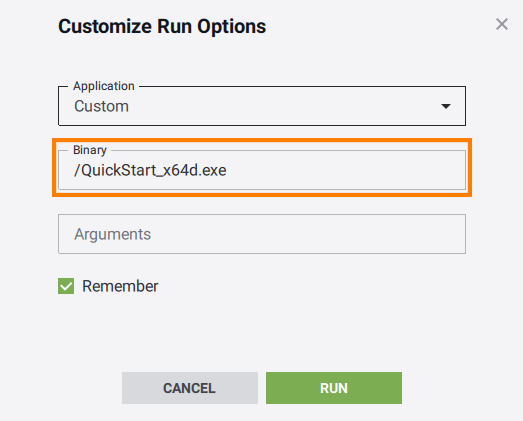 注意The debug binaries have a postfix (d) in the name of an executable.调试二进制文件在可执行文件名称中有一个后缀(d)。
本页面上的信息适用于 UNIGINE 2.20 SDK.