为正向渲染过程创建自定义着色器
 Since Unigine rendering pipeline includes forward rendering pass for transparent objects, you are able to create custom shaders for the forward rendering pass. Forward pass can be added to the already created custom material or you can create new material for it. This article shows you how to write a material with custom shaders for the forward rendering pass.由于Unigine渲染管道包括用于透明对象的前向渲染过程,因此您可以为前向渲染过程创建自定义着色器。可以将正向传递添加到已创建的自定义材料中,也可以为其创建新材料。本文向您展示了如何使用自定义着色器为前向渲染过程编写材质。
This article assumes you have prior knowledge of the following topics. Please read them before proceeding:
- Getting StartedGetting Started
- Materials Files FormatsMaterials Files Formats
- Unigine Language Object Notation (ULON)Unigine Language Object Notation (ULON)
- Creating a Custom Shader for Deferred Rendering passCreating a Custom Shader for Deferred Rendering pass
- UUSL Data Types and Common Intrinsic FunctionsUUSL Data Types and Common Intrinsic Functions
- UUSL TexturesUUSL Textures
- UUSL SemanticsUUSL Semantics
- UUSL ParametersUUSL Parameters
- Getting Started 入门
- Materials Files Formats 材料文件格式
- Unigine Language Object Notation (ULON) Unigine语言对象符号(ULON)
- Creating a Custom Shader for Deferred Rendering pass 为延迟渲染过程创建自定义着色器
- UUSL Data Types and Common Intrinsic Functions UUSL数据类型和常见的内部函数
- UUSL Textures UUSL纹理
- UUSL Semantics UUSL语义
- UUSL Parameters UUSL参数
See Also也可以看看#
- The article on Material Settings关于 材料设置 的文章
- The article on Custom Materials关于 自定义材料 的文章
Create a Material创建材料#
First, we should create a material with the forward pass. Another way (if you already created the material with the deferred pass) is to add the forward pass to the already created custom base material). But for now let's add a new custom ULON-based base material for the forward rendering pass (similar to deferred rendering pass material.首先,我们应该使用前向通过来创建材质。另一种方法(如果您已经使用延期通行证创建了资料)是将正向通行证添加到已经创建的自定义基础资料中)。但是,现在让我们为前向渲染过程添加一个新的基于自定义ULON的基础材料(类似于延迟渲染过程材料。
The material will have the following structure:该材料将具有以下结构:
// describing the read-only custom forward material to be used for static meshes,
// setting prefixes to be used in shaders to refer to textures and parameters
BaseMaterial custom_forward_material <node=ObjectMeshStatic editable=false var_prefix=var texture_prefix=tex default=true>
{
	// enabling the custom transparency preset
	Option transparent=2

	// enabling the ambient pass for our material and hiding it (will be invisible in the UnigineEditor)
	State ambient=1	<internal=true>

	// describing textures
	Group "Base"
	{
		Texture2D albedo="core/textures/common/white.dds" <unit=0 pass=[deferred || ambient] tooltip="Albedo texture">
		Texture2D height="core/textures/common/red.dds" <unit=1 pass=[deferred || ambient] tooltip="Displacement map">
		Texture2D              <unit=2 type=opacity_depth>
		Texture2D              <unit=3 type=gbuffer_normal>
	}

	//////////////////////////////////////////////////////////////////////////
	// Pass
	//////////////////////////////////////////////////////////////////////////

	//describing the ambient pass with links to shaders to be used
	Pass ambient <defines="AMBIENT">
	{
		Vertex   = "shaders/vertex/ambient.vert"
		Fragment = "shaders/fragment/ambient.frag"
	}

	// describing bindings for node types to which the material is to be applicable
	Bind ObjectMeshStatic=ObjectMeshDynamic
	Bind ObjectMeshStatic=ObjectMeshSkinned
}
The key changes of the material are:材质的关键变化是:
- Added a new ambient state for the custom material.为自定义材质添加了新的环境状态。
- Defined shaders for forward (ambient) rendering pass. 注意In UNIGINE we use "ambient pass" instead of "forward pass".定义的着色器forward (ambient)渲染通行证。In UNIGINE we use "ambient pass" instead of "forward pass".In UNIGINE we use "ambient pass" instead of "forward pass".注意In UNIGINE we use "ambient pass" instead of "forward pass".在UNIGINE中,我们使用"ambient pass"代替"forward pass"。
- Added ambient pass to the textures attributes.向纹理属性添加了ambient传递。
- Added two new textures for the fragment shader of the ambient pass: opacity_depth and gbuffer_normal. These textures contain the information from the corresponding buffers of the deferred rendering pass.为ambient传递的片段着色器添加了两个新纹理:opacity_depth和gbuffer_normal。这些纹理包含来自延迟渲染过程的相应缓冲区的信息。
Save the new material as custom_forward_material.basemat file to the data/materials folder.将新材料作为custom_forward_material.basemat文件保存到data/materials文件夹。
Now, in the project, there are materials with forward and deferred rendering passes.现在,在项目中,存在具有正向渲染路径和延迟渲染路径的材质。
Create a Vertex Shader创建一个顶点着色器#
Since we write a simple shader example, let's use the vertex shader for the deferred rendering pass.由于我们编写了一个简单的着色器示例,因此我们将顶点着色器用于延迟的渲染过程。
The vertex shader code is the following:顶点着色器代码如下:
// Include Unified Unigine Shader Language (UUSL) header
#include <core/shaders/common/common.h>

// Create a texture sampler
INIT_TEXTURE(1,TEX_HEIGHT)

// Input data struct
STRUCT(VERTEX_IN)
	INIT_ATTRIBUTE(float4,0,POSITION)	// Vertex position
	INIT_ATTRIBUTE(float4,1,TEXCOORD0)	// Vertex texcoord (uv)
	INIT_ATTRIBUTE(float4,2,TEXCOORD1)	// Vertex basis tangent
	INIT_ATTRIBUTE(float4,3,TEXCOORD2)	// Vertex color
	INIT_INSTANCE
END

// Our output vertex data struct
STRUCT(VERTEX_OUT)
	INIT_POSITION					// Out projected position
	INIT_OUT(float4,0)				// Texcoord (uv)
	INIT_OUT(float3,1)				// TBN matrix
	INIT_OUT(float3,2)				// TBN matrix
	INIT_OUT(float3,3)				// TBN matrix
END

MAIN_BEGIN(VERTEX_OUT,VERTEX_IN)

	// Get transform with scale and rotation (without translation)
	float4x4 transform = getObjectTransform(IN_INSTANCE);
	float4 row_0 = transform[0];
	float4 row_1 = transform[1];
	float4 row_2 = transform[2];

	// Get Modelview-space transform
	float4 in_vertex = float4(IN_ATTRIBUTE(0).xyz,1.0f);
	float4 position = mul4(row_0,row_1,row_2,in_vertex);

	// Set output UV
	float4 texcoord = IN_ATTRIBUTE(1);
	OUT_DATA(0) = texcoord;

	// Define tangent basis
	float3 tangent,binormal,normal;

	// Get normal in object-space
	getTangentBasis(IN_ATTRIBUTE(2),tangent,binormal,normal);

	// Transform object-space TBN into camera-space TBN
	normal = normalize(mul3(row_0,row_1,row_2,normal));
	tangent = normalize(mul3(row_0,row_1,row_2,tangent));
	binormal = normalize(mul3(row_0,row_1,row_2,binormal));

	// Set output TBN matrix
	OUT_DATA(1) = float3(tangent.x,binormal.x,normal.x);
	OUT_DATA(2) = float3(tangent.y,binormal.y,normal.y);
	OUT_DATA(3) = float3(tangent.z,binormal.z,normal.z);

	// Set the texture
	float4 height = TEXTURE_BIAS_ZERO(TEX_HEIGHT,texcoord.xy);

	// Perform the displacement mapping
	position.rgb += normal * (height.r) * 0.2f;

	// Set output position
	OUT_POSITION = getPosition(position);

MAIN_END

// endSave the shader as ambient.vert to the data/shaders/vertex folder of your project.将着色器另存为ambient.vert到项目的data/shaders/vertex文件夹中。
Use the materials_reload command to reload shaders whilst the engine is running.使用 materials_reload 命令在引擎运行时重新加载着色器。Create a Fragment Shader创建片段着色器#
This section contains instructions on how to create a fragment shader (also known as pixel shader). Forward rendering pass doesn't use deferred buffers to render the final image.本节包含有关如何创建片段着色器(也称为 pixel shader )的说明。前向渲染过程不使用延迟缓冲区来渲染最终图像。
Let's create the fragment shader with some interesting code. We took the current textures of deferred shaders buffers (normal buffer and depth buffer) and use them to form the output color. Here is a code of the fragment shader:让我们用一些有趣的代码创建片段着色器。我们采用了递延着色器缓冲区(普通缓冲区和深度缓冲区)的当前纹理,并使用它们来形成输出颜色。这是片段着色器的代码:
- Open a plain text editor, and write the following:
Source code (UUSL)
// Include the UUSL language header #include <core/shaders/common/fragment.h> // Adds texture samplers INIT_TEXTURE(0,TEX_COLOR) INIT_TEXTURE(2,TEX_DEFERRED_DEPTH) INIT_TEXTURE(3,TEX_DEFERRED_NORMAL) // Input data structure STRUCT(FRAGMENT_IN) INIT_POSITION // Projected position INIT_IN(float4,0) // Texcoord (uv) INIT_IN(float3,1) // Vertex TBN (X) INIT_IN(float3,2) // Vertex TBN (Y) INIT_IN(float3,3) // Vertex TBN (Z) END MAIN_BEGIN(FRAGMENT_OUT,FRAGMENT_IN) // Get the UV coords float4 texcoord = IN_DATA(0); // Calculate the screen UV float2 screen_uv = IN_POSITION.xy * s_viewport.zw; // Get the texture data float4 texture_data = TEXTURE(TEX_COLOR,texcoord.xy); // Define the normal of a fragment in tangent-space STATICVAR float3 tangentspace_normal = float3(0.0f,0.0f,1.0f); // Calculate the view-space normal float3 viewspace_normal; viewspace_normal.x = dot(IN_DATA(1),tangentspace_normal); viewspace_normal.y = dot(IN_DATA(2),tangentspace_normal); viewspace_normal.z = dot(IN_DATA(3),tangentspace_normal); viewspace_normal = normalize(viewspace_normal); // Create a Gbuffer GBuffer gbuffer = GBufferDefault(); // Set normal and depth textures loadGBufferNormal(gbuffer,TEXTURE_OUT(TEX_DEFERRED_NORMAL),screen_uv); float deferred_depth = getLinearizedDepth(TEXTURE_OUT(TEX_DEFERRED_DEPTH),screen_uv); // Cut the sky from the buffer float depth_cutout = deferred_depth >= s_depth_range.y ? 0.0f : 1.0f; // Set the output color by components OUT_COLOR.r = texture_data.r*0.05 + abs(dot(viewspace_normal,gbuffer.normal)) * depth_cutout; OUT_COLOR.g = texture_data.g*0.05 + abs(dot(viewspace_normal,gbuffer.normal)) * depth_cutout; OUT_COLOR.b = texture_data.b*0.05 + abs(dot(viewspace_normal,gbuffer.normal)) * depth_cutout; OUT_COLOR.a = 1.0f; MAIN_END // end警告You should add a new line (press Enter) after closing the instruction (after MAIN_END command).打开一个纯文本编辑器,并编写以下内容:You should add a new line (press Enter) after closing the instruction (after MAIN_END command).You should add a new line (press Enter) after closing the instruction (after MAIN_END command).Source code (UUSL)// Include the UUSL language header #include <core/shaders/common/fragment.h> // Adds texture samplers INIT_TEXTURE(0,TEX_COLOR) INIT_TEXTURE(2,TEX_DEFERRED_DEPTH) INIT_TEXTURE(3,TEX_DEFERRED_NORMAL) // Input data structure STRUCT(FRAGMENT_IN) INIT_POSITION // Projected position INIT_IN(float4,0) // Texcoord (uv) INIT_IN(float3,1) // Vertex TBN (X) INIT_IN(float3,2) // Vertex TBN (Y) INIT_IN(float3,3) // Vertex TBN (Z) END MAIN_BEGIN(FRAGMENT_OUT,FRAGMENT_IN) // Get the UV coords float4 texcoord = IN_DATA(0); // Calculate the screen UV float2 screen_uv = IN_POSITION.xy * s_viewport.zw; // Get the texture data float4 texture_data = TEXTURE(TEX_COLOR,texcoord.xy); // Define the normal of a fragment in tangent-space STATICVAR float3 tangentspace_normal = float3(0.0f,0.0f,1.0f); // Calculate the view-space normal float3 viewspace_normal; viewspace_normal.x = dot(IN_DATA(1),tangentspace_normal); viewspace_normal.y = dot(IN_DATA(2),tangentspace_normal); viewspace_normal.z = dot(IN_DATA(3),tangentspace_normal); viewspace_normal = normalize(viewspace_normal); // Create a Gbuffer GBuffer gbuffer = GBufferDefault(); // Set normal and depth textures loadGBufferNormal(gbuffer,TEXTURE_OUT(TEX_DEFERRED_NORMAL),screen_uv); float deferred_depth = getLinearizedDepth(TEXTURE_OUT(TEX_DEFERRED_DEPTH),screen_uv); // Cut the sky from the buffer float depth_cutout = deferred_depth >= s_depth_range.y ? 0.0f : 1.0f; // Set the output color by components OUT_COLOR.r = texture_data.r*0.05 + abs(dot(viewspace_normal,gbuffer.normal)) * depth_cutout; OUT_COLOR.g = texture_data.g*0.05 + abs(dot(viewspace_normal,gbuffer.normal)) * depth_cutout; OUT_COLOR.b = texture_data.b*0.05 + abs(dot(viewspace_normal,gbuffer.normal)) * depth_cutout; OUT_COLOR.a = 1.0f; MAIN_END // end警告You should add a new line (press Enter) after closing the instruction (after MAIN_END command).关闭指令后(在MAIN_END命令之后),您应该添加新行(按Enter)。 - Save the shader file as ambient.frag to the data/shaders/fragment folder of your project.将着色器文件另存为ambient.frag到项目的data/shaders/fragment文件夹中。
Well, let's clarify what is under the hood of this fragment shader:好吧,让我们澄清一下该片段着色器的内幕:
- We defined 2 textures in material:
opacity_depth (depth buffer texture) and
gbuffer_normal (normal buffer texture) to use them in our fragment shader.
我们在材质中定义了2个纹理:
opacity_depth(深度缓冲区纹理)和
_ gbuffer_normal(普通缓冲区纹理)在我们的片段中使用它们着色器。
- We defined the depth_cutout variable to cut out the sky.我们定义了depth_cutout变量以裁剪天空。
- We set the output color by using our initial albedo texture and the dot product of normal vectors.我们使用初始反照率纹理和法线向量的点积来设置输出颜色。
- We didn't fill the G-buffer, because it's the fragment shader for ambient pass.我们没有填充G-buffer,因为它是环境遍历的片段着色器。
Use the materials_reload console command to reload shaders whilst the engine is running.
在引擎运行时,使用 materials_reload 控制台命令重新加载着色器。
Editing the Material编辑材料#
After performing all these steps, you can see recently created shaders in use. Now you should open the UnigineEditor and assign the material.执行所有这些步骤之后,您可以看到正在使用的最近创建的着色器。现在,您应该打开UnigineEditor并分配材质。
- Open your project in the UnigineEditor.在UnigineEditor中打开您的项目。
- Create a primitive, for example, a sphere.创建一个基本体,例如一个球体。
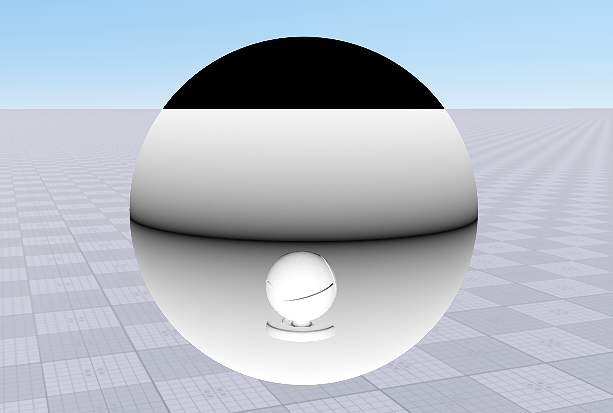
- Assign the created material by dragging it to the the primitive.通过将创建的材质拖动到图元来对其进行分配。
After that you'll get the following result.之后,您将获得以下结果。