IG Editor Plugin
The IG Editor Plugin allows you to adjust the weather properties for IG right in the Editor.
To make the plugin available in the Editor:
- Create a new project with an IG template via SDK Browser.
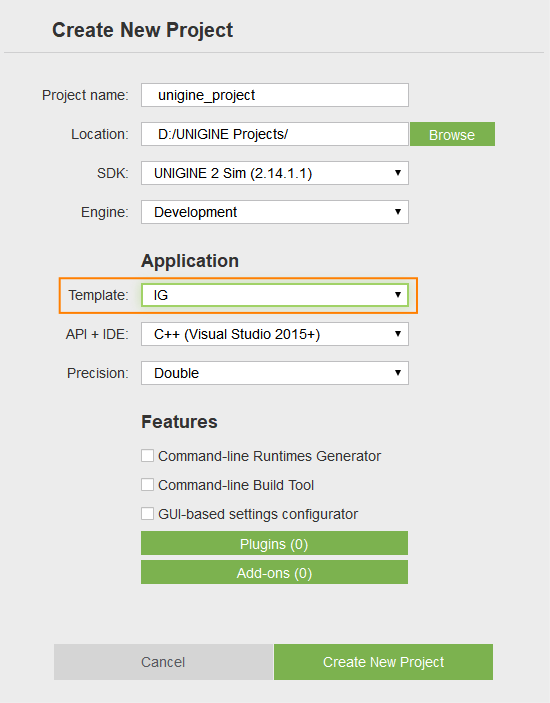
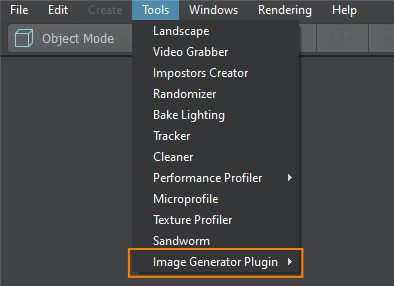
- Open the plugin windows via Tools->Image Generator Plugin.
The IG Editor Plugin provides the following features.
Geodetics#
This window outputs current coordinates in the geodetics format.

- DataBase Origin - origin of the world (not editable)
- Camera - camera geoposition
- Current Node - geoposition of the selected node
Reload Geodetic System#
The Reload Geodetic System button recalculates the origin coordinates for the world. It is useful when the terrain or the geodetic pivot position was changed. In such cases the manual reload of the geodetic system is required to make the window show the new correct coordinates.
DateTime#
Allows to set up the date and time parameters which affect the sky and world illumination due to stars, Sun, and Moon position change.
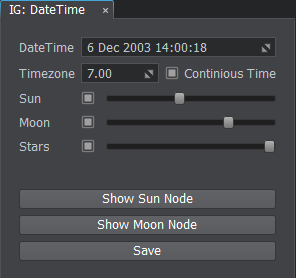
- DateTime - sets the current date and time
- Timezone - sets the current UTC time zone for the date and time (e.g., for the UTC-3:30 timezone the value will be equal to -3.5)
- Continuous Time - enables or disables the passage of time
- Sun - enables the sun and its light rendering and sets brightness intensity
- Moon - enables the moon and its light rendering and sets brightness intensity
- Stars - enables the stars rendering and sets their brightness intensity
Buttons#
- Show Sun Node - selects the sun node in the World Nodes window
- Show Moon Node - selects the moon node in the World Nodes window
- Save - saves the data, time, and timezone to configuration file
Meteo#
The Meteo window provides a way to create regions and layers inside them. By default there is always a Global region present which have an unlimited and non-removable Global layer.

Regions#
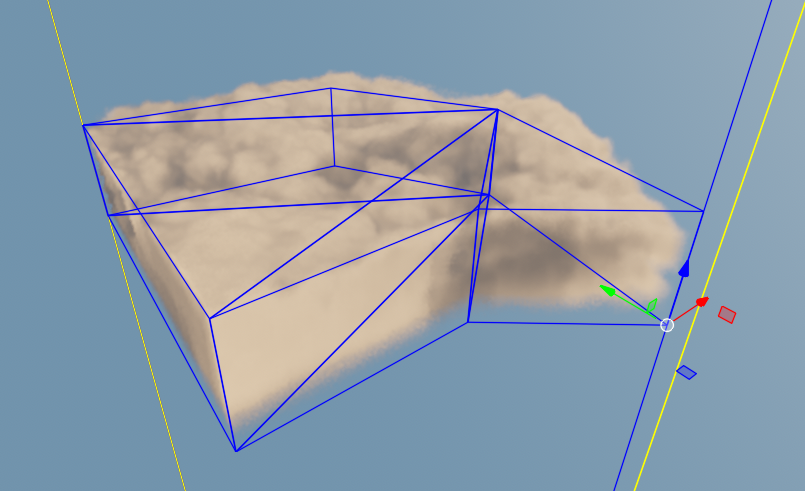
A weather region provides a top-down form for the weather map. There are three types of regions supported.
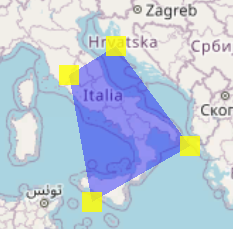
Setting Up Region#
To set up a custom weather region, do the following:
- Go to Tools->Image Generator Plugin->Meteo.
- Click Add Region and then press the Edit Region button to start editing the newly created region in the world.

- Select and use handle nodes in the world to specify the region shape (you can add a cloud layer to see the region boundaries more clearly).
The rectangle shape type supports translation and scale of the rectangle regional area.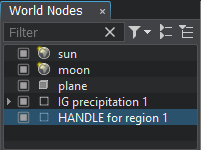
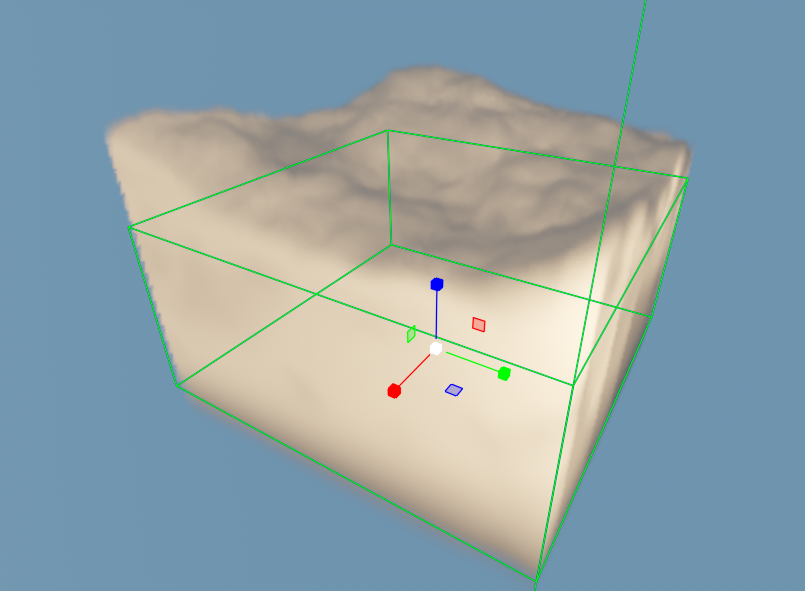
For the polygon shape type the handles can be moved, reordered, added, and deleted. This way you can make a region of any custom shape you require.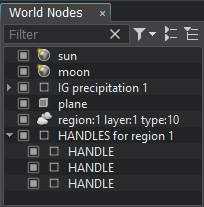
Editing Regions#
The following buttons are provided to setup a region:
- Add Region - adds a region
- Remove Region - removes the selected region
- Edit Region - enables edit mode for the selected region
Saving the Region Configuration#
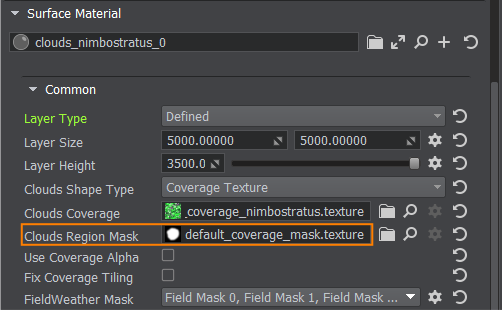
You can save the region via the Save Region Mask button as a texture on a disk, so later it can be used as a Clouds Region Mask value for a defined layer type of various clouds materials.
Saving and Loading Meteo Presets#
Meteo Presets store the data about regions with layers and their parameters to a file of special format (*.igmeteo). The IG:Meteo window allows you to use presets the following ways:
- Save - saves the region on a disk as a meteo preset
- Load - loads the meteo preset from a disk
Layers#
Layers comprise a vertical profile of the region. Various heights can store different cloud or precipitation layers.

Types of Layers#
- Base Layer - base layer without any visual representation. Contains only parameters (visibility distance, temperature, humidity, etc.).
- Cloud Layer - layer that describes the clouds
- Precipitation Layer - layer that describes the precipitation (rains or snow)
Setting Up Layers#
To add a new layer to a region, do the following:
- Select the region in the left Regions list and click the required Add Layer button.
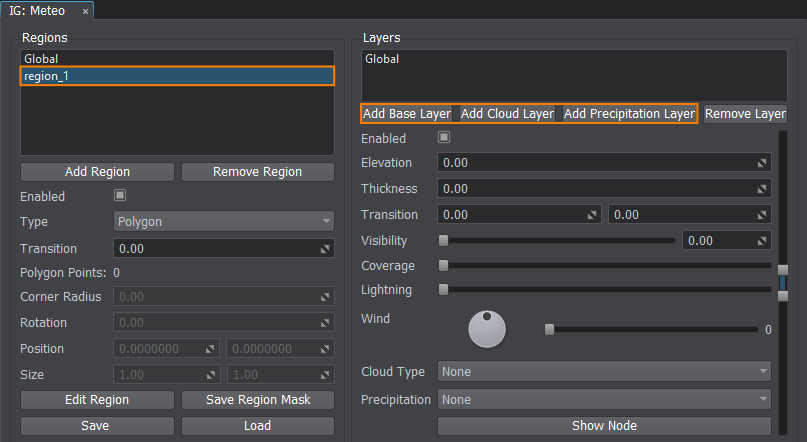
- Increase the Coverage parameter to make the layer affect the weather.
- Set the Elevation and Thickness parameters to adjust the layer’s height and size (in meters).

You can use the scroll manipulator to set the elevation and thickness parameters visually (changes will be reflected in the viewport).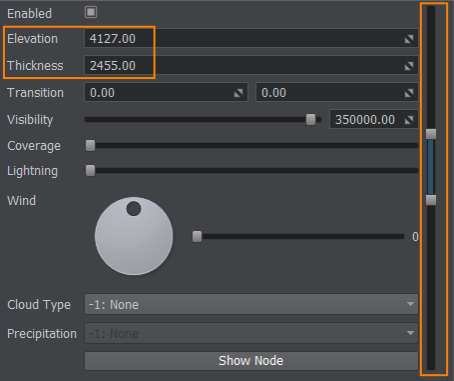
- Depending on the type of the layer (base, cloud, precipitation), you must specify its properties.
- In order to see the cloud/precipitation node in the world, click the Show Node button.
- If you want to delete the added layer, select it and click the Remove Layer button.
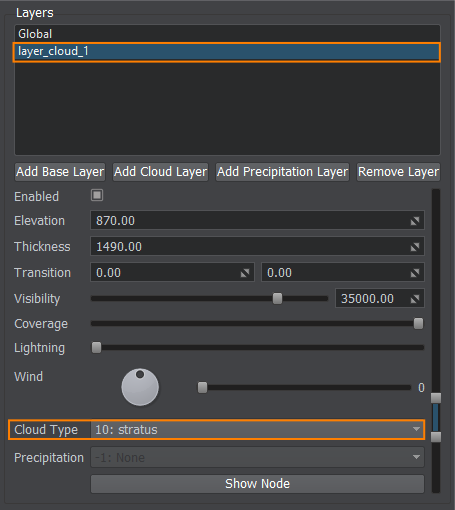
Cloud Types#
Specifies the type of cloud for the given layer. Can be one of the types specified for this project via the Cloud Types window.
Upon selection of a cloud type the recommended parameters are automatically set for this type of clouds.
Setting Up Clouds#
To start adjusting clouds in the corresponding layer, select it in the Layers list and specify the required Cloud Type.
Use the Coverage parameter to make clouds appear and stand out in the sky.
Precipitation#
Specifies the type of precipitation:
- -1: None - no precipitation is set for this layer
- 1: Rain - raindrops
- 2: Snow - snowflakes
Setting Up Precipitations#
To start adjusting rain or snow precipitations in the corresponding layer, select it in the Layers list and specify the required Precipitation Type.
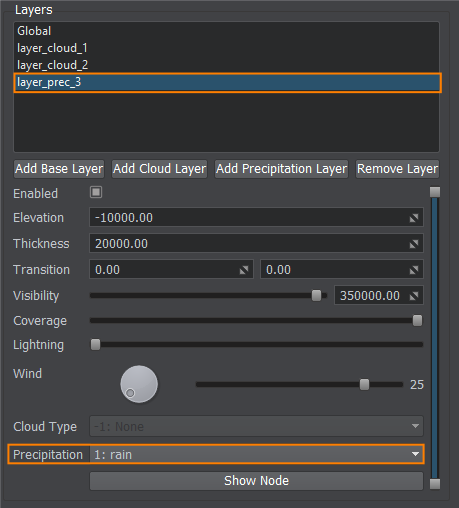
Don’t forget to increase the Coverage parameter to make precipitation appear and stand out in the viewport.
Lightning#
To adjust the lighting appearance for the corresponding layer, select it in the Layers list and specify the required frequency of lighting spawn.
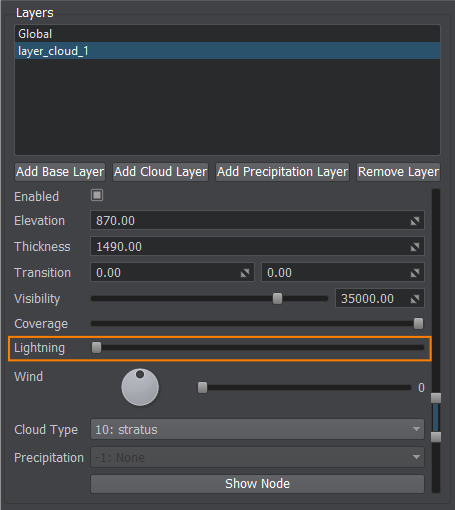
The maximum frequency that can be set via the IG Editor Plugin is once per second.
Wind#
Specifies wind properties for this layer by setting the direction and force of the wind.
- Direction - wind direction inside the layer
- Wind Force - force of the wind for the layer

Cloud Types#

This window describes all types of clouds available in IG:
- 1: altocumulus
- 2: altostratus
- 3: cirrocumulus
- 4: cirrostratus
- 5: cirrus
- 6: cumulonimbus_1
- 7: cumulus
- 8: nimbostratus
- 9: stratocumulus
- 10: stratus
- 12: cumulonimbus_2
- 13: cumulonimbus_3
Adjusting Clouds#
Via this window you can add your own custom types of clouds or change the default ones. The following parameters are available:
- Cloud ID - ID of the cloud in the list
- Name - cloud name
- Material - cloud material
- Tracker - cloud track used for coverage changing
- Shadow - power of the shadow cast by this cloud
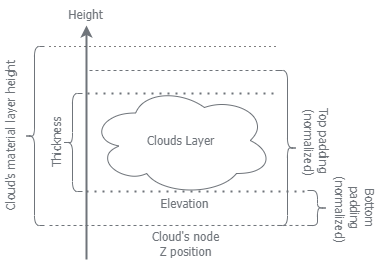
- Elevation - default elevation for this type of cloud (height above sea level)
- Thickness - default thickness for this type of cloud
- Padding - lower and upper bound for this type of cloud
To understand the parameters’ meaning, check the diagram below.
Clouds list and parameters are saved to the ig_config.xml file, so it can be restored and used in other instances of IG.