Визуальное представление
Visual representation of nodes can be changed by adjusting parameters of its surfaces on the Node tab of the Parameters window. Визуальное представление узлов можно изменить, настроив параметры его поверхностей (surfaces) на вкладке Node окна Parameters.
Surfaces are organized in a hierarchy that displayed in the following section:Поверхности организованы в иерархию, которая отображается в следующем разделе:
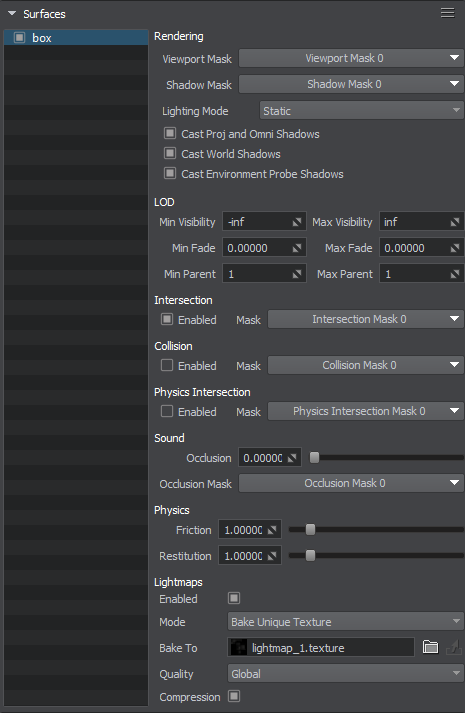
To change the surface parameters, select the required surface in the hierarchy and tweak its parameters. For each surface, the parameters listed below are available for editing.Чтобы изменить параметры поверхности, выберите необходимую поверхность в иерархии и настройте ее параметры. Для каждой поверхности параметры, перечисленные ниже, доступны для редактирования.
Rendering ParametersПараметры рендеринга#
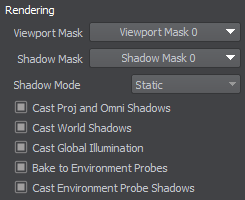
This section provides parameters for setting up rendering of the surface and its shadows.В этом разделе представлены параметры для настройки рендеринга поверхности и ее теней.
| Viewport Mask | Viewport mask of the surface.Viewport маска поверхности. |
|---|---|
| Shadow Mask | Shadow mask of the surface.Shadow маска поверхности. |
| Shadow Mode | Considering the concept of static and dynamic light, a surface can cast static (using precomputed shadow texture) or dynamic (geometry-based) shadow depending on the light source mode. Two shadow modes are available:
Примечание
In this mode, the Min Visibility parameter of a surface should not be greater than 0. Otherwise, a shadow from a static light source wouldn't be baked.Dynamic. The surface casts shadow only if lit by a dynamic light or a static light with Mixed shadow mode. No shadows are baked.Учитывая концепцию статического и динамического света, поверхность может отбрасывать статическую (запеченную) или динамическую (основанную на геометрии) тень в зависимости от режима источника света . Доступны два теневых режима:
In this mode, the Min Visibility parameter of a surface should not be greater than 0. Otherwise, a shadow from a static light source wouldn't be baked.In this mode, the Min Visibility parameter of a surface should not be greater than 0. Otherwise, a shadow from a static light source wouldn't be baked.
|
| Cast Proj and Omni Shadows | Flag indicating if the surface casts shadows from projected and omni light sources.Флаг, указывающий, отбрасывает ли поверхность тени от источников света projected и omni. |
| Cast World Shadows | Flag indicating if the surface casts shadows from world light sources.Флаг, указывающий, отбрасывает ли поверхность тени от источников света world. |
| Cast Global Illumination | Flag indicating if the surface is to be baked to static GI.Флаг, указывающий, следует ли запечь поверхность до статического GI . |
| Bake to Environment Probes | Flag indicating if the surface is to be baked to environment probes.Флаг, указывающий, следует ли запечь поверхность до environment probes. |
| Cast Environment Probe Shadows | Flag indicating if the surface casts shadows from environment probes. This option is required for the Cutout by Shadow feature.Флаг, указывающий, отбрасывает ли поверхность тени от environment probes. Эта опция требуется для функции Cutout by Shadow. |
LOD ParametersПараметры уровней детализации#

This section provides parameters for setting up surface LODs.В этом разделе представлены параметры для настройки поверхностных LOD .
| Min Visibility | Minimum visibility distance from the camera when a surface starts to appear on the screen. By default it is -inf.Минимальное расстояние видимости от камеры, когда поверхность начинает появляться на экране. По умолчанию это -inf. |
|---|---|
| Max Visibility | Maximum visibility distance when a surface is no longer fully visible: it can either disappear completely or start to fade out. By default it is inf.Максимальное расстояние видимости, когда поверхность больше не видна полностью: она может либо полностью исчезнуть, либо начать исчезать. По умолчанию это inf. |
| Min Fade | Minimum fade distance, over which the surface fades in until it is completely visible. Along this distance the engine will automatically interpolate the level of detail from alpha of 0.0 (completely invisible) to 1.0 (completely visible). Fading in starts when the camera has reached the minimum distance of surface visibility and is in the full visibility range.Минимальное расстояние появления, на котором поверхность становится полностью видимой. Вдоль этого расстояния движок автоматически интерполирует уровень детализации от альфа 0.0 (полностью невидимый) до 1.0 (полностью видимый). Переход начинается, когда камера достигает минимального расстояния видимости поверхности и находится в полном диапазоне видимости. |
| Max Fade | Maximum fade distance, over which the surface fades out until it is completely invisible. Fading out starts when the camera has reached the maximum distance of surface visibility and is out of the full visibility range.Максимальное расстояние затухания, на котором поверхность исчезает, пока не станет полностью невидимой. Переход начинается, когда камера достигает максимального расстояния видимости поверхности и выходит за пределы полного диапазона видимости. |
| Min Parent | Reference object, from which the minimum visibility distance of the surface is measured.
The reference object is used to ensure simultaneous LOD switching for all surfaces.The reference object is used to ensure simultaneous LOD switching for all surfaces. If 0 is set, the minimum visibility distance is measured from the current surface.If 1 is set, the distance is measured from the surface one level up in the surfaces hierarchy. If there is no parent surfaces, the distance will be measured from the node it belongs to.For higher numbers, the reference object is found n levels up in the surfaces hierarchy. If the number of parent surfaces is less than the specified value, the node or its parent will be used as the reference object.The reference object is used to ensure simultaneous LOD switching for all surfaces.Опорный объект , от которого измеряется минимальное расстояние видимости поверхности.
The reference object is used to ensure simultaneous LOD switching for all surfaces.Опорный объект используется для обеспечения одновременного переключения LOD для всех поверхностей. |
| Max Parent | Reference object, from which the maximum visibility distance of the surface is measured. The same principle as for the minimum parent is used to count it. The reference object is used to ensure simultaneous LOD switching for all surfaces. Опорный объект , от которого измеряется максимальное расстояние видимости поверхности. Для его подсчета используется тот же принцип, что и для минимального родителя . Опорный объект используется для обеспечения одновременного переключения LOD для всех поверхностей. |
Lightmaps ParametersПараметры карт освещения#
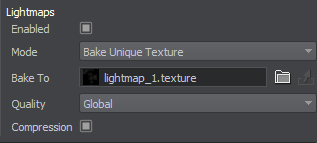
This section provides lightmapping-related parameters for the surface.В этом разделе представлены параметры поверхности, относящиеся к лайтмаппингу .
| Enabled | Flag indicating if lightmapping and related parameters are enabled for the surface.Флаг, указывающий, включены ли для поверхности световая карта и связанные с ней параметры. |
|---|---|
| Mode |
Option indicating the lightmapping mode for the surface:
|
| Bake To | Target asset for baking and storing the lightmap texture in the Bake Unique Texture mode. If the value is empty, a new lightmap texture will be created and assigned to this parameter upon light baking.Целевой ассет для запекания и хранения текстуры карты освещения в режиме Bake Unique Texture. Если значение не задано, новая текстура карты освещения будет создана и назначена этому параметру после запекания света. |
| Texture | Lightmap texture assigned to the surface in the Use Custom Texture mode.Текстура карты освещения, назначенная поверхности в режиме Use Custom Texture. |
| Quality |
Lightmap baking quality preset:
|
| Compression | Flag indicating if the baked lightmap texture should be compressed. Примечание Compressed lightmaps are lightweight but can be subject to compression artifacts.Флаг, указывающий, следует ли сжимать запеченную текстуру карты освещения.Compressed lightmaps are lightweight but can be subject to compression artifacts.Compressed lightmaps are lightweight but can be subject to compression artifacts. Примечание Compressed lightmaps are lightweight but can be subject to compression artifacts.Сжатые карты освещения легки, но могут иметь артефакты сжатия. |
| Surface | The surface providing the lightmap texture when the Reuse Texture From Other Surface mode is selected.Поверхность, обеспечивающая текстуру карты освещения, когда выбран режим Reuse Texture From Other Surface. |
Material ParametersПараметры материала#
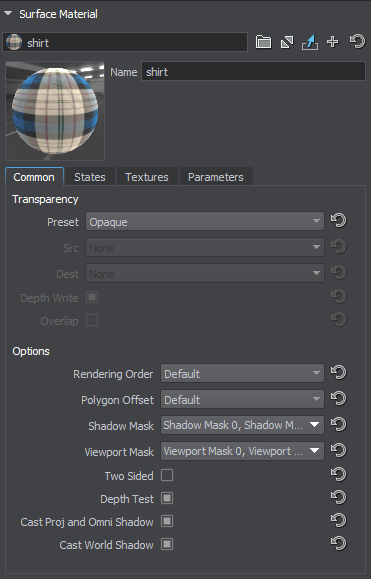
In this section, a material can be assigned to the surface and then material's parameters can be tweaked (if the material is editable). Here you can also inherit a new material from the material assigned to the surface: it will be assigned automatically. To inherit the material, click  right to the field with the material name.
To set the default material, click
  right to the field with the material name.В этом разделе можно назначить поверхности материал, а также настроить его параметры (если материал редактируемый ). Здесь вы также можете унаследовать новый материал от материала, назначенного поверхности: он будет назначен автоматически. Чтобы унаследовать материал, щелкните
  справа от поля с названием материала.
Чтобы установить материал по умолчанию, щелкните
  справа от поля с названием материала.
The material parameters can also be changed on the Material tab of the Parameters window: it becomes available when the target material is selected in the Material Hierarchy window.Параметры материала также можно изменить на вкладке Material окна Parameters: он становится доступным, когда материал выбран в окне Material Hierarchy.
Quick Copy and Paste OperationsОперации быстрого копирования и вставки#
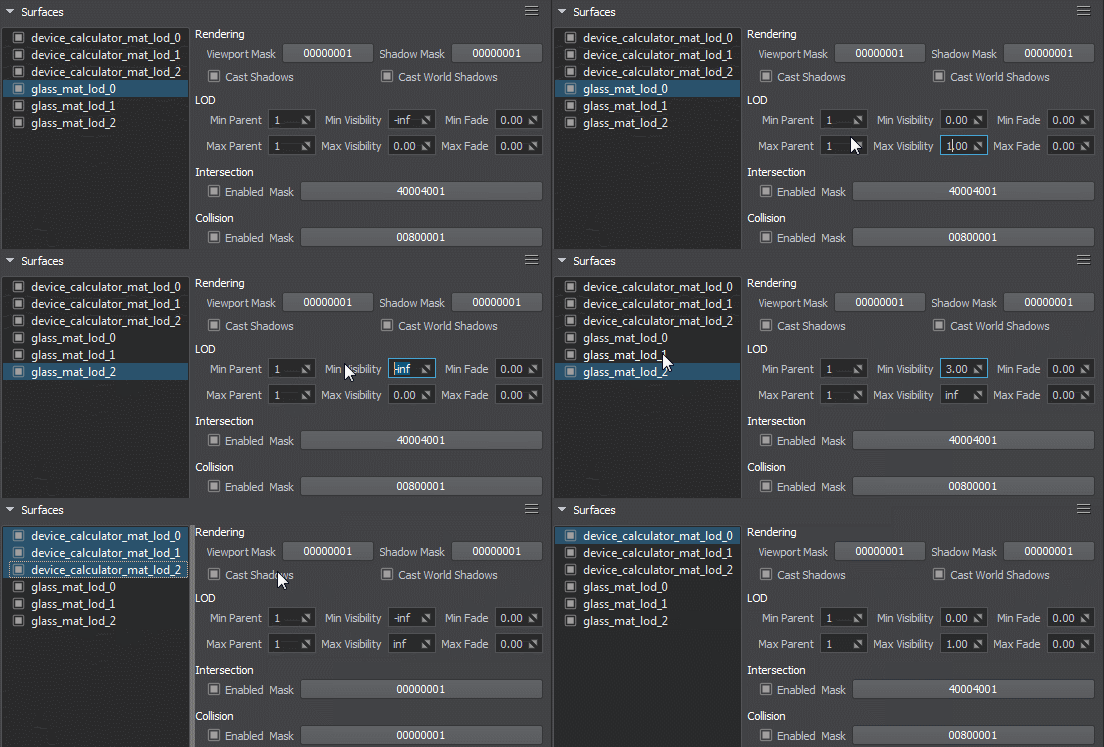
You can copy and paste all parameters from one surface to another using the following context menu displayed by clicking  in the top-right corner of the Surfaces section.Вы можете скопировать и вставить все параметры с одной поверхности на другую, используя следующее контекстное меню, отображаемое при нажатии
  в правом верхнем углу раздела Surfaces.

The copy/paste option supports multi-selection. This can be especially useful, when setting up LODs for several models, for example. Suppose you have 3 LODs in each model as separate surfaces, you just set up parent, visibility and fade distances for the three surfaces of one model, then select these surfaces and click Copy Parameters in the context menu shown above, then select three corresponding surfaces of another model and select one of the following options:Опция копирования / вставки поддерживает множественный выбор. Это может быть особенно полезно, например, при настройке LOD для нескольких моделей. Предположим, что у вас есть уровни детализации 3 в каждой модели как отдельные поверхности, вы просто настраиваете расстояние до родителя, видимости и исчезновения для трех поверхностей одной модели, затем выбираете эти поверхности и нажимаете Copy Parameters в контекстном меню, показанном выше, затем выделяете три соответствующие поверхности другой модели и выбираете один из следующих вариантов:
- Paste Parameters Sequentially — in this case the parameters copied from source surfaces will be simply pasted to destination surfaces in the order they appear in the hierarchy.Paste Parameters Sequentially - в этом случае параметры, скопированные с исходных поверхностей, будут просто применены к целевым поверхностям в том порядке, в котором они появляются в иерархии.
- Paste Parameters By Surface Names — in this case the parameters copied from source surfaces will be pasted to destination surfaces with matching names.Paste Parameters By Surface Names - в этом случае параметры, скопированные с исходных поверхностей, будут применены к целевым поверхностям с соответствующими именами.
