Adding Pipelines, Fences, Powerlines
You should upgrade to
Fences, pipes, and similar objects are placed along line segments selected from vector data sources (*.shp files). You can also simulate aircraft warning lights (in this case Billboards is used as the basic object).
In this chapter, let's create lights using the Billboards object and place a fence along a road.
Preparing a Primary Object#
A primary object to be used for the generation should be a *.node file (Node Reference) containing a single root node with any hierarchy.
Preparing Billboards#
- Create a Billboards: click Create —> Billboards —> Base on the Menu bar.
-
Inherit the surface material and enable the Emission state. You can change the emission color and any other parameters in the Parameters tab.
- Export the object to a *.node file.
Now that the primary node (the *.node asset) is ready for use, you can disable it or delete from the scene.
Preparing Fence#
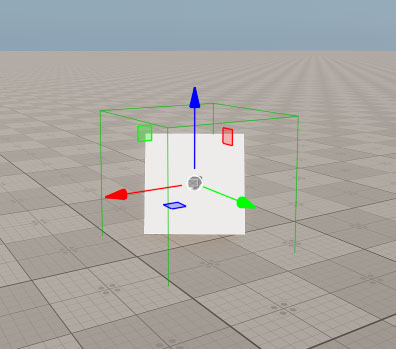
An important issue about placing objects along the lines is the node's pivot point: it should be shifted, if you want a fence to be generated near the road, not in the middle of it. To do this, open the asset in a third-party Digital Content Creation software.
The width of the plane that we created for the road is 10 units, therefore we need to move the fence more than 5 units from the pivot, so that it wouldn't be on the road.
The reimported model will look as follows:

Placing Points#
Placing Billboards#
In Sandworm, create a Point object and add the data source.
As we are going to place billboards along the road, let's use sw_georeferenced/vector/roads.shp file as the vector data source.
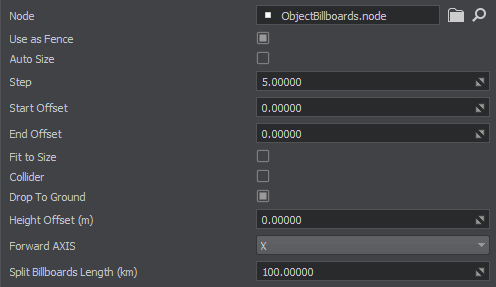
- Select the created Node Reference as Node.
- Enable the Use as Fence option.
- Disable the Autosize option.
- Set 5 as the value for the Step parameter that determines the distance (in units) between the two adjacent lights (Billboards) placed along the road.
- Click the Create Point Object button.
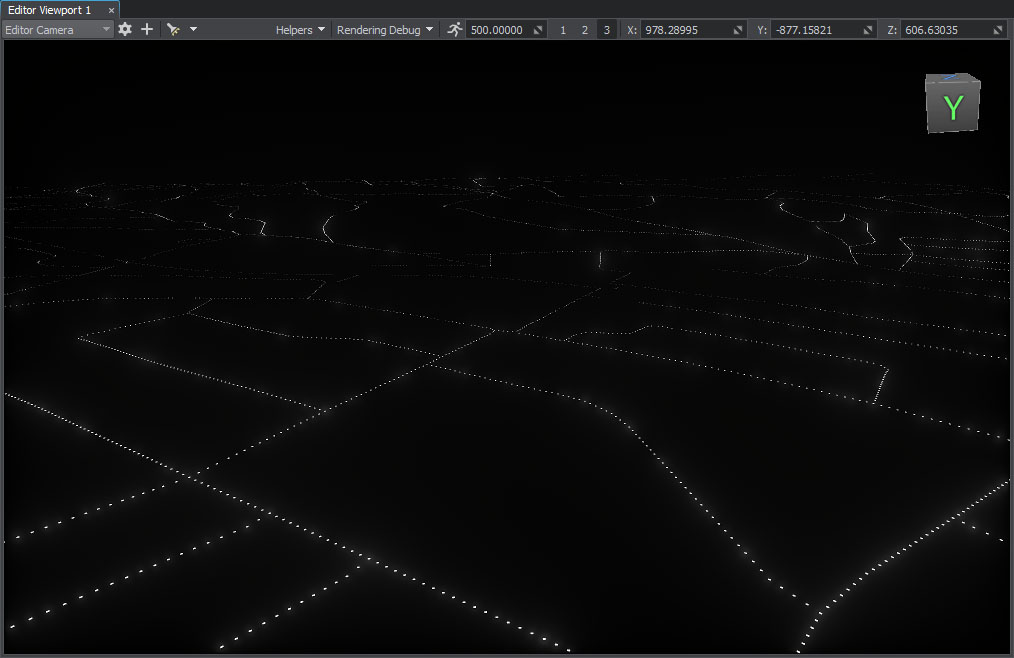
The generated lights will look as follows (if you disable the sun light):
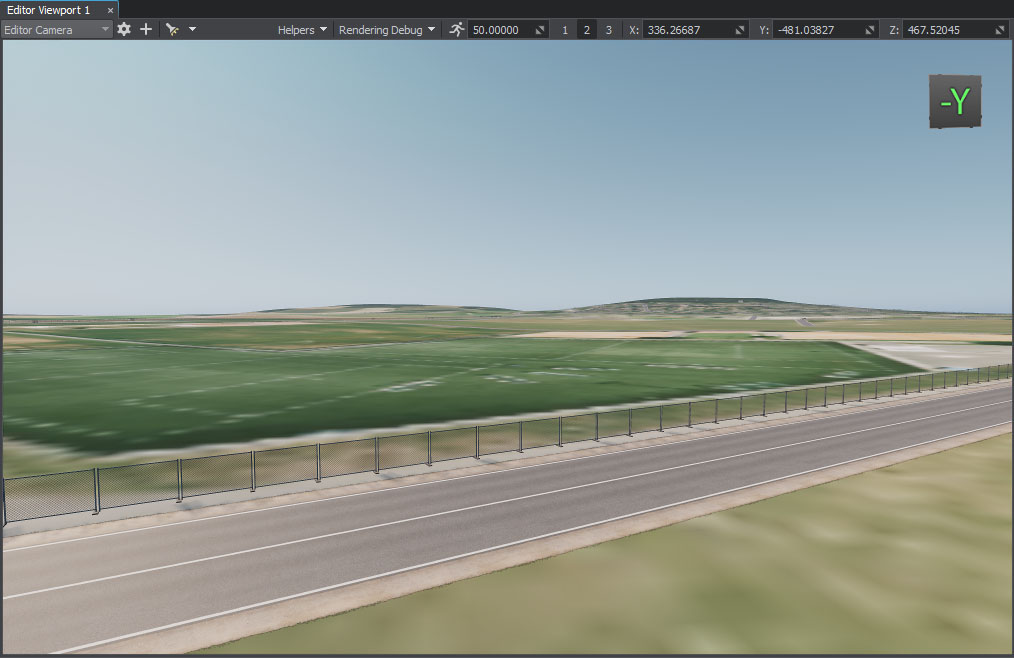
Placing Fence#
In Sandworm, create a Point object and add the data source.
As we are going to place a fence along the road, let's use sw_georeferenced/vector/roads.shp file as the vector data source and set a filter. Placing fences along all roads might be not very performance-friendly.
Let's set the same filter as for roads:

And set the following parameters for the object:
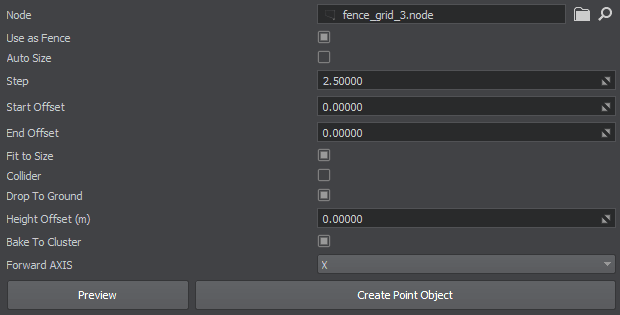
- Select the created Node Reference as Node.
- Enable the Use as Fence option.
- Click the Create Point Object button.
The generated fence will look as follows:
You can modify the cluster manually, but keep in mind that if you regenerate the object all manual changes will be lost. A solution may be to clone the edited object and move outside the Terrain hierarchy.
What Else#
- Read more about the points parameters.
- Read more about the filter settings.