Creating a Custom Shader for Deferred Rendering Pass
In Unigine all the opaque geometry is rendered in the deferred rendering pass. This article explains how to create your own material with shaders (both vertex and fragment) for the deferred rendering pass.
In this article, we create a material for static, dynamic and skinned meshes. We define a heightmap for a vertex shader and a albedo texture for fragment shader. Also, we calculate normals to make our mesh be lit properly.
See Also
- The article on Material Settings
- The article on Custom Materials
Create a Material
The material is the essential thing for rendering: you specify shaders, states, bindings, textures in the material thus telling the engine how to render it.
Let's create our own material (for deferred pass only) and write the vertex and the fragment shaders for it. Perform the following steps to create the material:
- In your project folder (which located in the data folder) open the materials folder.
- Open the existing material library with .mat extension in any plain text editor.
- Add the following material to the material library:
Source code (XML)
<?xml version="1.0" encoding="utf-8"?> <materials version="2.3"> <!-- Other materials defined here --> <!-- Custom mesh material --> <material name="custom_mesh_material" editable="0"> <!-- States --> <state name="deferred">1</state> <!-- Deferred rendering shaders --> <shader pass="deferred" object="mesh_static" deferred="1" defines="BASE_DEFERRED" vertex="<your project folder>/data/shaders/vertex/deferred.vert" fragment="<your project folder>/data/shaders/fragment/deferred.frag"/> <!-- Bindings --> <bind object="mesh_dynamic" to="mesh_static"/> <bind object="mesh_skinned" to="mesh_static"/> </material> </materials>- We defined a new custom_mesh_material material with the deferred state.
- Also we defined shaders (fragment and vertex) for the deferred pass and set the paths to them (we will create these shader files and folder in further steps).
- Finally, we defined the bindings: types of meshes for which the material can be assigned.
- Save the changes.
Create Vertex Shader
In this section we explain how to create the structure for shaders and how to create the custom vertex shader.
We assign two shaders in out material: vertex and fragment. To create the vertex shader, perform the following:
- Create the shaders folder in your project's data folder.
- Inside recently created folder, create another two folders: vertex for vertex shaders, fragment for fragment shaders.
- Open a plain text editor and write the following:
Source code (UUSL)
// Include Unified Unigine Shader Language (UUSL) header #include <core/shaders/common/common.h> // Input data struct STRUCT(VERTEX_IN) INIT_ATTRIBUTE(float4,0,POSITION) // Vertex position INIT_ATTRIBUTE(float4,1,TEXCOORD0) // Vertex texcoord (uv) INIT_ATTRIBUTE(float4,2,TEXCOORD1) // Vertex basis tangent INIT_ATTRIBUTE(float4,3,TEXCOORD2) // Vertex color END // Our output vertex data struct STRUCT(VERTEX_OUT) INIT_POSITION // Out projected position INIT_OUT(float4,0) // Texcoord (uv) END MAIN_BEGIN(VERTEX_OUT,VERTEX_IN) // Get transform with scale and rotation (without translation) float4 row_0 = s_transform[0]; float4 row_1 = s_transform[1]; float4 row_2 = s_transform[2]; // Get Modelview-space transform float4 in_vertex = float4(IN_ATTRIBUTE(0).xyz,1.0f); float4 position = mul4(row_0,row_1,row_2,in_vertex); // Set output UV float4 texcoord = IN_ATTRIBUTE(1); OUT_DATA(0) = texcoord; // Set output position OUT_POSITION = getPosition(position); MAIN_END // endWarningYou should add a new line (press Enter) after closing the instruction (after MAIN_END command).The code is pretty simple and clear. In the code above we
- Include the UUSL header.
- Define the input vertex data structure.
- Define the output vertex data structure.
- Start the main program of the shader:
- Translate the object-space coordinates to clipping space coordinates.
- Set the output UV.
- Set the vertex position.
- Save the shader file with the deferred.vert name and extension inside the shaders/vertex folder.
Create Fragment Shader
This section contains instructions on how to create a fragment shader (also known as pixel shader).
To create the fragment shader, perform the following:
- Open a plain text editor, and write the following:
Source code (UUSL)
// Include the UUSL language header #include <core/shaders/common/fragment.h> // Input data struct STRUCT(FRAGMENT_IN) INIT_POSITION // Projected position INIT_IN(float4,0) // Texcoord (uv) END MAIN_BEGIN_DEFERRED(FRAGMENT_IN) // Create the G-Buffer and set it GBuffer gbuffer = GBufferDefault(); setGBuffer(gbuffer); MAIN_END // endWarningYou should add a new line (press Enter) after closing the instruction (after MAIN_END command).Explanations on fragment shader:
- We include the UUSL header for fragment shaders.
- Define the input fragment data struct (where we receive the data from output structure of the vertex shader).
- Start the main program of the shader, where we create a GBuffer instance for metalness workflow and set it.
- Save the shader file with the deferred.frag name and extension to the shaders/fragment folder.
Working with Material
After performing all these steps, you can see recently created shaders in use. These shaders are primitive, and they don't provide a nice final image. Anyway, to see their work perform the following steps:
- Launch your project in editor mode (or open your world by using UnigineEditor).
- Open the Materials settings window. You will see the recently created material in your project's material library.
- Assign your custom material to the material ball or create a primitive, for example, a sphere.
After that you'll get the following result:
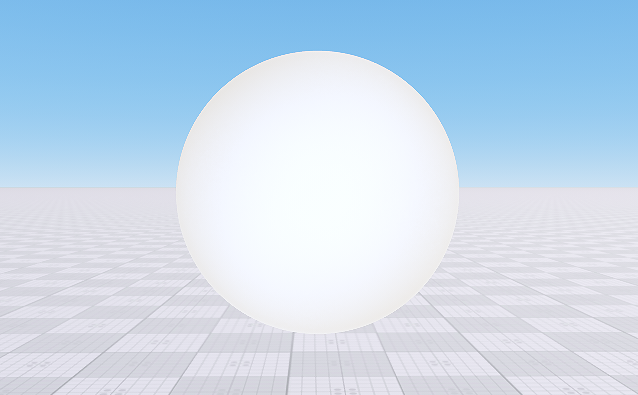
It doesn't look good, but it works.
Let's go further and calculate the tangent basis for the mesh and assign textures to it.
Adding Textures to Shaders
Let's add textures to the both shaders: vertex and fragment. In vertex shader we will use texture as a heightmap and in the fragment as a albedo map.
Editting the Material
First, let's edit the custom material and add texture slots.
- Open the custom material .mat file by using plain text editor.
- Edit it in the following way:
Source code (XML)
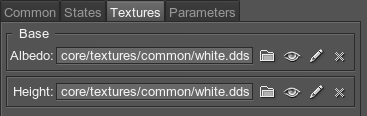
<?xml version="1.0" encoding="utf-8"?>
<materials version="2.3">

	<!-- Other materials defined here -->

	<!-- Custom mesh material -->
	<material name="custom_mesh_material" editable="0">

		<!-- States -->
		<state name="deferred">1</state>

		<!-- Deferred rendering shaders -->
		<shader pass="deferred" object="mesh_static"
			deferred="1"
			defines="BASE_DEFERRED"
			vertex="<your project folder>/data/shaders/vertex/deferred.vert"
			fragment="<your project folder>/data/shaders/fragment/deferred.frag"/>

		<!-- Bindings -->
		<bind object="mesh_dynamic" to="mesh_static"/>
		<bind object="mesh_skinned" to="mesh_static"/>

		<texture unit="0" name="albedo" anisotropy="1" shader="fragment" pass="deferred">core/textures/common/white.dds</texture>
		<texture unit="1" name="height" shader="all" pass="deferred">core/textures/common/white.dds</texture>

	</material>

</materials>
Now the textures will be available for the shaders. We specified the name of the texture, rendering pass, and the path to the default texture.
Editing the Vertex Shader
Now we should edit the vertex shader code and add the texture to the shader.
The better way to add the texture in the shader (an example):
// Initialize the texture slot for a texture named TEX_COLOR
INIT_TEXTURE(0, TEX_COLOR)
It makes changing the number of textures slots easy without correction of whole shader's code. Let's do it in the vertex shader:
- Open the vertex shader deferred.vert file by using plain text editor.
- Edit the source code in the following way:
Source code (UUSL)
// Include Unified Unigine Shader Language (UUSL) header #include <core/shaders/common/common.h> // Create a texture sampler INIT_TEXTURE(1,TEX_HEIGHT) // Input data struct STRUCT(VERTEX_IN) INIT_ATTRIBUTE(float4,0,POSITION) // Vertex position INIT_ATTRIBUTE(float4,1,TEXCOORD0) // Vertex texcoord (uv) INIT_ATTRIBUTE(float4,2,TEXCOORD1) // Vertex basis tangent INIT_ATTRIBUTE(float4,3,TEXCOORD2) // Vertex color END // Our output vertex data struct STRUCT(VERTEX_OUT) INIT_POSITION // Out projected position INIT_OUT(float4,0) // Texcoord (uv) INIT_OUT(float3,1) // Vertex TBN (X) INIT_OUT(float3,2) // Vertex TBN (Y) INIT_OUT(float3,3) // Vertex TBN (Z) END MAIN_BEGIN(VERTEX_OUT,VERTEX_IN) // Get transform with scale and rotation (without translation) float4 row_0 = s_transform[0]; float4 row_1 = s_transform[1]; float4 row_2 = s_transform[2]; // Perfrom Modelview-space transform float4 in_vertex = float4(IN_ATTRIBUTE(0).xyz,1.0f); float4 position = mul4(row_0,row_1,row_2,in_vertex); // Set output UV float4 texcoord = IN_ATTRIBUTE(1); OUT_DATA(0) = texcoord; // Define tangent basis float3 tangent,binormal,normal; // Get normal in object-space getTangentBasis(IN_ATTRIBUTE(2),tangent,binormal,normal); // Transform object-space TBN into camera-space TBN normal = normalize(mul3(row_0,row_1,row_2,normal)); tangent = normalize(mul3(row_0,row_1,row_2,tangent)); binormal = normalize(mul3(row_0,row_1,row_2,binormal)); // Set output TBN matrix OUT_DATA(1) = float3(tangent.x,binormal.x,normal.x); OUT_DATA(2) = float3(tangent.y,binormal.y,normal.y); OUT_DATA(3) = float3(tangent.z,binormal.z,normal.z); // Set the texture float4 height = TEXTURE_BIAS_ZERO(TEX_HEIGHT,texcoord.xy); // Perform the displacement mapping position.rgb += normal * (height.r) * 0.2f; // Set output position OUT_POSITION = getPosition(position); MAIN_END // endWarningYou should add a new line (press Enter) after closing the instruction (after MAIN_END command). - Save the file.
That's it! Our vertex shader now calculates the normals, gets the texture and performs the displacement mapping. We add three new output semantics and now we should receive them in our fragment shader.
Editing the Fragment Shader
Now we should edit the fragment shader code and add the albedo texture to the shader.
- Open the fragment shader deferred.frag file by using plain text editor.
- Edit the source code in the following way:
Source code
// Include the UUSL language header #include <core/shaders/common/fragment.h> // Adds a texture sampler INIT_TEXTURE(0, TEX_COLOR) STRUCT(FRAGMENT_IN) INIT_POSITION // Projected position INIT_IN(float4,0) // Texcoord (uv) INIT_IN(float3,1) // Vertex TBN (X) INIT_IN(float3,2) // Vertex TBN (Y) INIT_IN(float3,3) // Vertex TBN (Z) END MAIN_BEGIN_DEFERRED(FRAGMENT_IN) // Get the UV coords float4 texcoord = IN_DATA(0); // Get the texture data float4 texture_data = TEXTURE(TEX_COLOR,texcoord.xy); // Define the normal of a fragment in tangent-space STATICVAR float3 tangentspace_normal = float3(0.0f,0.0f,1.0f); // Calculate the view-space normal float3 viewspace_normal; viewspace_normal.x = dot(IN_DATA(1),tangentspace_normal); viewspace_normal.y = dot(IN_DATA(2),tangentspace_normal); viewspace_normal.z = dot(IN_DATA(3),tangentspace_normal); viewspace_normal = normalize(viewspace_normal); // Fill G-Buffer: set the calculated normal and albedo color of the texture GBuffer gbuffer = GBufferDefault(); gbuffer.albedo = texture_data.rgb; gbuffer.normal = viewspace_normal; setGBuffer(gbuffer); MAIN_END // endWarningYou should add a new line (press Enter) after closing the instruction (after MAIN_END command). - Save the file.
Now our shaders are ready to work! Let's see them in action!
Editing the Material
We changed the material and shader, so we should reload materials and shader by using materials_reload and shaders_reload console commands.
Now the result is different: we see the white lit sphere:

It looks much better! So perform the following:
- Create a new material by inheriting recently created.
- Go to the textures tab of the material.
- Choose the albedo and the displacement maps for the material.
Voila! We just created a new deferred material with own shaders which use two textures for albedo and displacement mapping!