Adding Materials to Cars
This article is a tutorial that will help you to assign random materials to your car into City Traffic. It is assumed that you have already imported a car to City Traffic by using this article.
To assign a random material to a car, you should create different materials and create a property. Your materials can be inherited from different base materials and assigned by using a property
Requirements
- It is supposed that you already have an exported 3D model of a car, 3D model of wheels and necessary textures.
- It is supposed that City Traffic has been already installed.
- It is supposed that you have already created materials for your cars.
See Also
- The article on Importing cars into City Traffic.
- The article on Vehicles in City Traffic.
- The article on Hierarchy and Inheritance to learn how to create a new material.
Creating Materials
To assign materials to a car by using a property you should create them. We suppose that you created materials by following instructions of the How to Inherit a Material section of the Hierarchy and Inheritance tutorial.
Creating a Property
This section shows how to create a new property for a car to assign two different materials to the surfaces of a car.
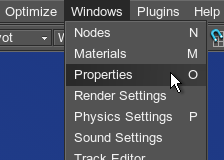
- Open the Properties window in City Traffic by pressing O or click Windows -> Properties on the Menu bar.
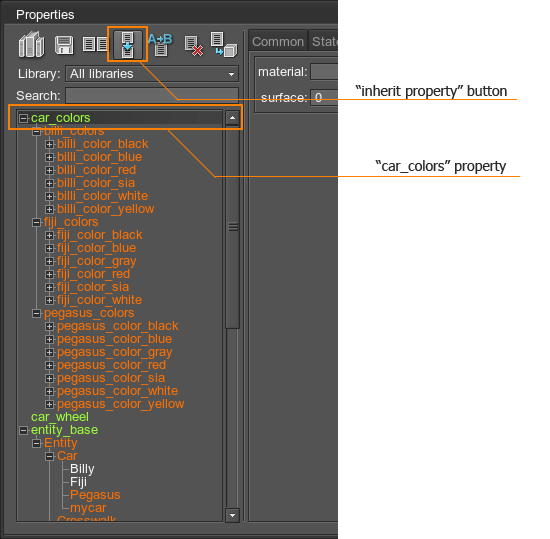
- Choose the car_colors property and click the Inherit property button.
- In the window that opens, specify the name of the property.
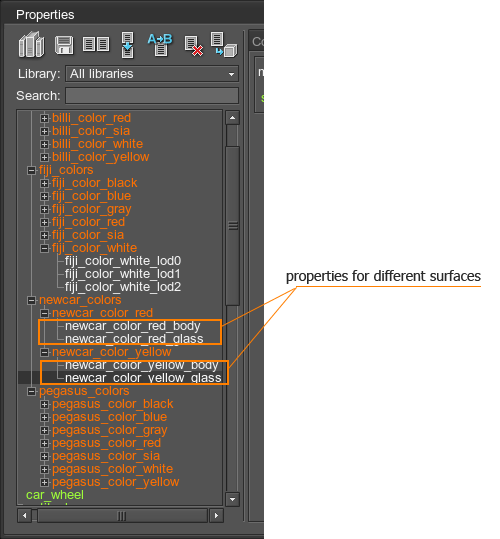
This property can assign only one material to the surface. To specify all of the necessary surfaces and their materials, you need to create auxiliary children, inherited from this property.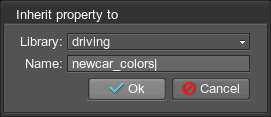
- Choose the created property and click the Inherit property button to create a child property.
NoticeThis property will contain child properties for each surface of a car. The engine will take this parent property and assign all the materials that you specified in the children properties.

- Create a new child property for each surface which material you want to be changed.
- Specify Material and Surface in the Parameters tab for each property.
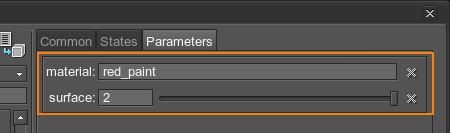 NoticeWhen you set the parameter for the parent node, child nodes change their default properties automatically.
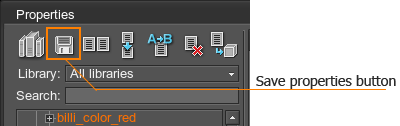
 - Click the Save properties button to save all the changes.
Assigning Property to a Car
After creating the property, you need to assign it to the car entity to City Traffic. To assign the property you should do the following:
- Open the Game Framework plugin window by clicking Plugins -> Game Framework.
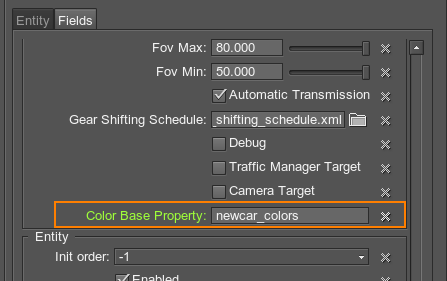
- In the window that opened, choose created car entity.
- Select the Entity Fields tab, and fill the Color Base Property with the name of the created property.
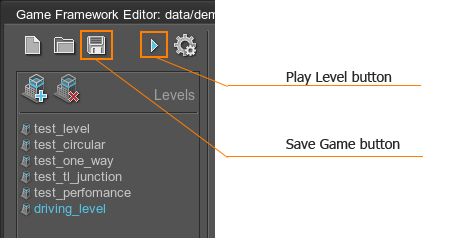
- Click the Save Game button and launch the level.
On the car's creation, the materials will be chosen randomly. The property will check all of the children and assign materials to required surfaces.