Color Correction
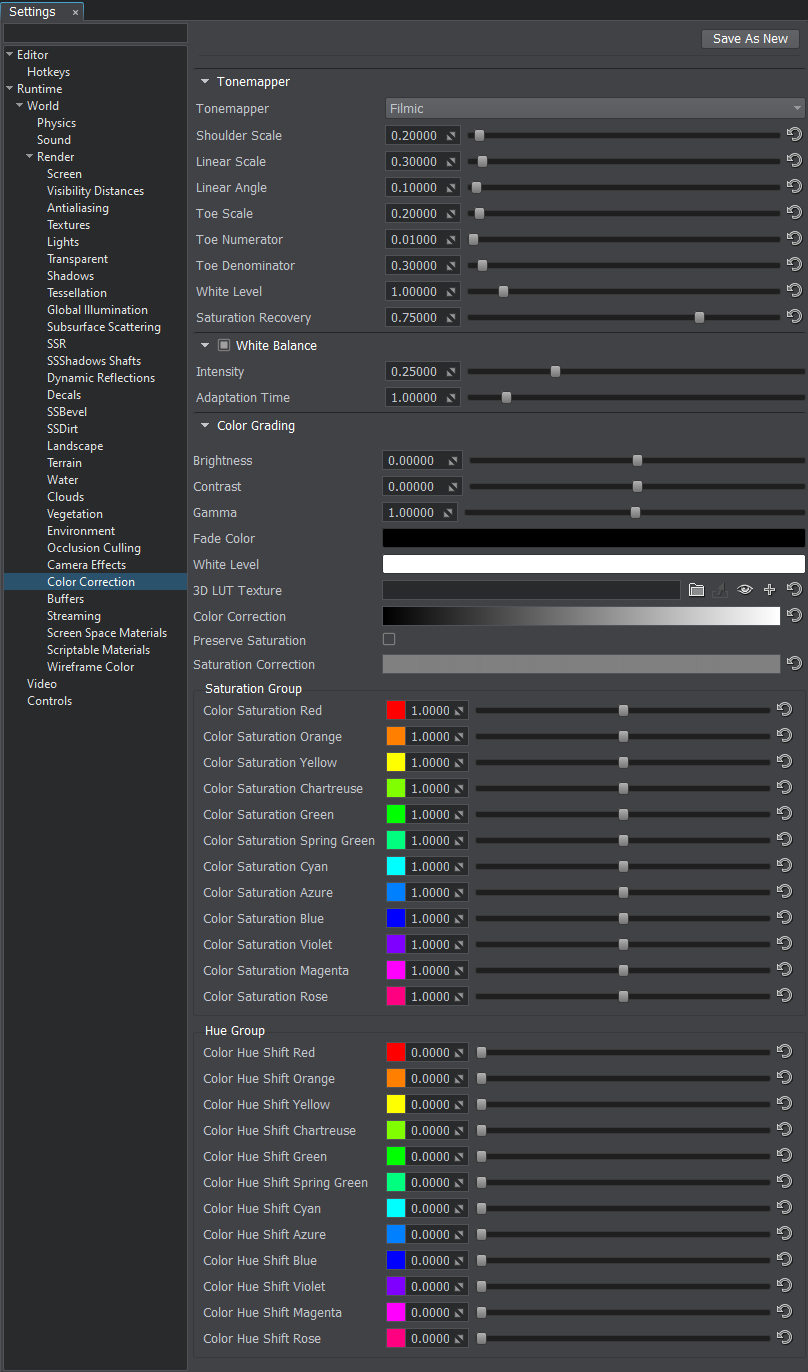
This section describes settings for color correction of the scene.
Tonemapper#
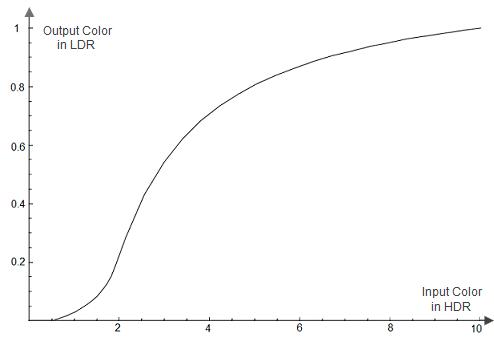
The tone mapping provides better image quality by remapping high dynamic range (HDR) colors into a range suitable for mediums with low dynamic range (LDR), like LCD or CRT screens. Its most common purpose is to make an image with a low dynamic range appear to have a higher range of colors providing a more dynamic and realistic effect. It lightens the darkest image regions and makes the lightest regions darker.
When using an HDR camera, always apply tonemapping, otherwise color intensity values exceeding 1 will be clamped at 1, altering the luminance balance of the scene.
| Tonemapper |
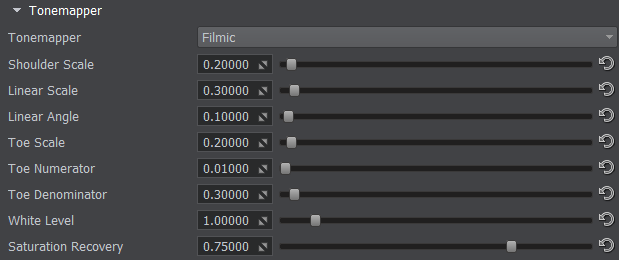
The mode of tone mapping. One of the following values:
Console access: render_tonemapper |
|---|
Filmic#
Parameters described below represent John Hable's artist-friendly tonemapping curve, which is constructed by using the following formula:

- A — Shoulder Scale
- B — Linear Scale
- C — Linear Angle
- D — Toe Scale
- E — Toe Numerator
- F — Toe Denominator
For more details about tone mapping curve construction see the article on Filmic Tonemapping with Piecewise Power Curves.
| Shoulder Scale |
The Shoulder Strength tonemapping parameter value that is used to change bright values. Range of values: [0.0f, 1.0f]. The default value is 0.2f. Console access: render_filmic_shoulder_scale
|
||
|---|---|---|---|
| Linear Scale |
The Linear Strength tone mapping parameter value that is used to change gray values. The Linear Scale controls the length of the tone mapping curve linear part. Range of values: [0.0f, 1.0f]. The default value is 0.3f. Console access: render_filmic_linear_scale
|
||
| Linear Angle |
The Linear Angle tone mapping parameter value. This parameter controls the slope of the linear part of the tone mapping curve. Range of values: [0.0f, 1.0f]. The default value is 1.0f. Console access: render_filmic_linear_angle
|
||
| Toe Scale |
The Toe Scale tonemapping parameter value that is used to change dark values. The Toe Scale controls the slope of the tone mapping curve toe (the area of underexposure). Range of values: [0.0f, 1.0f]. The default value is 0.2f. Console access: render_filmic_toe_scale
|
||
| Toe Numerator |
The Toe Numerator tonemapping parameter value. Range of values: [0.0f, 1.0f]. The default value is 0.01f. Console access: render_filmic_toe_numerator
|
||
| Toe Denominator |
The Toe Denominator tonemapping parameter value. Range of values: [0.0f, 1.0f]. The default value is 0.3f. Console access: render_filmic_toe_denominator
|
||
| White Level |
The Linear White Point tonemapping parameter value, which is mapped as pure white in the resulting image. Range of values: [0.0f, inf]. The default value is 1.0f. Console access: render_filmic_white_level
|
||
| Saturation Recovery | The color saturation recovery value for the filmic tonemapper. Filmic tonemapper desaturates image colors in bright areas making them look grayish. This parameter enables you to recover initial color saturation in such areas. Higher values make colors more saturated:
Notice
When the 1.0f value is set specular highlights appear too saturated, so the recommended value is 0.75f (default) Range of values: [0.0f, 1.0f]. The default value is 0.75f. Console access: render_filmic_saturation_recovery
|
ACES#
| White Clip |
The white clip parameter for the ACES operator. Controls the cut-off point for white. |
|---|---|
| Toe |
The toe parameter for the ACES operator. Controls the dark color. Higher values result in darker colors. |
| Shoulder Angle |
The shoulder angle parameter for the ACES operator. Controls how much overshoot should be added to the curve's shoulder. |
| Shoulder Strength |
The shoulder strength parameter for the ACES operator. Controls the strength of the transition between the curve's midsection and the curve's shoulder. |
| Shoulder Length |
The shoulder length parameter for the ACES operator. Controls the amount of f-stops to add to the dynamic range of the curve. Defines how much of the highlights the curve takes into account. |
Mix ACES With Reinhard#
| Mix With Reinhard |
The ACES with Reinhard tonemapping operator contribution. If the value is closer to 0, then ACES prevails. Otherwise, when the value is closer to 1, the Reinhard has a grater impact. Range of values: [0.0f, 1.0f]. The default value is 0.5f. Console access: render_aces_with_reinhard_mix |
|---|
Reinhard#
| Contribution |
The Reinhard tonemapping operator contribution. The value is calculated according to the following formula: C / (1 + C) It controls the overall contribution that the Reinhard operator makes to the final color grading of the image. The higher values result in more tonemapping contribution to the final image.Range of values: [0.0f, 1.0f]. The default value is 1.0f. Console access: render_reinhard_contribution |
|---|
Reinhard Luma-Based#
| Contribution |
The Reinhard Luma Based tonemapping operator contribution. Controls the overall contribution that the Reinhard operator makes to the final color grading of the image. Higher values result in more tonemapping contribution to the final image. Range of values: [0.0f, 1.0f]. The default value is 1.0f. Console access: render_reinhard_luma_based_contribution |
|---|
White Balance#
White balance correction eliminates the discoloration in the final image due to certain colors in the scene having more intensity and/or a higher or lower color temperature. Adaptive automatic white balance correction ensures realistic coloration of your scenes in real-time mode.

| White Balance |
The value indicating if automatic white balance correction is enabled. Enabled by default.
Console access: render_white_balance
|
|---|---|
| Intensity |
The value of white balance correction intensity.
Notice
Do not set too high values for night-time and dimly lit scenes, as it may lead to heavy color distortion making the scene look totally unnatural. Range of values: [0.0f, 1.0f]. The default value is 0.3f. Console access: render_white_balance_intensity |
| Adaptation Time |
The time period set for the camera to adjust white balance. During this time white balance correction is performed (0.0f - instant correction is to be used).
Notice
It is recommended to use lower values, when possible, to make correction process unnoticeable, otherwise it'll be slow and will catch user's eye. However, setting too low values may result in abrupt switching of colors as the camera moves. So, adjust this parameter carefully to make transition smoooth. You can set it equal to the Exposure Adaptation value. Range of values: [0.0f, inf]. The default value is 1.0f. Console access: render_white_balance_adaptation_time |
Color Grading#
| Brightness | Correction of the overall scene brightness:
|
|---|---|
| Contrast | Correction of the overall scene contrast:
|
| Gamma | Correction of the overall scene gamma. |
| Fade Color |
The current fade color for the scene on the screen. By gradually changing this value it is possible to create "fade in" and "fade out" effects depending on the w component of the given vector. For example, when the following vectors are passed the result will be:
vec4_zero - default value (white) Console access: render_fade_color |
| White Level | White level of the scene. |
| 3D LUT Texture | The loading, viewing, or clearing of the Lookup Table texture for color transformation. |
| Color Correction | Tonal range and tone response of the final image. The horizontal input color values are mapped to the vertical output values based on curves for Red, Green and Blue channels. By adjusting all three channels at once, you control the luminance of the final image.
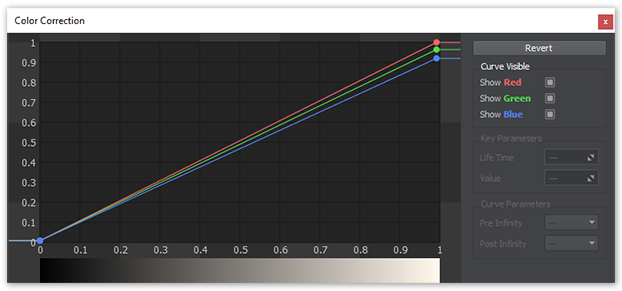 Color correction curves
|
| Preserve Saturation | Preserve initial scene color saturation after applying color correction. |
| Saturation Correction | Correction curve of the overall scene saturation. The input luminance values are mapped to the vertical saturation values:
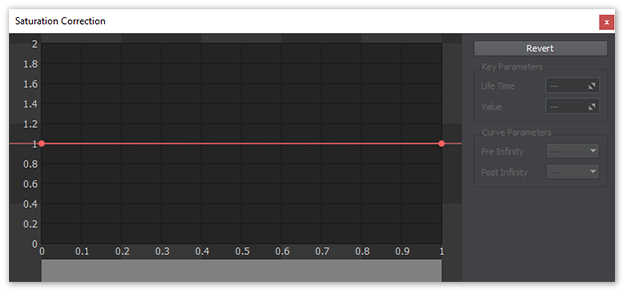 Saturation curve
Control the saturation of shadows by adjusting the values on the left, highlights - on the right.
|
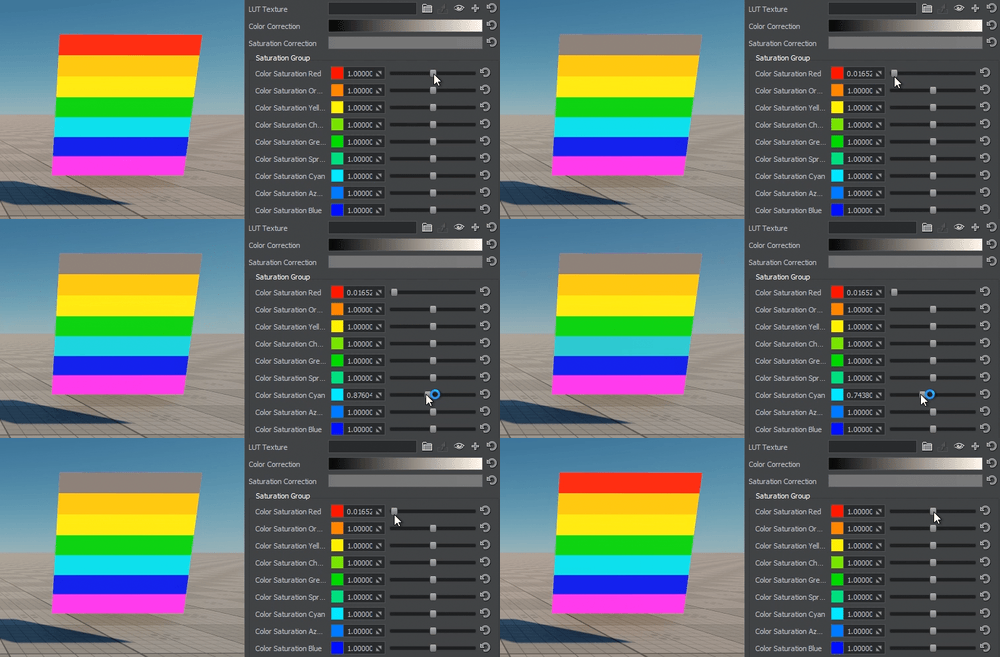
| Saturation Group | Saturation fine-adjustment for 12 major colors of the spectre.
Saturation adjustment
|
| Hue Group | Hue (color shift) fine-adjustment for 12 major colors of the spectre.
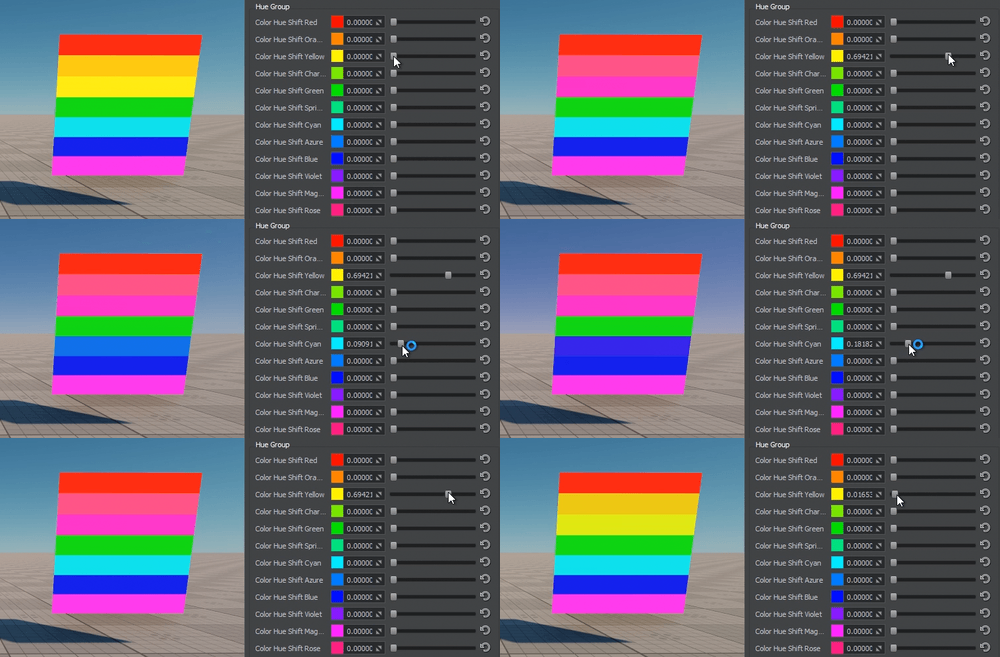 Hue adjustment
|
Color Correction LUT#
Color Correction LUT (Lookup Texture) is an optimized way of performing color grading in a post effect. Instead of tweaking individual color grading parameters, only a single texture is used to produce the corrected image. The lookup is performed by using the original image color as a vector to address the lookup texture.
One of the most common applications of lookup tables is to use them to see how images look in different media, such as TV/video or film, which have different color capabilities. Using a lookup table designed to mimic a certain display medium gives a much better idea what your current work will look like after it’s transferred to that medium.
Advantages of using a Color correction LUT include:
- Better performance — realtime computation is replaced by a simple array indexing operation.
- More professional workflow opportunities, where all color transforms can be defined using professional image editing software (such as Photoshop or GIMP), which provides a more precise result.


Lookup Texture Requirements#
The 2D texture representation must be laid out in a way that it represents an unwrapped volume texture (as an image sequence of "depth slices").

Workflow Example#
- Generate a default lookup texture by clicking the
 button (Save texture) right to the LUT texture field and saving it as a TGA file (by selecting it in the Typefield).
 - Take a screenshot of your scene.
- Import your screenshot into a graphics editor (e.g., Photoshop or GIMP) and perform all necessary image correction operations (brightness, contrast, etc.) to achieve a desired look.
- Import your generated default lookup texture into the graphics editor and perform the same operations as for the scene screenshot. Save the modified lookup texture as a new LUT.
- In Render Settings -> Color -> LUT texture, select you new texture.
Now your scene in UnigineEditor looks exactly as in the graphics editor!
