SDK Browser
This article contains brief description on the new UNIGINE SDK browser. It features:
- Integration with the developer.unigine.com accounts.
- Convenient downloading, installation and upgrade of multiple UNIGINE SDKs.
- Quick creation of projects with customizable settings.
- Browsing through various samples: UnigineScript, C++ API, C# API, 3rd party.
- Downloading content on demand.
- Self-update via Internet.
- Easy access to UNIGINE Add-Ons library.

The information on the browser downloading and installing can be found here.
The information on licensing is available in the Licenses article.
Signing In
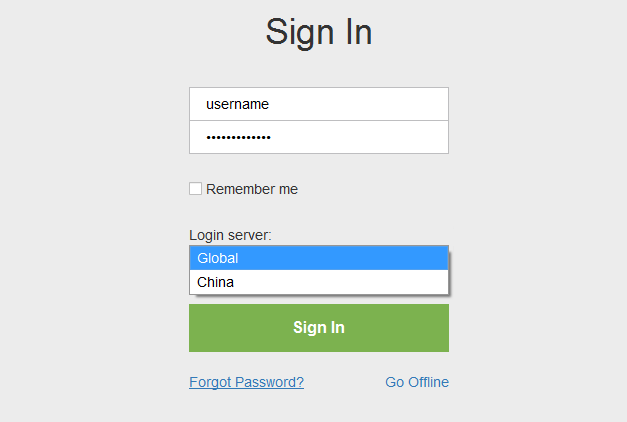
Once the browser is installed on the computer, choose server location (Netherlands or China) and log in with your account credentials.

Options
It is possible to set the general startup settings for all projects, samples and demos run via the SDK Browser.
To open the Options form, click the following tab in the SDK Browser:

The form will open:

| Storage Path | A path to a folder where the downloaded SDKs, add-ons and demos will be stored. |
|---|---|
| Show Welcome Screen | Show the welcome screen on the SDK Browser startup. |
| Qt Path | Path to Qt libraries. This path is used to run projects created by using QMake via UNIGINE SDK Browser.
Notice
This option is available on Windows only. |
| API | Graphics API to be used for rendering. The following values are available:
|
| Resolution | Window resolution. |
| Fullscreen | Fullscreen mode. |
| Video Debug | Debug context for OpenGL or DirectX 11. |
| Anti-aliasing | Anti-aliasing mode. |
| Quality | Quality of the output video. |
| Monitors | Display configuration (for single- or multi-monitor rendering). |
| Stereo 3D | Stereo mode.
Notice
Depending on the graphics API used for rendering, the set of available modes varies. |
SDKs
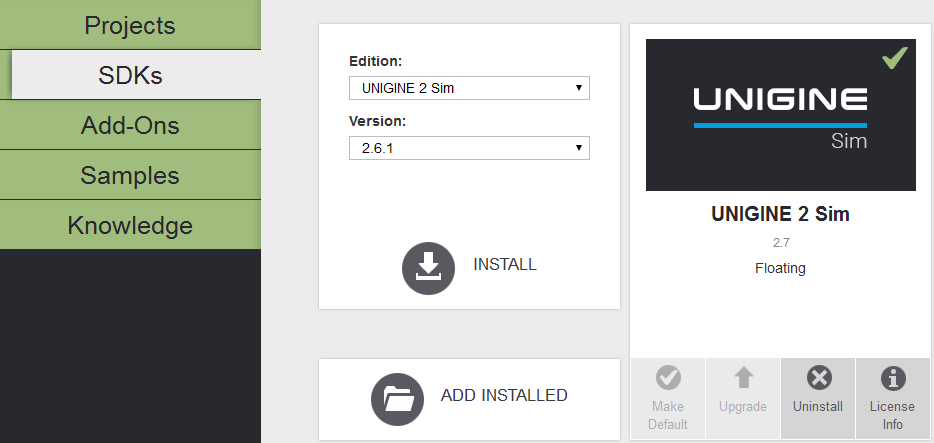
To start working, you should have an SDK installed. In the SDKs tab you can install a new SDK version or add the already installed one.

- To install a new SDK, you should do the following:
- Specify the SDK type in the Edition field (Entertainment, Engineering, or Sim) in the SDKs tab.
- Specify the SDK version in the Version field.
- Click Install. The installation progress will be shown under the menu at the left. The installed SDK will appear in the SDKs list.

- To add the already installed SDK, you should do the following:
- Click Add Installed in the SDKs tab.
- Specify the path to the root folder of the required SDK. It will appear in the projects list.
NoticeOnly SDKs containing the manifest file (present from the 04/23/2015) are available for adding.
Once the SDK is installed, you can:
- Create a new project in the Projects tab.
- Create a project with installed add-ons in the Projects tab.
- Run built-in demos or samples (UnigineScript, C++ API, C# API, 3rd party).
Projects

A project is an independent entity that contains all the data on your application content organized in a set of directories.
There are several ways of working with projects:
- Create a new project (you should have an SDK installed).
- Create a project with add-ons (you should have an SDK and add-ons installed).
- Add an existing project from your local drive (after that, it will be easily accessible from here for editing, upgrade or other actions).
Add-Ons

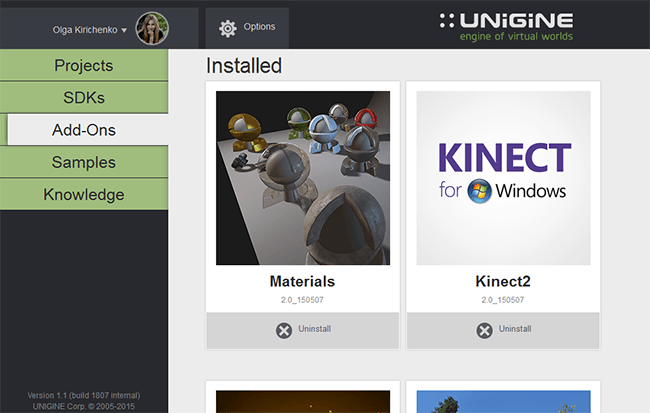
An add-on is the plugged functionality extension that can be presented as any engine addition: plugin, library, material, etc.
See how to create a project with an add-on here.
The full list of add-ons and their usage is available here.
Samples

The following samples can be found in the Samples tab:
- Demos - a set of UNIGINE demos and benchmarks that can be converted to a project in order to be modified
- UnigineScript - a set of UnigineScript demos
- C++ API - a set of C++ API demos
- C# API - a set of C# demos
- 3rd party - a set of demos demonstrating UNIGINE integration with applications based on 3rd party technologies.
Knowledge
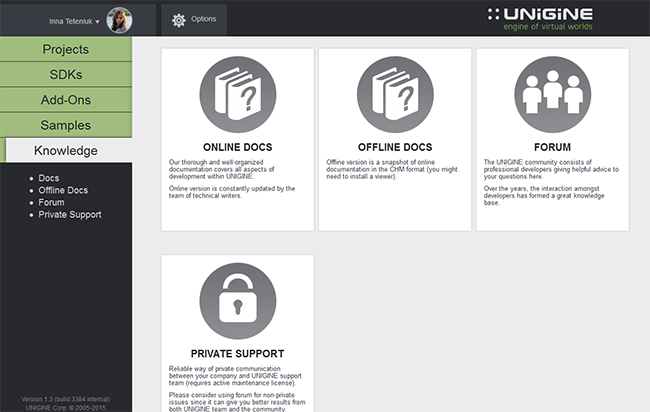
Access to online and offline documentation, Unigine community forum and private support.
