Content Optimization
This article describes some tips and tricks which can help to optimize the performance of your project.
To show the performance status of the current scene, use the Performance profiler tool. This tool can give you a hint of what you should do to increase the performance.
Level of Details
Using Levels of Details (LODs) is the main way to optimize your project.
Creating LODs
To create LODs for the existing object do the following:
- In a 3D computer graphics software (Autodesk 3ds Max, Autodesk Maya, etc.) create one or more LODs for a mesh object. For example, you can just copy the existing object and create an object with the less number of triangles.
NoticeYou should create a LOD for each part of the model to which a unique material is assigned.
- Position LODs at the same point, so that their coordinates coincide.
- Export these LODs as a single .mesh file, where each LOD is a surface of the object.
NoticeA separate surface is exported if it either needs a different material or represents a LOD. So keep the number of surfaces in the exported models as low as reasonably possible.
Here you can read more information about LODs.
Using LODs
LODs have a wide range of usage:
Switching by Distance
To speed up rendering, switch the LODs after the specified distance:
- Open the World Hierarchy window and select your mesh object with LODs.
- In the LOD section of the Node tab, specify Visibility, Fade and Parent parameters.
-
The maximum visible distance of the closest LOD should be the minimum visible distance of the next LOD. When the distance between the camera and an object become as specified, LODs will be switched.
-
To make this operation smoother and not so noticeable, specify minimum fade and maximum fade parameters for LODs. The idea is the same as for visible distance. The maximum fade distance of the closest LOD should be the minimum fade distance of the next LOD.
-
Minimum parent and maximum parent parameters allows you to specify from which object in the surface hierarchy the minimum visible distance will be measured. Here you can find more information about these parameters.
-
The following example shows how LODs are implemented in the Port Angeles demo:
| 14698 polygons | 10840 polygons | 2958 polygons |
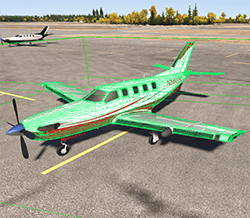
|
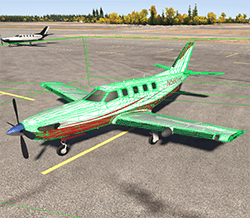
|
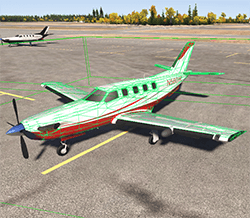
|

|

|

|

|

|

|
See also LODs samples in the Objects section (or <UNIGINE_SDK>/data/samples/object folder):
- lods_00
- lods_01
- lods_02
- lods_03
Using for Collision and Intersection
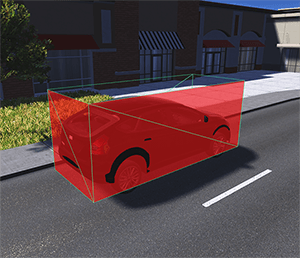
Another way to reduce performance costs is to create a collision and intersection detection surface for the mesh.
- Create a detection surface for whole mesh in a 3D editor.
- After adding the mesh to the world, enable the Intersection and Collision options for the detection surface.
- Disable these options (Intersection and Collision) for all other surfaces of the mesh to reduce the number of calculations.
- Specify the Viewport mask not to render the detection surface. Another way to not render the detection surface is not to assign material.
Working with a large number of objects
Use cluster and clutter to optimize a large number of objects. It allows managing a great number of identical meshes as a single object. This will simplify a spatial tree of nodes, thus increasing the performance.
- To set a great number of identical meshes in the world with specified positions, use the ObjectMeshCluster.
Here you can find an example of how to create a cluster from identical meshes.
- To scatter a great number of identical meshes randomly in the world, use the ObjectMeshClutter.
Here you can find an example of how to create a cluster from identical meshes.
Instancing
Surfaces of identical meshes which have the same materials assigned to them (and the same number of bones attached to their vertices, for ObjectMeshSkinned meshes) are automatically instanced and drawn in one draw call. The instancing flag is enabled by default.
It is highly recommended NOT to change the material of the surface in the surface properties of the node. This creates a copy material in the spatial tree of materials, thus decreasing the performance.
To avoid that, create new materials (click Windows -> Materials on the Menu bar) and create a hierarchy of the materials.
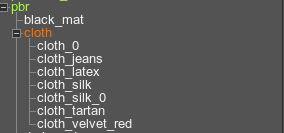
This will increase the performance of your project.
Impostors
There is a hint of how to optimize the performance if you use mesh clutters.
Use ObjectGrass as the farthest LOD of a mesh clutter. You should use a Impostors Creator tool, to create impostors:
- Click Windows -> Tool on the Menu bar and choose the Grabber tab.
- Select the Impostor mode.
- Specify parameters of the tool. They should be the same as parameters of the mesh clutter.
- Click the Grab button and save the grabbed texture.
- Create a new impostor material for ObjectGrass by inheriting the grass_impostor_base material with the grabbed texture.

- Create a new ObjectGrass and assign created material to it.
- Specify the Visible distance parameter to the created ObjectGrass.
Decals
Using Decals is a great thing to optimize the performance. They allow you to add a lot of additional details at basically no performance cost.
For example, in the Port Angeles demo we use decals as the farthest LOD for town houses.
Textures
Do NOT use textures with a resolution greater than 4096x4096. That could significantly decrease your FPS number. To optimize your textures, do the following:
- Compress the textures.
It is recommended to create the uncompressed folder in your project's textures folder to store uncompressed textures. Use special postfixes to allow the imagedds script to compress your textures automatically, or use ImageDDS tool for custom compression.
-
 my_project - a folder for your project.
-
 textures - a folder for compressed textures.
-
 uncompressed - a separate folder to store your source uncompressed textures. You should put them into this folder.
-
-
-
- Compress the terrain textures. Also, read here about terrain optimization.
- Use small size for one-colored textures.
Reflections
This section contains tips for optimization of reflection usage.
- Keep the number of reflections as low as possible. Each surface which has a reflection is rendered twice and that doubles the number of triangles and the number of draw calls.
- Use reflection masks for the camera to control rendering of objects reflections into the viewport.
To specify surfaces, which reflections will be rendered into the camera viewport, do the following:
- Open the Camera Settings window.

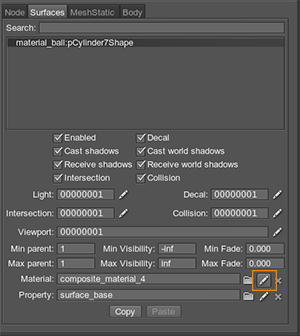
- Specify the Reflection mask of the camera.
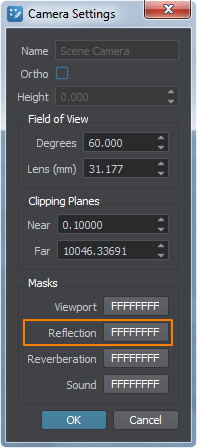
- In the Nodes windows, choose your node with exported LODs and specify the Viewport mask so that it matches or doesn't match the camera reflection mask (depends on the result you expect).
NoticeTo achieve the required result, you can change the viewport mask of the node's material instead.
- Open the Camera Settings window.
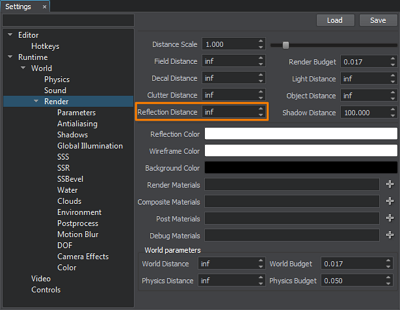
- Specify the global Reflection Distance parameter to set the distance when reflections are turned off.
To specify the Reflection Distance parameter, open the Rendering Settings window by clicking Windows -> Settings on the Menu bar.
Light and Shadows
The following guidelines will increase your performance on shadows and lights:
- World Light source illuminates all objects in the scene thus increasing the number of calculations of shadows, so keep the number of World Light objects as low as possible. For most purposes other light sources (Projected Light, etc.) are more suitable in terms of project performance.
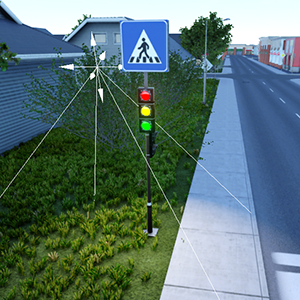
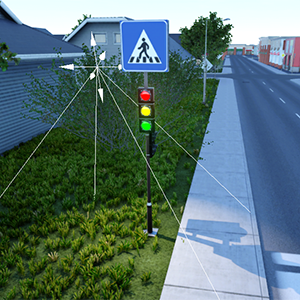
- Use Shadow masks to specify which surfaces lit by a light source should cast shadows.
To specify the shadow mask of the light source, open the World Hierarchy window by clicking Windows -> World Heirarchy and select your light source. In the Light Mask field of the Light World tab specify the shadow mask.
The specified shadow mask of the World Light sourceOnly those surface will cast shadow, the shadow mask of which matches the light source's shadow mask.

 NoticeRead this article to know more about masks.
 - Specify Distance visibility parameters of the light source. These parameters turn off lights and shadows rendering of an object when the camera is located at a given distance from this object.
To set these parameters, do the following:
- Disable Cast shadow checkboxes for some surfaces (for example, the last LOD surface) or for materials.
To disable these checkboxes, choose the node in the World Hierarchy window and open the Surfaces section on the Node tab of the Parameters window.
Shadow parameters of the surfaceTo set shadow parameters of the material, open the Materials window (click Windows -> Materials Hierarchy on the Menu bar or press M). Choose the material and open the Common tab.
 Shadow parameters of the material
 - Use lightmaps for static objects.
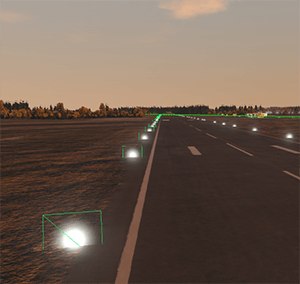
- Be creative and think differently! For example, use billboards when you need only the visualization of the light source without illumination.
In the Port Angeles demo we use billboards for takeoff runway lights. They don't produce any light, but look like real lights.
Culling
Object culling allows you not to render objects which are not presented in the viewing frustum:
- Export objects from 3D computer graphics software in local coordinates to make bounds of the mesh closer to geometry.
- Use Sectors and Portals.
- Use Occluders: world, mesh, terrain. Occluders can be highly effective in case of complex environments where there are many objects that occlude each other and are costly to render (they have a lot of polygons and/or heavy shaders).
- Use hardware occlusion queries for objects with heavy shaders.

