Terrain Material
A terrain material system is different from other objects ones. It has the following structure:
- A height map based on which the terrain relief is created.
- A set of main terrain textures: diffuse, normal and holes. They are used to create a basic cover for a terrain, for example, to imitate the earth blanket with moss or grass.
- A layer which has the set of textures (diffuse, normal, specular) and the mask for them. It is used to augment a terrain with additional details, such as rocks, dirt, wood dust, snow, etc.
All of the textures and their parameters are modified via the Nodes panel.
See Also
- A Terrain Requirements article to know about textures requirements
- A Terrain Creation article for information about creating and editing terrains
Textures Import
Import of height, diffuse, normal, holes and layer mask textures is available via the Import tab of the selected terrain. To specify the textures that you want to import check the box near the required texture.
After all of the boxes are checked and all of the textures and their parameters are specified, click Import.
Height Map
To import the height map, go to the Textures field. In the corresponding field, choose the path to the height map. The Max height parameter is the maximum possible height for a terrain relief (this parameter specifies the scale). In case of non-float texture, values of the texture will be normalized and then multiplied by this Max height parameter. In case of float texture, engine uses float values of the height map and these values also will be multiplied by Max height parameter.

Diffuse, Normal and Holes Textures
To import the diffuse, normal or holes texture, go to the Textures field. In the corresponding fields, choose the path to the required textures.

To specify layers go to the Layers tab. Then you can import layers and basic textures at the same time by pressing the Import button.
Masks
To import a mask for a layer, first you need to add a layer itself in the Layers tab. Just click Add and the layer will appear in the list. At the same time, the field for this layer mask import will appear in the Import tab.

The Number of channels field indicates how much textures channels will be used for a terrain. The materials that are at the top of the hierarchy list will be taken first.
For each mask you need to specify a channel that will be used.

Refined Textures
When a terrain is created, its grid is automatically divided into smaller refined chucks of 257×257 vertices in size (shown in the Refined tab). Each surface has a unique set of textures, which, in fact, are parts cut out from the imported textures.
You can modify the following parameters in the Refined tab:

- Enabled - enable or disable the terrain chunk.
- Cast shadow - cast the shadows from the chunk terrain relief.
- Threshold - the flatness threshold for the chunk.
- Diffuse - the diffuse texture of the chunk.
- Normal - the normal texture of the chunk.
- Index - the index texture of the chunk.
- Mask - the mask of the chunk.
You can manually change a size of refined diffuse, normal and mask textures in the Texture Resolution field of the Parameters tab.

Paths to the refined diffuse, normal, mask and index textures is displayed at the File Structure field.

Coarse Textures
Coarse diffuse, normal, mask and index textures are generated automatically and are shown in the Coarse Texture field of the Parameters tab.

You can manually change a size of coarse diffuse, normal and mask textures in the Texture Resolution field of the Parameters tab.

Layer Settings
In the Layers tab, you can performs the following operations with layers:
- Add - add a new layer to the list.
- Remove - remove a selected layer from the list.
- Clone - clone the selected layer.
- Up - move the layer upper in the hierarchy.
- Down - move the layer down in the hierarchy.
You can set the following layer textures and parameters. They can be modified either after or before the mask import.

- Name - the name of the material
- Parent - the parent material in materials hierarchy
- Overlap - the overlap blending mode
- Mask Base - use the mask of the parent material
- Transform - layer coordinates transformation
- Value - the blending value
- Width - the blending width
- Threshold - the blending threshold
- Diffuse - the path to the diffuse texture
- Scale - the intensity scale of the diffuse texture
- Normal - the path to the normal texture
- Scale - the intensity scale of the normal texture
- Specular - the path to the specular texture
- Scale - the intensity scale of the specular texture
- Diffuse Array - the array layer diffuse textures and its size
- Normal Array - the array of layer normal textures and its size
- Specular Array - the array of layer specular textures and its size
Value, Width and Threshold Parameters
Value, Width and Threshold parameters allow you to control the blending of the layer according to the mask.
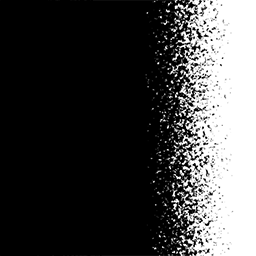
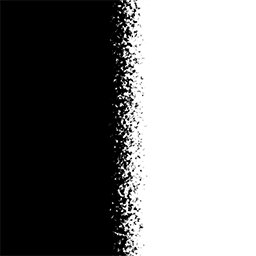
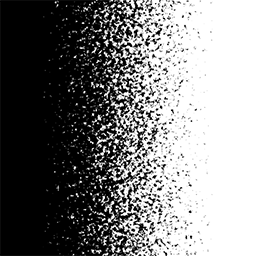
 The mask |
 The alpha channel |
The Value parameter controls the spread intensity of the layer. Lower values provide bigger spread.
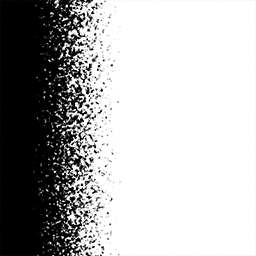 The high value |
 The low value |
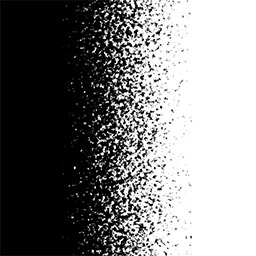
The Width parameter controls the width of blending with a layer. Higher values provide wider areas.
 The low value |
 The high value |
The Threshold parameter controls smoothness of blending. Higher values provide smoother results.
 The low value |
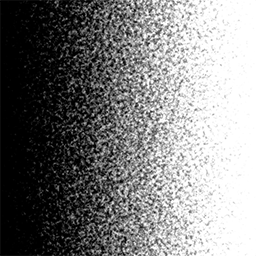 The high value |
Textures Compression
After loading of all the textures and finishing their editing in Terrain Editor, it is strongly recommended to compress them for more efficient usage of the memory. The Compress option compresses refined diffuse, normal, and mask textures, as well as their coarse textures. Layer textures are not compressed.

The following conversion is done:
- R8 to ATI1
- RG8 to ATI2
- RGB8 to DXT1
- RGBA8 to DXT5
On the contrary, the Decompress option decompresses all compressed textures mentioned above.
Textures Export
You can export any of your basic textures via the Export tab. Just press Export near the required texture. In the opened dialog window choose the extension and a path to the texture.
For a height map, you need to specify a Max Height parameter, which is equal to the terrain maximum height.
