Creating of Custom Shader for Post-Processing
UNIGINE 2 allows you to create your own post-effects by writing custom shaders. To write post-effect shaders, you should use the same workflow as for deffered and forward rendering passes: create the material, write vertex and fragment shaders.
This tutorial explains how to create a post-effect material, write shaders for it (both vertex and fragment), add a parameter to the material to be able to specify the value from the UnigineEditor.
See Also
- The article on Material Settings
- The article on Custom Materials
Create a Material
As in all other shaders tutorials, you should create the material first. Let's add the material to the already created library from the previous shaders tutorials (for deferred and forward passes).
To create post-effect material, you should specify the post pass for shaders and textures.
The material will have the following structure:
<?xml version="1.0" encoding="utf-8"?>

<materials version="2.0" editable="0">
	<!-- custom mesh material -->
	<material name="custom_mesh_material" editable="0">

		<!-- states -->
		<state name="deferred">1</state>
		<state name="ambient">1</state>

		<!-- deferred rendering shaders -->
		<shader pass="deferred" object="mesh_static"
			deferred="1"
			defines="BASE_DEFERRED"
			vertex="<your project folder>/shaders/vertex/deferred.vert"
			fragment="<your project folder>/shaders/fragment/deferred.frag"/>

		<!-- forward rendering shaders -->
		<shader pass="ambient" object="mesh_static"
			ambient="1"
			defines="BASE_AMBIENT"
			vertex="<your project folder>/shaders/vertex/deferred.vert"
			fragment="<your project folder>/fragment/forward.frag"/>

		<!-- bindings -->
		<bind object="mesh_dynamic" to="mesh_static"/>
		<bind object="mesh_skinned" to="mesh_static"/>

		<!-- textures -->
		<texture unit="0" name="diffuse" anisotropy="1" shader="fragment" pass="deferred,ambient">core/textures/common/white.dds</texture>
		<texture unit="1" name="height" shader="vertex" pass="deferred,ambient">core/textures/common/white.dds</texture>
		<texture unit="1" shader="fragment" type="deferred_depth"/>
		<texture unit="2" shader="fragment" type="deferred_normal"/>

	</material>

	<!-- custom post material -->
	<material name="custom_post">

		<!-- post-effect shaders -->
		<shader pass="post"
			defines="BASE_POST"
			vertex="<your project folder>/shaders/vertex/post.vert"
			fragment="<your project folder>/shaders/fragment/post.frag"/>

		<!-- textures -->
		<texture name="color" pass="post" unit="0" type="procedural"/>

		<!-- parameters -->
		<parameter name="grayscale_power" type="slider" shared="1" min="0.0" max="1.0" flags="max_expand">0.5</parameter>

	</material>

</materials>
The key features of the post material are:
- Added a post pass shaders and textures.
- Added the shared grayscale_power parameter.
Now the material library has two materials: for forward and deferred rendering passes, for post effect.
Create Vertex Shader
Since we write a simple shader example, let's use the vertex shader for the deferred rendering pass.
The vertex shader code is the following:
- Write the shader code:
Source code (UUSL)
// Include the UUSL header #include <core/shaders/common/common.h> // Input data struct STRUCT(VERTEX_IN) INIT_ATTRIBUTE(float4,0,POSITION) // Vertex position INIT_ATTRIBUTE(float4,1,TEXCOORD0) // Vertex texcoords INIT_ATTRIBUTE(float4,2,COLOR0) // Vertex color END // Output data struct STRUCT(VERTEX_OUT) INIT_POSITION // Output projected position INIT_OUT(float2,0) // Texcoords (x and y only) END MAIN_BEGIN(VERTEX_OUT,VERTEX_IN) OUT_POSITION = getPosition(IN_ATTRIBUTE(0)); OUT_DATA(0).xy = IN_ATTRIBUTE(1).xy; MAIN_END // endWarningYou should add a new line (press Enter) after closing the instruction. - Save the shader file with the post.vert extension to the shaders/vertex folder.
The code of the vertex shader is so simple.
Create Fragment Shader
This sections contains instruction how to create a fragment shader(also known as pixel shader).
To create the fragment shader for post-process pass, perform the following:
- Open a plain text editor, and write the following:
Source code (UUSL)
// Include the UUSL fragment shader header #include <core/shaders/common/fragment.h> // Define the texture of the scene #define TEX_SCENE 0 INIT_TEXTURE(TEX_SCENE) // Input values STRUCT(FRAGMENT_IN) INIT_POSITION // Projected position INIT_IN(float2,0) // Texcoords END // Define the grayscale_power parameter CBUFFER(parameters) UNIFORM float grayscale_power; END MAIN_BEGIN(FRAGMENT_OUT,FRAGMENT_IN) // Get the UV float2 uv = IN_DATA(0); // Get the scene color float4 scene_color = TEXTURE_BIAS_ZERO(TEX_SCENE,uv); // Calculate the grayscale float3 gray_scene_color = FLOAT3(dot(float3(0.3f, 0.59f, 0.11f), scene_color.rgb)); scene_color.rgb = lerp(scene_color.rgb,gray_scene_color,FLOAT3(grayscale_power)); OUT_COLOR = scene_color; MAIN_END // endWarningYou should add a new line (press Enter) after closing the instruction. - Save the shader file with the post.frag extension to the shaders/fragment folder.
Well, let's clarify what is under the hood of this fragment shader:
- We get the texture which was specified in the post-effect material.
- By applying a standard grayscale equation, we change the color of the scene.
- By using lerp function (which performs a linear interpolation), we add the custom parameter to adjust the grayscale power.
See Also
- Grayscale article on Wikipedia.
Editting the Material
Material has been created, shaders have been written, it's time to use in the project!
- Open UnigineEditor and launch your project.
- Go the Materials settings and add a new material, which you recently created.
- Create a new material by inheriting recently created.
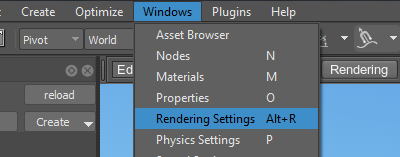
- Open the Rendering Settings window by choosing Windows -> Rendering Settings on the main tab (or pressing the Alt+R hotkey combination.

- In the Common tab of the Rendering Settings window, specify the name of the child post material in the Post field.

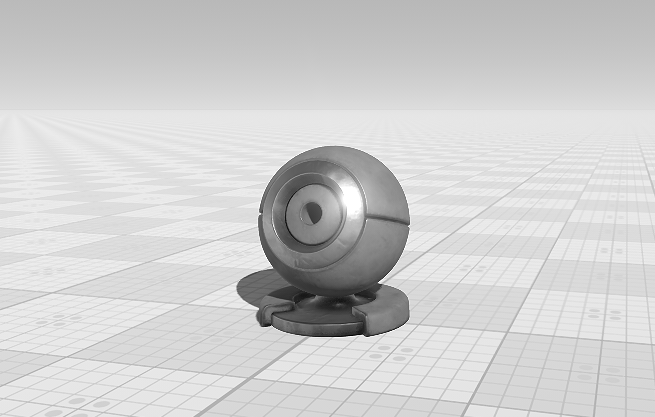
The grayscale post-effect will be applied.
- Go to the Material settings, open the Parameters tab of the applied post material.
Set up the grayscale post-effect by adjusting the grayscale power parameter.
 The final scene.