Quick Start with Component System
Let's create a small game project to illustrate typical use cases and best practices for the C++ Component System.

What You Will Learn#
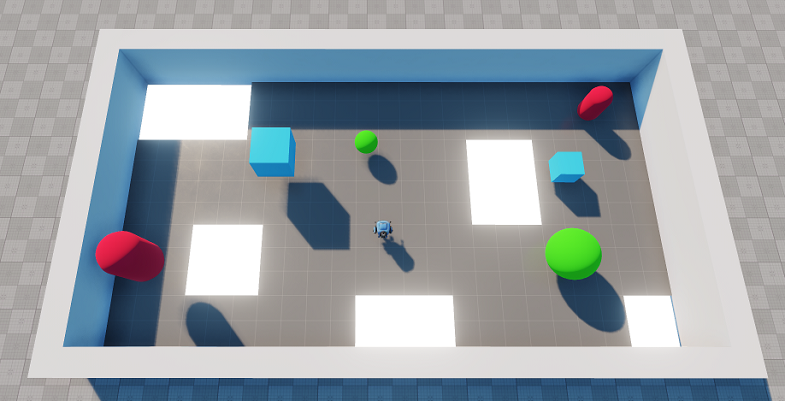
The game that you will create is a simple top-down shooter with physics mechanics. The player controls the character with WASD buttons and rotates it to fire bullets using the cursor. The level has some geometric objects (cubes, spheres, etc) that can be thrown to holes by either pushing or shooting. The game has a time limit based on which the game ends. The application also provides a user interface to show the timer and the current amount of objects left to clear. At the end, the game outputs a widget with the reset functionality.
You will acquire some basic UNIGINE Editor skills and knowledge about the UNIGINE engine in general. The basic workflow for game logic implementation with the C++ Component System is given below.
C++ Component System enables you to implement your application's logic via a set of building blocks — components, and assign these blocks to objects (nodes), giving them additional functionality. A logic component integrates a node, a C++ class, containing logic implementation (actions to be performed), and a property defining a set of additional parameters to be used.
In this tutorial you will learn how to:
- Set Up the Project
- Create the Controllable Character
- Implement Shooting
- Generate Physical Objects
- Implement Color Zone
- Play Background Music
- Manage Game Rules
- Create the End UI
- Build the Project
What You Need to Start Coding#
To start developing your code, you need to set up an IDE.
In most cases, it is enough. However, if you have issues, check the articles in the Setting Up Development Environment section.
On Windows#
We recommend you to use Microsoft Visual Studio 2022:
- Follow the link and click Download Visual Studio.
- Choose the required version for downloading.
- Open the downloaded file and follow the instructions on installation.
UNIGINE automatically uses Visual Studio as the default IDE for editing the code of the C++ project. If it doesn't, you can set it manually via the UNIGINE SDK.
On Linux#
You can use any IDE suitable for C++ development. However, note that within this guide we will use Visual Studio Code:
- Follow the link and choose the required version for downloading.
- Open the downloaded file and follow the instructions on installation.
If UNIGINE doesn't use your IDE as the default one for editing the code of the C++ project, you can set it manually via the UNIGINE SDK.
You may also need to install a С++ compiler GCC 8.3.0+:
sudo apt install g++Additional Reference Materials#
For more details refer to the Programming Quick Reference article to learn key information on the workflow stages for developing a project with UNIGINE. It contains code examples that will be useful when developing your first UNIGINE projects.
The information on this page is valid for UNIGINE 2.19 SDK.