This page has been translated automatically.
Video Tutorials
Interface
Essentials
Advanced
How To
Basics
Rendering
Professional (SIM)
UnigineEditor
Interface Overview
Assets Workflow
Version Control
Settings and Preferences
Working With Projects
Adjusting Node Parameters
Setting Up Materials
Setting Up Properties
Lighting
Sandworm
Using Editor Tools for Specific Tasks
Extending Editor Functionality
Built-in Node Types
Nodes
Objects
Decals
Light Sources
Geodetics
World Nodes
Sound Objects
Pathfinding Objects
Players
Programming
Fundamentals
Setting Up Development Environment
Usage Examples
C++
C#
UnigineScript
UUSL (Unified UNIGINE Shader Language)
Plugins
File Formats
Materials and Shaders
Rebuilding the Engine Tools
GUI
Double Precision Coordinates
API
Animations-Related Classes
Containers
Common Functionality
Controls-Related Classes
Engine-Related Classes
Filesystem Functionality
GUI-Related Classes
Math Functionality
Node-Related Classes
Objects-Related Classes
Networking Functionality
Pathfinding-Related Classes
Physics-Related Classes
Plugins-Related Classes
IG Plugin
CIGIConnector Plugin
Rendering-Related Classes
VR-Related Classes
Content Creation
Content Optimization
Materials
Material Nodes Library
Miscellaneous
Input
Math
Matrix
Textures
Art Samples
Tutorials
Warning! This version of documentation is OUTDATED, as it describes an older SDK version! Please switch to the documentation for the latest SDK version.
Warning! This version of documentation describes an old SDK version which is no longer supported! Please upgrade to the latest SDK version.

Volume Projected

The Volume Projected object is used to create light beams from directional light sources, such as car headlights, searchlights or beacon light. It can also be animated to simulate a flow of particles that moves from the light source or even swirls. Only a volume proj material can be assigned to it.
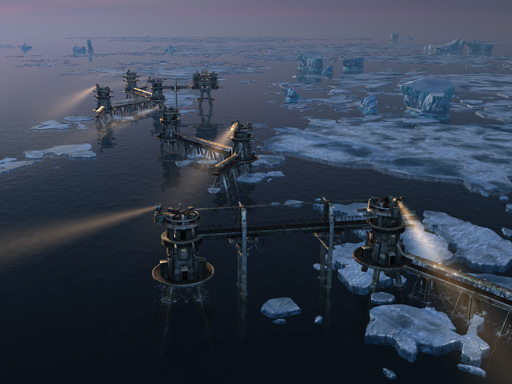
Volume Projected objects

Volume Projected objects

Volume Projected is rendered as a simple particle system. It is a number of Billboards, where each following Billboard is bigger than the previous one.
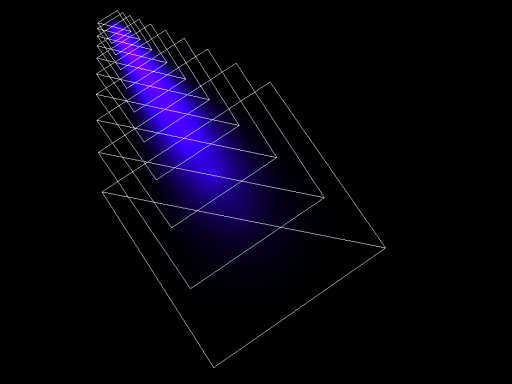
Billboards of a Volume Projected object

Billboards of a Volume Projected object

See also#

Creating a Volume Projected Object#

To create a Volume Projected object, perform the following steps:

  1. On the Menu bar, click Create -> Volume -> Projected.
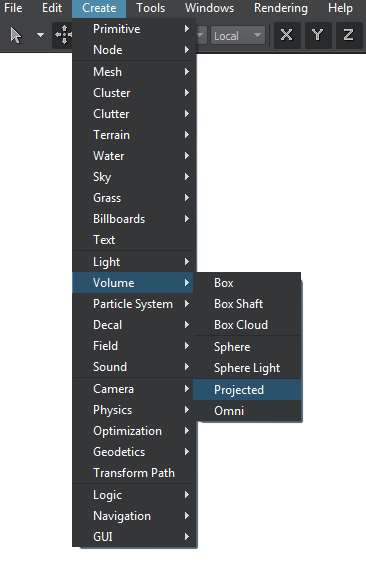
  2. Place the Volume Projected object somewhere in the world.
  3. Specify the Volume Projected object parameters.

Volume Projected Parameters#
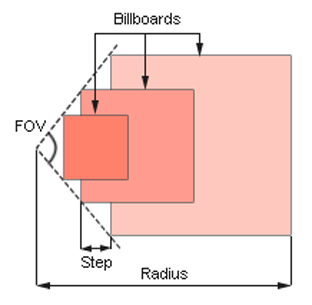
Options

Parameters

In the Volume Projected section (Parameters window -> Node tab), you can adjust the following parameters of the Volume Projected object:
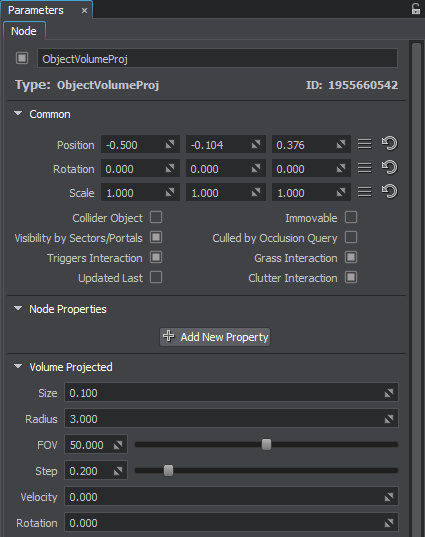
Size Size of the smallest Billboard in units. By the minimum value of 0, Volume Projected is not rendered at all.
Radius Length of the light beam along the Z axis, in units.
FOV

Width of the light beam. It is specified as the angle of the beam cone (in degrees).

  • By the minimum value of 10, the beam is the narrowest.
  • By the maximum value of 90, the beam is the widest.
Step

Distance between neighboring Billboards.

  • The lower the step is, the smoother the beam, since more Billboards are rendered.
  • The higher the step, the more discrete the beam, but the higher the performance is.
Velocity Velocity with which Billboards move to the end of the beam (along the Z axis).
Rotation

Angle of Billboards rotation (in degrees). This angle is set for the Billboard at the end of the beam.
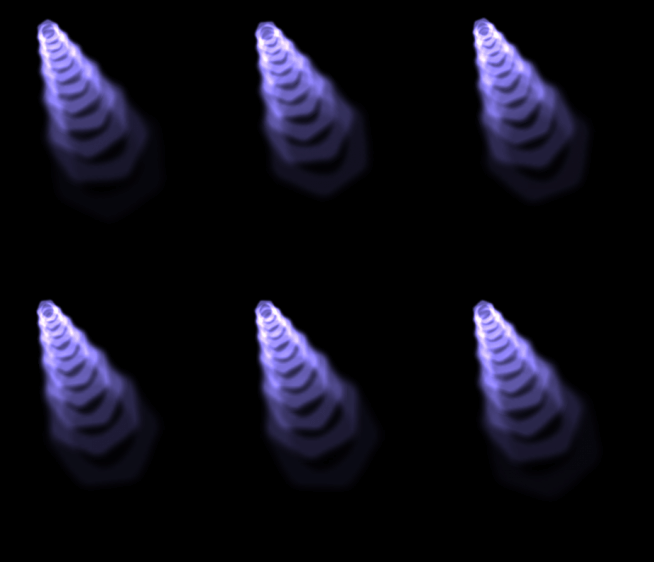
  • If positive, all Billboards rotate clockwise.
  • If negative, all Billboards rotate counterclockwise.

Positive rotation angle
Last update: 2024-08-16
Build: ()