Working with Projects
A project is an independent entity that contains all data on your application content organized in a set of directories. The .project file containing metadata is associated with the project.
Creating New Project#
Before starting to create new projects you should have an SDK installed. Once you have the required version of the SDK, you can create a new project as follows:
- Open the Projects tab in the SDK browser.

- Click Create New. The new project creation window will be opened.
- Define the name of the project, choose a path to store project files, specify the SDK and UNIGINE Engine build to be used.
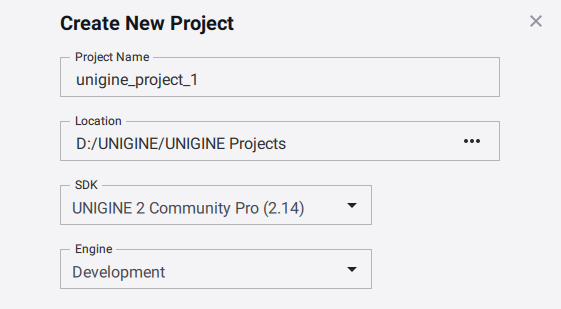
The project will be created in the <project path>/<unigine_project> folder.
- Specify the required application and general settings.
- Click Create New Project. The project will appear in the projects list.

Application Settings#
The project can be created with the following application settings:
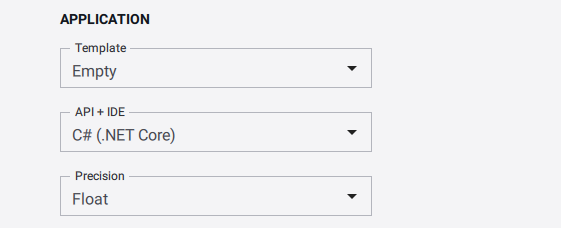
| Template | A template that is used as a basis for the project:
|
|---|---|
| API+IDE | Programming language to be used for project creation. The following APIs are available:
|
| Precision | The coordinates precision to be used:
|
Features#
The project can be created with the following features:

| Command-line Runtimes Generator | Enables Command-line Runtimes Generator for the project. |
|---|---|
| Command-line Build Tool | Enables the Command-line Build Tool for the project. |
| Sandworm Distributed & Headless Mode | Enables creation of the console application required on Worker computers for distributed computing and headless generation of terrain using the Sandworm tool for the project. |
| Editor Plugin Template | Enables the creation of an editor plugin based on available templates for the project.
Notice
After the plugin template is selected and the project created (or reconfigured), you won't be able to change the template anymore. |
The Plugins (0) button opens the list of available plugins:
| STEREO 3D | |
| Dual output stereo 3D (Separate plugin) | Output 2 separate images for each eye.
Notice
The Separate supports DirectX 11 only. |
|---|---|
| MULTI-MONITOR | |
| SpiderVision (SpiderVision plugin) |
Render the application into the configurable number of monitors or projections, or use a multi-projector setup stored in a calibration file created via Scalable Display Manager and set up via EasyBlend SDK. |
| 3-monitor output (Surround plugin) | Render the application across 3 monitors simultaneously. |
| NETWORK | |
| ARTTracker plugin | Create a project with the ARTTracker plugin. |
| Steam plugin | Create a project with the plugin for Steam integration. |
| Syncker plugin | Create a project with the Syncker plugin for multi-channel rendering synchronization. |
| VRPN Client plugin | Create a project with the VRPN Client plugin. |
| WebStream plugin | Create a project with the WebStream plugin. |
| SPECIALS | |
| GPU Monitor plugin | Enable GPU frequencies and temperature monitoring for your project. |
| Kinect2 Plugin | Create a project with the Kinect2 plugin. |
| Leap Motion plugin | Tracking hands and fingers with Leap Motion. |
| TeslaSuit plugin | Creating sensations, tracing the body motions, and capturing the user's biometrics with Teslasuit. |
| Ultraleap | Tracking hands and fingers with Ultraleap. |
| VCSIntegration Plugin | Using the version control system (SVN, Git) to track all file changes performed in UNIGINE Editor. |
| SOUND | |
| FMOD plugin | Plugin providing integration with FMOD library developed by Firelight Technologies. FMOD is a solution that includes all the tools you need to add sound and music to video games and applications. |
Adding Existing Project#
To add an existing project to the browser:
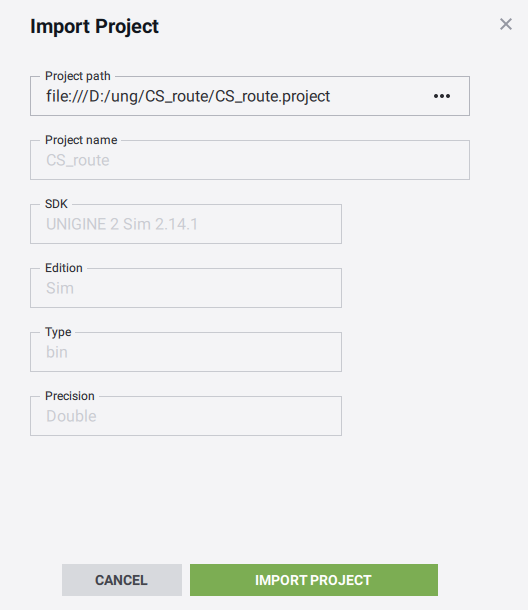
- Click Add Existing in the Projects tab.

- In the file dialog window that opens, specify the path to the project folder and click Import Project. The project will appear in the projects list.
Upgrading Existing Project#
Projects that require upgrade are marked with the Upgrade label:
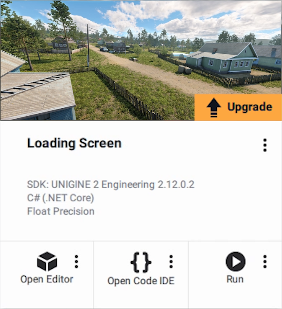
To upgrade your project to the newest installed version of UNIGINE SDK:
-
Click the Upgrade label on the project image or Other Actions -> Configure. The following form will open:
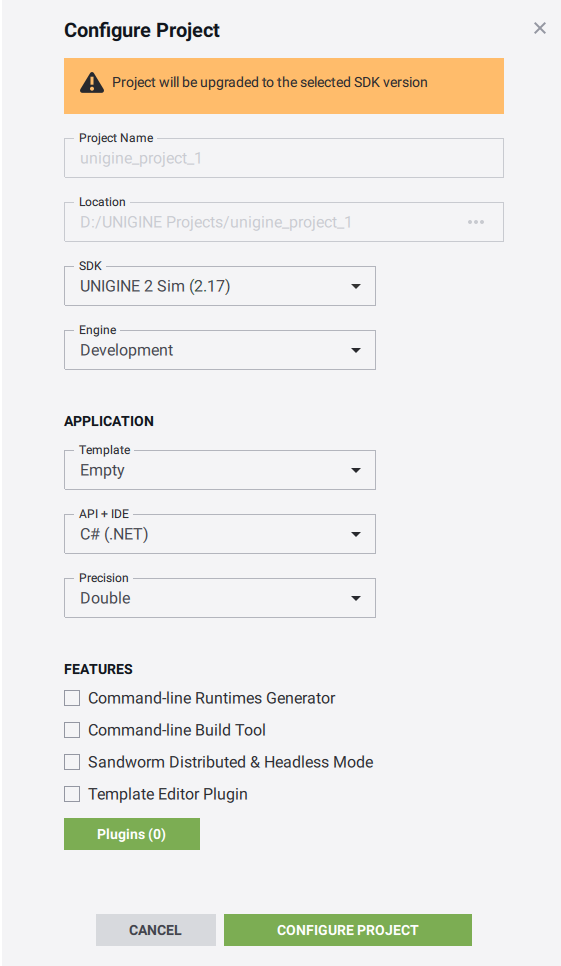
- Choose the newest installed version of the SDK and click CONFIGURE PROJECT.
-
Specify a path to the backup folder into which the original project will be copied. Keep Migrate Content checked and click UPGRADE PROJECT.
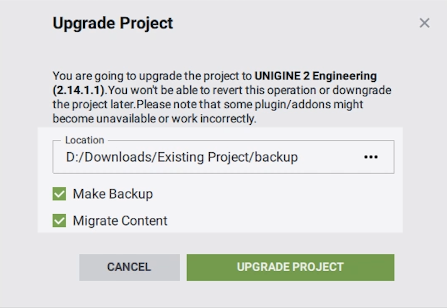
The project will be upgraded automatically. You can also manually upgrade the project by running the upgrade script. In both cases, the same script will be used.
Running a Project#
To run the actual compiled binary of the project with default settings, click the Run button:
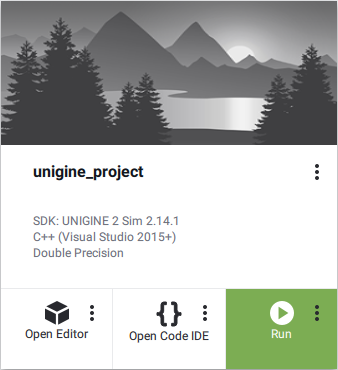
You can also use launchers created by default in the project folder:
-
 launch_debug — the launcher of the project's debug version.
 -
 launch_editor — the launcher of the project's with the loaded editor.
 -
 launch_release — the launcher of the project's release version.NoticeTo use the release launcher, you should reconfigure your project to the Release binaries first.
Running Project with Custom Settings#
To run the project with custom settings, click an ellipsis on the Run button:
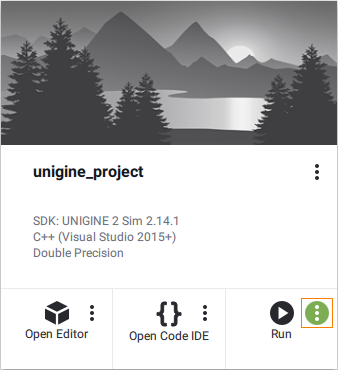
The Customize Run Options form will open.
Depending on the value of the Application option, different sets of options are available:
- Default — the default main application (<project_name>_x*.exe) will be run:
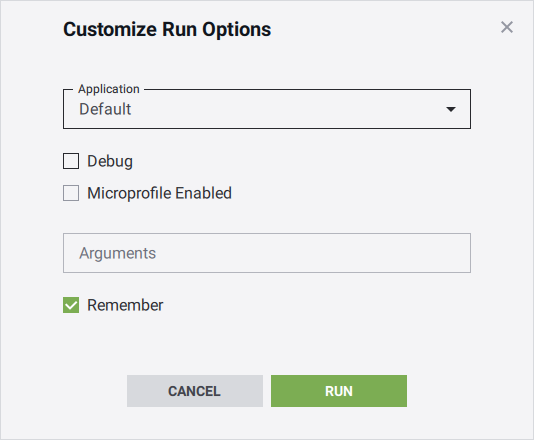
The default main application should be used when only UnigineScript is used to implement the project. In this case, the following options can be customized:
Debug Indicates whether debug or release version of the application should be run. Microprofile Enabled Run the application with the Microprofile tool enabled. Arguments Start-up command-line options. Remember Indicates whether to remember the specified custom settings for future run or not. - Custom — a custom main application will be run:
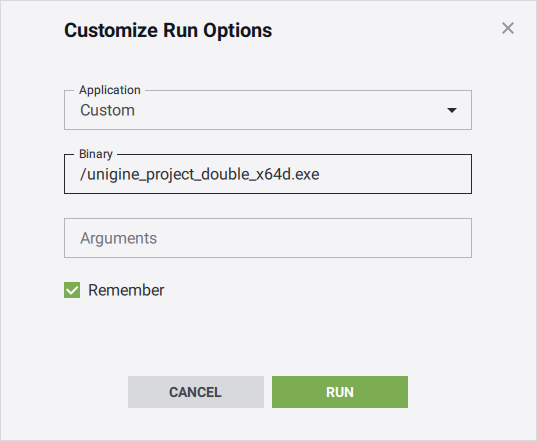
This option should be chosen if the C++ or C# API is used to implement the project (besides UnigineScript). In this case, the following options can be customized:
Binary Name of the custom main application. Here the name of the compiled binary executable located in the bin folder of the project should be specified. If the binary executable is located outside this folder, a path to it relative to the bin folder should be specified. Arguments Start-up command-line options. Remember Indicates whether to remember the specified custom settings for future run or not.
Editing Project#
The project content is edited via UNIGINE Editor, code is edited via IDE.
-
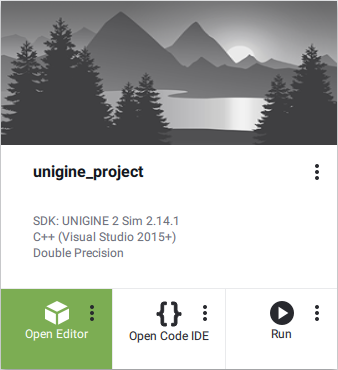
To edit the project content, click Open Editor.
-
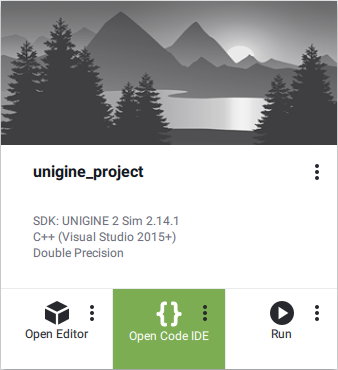
To edit the source code use Open Code IDE. The IDE selected as the default one will be used to open code.
The project editing tools can also be run in a customized mode.
Customizing UNIGINE Editor Options#
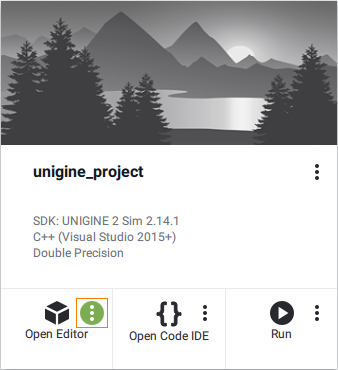
Customize the UNIGINE Editor running options by clicking an ellipsis on the Open Editor button:
In the Customize UNIGINE Editor Options form that opens, set the required values and click Edit.
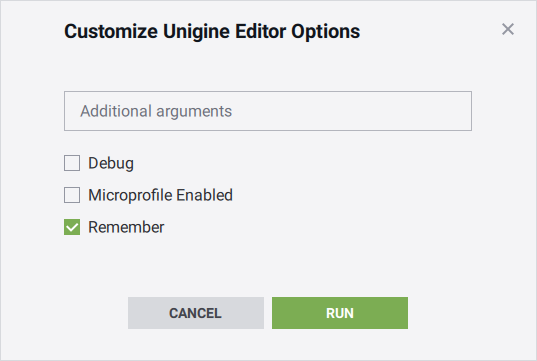
| Additional arguments | Start-up command-line options. |
|---|---|
| Debug | The editor version (debug or release) that will be used for project's editing. |
| Microprofile Enabled | Run the application with the Microprofile tool enabled. |
| Remember | Indicates whether to remember the specified custom settings for a future run or not. |
Customizing IDE Options#
To change a tool, do the following:
On Windows, click an ellipsis on the Open Code IDE button. The following form will open:
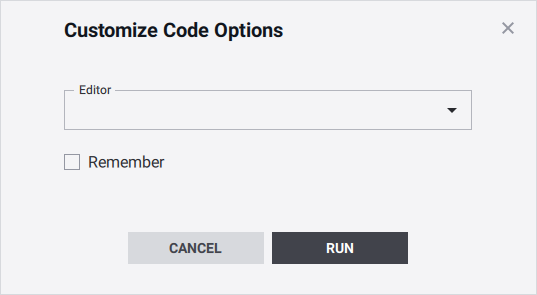
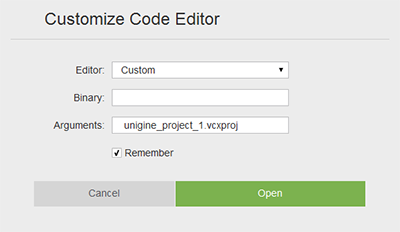
Choose Custom in the drop-down list and specify a path to a custom tool (e.g. IDE or editor) with required arguments:
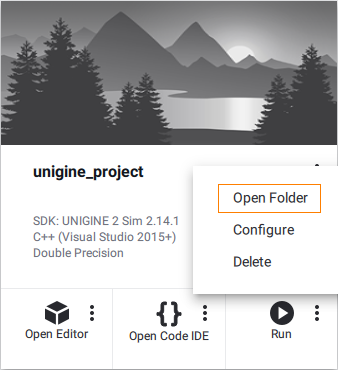
- On Linux, click Open folder and then edit code in an associated tool:
See Also
- Articles in the Programming Overview section to learn how to edit the opened project
- The video tutorial demonstrating how to change the IDE
Release and Development Builds#
You can choose the Development or Release build of UNIGINE Engine:
- The Development build includes additional features that can be useful for project's development (Microprofile, etc.)
- The Release build allows checking the final performance of the application.
By default, the project is configured to use Development Engine binaries that contain additional debugging tools. Development binaries of the Engine require a running SDK Browser instance, just the same way as for the UnigineEditor.
You can run your application without running SDK Browser via the launch_release file in the project folder, but first, you should reconfigure the project to use the Release binaries.
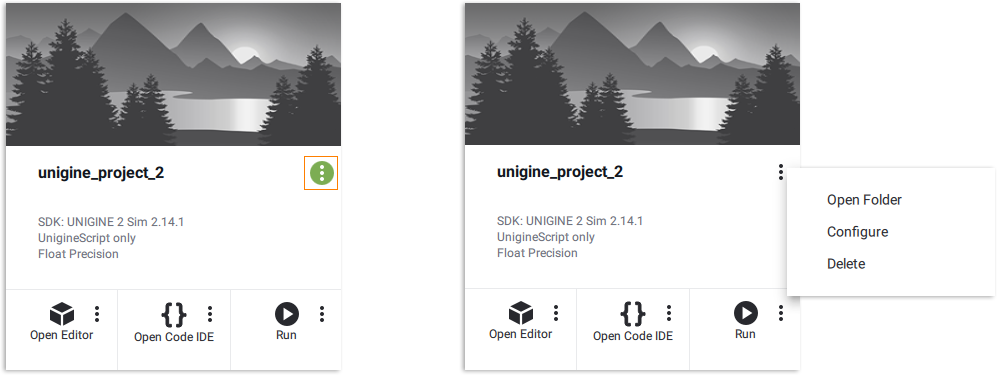
To reconfigure the project:
Click Other Actions -> Configure.
Select select the Release option in the Engine drop-down.
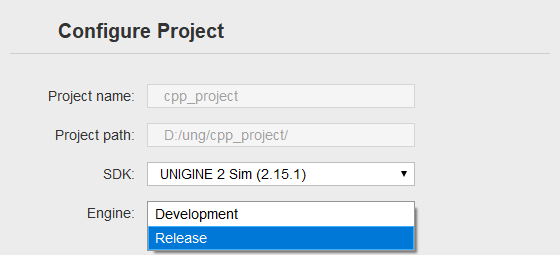
- Click the Update Configuration button at the bottom of the configuration window to save the configuration.
As soon as the project has been reconfigured to the Release build, it can be run without SDK Browser — run the launch_release file in the project folder.
The Release binaries should be used in the final build of the project.
Other Actions#

When clicking the Other Actions button, the following options are available:
| Configure | Change project settings. |
|---|---|
| Open Folder | Open the project folder. |
| Delete | Delete the project. |
Updating Project Configuration#
When clicking Other Actions -> Configure, the following form opens:
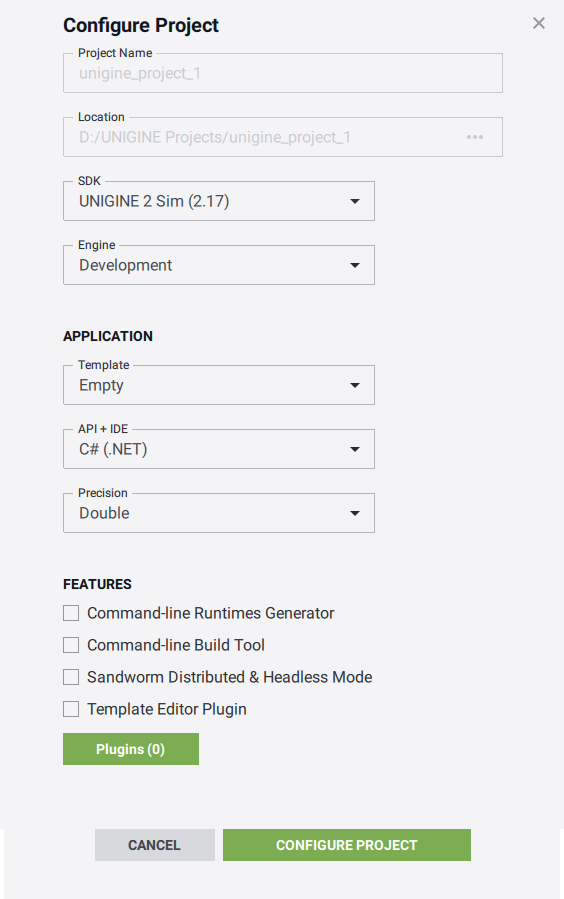
Via this form, you can change settings of an existing project: the UNIGINE Engine build used for the project, the version of the release application, the coordinates precision, and the general settings. This option should also be used when you need to upgrade the existing project to the newest SDK version.
Moreover, you can restore the project's files that were corrupted, missed, or mistakenly modified. For this, you should leave settings in the form unchanged and press the Update Configuration button. In this case, the following files of the project will be restored (they will be copied from the SDK):
- Binaries
- core.ung, editor.ung and scripts.ung
- Launchers
The information on this page is valid for UNIGINE 2.19 SDK.